

How to hide the display style when the mouse passes through css

In CSS, you can use the ":hover" selector and the display attribute to hide the display style when the mouse passes over it; you only need to use the ":hover" selector to select the element on which the mouse pointer is floating, and give it Just set the "display:none;" style for the status element, and the syntax is "specify element:hover {display:none;}".
The operating environment of this tutorial: Windows 7 system, CSS3&&HTML5 version, Dell G3 computer.
In CSS, you can use the ":hover" selector and display attribute to hide the display style when the mouse passes.
You only need to use the ":hover" selector to select the element on which the mouse pointer is floating, and set the "display:none;" style to the element in this state to hide it.
1 2 3 4 5 6 7 8 9 10 11 12 13 14 15 16 17 18 19 20 21 |
|

Description:
:hover selector
:hover selector is used to select the element on which the mouse pointer is floating.
Tip: The :hover selector can be used on all elements, not just links.
In the CSS definition, :hover must be placed after :link and :visited (if present) for the style to take effect.
: The link selector sets the style of links pointing to pages that have not been visited, the :visited selector is used to set links to pages that have been visited, and the :active selector is used for active links.
Usage 1:
This means: when the mouse is hovering over the style a, the background color of a is set to yellow
1 2 3 4 |
|
This is the most common usage, it just changes the style through a
Usage 2:
Use a to control the style of other blocks:
Use a to control the child element b of a:
1 2 3 |
|
Use a to control the sibling element c (sibling element) of a:
1 2 3 |
|
Use a to control the nearby element d of a:
1 2 3 |
|
To summarize:
1. Add nothing in the middle to control child elements;
2. ' ' Control sibling elements (sibling elements) ;
3. '~' controls the nearby element;
Example
Use a button to control the movement state of a box. When the mouse moves to the button When the mouse is above, the box stops moving, and when the mouse moves away, the box continues to move
body code:
1 2 3 4 |
|
css style:
1 2 3 4 5 6 7 8 9 10 11 12 13 14 15 16 17 18 19 20 21 22 23 24 25 26 27 28 |
|
"display:none;" style
display:none can hide the element without occupying space, so dynamically changing this attribute will cause rearrangement (change the page layout), which is understandable It is the same as deleting the element from the page; it will not be inherited by descendants, but its descendants will not be displayed. After all, they are all hidden together.
1 2 3 4 5 6 7 8 9 10 11 12 13 14 15 16 |
|

(Learning video sharing: web front-end)
The above is the detailed content of How to hide the display style when the mouse passes through css. For more information, please follow other related articles on the PHP Chinese website!

Hot AI Tools

Undresser.AI Undress
AI-powered app for creating realistic nude photos

AI Clothes Remover
Online AI tool for removing clothes from photos.

Undress AI Tool
Undress images for free

Clothoff.io
AI clothes remover

AI Hentai Generator
Generate AI Hentai for free.
Hot Article
Hot Tools

Notepad++7.3.1
Easy-to-use and free code editor

SublimeText3 Chinese version
Chinese version, very easy to use

Zend Studio 13.0.1
Powerful PHP integrated development environment

Dreamweaver CS6
Visual web development tools

SublimeText3 Mac version
God-level code editing software (SublimeText3)
Hot Topics


 What does placeholder mean in vue
May 07, 2024 am 09:57 AM
What does placeholder mean in vue
May 07, 2024 am 09:57 AM
In Vue.js, the placeholder attribute specifies the placeholder text of the input element, which is displayed when the user has not entered content, provides input tips or examples, and improves form accessibility. Its usage is to set the placeholder attribute on the input element and customize the appearance using CSS. Best practices include being relevant to the input, being short and clear, avoiding default text, and considering accessibility.
 What does span mean in js
May 06, 2024 am 11:42 AM
What does span mean in js
May 06, 2024 am 11:42 AM
The span tag can add styles, attributes, or behaviors to text. It is used to: add styles, such as color and font size. Set attributes such as id, class, etc. Associated behaviors such as clicks, hovers, etc. Mark text for further processing or citation.
 What does rem mean in js
May 06, 2024 am 11:30 AM
What does rem mean in js
May 06, 2024 am 11:30 AM
REM in CSS is a relative unit relative to the font size of the root element (html). It has the following characteristics: relative to the root element font size, not affected by the parent element. When the root element's font size changes, elements using REM will adjust accordingly. Can be used with any CSS property. Advantages of using REM include: Responsiveness: Keep text readable on different devices and screen sizes. Consistency: Make sure font sizes are consistent throughout your website. Scalability: Easily change the global font size by adjusting the root element font size.
 How to introduce images into vue
May 02, 2024 pm 10:48 PM
How to introduce images into vue
May 02, 2024 pm 10:48 PM
There are five ways to introduce images in Vue: through URL, require function, static file, v-bind directive and CSS background image. Dynamic images can be handled in Vue's computed properties or listeners, and bundled tools can be used to optimize image loading. Make sure the path is correct otherwise a loading error will appear.
 What is node in js
May 07, 2024 pm 09:06 PM
What is node in js
May 07, 2024 pm 09:06 PM
Nodes are entities in the JavaScript DOM that represent HTML elements. They represent a specific element in the page and can be used to access and manipulate that element. Common node types include element nodes, text nodes, comment nodes, and document nodes. Through DOM methods such as getElementById(), you can access nodes and operate on them, including modifying properties, adding/removing child nodes, inserting/replacing nodes, and cloning nodes. Node traversal helps navigate within the DOM structure. Nodes are useful for dynamically creating page content, event handling, animation, and data binding.
 What language is the browser plug-in written in?
May 08, 2024 pm 09:36 PM
What language is the browser plug-in written in?
May 08, 2024 pm 09:36 PM
Browser plug-ins are usually written in the following languages: Front-end languages: JavaScript, HTML, CSS Back-end languages: C++, Rust, WebAssembly Other languages: Python, Java
 How to set unknown attributes in vscode vscode method to set unknown attributes
May 09, 2024 pm 02:43 PM
How to set unknown attributes in vscode vscode method to set unknown attributes
May 09, 2024 pm 02:43 PM
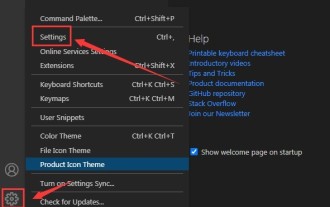
1. First, open the settings icon in the lower left corner and click the settings option. 2. Then, find the CSS column in the jumped window. 3. Finally, change the drop-down option in the unknownproperties menu to the error button.
 What do ref and id in vue do?
May 02, 2024 pm 08:42 PM
What do ref and id in vue do?
May 02, 2024 pm 08:42 PM
In Vue.js, ref is used in JavaScript to reference a DOM element (accessible to subcomponents and the DOM element itself), while id is used to set the HTML id attribute (can be used for CSS styling, HTML markup, and JavaScript lookup).
