

Recently, a group of friends asked me about one of their assignments, using as few tags as possible to achieve such a chess layout:
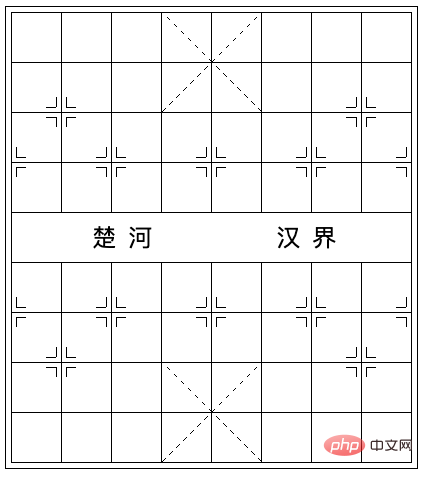
used more than 60 tags, while his classmates only used 6. He asked me if there was any way to use as few tags as possible to complete the task. This layout effect.
In fact, for the layout of a page, fewertags are not necessarily a good thing. While considering the consumption of DOM, we also need to pay attention to the readability of the code and the follow-up The ease of interaction based on the production of this layout, etc.
Of course, just from the perspective of completing this layout with fewer tags, how many tags can we compress to? (Ignore and )
The answer is 1.
This article attempts to use a tag to achieve this effect. Of course, this is just to explore the limits of CSS, and it does not mean that I recommend writing like this in actual business. [Recommended learning:css video tutorial]
Let’s split the entire layout, which can be roughly divided into three parts: grid dotted line cross cross special symbol: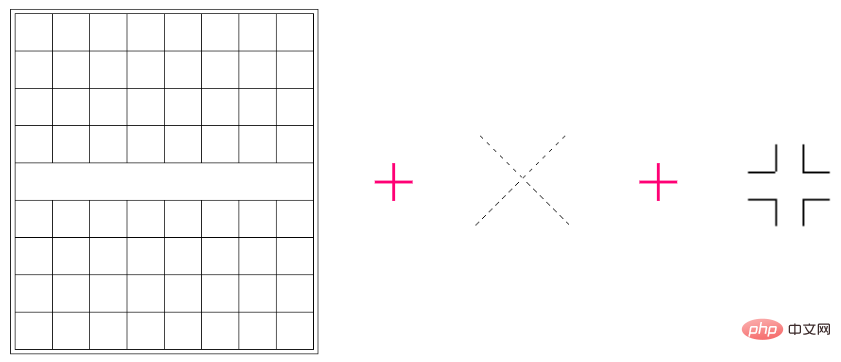
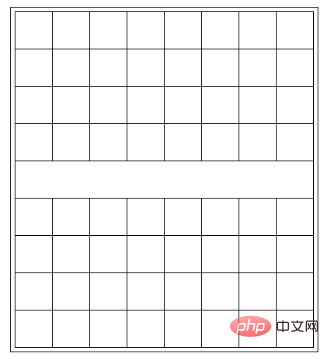
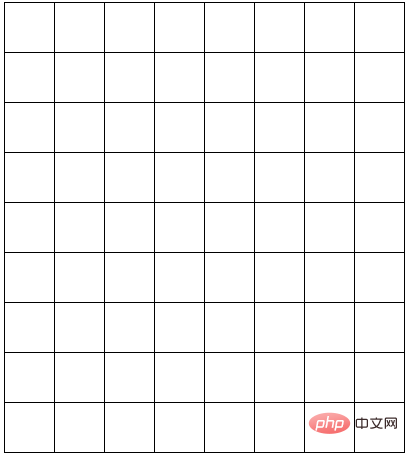
Multilinear Gradient to implement a grid layout:
<div class="g-grid"></div>
.g-grid {
    width: 401px;
    height: 451px;
    background:
        repeating-linear-gradient(#000, #000 1px, transparent 1px, transparent 50px),
        repeating-linear-gradient(90deg, #000, #000 1px, transparent 1px, transparent 50px);
    background-repeat: no-repeat;
    background-size: 100% 100%, 100% 100%;
    background-position: 0 0, 0 0;
}
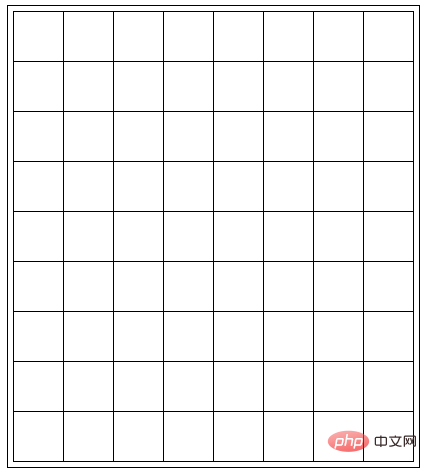
outline combined with outline-offset:
.g-grid {
    width: 401px;
    height: 451px;
    background:
        repeating-linear-gradient(#000, #000 1px, transparent 1px, transparent 50px),
        repeating-linear-gradient(90deg, #000, #000 1px, transparent 1px, transparent 50px);
    background-repeat: no-repeat;
    background-size: 100% 100%, 100% 100%;
    background-position: 0 0, 0 0;
    outline: 1px solid #000;
    outline-offset: 5px;
}
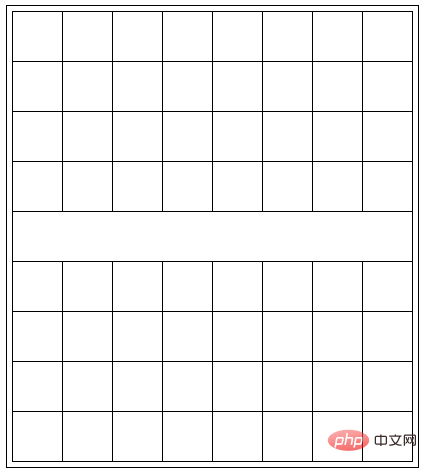
background-size and background-position.
.grid {
    // ...
    background:
        // 最上层叠加一层白色渐变
        linear-gradient(#fff, #fff),
        // 下面两个重复线性渐变实现网格
        repeating-linear-gradient(#000, #000 1px, transparent 1px, transparent 50px),
        repeating-linear-gradient(90deg, #000, #000 1px, transparent 1px, transparent 50px);
    background-repeat: no-repeat;
    background-size: calc(100% - 2px) 49px, 100% 100%, 100% 100%;
    background-position: 1px 201px, 0 0, 0 0;
}
This is actually really difficult. Imagine if you were given a DIV to implement one of them, what would you do? 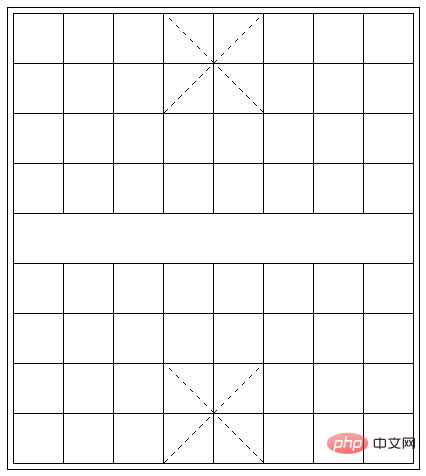
So, here we take a different approach and continue to use gradient
!First of all, let’s take a look. If it is a 100px x 100px div, how can we use gradient to draw a cross dotted line cross
?<div></div>
div {
    position: relative;
    margin: auto;
    width: 100px;
    height: 100px;
    border: 1px solid #000;
    background: linear-gradient(
        45deg,
        transparent 0, transparent calc(50% - 0.5px),
        #000 calc(50% - 0.5px), #000 calc(50% + 0.5px),
        transparent calc(50% + 0.5px), transparent 0);
}
Let’s reverse it 45° and use  Multilinear Gradient
div {
    position: relative;
    margin: auto;
    width: 100px;
    height: 100px;
    border: 1px solid #000;
    background:
        // 渐变 1
        repeating-linear-gradient(-45deg, transparent 0, transparent 5px, #fff 5px, #fff 10px),
        // 渐变 2
        linear-gradient(45deg,
        transparent 0, transparent calc(50% - 0.5px),
        #000 calc(50% - 0.5px), #000 calc(50% + 0.5px),
        transparent calc(50% + 0.5px), transparent 0);
}Okay, some students may be a little confused about this step, how to change it. 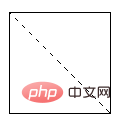
gradient 1
to black, and it is easy to understand:
想象一下,上图的黑色部分,如果是透明的,就能透出原本的那条斜线没有被白色遮挡住的地方。
这里,需要提一下,在渐变中,越是先书写的渐变,层级越高。
好,有了上面的铺垫,我们基于上面的代码,再继续利用渐变,把上下两个交叉虚线十字补齐即可:
.g-grid {
    width: 401px;
    height: 451px;
    outline: 1px solid #000;
    outline-offset: 5px;
    background:
        // 最上层的白色块,挡住中间的网格
        linear-gradient(#fff, #fff),
        // 实现网格布局
        repeating-linear-gradient(#000, #000 1px, transparent 1px, transparent 50px),
        repeating-linear-gradient(90deg, #000, #000 1px, transparent 1px, transparent 50px),
        // 棋盘上方的虚线1
        repeating-linear-gradient(-45deg, transparent 0, transparent 5px, #fff 5px, #fff 10px),
        linear-gradient(45deg, transparent,
            transparent calc(50% - 0.5px),
            #000 calc(50% - 0.5px),
            #000 calc(50% + 0.5px),
            transparent calc(50% + 0.5px),
            transparent 0),
        // 棋盘上方的虚线2
        repeating-linear-gradient(45deg, transparent 0, transparent 5px, #fff 5px, #fff 10px),
        linear-gradient(-45deg, transparent,
            transparent calc(50% - 0.5px),
            #000 calc(50% - 0.5px),
            #000 calc(50% + 0.5px),
            transparent calc(50% + 0.5px),
            transparent 0),
        // 棋盘下方的虚线1
        repeating-linear-gradient(-45deg, transparent 0, transparent 5px, #fff 5px, #fff 10px),
        linear-gradient(45deg, transparent,
            transparent calc(50% - 0.5px),
            #000 calc(50% - 0.5px),
            #000 calc(50% + 0.5px),
            transparent calc(50% + 0.5px),
            transparent 0),
        // 棋盘下方的虚线2
        repeating-linear-gradient(45deg, transparent 0, transparent 5px, #fff 5px, #fff 10px),
        linear-gradient(-45deg, transparent,
            transparent calc(50% - 0.5px),
            #000 calc(50% - 0.5px),
            #000 calc(50% + 0.5px),
            transparent calc(50% + 0.5px),
            transparent 0);
    background-repeat: no-repeat;
    background-size:
        calc(100% - 2px) 49px, 100% 100%, 100% 100%,
        // 交叉虚线 1
        100px 100px, 100px 100px, 100px 100px, 100px 100px,
        // 交叉虚线 2
        100px 100px, 100px 100px, 100px 100px, 100px 100px;
    background-position:
        1px 201px, 0 0, 0 0,
        // 交叉虚线 1
        151px 0, 151px 0, 151px 0, 151px 0,
        // 交叉虚线 2
        151px 350px, 151px 350px, 151px 350px, 151px 350px;
}嚯,这渐变代码确实复杂了点,但是其实每一块的作用都是很清晰的,这样,我们的棋盘就变成了这样:
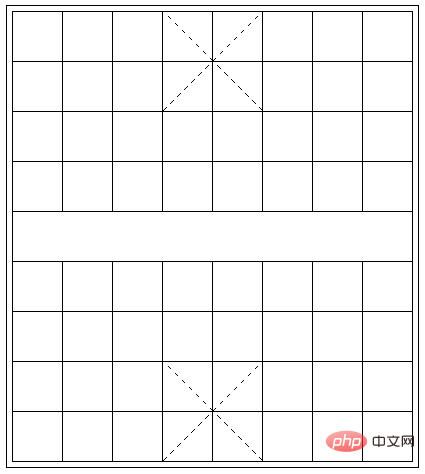
到这里,我们仅仅使用了元素本身,要知道,我们还有元素的两个伪元素没使用。要实现的只剩下多个的这个符合:

因为一共要实现 12 个这样的符号,有的符合还是不完整的,所有这些要在剩余的元素的两个伪元素中完成。可选的方法思来想去,也只有 box-shadow 了。
利用 box-shadow 能够非常好的复制自身。这个技巧其实也反复讲过非常多次了。
我们首先利用元素的一个伪元素,在这个位置,实现一个短横线:
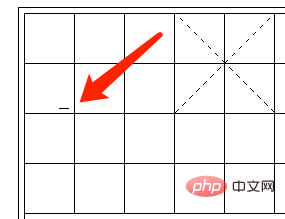
代码大致如下:
.g-grid {
    // ...
    &::before {
        content: "";
        position: absolute;
        top: 95px;
        left: 35px;
        width: 10px;
        height: 1px;
        background: #000;
    }
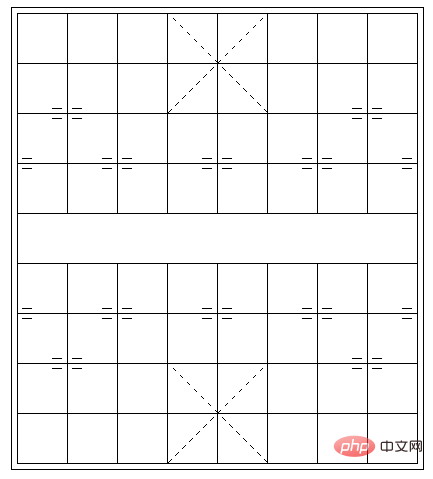
}我们利用 box-shadow 复制自身,可以完成一半横线效果。当然这里由于是个镜面布局,可以利用镜像 -webkit-box-reflect: below 减少一半的代码:
.g-grid {
    // ...
    &::before {
        content: "";
        position: absolute;
        top: 95px;
        left: 35px;
        width: 10px;
        height: 1px;
        background: #000;
        box-shadow:
            20px 0, 0 10px, 20px 10px,
            300px 0, 320px 0, 300px 10px, 320px 10px,
            -30px 50px, -30px 60px,
            50px 50px, 50px 60px, 70px 50px, 70px 60px,
            150px 50px, 150px 60px, 170px 50px, 170px 60px,
            250px 50px, 250px 60px, 270px 50px, 270px 60px,
            350px 50px, 350px 60px;
        -webkit-box-reflect: below 259px;
    }
}效果如下:
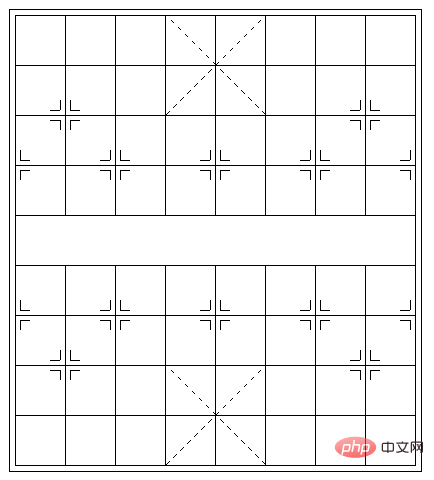
最后,利用另外一个伪元素,完成另外一半的竖向横线即可:
.g-grid {
    // ...
    &::before {
        // ...
    }
    &::after {
        // ...
        box-shadow:
            10px 0, 0 20px, 10px 20px,
            300px 0px, 300px 20px, 310px 0, 310px 20px,
            -40px 50px, -40px 70px,
            50px 50px, 50px 70px, 60px 50px, 60px 70px,
            150px 50px, 150px 70px, 160px 50px, 160px 70px,
            250px 50px, 250px 70px, 260px 50px, 260px 70px,
            350px 50px, 350px 70px;
        -webkit-box-reflect: below 260px;
    }
}这样,我们就在一个标签内,得到这样一个效果:
当然,还剩下楚河、汉界 4 个字,这个也简单直接加在 div 中即可,配合一些简单的 CSS 调整,整个效果就在一个标签内完成啦:
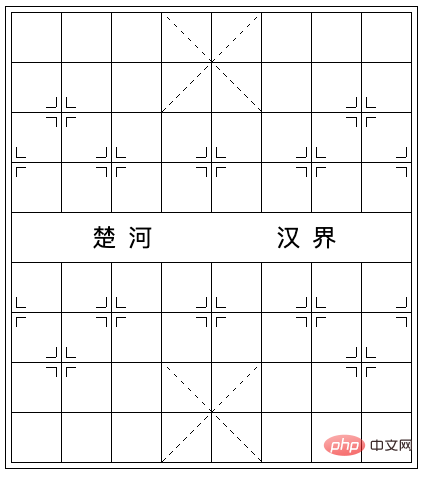
完整的代码你可以戳这里:CodePen Demo -- CSS Chess board
好,实际中我确实不太推荐这么去写,纯粹是为了实现而实现,少了很多代码可读性的考量。因此,本文更多的是给大家带来一些思路,当遇到类似的问题的使用能够有更多的灵感。
原文地址:https://www.cnblogs.com/coco1s/p/16710203.html
作者:ChokCoco
The above is the detailed content of Take you step by step to implement complex chessboard layout using a single tag + CSS. For more information, please follow other related articles on the PHP Chinese website!