
When we first started learning vue, we all used vue-cli to build the basic directory structure of a basic vue project, and implemented it using npm run serve, start our vue project and run a 8080 port service locally, and when we modify and save, the local port page will also be refreshed, similar tolive-server function. [Related recommendations: vuejs video tutorial]
To implement a vue-cli scaffolding, we first need to understand what webpack is? How to use webpack?

Essentially, webpack is a static module bundler(module bundler) for modern JavaScript applications. When webpack processes an application, it recursively builds a dependency graph that contains every module the application requires, and then packages all of these modules into one or more bundle. It includes four core concepts:
Next, while we implement the infrastructure built by vue-cli for us, we will briefly talk about the core concepts of webpack.
First we open a folder, open the terminal in the current folder, first run npm init -y in the terminal to make the current file There is a file of package.json, so that our project can install the dependencies we need from (node library (npmjs.com)). First, we use Install webpack and webpack-cli in the terminal and run npm install webpack webpack-cli (or npm i webpack webpack-cli)
First we create a index.html, only put a container with the id app in it
nbsp;html>


  <meta>
  <meta>
  <meta>


  <div></div>
Create a src folder in the root directory, and create a main inside it .js, usually in vue projects we use files with the suffix .vue to write components or pages (usually what we call pages actually just use routing to jump, not counting The real page, usually we will call it a page), because we did not use vue-cli to build the project, so we did not combine the source code of vue and webpackCombined, so we have to manually introduce the source code of vue so that we can use the syntax of vue, then we should first use node to install a vue source code and run it in the terminalnpm i vue, because the latest we have introduced the source code of vue3, we no longer introduce the entire vue instance object into the project, because in vue3, in order to improve performance, all codes are introduced on demand , instead of introducing the entire vue instance object into the project like vue2, directly use the methods on the instance object.
If we do not introduce the source code of vue into the project, then we can only write the syntax of native js in main.js, as follows:
未引入vue源码的main.js:

function comp() {
  const el = document.createElement("div");

  el.innerHTML = '<i>你好,vue-cli</i>'

  return el
}

document.body.appendChild(comp())
Then What should we do if we add some more styles to it? Theoretically, webpack can only package js files, so how does it handle files with css, less, and vue suffixes? Let’s look at it step by step. Since it is a vue project, we usually write files with the vue suffix. Sometimes for convenience when writing projects, we will also create a style folder under the src file, which handles some common styles in the project. But here, we no longer nest folders. In fact, the principle is the same. If you nest folders, you only need to change the path of the file to achieve it.
main.js
import { createApp } from 'vue';
import './style.css'
import App from './App.vue'

const app = createApp(App)
app.mount('#app')In the src directory, we create a new style.css file and a App.vue, the code is as follows:
style.css:
div{
  color: red;
}App.vue:
<template>
<div>
每一份付出,都会使你得到什么
<p>coding</p>
</div>
</template>
<script>
export default {
setup() {
function time() {
const time = setTimeout(() => {
console.log('hello webpack');
},1000)
}
const testFunctions = async () => {
await time()
console.log('hello vue3');
}
return {
testFunctions
}
}
}
</script>
<style>
div {
color: aqua;
}
</style>The basic project These are the file types. If you need to use .less files or .stylus files, etc., then we set some rules in the loader, one of the four cores of webpack. Convert the .less file or .stylus file into a .css file first, and then tell webpack to load the CSS file.
Since we want to use the core functions of webpack, first we should create a webpack configuration file in the root directory webpack.config.jsNext, I will take you through the core parts one by one. Come and find out.
入口起点(entry point) 指示 webpack 应该使用哪个模块,来作为构建其内部依赖图的开始。进入入口起点后,webpack 会找出有哪些模块和库是入口起点(直接和间接)依赖的。
可以通过在 webpack 配置中配置 entry 属性,来指定一个入口起点(或多个入口起点)。默认值为 ./src。
module.exports = {
  entry: './src/main.js', // 项目入口文件(打包这个文件)
};根据应用程序的特定需求,可以以多种方式配置 entry 属性。从入口起点章节可以了解更多信息。
output 属性告诉 webpack 在哪里输出它所创建的 bundles,以及如何命名这些文件,默认值为 ./dist。基本上,整个应用程序结构,都会被编译到你指定的输出路径的文件夹中。你可以通过在配置中指定一个 output 字段,来配置这些处理过程:
const path = require('path'); // node 提供的方法获取绝对路径

module.exports = {
  entry: './src/main.js', // 项目入口文件(打包这个文件)
  output: {
      path: path.resolve(__dirname,'dist'), // webpack要求必须要绝对路径,__dirname项目文件的绝对路径
      filename: 'js/[name].[contenthash].js' // 生成打包代码重命名 js[name].js 默认main.js
     },
};可能你想要了解在代码最上面导入的 path 模块是什么,它是一个 Node.js 核心模块,用于操作文件路径。
在实际开发中我们很少直接去接触babel,但是babel对于前端开发来说又是必不可少的。Babel到底是什么呢,它其实是一个工具链,跟postcss一样,它能够将ECMAScript后版本语法代码转为ES5代码,包括:语法转换、源代码转换、Polyfill实现功能。
我们来安装babel核心库@babel/core,如果我们想要在命令行使用需要安装@babel/cli,安装npm install @babel/core @babel/cli。我们如果想使用babel的功能,就需要安装bable的插件,我们可以使用babel的预设插件@babel/preset-env,安装npm install @babel/preset-env -D。
babel.config.js:
module.exports = {
  presets: [
    ["@babel/preset-env", {
      "targets": {
        "browsers": ["last 2 versions"]
      }
    }]
  ]
}尽管现在市面上主流的浏览器已经适配了es6的语法,但是我觉得js语法降级也是我们需要掌握的;
loader 让 webpack 能够去处理那些非 JavaScript 文件(webpack 自身只理解 JavaScript)。loader 可以将所有类型的文件转换为 webpack 能够处理的有效模块,然后你就可以利用 webpack 的打包能力,对它们进行处理。
本质上,webpack loader 将所有类型的文件,转换为应用程序的依赖图(和最终的 bundle)可以直接引用的模块。
注意,loader 能够
import导入任何类型的模块(例如.css文件),这是 webpack 特有的功能,其他打包程序或任务执行器的可能并不支持。我们认为这种语言扩展是有很必要的,因为这可以使开发人员创建出更准确的依赖关系图。
在更高层面,在 webpack 的配置中 loader 有两个目标:
test 属性,用于标识出应该被对应的 loader 进行转换的某个或某些文件。
use 属性,表示进行转换时,应该使用哪个 loader。
const path = require('path');  // node 提供的方法获取绝对路径
module.exports = {
  mode: 'development', // 开发模式(打包出来的代码不会被压缩)转化为html、css、js,图片压缩等
  entry: './src/main.js', // 项目入口文件(打包这个文件)
  output: {
    path: path.resolve(__dirname,'dist'),  // webpack要求必须要绝对路径,__dirname项目文件的绝对路径
    filename: 'js/[name].[contenthash].js' // 生成打包代码重命名 js[name].js  默认main.js
  },
  module: {
    rules: [
      {
        test: /\.css$/i,  //正则表达式
        use: ['style-loader', 'css-loader']  // 从右向左执行,有先后顺序
      },
      {
        test: /\.vue$/i,  //正则表达式
        use: ['vue-loader']  // 从右向左执行,有先后顺序
      },
      {
        test: /\.js$/i,  //正则表达式
        exclude: '/node_modules',
        use: ['babel-loader']
      }
    ]
  }
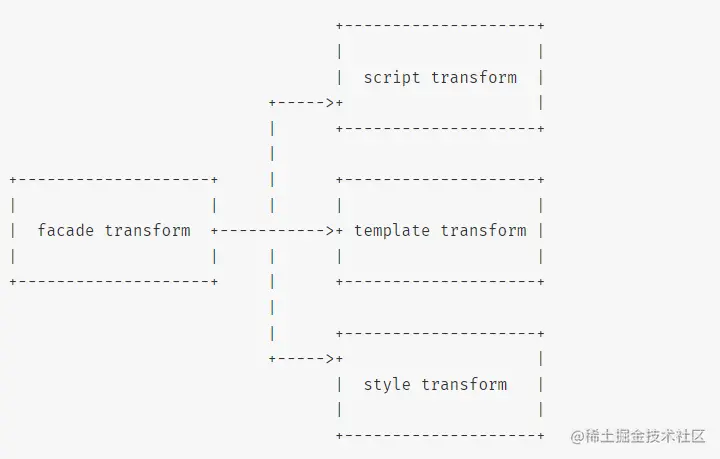
}在一般的vue项目中我们需要使用node安装三个loader npm i style-loader、npm i css-loader、npm i vue-loader,同时还需要一个vue的编译插件npm i @vue/compiler-sfc,其作用是将vue的语法编译成抽象语法树(虚拟dom结构),

换句话说就是将.vue文件的三个部分取出来,分别放到`script` 、 `template` 、 `style` 三个部分中去。
loader 被用于转换某些类型的模块,而插件则可以用于执行范围更广的任务。插件的范围包括,从打包优化和压缩,一直到重新定义环境中的变量。插件接口功能极其强大,可以用来处理各种各样的任务。
想要使用一个插件,你只需要 require() 它,然后把它添加到 plugins 数组中。多数插件可以通过选项(option)自定义。你也可以在一个配置文件中因为不同目的而多次使用同一个插件,这时需要通过使用 new 操作符来创建它的一个实例。
首先为了打包之后生成一个新的html的文件,我们需要安装一个插件npm i html-webpack-plugin -D该插件将为你生成一个 HTML5 文件,配置文件如下:
const HtmlWebpackPlugin = require('html-webpack-plugin'); // 通过 npm 安装
const path = require('path');  // node 提供的方法获取绝对路径
const { VueLoaderPlugin } = require('vue-loader/dist/index')
const { CleanWebpackPlugin } = require('clean-webpack-plugin')
module.exports = {
  mode: 'development', // 开发模式(打包出来的代码不会被压缩)转化为html、css、js,图片压缩等
  entry: './src/main.js', // 项目入口文件(打包这个文件)
  output: {
    path: path.resolve(__dirname,'dist'),  // webpack要求必须要绝对路径,__dirname项目文件的绝对路径
    filename: 'js/[name].[contenthash].js' // 生成打包代码重命名 js[name].js  默认main.js
  },
  module: {
    rules: [
      {
        test: /\.css$/i,
        use: ['style-loader', 'css-loader']  // 从右向左执行,有先后顺序
      },
      {
        test: /\.vue$/i,
        use: ['vue-loader']  // 从右向左执行,有先后顺序
      },
      {
        test: /\.js$/i,
        exclude: '/node_modules',
        use: ['babel-loader']  // 我们安装的一个插件,使得es6之后的语法转化为es5
      }
    ]
  },
  plugins: [
    new HtmlWebpackPlugin({
      template: path.resolve(__dirname,'./index.html'),  // 需要打包的html文件的绝对路径
      filename: 'index.html',   // 打包之后的文件可以重命名
      title: '手动搭建vue-cli'   //还可以修改打包后的HTML中的title
    }),
    new VueLoaderPlugin(),
    new CleanWebpackPlugin() // 清除上一次打包的内容删除,使得下一次的打包顺利进行
  ]
}在插件中修改HTML的title,需要在HTML中写一行代码<title></title>,
htmlWebPlugin就是我们在plugin里new出来的实例对象,同时我们之前安装的vue-loader的功能不仅仅是帮我们去读懂.vue后缀的文件,我们也可以当一个插件来使用;首先引入const { VueLoaderPlugin } = require('vue-loader/dist/index'),在plugin里面new一下我们引用的这个构造函数,它的作用是将我们定义过的规则复制并应用到.vue文件相应的语法块中。
通过选择 development开发模式 或 production 生产模式之中的一个,来设置 mode 参数,你可以启用相应模式下的 webpack 内置的优化
module.exports = {
  mode: 'production'
};到现在我们基本的vue-cli的功能已经实现了,但是我们会发现,我们使用vue-cli运行项目的时候我们是直接跑了一个本地端口的服务,所以我们只需要在最后配置一下DevServer
devServer: {
    static: {
      directory: path.join(__dirname, 'dist'),  // 跑起来的服务的文件
    },
    compress: true,  // 是否压缩
    port: 8080,   // 本地开启服务的端口号
    open: true  // 运行服务之后是否自动打开
}package.json
{
  "name": "vue-cli",
  "version": "1.0.0",
  "description": "",
  "main": "index.js",
  "scripts": {
    "test": "echo \"Error: no test specified\" && exit 1",
    "build": "webpack",    //我们使用 npm run build 将项目打包至dist文件夹
    "dev": "webpack serve" // 我们使用 npm run dev 将项目运行起来
  },
  "keywords": [],
  "author": "",
  "license": "ISC",
  "devDependencies": {
    "@babel/core": "^7.19.1",
    "@babel/preset-env": "^7.19.1",
    "babel-loader": "^8.2.5",
    "clean-webpack-plugin": "^4.0.0",
    "css-loader": "^6.7.1",
    "html-webpack-plugin": "^5.5.0",
    "style-loader": "^3.3.1",
    "vue": "^3.2.39",
    "webpack": "^5.74.0",
    "webpack-cli": "^4.10.0",
    "webpack-dev-server": "^4.11.1"
  },
  "dependencies": {
    "@vue/compiler-sfc": "^3.2.39",
    "vue-loader": "^17.0.0"
  }
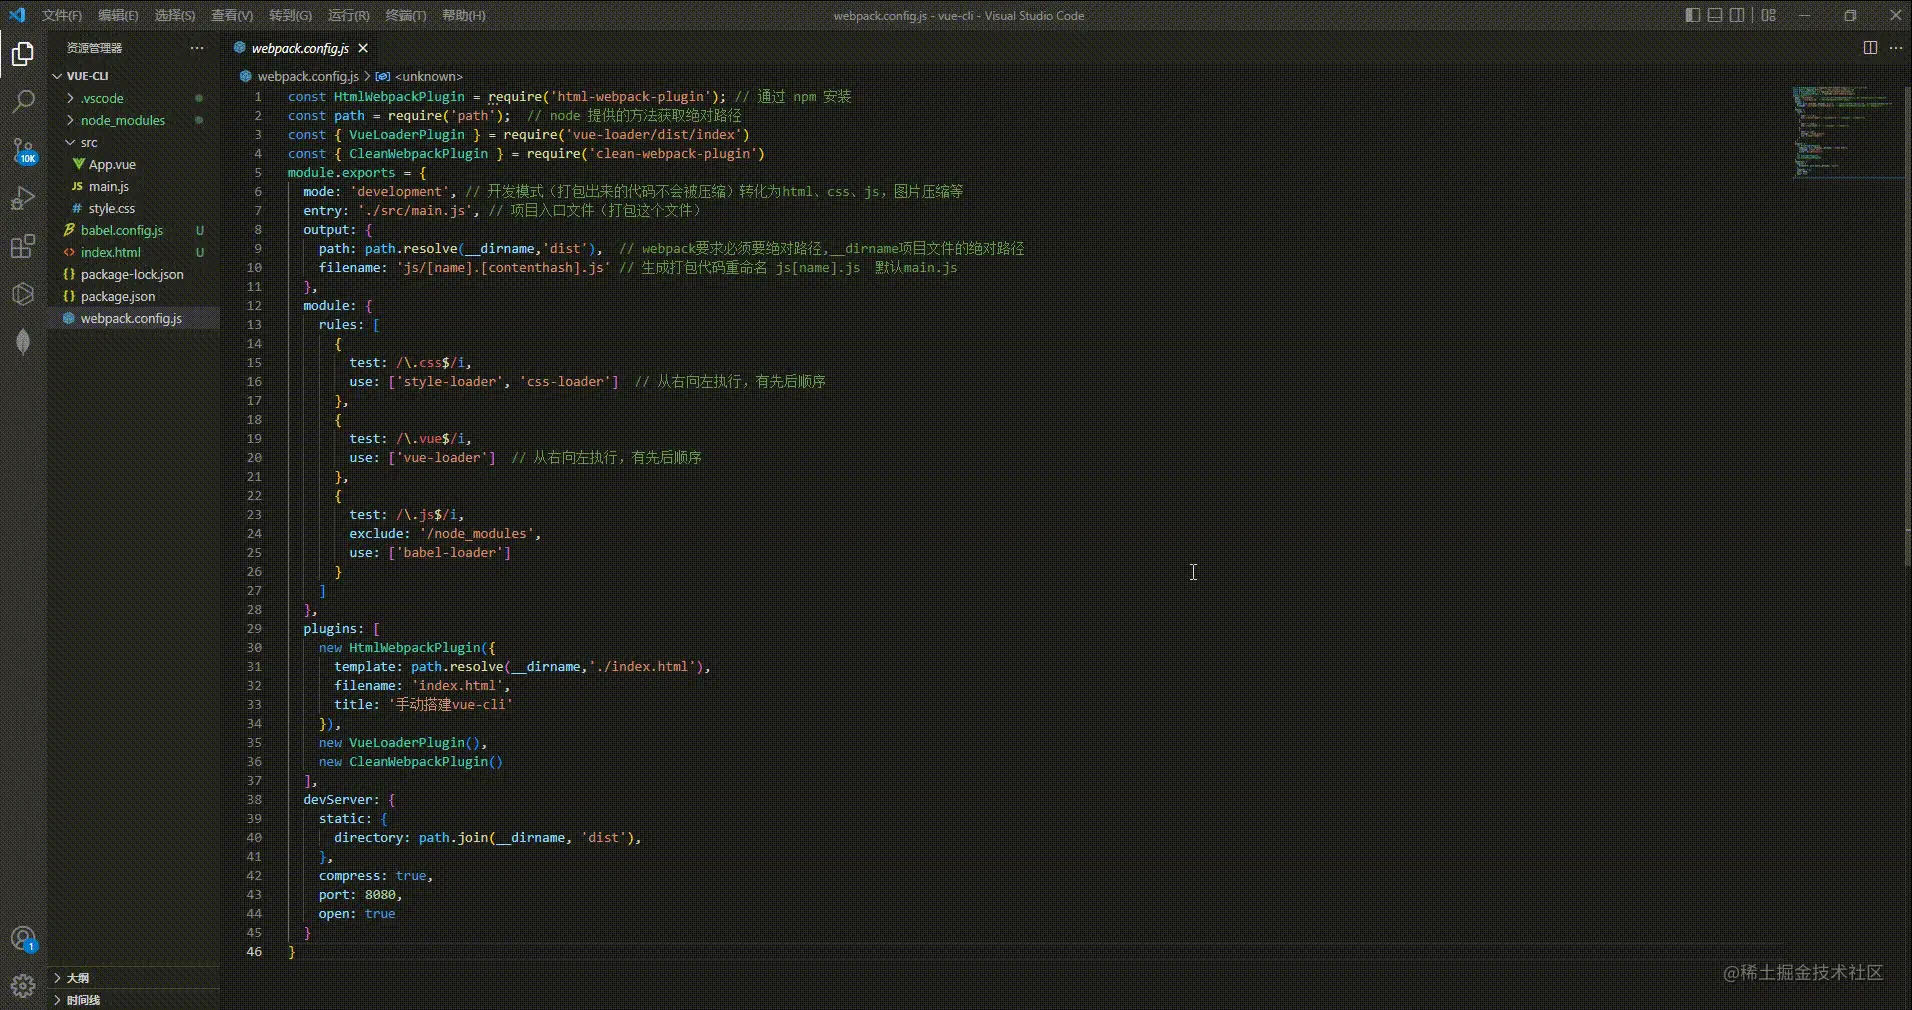
}完整的webpack.config.js配置文件:
const HtmlWebpackPlugin = require('html-webpack-plugin'); // 通过 npm 安装
const path = require('path');  // node 提供的方法获取绝对路径
const { VueLoaderPlugin } = require('vue-loader/dist/index')
const { CleanWebpackPlugin } = require('clean-webpack-plugin')
module.exports = {
  mode: 'development', // 开发模式(打包出来的代码不会被压缩)转化为html、css、js,图片压缩等
  entry: './src/main.js', // 项目入口文件(打包这个文件)
  output: {
    path: path.resolve(__dirname,'dist'),  // webpack要求必须要绝对路径,__dirname项目文件的绝对路径
    filename: 'js/[name].[contenthash].js' // 生成打包代码重命名 js[name].js  默认main.js
  },
  module: {
    rules: [
      {
        test: /\.css$/i,
        use: ['style-loader', 'css-loader']  // 从右向左执行,有先后顺序
      },
      {
        test: /\.vue$/i,
        use: ['vue-loader']  // 从右向左执行,有先后顺序
      },
      {
        test: /\.js$/i,
        exclude: '/node_modules',
        use: ['babel-loader']
      }
    ]
  },
  plugins: [
    new HtmlWebpackPlugin({
      template: path.resolve(__dirname,'./index.html'),
      filename: 'index.html',
      title: '手动搭建vue-cli'
    }),
    new VueLoaderPlugin(),
    new CleanWebpackPlugin()
  ],
  devServer: {
    static: {
      directory: path.join(__dirname, 'dist'),
    },
    compress: true,
    port: 8080,
    open: true
  }
}实际效果展示:

The above is the detailed content of Teach you step by step how to use webpack to implement vue-cli. For more information, please follow other related articles on the PHP Chinese website!