Tip sharing: Elegantly obtain the package.json file

In daily development, we all know that package.json is a description of a project or module package, which contains a lot of meta-information. So how should we read package.json to obtain the information inside? What comes into play is our protagonist today - read-pkg. The key source code is only about 30 lines. Next, let’s take a closer look at the implementation, which can be regarded as laying the foundation for the subsequent development of our own toolkit! [Related tutorial recommendations: nodejs video tutorial]
Harvest list
- Debugging source code
- Elegantly obtain package.json
- Standardize package metadata
- Application of import.meta.url
Preschool Prepare
Download the source code
git clone https://github.com/sindresorhus/read-pkg.git
cd read-pkg&&yarn
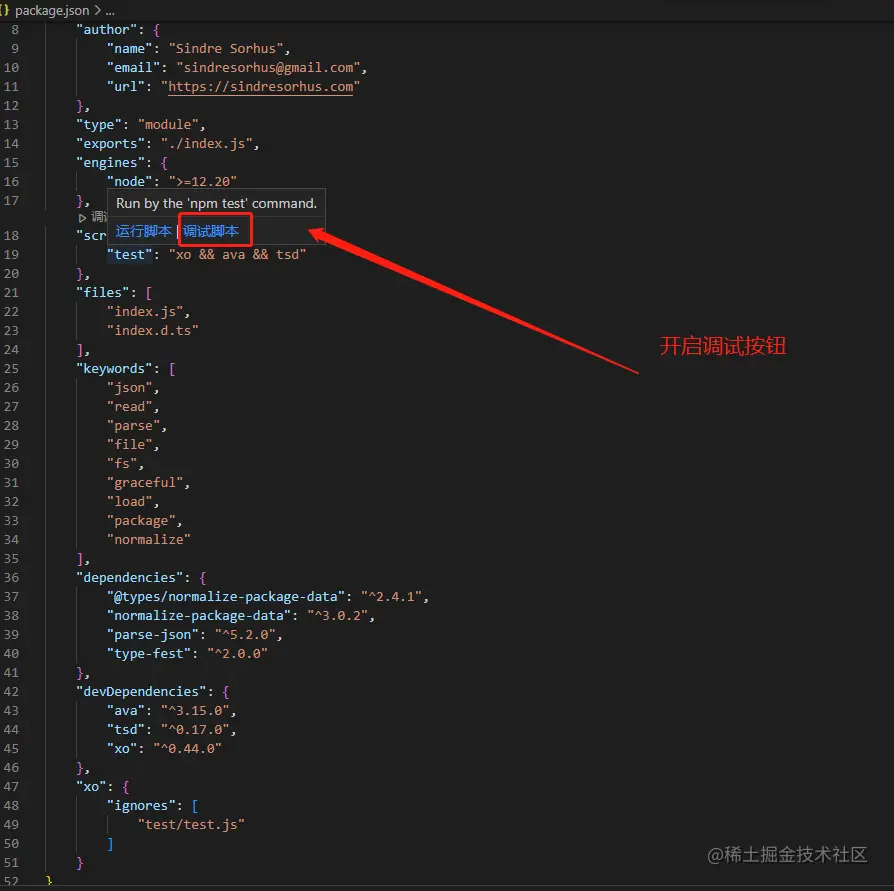
General source code learning first looks at README.md and package.json, The readme teaches usage, and package.json will indicate the command. Generally, we start debugging from the script of package.json. Here is a screenshot:

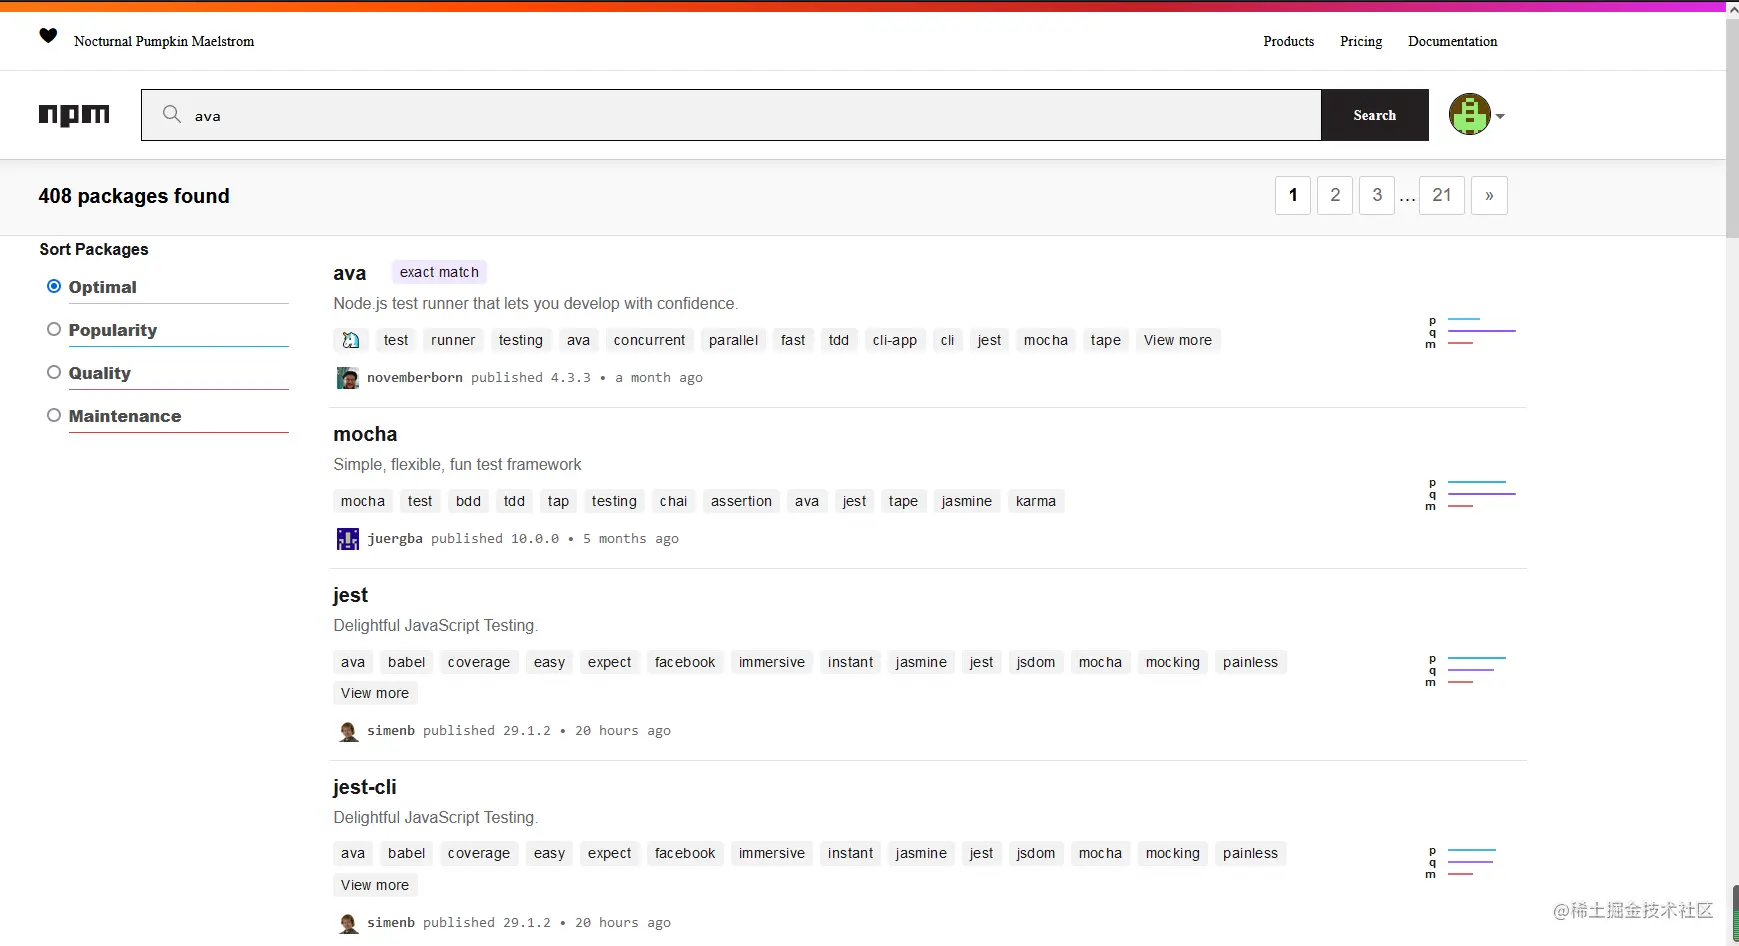
This is the first time I have seen this command. Maybe you don’t know what it wants to express. If you look down at devDependencies, you can see that the three commands correspond to three packages. Don’t know what the packages are for? Go to Baidu by yourself, general package usage can be found on npm

node.js test package

Detect ts type


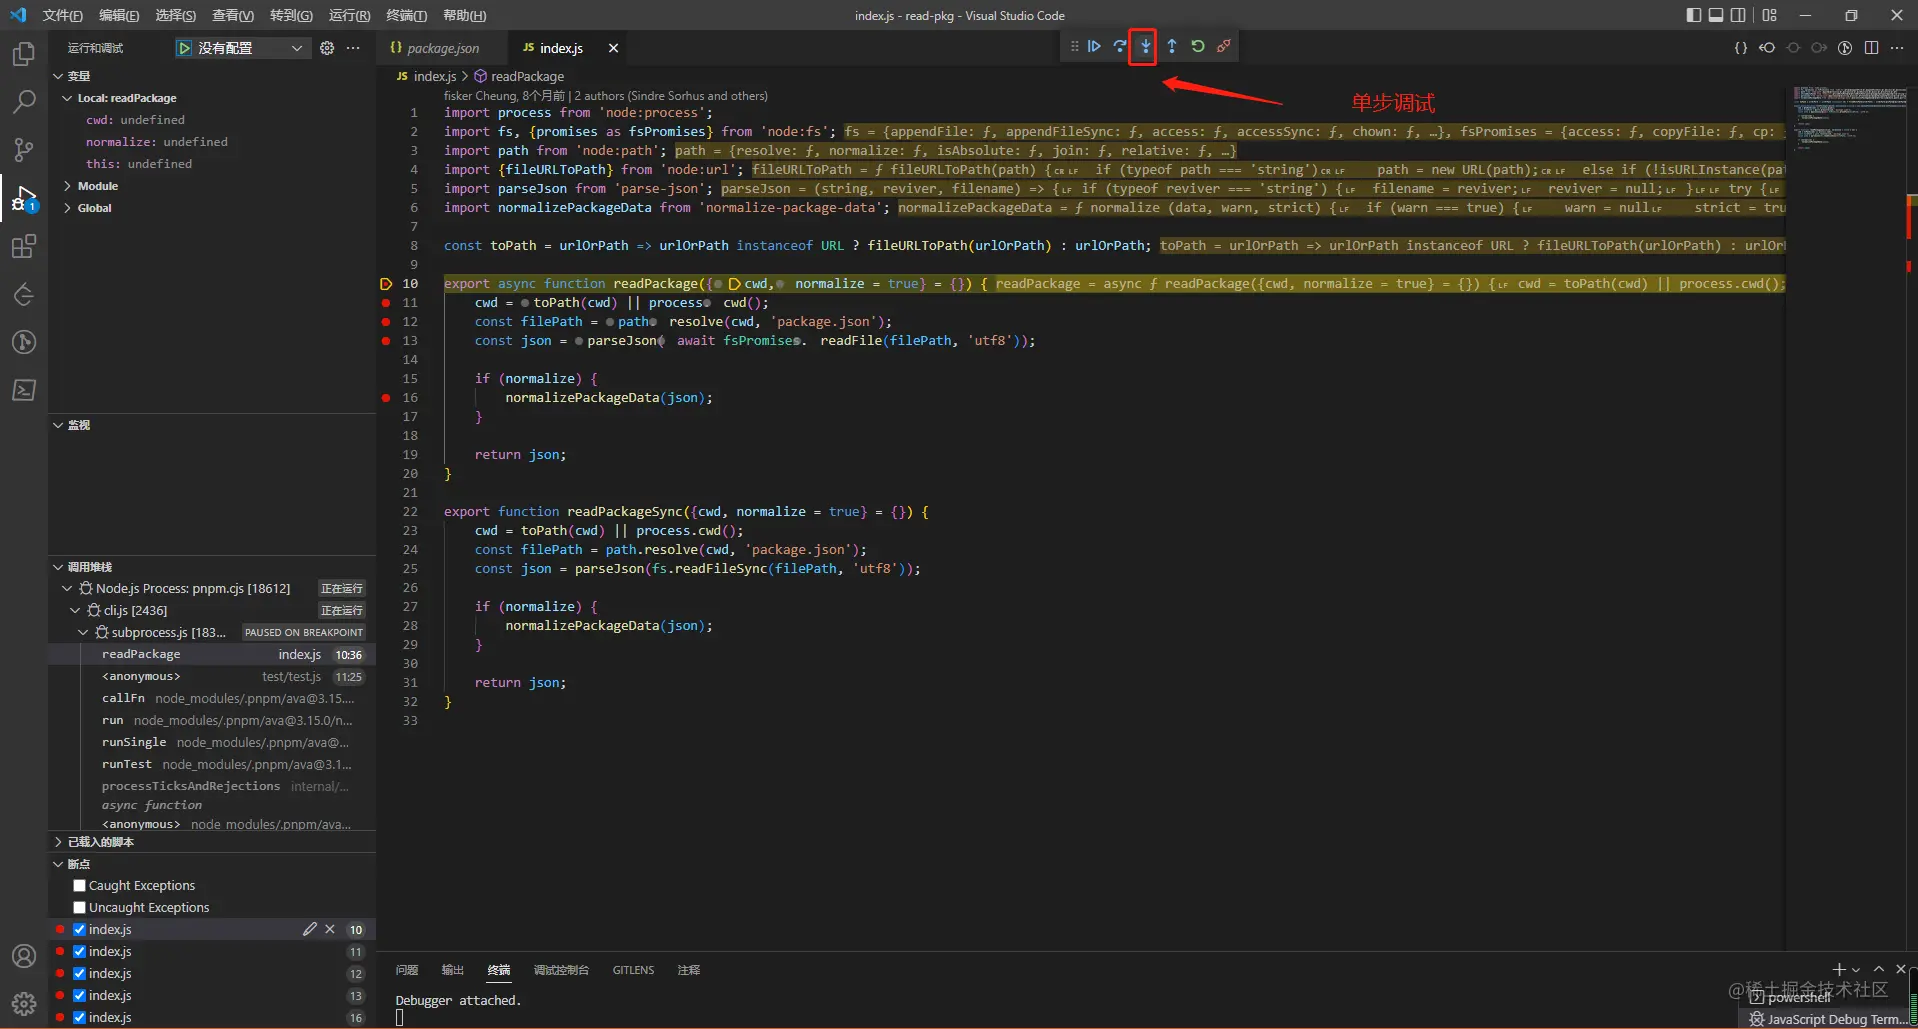
Set a breakpoint in the entry file in advance, and then click the
Debug Script button in the script of package.json to enable debugging. If there is no such button, you may need to update vscode.

// node进程
import process from 'node:process';
// fs文件模块
import fs, {promises as fsPromises} from 'node:fs';
// path 路径模块
import path from 'node:path';
// url模块
import {fileURLToPath} from 'node:url';
// 解析json,并且会伴随有用的报错,https://github.com/sindresorhus/parse-json#readme
import parseJson from 'parse-json';
// 规范化包元数据 https://github.com/npm/normalize-package-data#readme
import normalizePackageData from 'normalize-package-data';
Copy after login
// fileURLToPath将url转化为文件路径
const toPath = urlOrPath => urlOrPath instanceof URL ? fileURLToPath(urlOrPath) : urlOrPath;
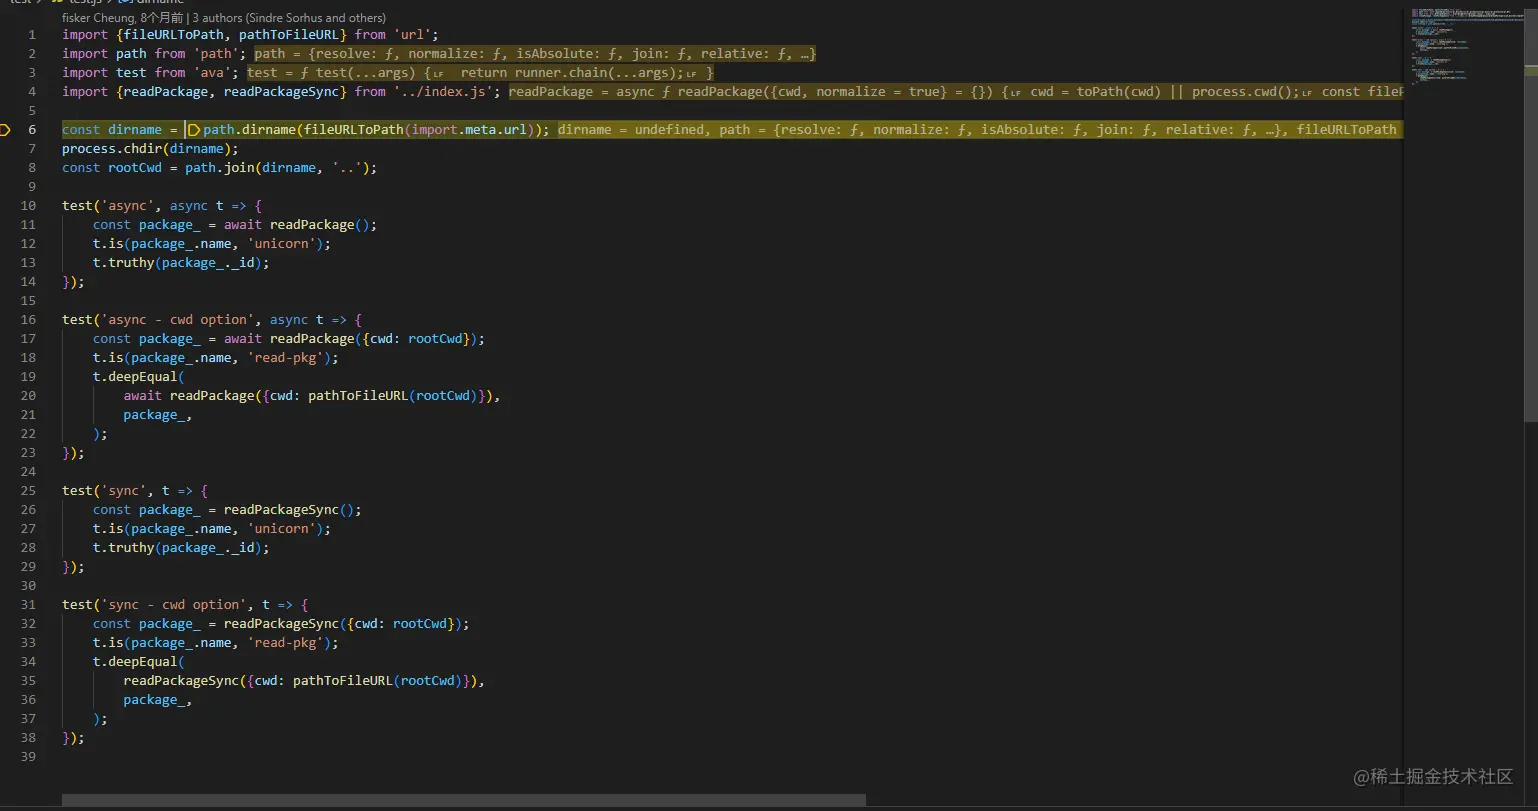
Copy after login As debugging comes to the test file, there are several concepts that can be seen in many source codes, so they are worthy of our attention. They are analyzed below:

Mainly applied to __filename and __dirname which are not available in ES module
Used to obtain the directory name of the specified path
fileURLToPath(import.meta.url )
Extraction path
process.chdir
更改Node.js进程的当前工作目录,或者在执行失败时抛出异常(例如,如果指定的目录不存在)。
- readPackage方法(异步读取)
export async function readPackage({cwd, normalize = true} = {}) {
// 默认用process.cwd获取当前工作目录,获取工作目录
    cwd = toPath(cwd) || process.cwd();
// 获取package.json相对当前工作目录的绝对路径
    const filePath = path.resolve(cwd, 'package.json');
// 异步读取package.json并解析,fsPromises异步文件模块
    const json = parseJson(await fsPromises.readFile(filePath, 'utf8'));
   // 规范化包元数据
    if (normalize) {
        normalizePackageData(json);
    }


    return json;

}- readPackageSync方法(同步读取)
export function readPackageSync({cwd, normalize = true} = {}) {
   // 默认用process.cwd获取当前工作目录,获取工作目录
    cwd = toPath(cwd) || process.cwd();
   // 获取package.json相对当前工作目录的绝对路径
    const filePath = path.resolve(cwd, 'package.json');
   // 读取package.json并解析
    const json = parseJson(fs.readFileSync(filePath, 'utf8'));

    // 序列化元数据
    if (normalize) {

        normalizePackageData(json);

    }


    return json;

}- normalizePackageData作用
序列化前
序列化后
调试后发现序列化后会生成_id,对应测试用例中的t.truthy(package_._id)
总结
今天下载并调试了read-pkg的源码,进一步了解了nodejs的path、url、process模块对于读取文件的应用,read-pkg麻雀虽小五脏俱全,完整的测试用例也是我们可以在自己的工具包中借鉴使用的!今天刚好是国庆,追梦人们国庆快乐哇~
更多node相关知识,请访问:nodejs 教程!
The above is the detailed content of Tip sharing: Elegantly obtain the package.json file. For more information, please follow other related articles on the PHP Chinese website!

Hot AI Tools

Undresser.AI Undress
AI-powered app for creating realistic nude photos

AI Clothes Remover
Online AI tool for removing clothes from photos.

Undress AI Tool
Undress images for free

Clothoff.io
AI clothes remover

Video Face Swap
Swap faces in any video effortlessly with our completely free AI face swap tool!

Hot Article

Hot Tools

Notepad++7.3.1
Easy-to-use and free code editor

SublimeText3 Chinese version
Chinese version, very easy to use

Zend Studio 13.0.1
Powerful PHP integrated development environment

Dreamweaver CS6
Visual web development tools

SublimeText3 Mac version
God-level code editing software (SublimeText3)

Hot Topics
 1386
1386
 52
52
 Is nodejs a backend framework?
Apr 21, 2024 am 05:09 AM
Node.js can be used as a backend framework as it offers features such as high performance, scalability, cross-platform support, rich ecosystem, and ease of development.
 How to connect nodejs to mysql database
Apr 21, 2024 am 06:13 AM
To connect to a MySQL database, you need to follow these steps: Install the mysql2 driver. Use mysql2.createConnection() to create a connection object that contains the host address, port, username, password, and database name. Use connection.query() to perform queries. Finally use connection.end() to end the connection.
 What is the difference between npm and npm.cmd files in the nodejs installation directory?
Apr 21, 2024 am 05:18 AM
There are two npm-related files in the Node.js installation directory: npm and npm.cmd. The differences are as follows: different extensions: npm is an executable file, and npm.cmd is a command window shortcut. Windows users: npm.cmd can be used from the command prompt, npm can only be run from the command line. Compatibility: npm.cmd is specific to Windows systems, npm is available cross-platform. Usage recommendations: Windows users use npm.cmd, other operating systems use npm.
 What are the global variables in nodejs
Apr 21, 2024 am 04:54 AM
The following global variables exist in Node.js: Global object: global Core module: process, console, require Runtime environment variables: __dirname, __filename, __line, __column Constants: undefined, null, NaN, Infinity, -Infinity
 Is there a big difference between nodejs and java?
Apr 21, 2024 am 06:12 AM
The main differences between Node.js and Java are design and features: Event-driven vs. thread-driven: Node.js is event-driven and Java is thread-driven. Single-threaded vs. multi-threaded: Node.js uses a single-threaded event loop, and Java uses a multi-threaded architecture. Runtime environment: Node.js runs on the V8 JavaScript engine, while Java runs on the JVM. Syntax: Node.js uses JavaScript syntax, while Java uses Java syntax. Purpose: Node.js is suitable for I/O-intensive tasks, while Java is suitable for large enterprise applications.
 Pi Node Teaching: What is a Pi Node? How to install and set up Pi Node?
Mar 05, 2025 pm 05:57 PM
Detailed explanation and installation guide for PiNetwork nodes This article will introduce the PiNetwork ecosystem in detail - Pi nodes, a key role in the PiNetwork ecosystem, and provide complete steps for installation and configuration. After the launch of the PiNetwork blockchain test network, Pi nodes have become an important part of many pioneers actively participating in the testing, preparing for the upcoming main network release. If you don’t know PiNetwork yet, please refer to what is Picoin? What is the price for listing? Pi usage, mining and security analysis. What is PiNetwork? The PiNetwork project started in 2019 and owns its exclusive cryptocurrency Pi Coin. The project aims to create a one that everyone can participate
 Is nodejs a back-end development language?
Apr 21, 2024 am 05:09 AM
Yes, Node.js is a backend development language. It is used for back-end development, including handling server-side business logic, managing database connections, and providing APIs.
 How to deploy nodejs project to server
Apr 21, 2024 am 04:40 AM
Server deployment steps for a Node.js project: Prepare the deployment environment: obtain server access, install Node.js, set up a Git repository. Build the application: Use npm run build to generate deployable code and dependencies. Upload code to the server: via Git or File Transfer Protocol. Install dependencies: SSH into the server and use npm install to install application dependencies. Start the application: Use a command such as node index.js to start the application, or use a process manager such as pm2. Configure a reverse proxy (optional): Use a reverse proxy such as Nginx or Apache to route traffic to your application


