How to build the es6 running environment
Building steps: 1. Install the babel-cli tool with the syntax "npm install --save-dev babel-cli"; 2. Install dependencies with the syntax "npm install --save-dev babel-preset-es2015 babel-cli"; 3. Configure the ".babelrc" file in the root directory and set the transcoding rules; 4. Modify the scripts command execution items in package.json.

The operating environment of this tutorial: Windows 7 system, ECMAScript version 6, Dell G3 computer.
Advantages of es6 (off topic):
es6 is ECMAScript2015. es6 is a subset of js, but the js we generally talk about is the version before es6. js itself is a very imperfect language, but es6 hides many ugly parts of js through syntax sugar. It provides many features, such as javascript data processing, arrow functions, destructuring assignment, Default Parameters (default parameters), Classes (classes), Modules (modules), etc., including these asynchronous request methods for front-end and back-end separation, which can be very good Solve the problems encountered by large front-end.
Development environment construction for es6 (es6 transcoding to es5)
If you want to do your job well, you must first sharpen your tools, haha, so the first step is to build one es6 development environment. Lower version browsers do not support es6 syntax, which requires converting es6 syntax into es5 syntax in the running environment. Webpack has automatic compilation and conversion capabilities in vue. In addition to Webpack, babel can be used
Babel usage rules
Babel is a widely used transcoder that can convert ES6 code to ES5 code to execute in the existing environment.
This means that you can write programs in ES6 now without worrying about whether your existing environment supports it. Below is an example.
// 转码前
input.map(item => item + 1);

// 转码后
input.map(function (item) {
  return item + 1;
});
//上面的原始代码用了箭头函数,这个特性还没有得到广泛支持,Babel将其转为普通函数,就能在现有的JavaScript环境执行了。1. Install babel
Babel provides the babel-cli tool for command line conversion code.
Its installation command is as follows:
//需要先安装babel-cli
npm install --global babel-cli
2. Configuration file .babelrc
Babel’s configuration file is .babelrc, stored in the root directory of the project. The first step in using Babel is to configure this file.
This file is used to set transcoding rules and plug-ins. The basic format is as follows. The
{
  "presets": [],
  "plugins": []
}presets field sets the transcoding rules. The following official rule sets are provided. You can install them as needed.
# ES2015转码规则
npm install --save-dev babel-preset-es2015

# ES7不同阶段语法提案的转码规则(共有4个阶段),选装一个
npm install --save-dev babel-preset-stage-0
npm install --save-dev babel-preset-stage-1
npm install --save-dev babel-preset-stage-2
npm install --save-dev babel-preset-stage-3
Then, add these rules to .babelrc.
//例如:按需求添加
{
    "presets": [
      	"es2015",
      	"stage-2"
    ],
	"plugins": []
}3. Usage
# 转码结果输出到标准输出
$ babel example.js

# 转码结果写入一个文件
# --out-file 或 -o 参数指定输出文件
$ babel example.js --out-file compiled.js
# 或者
$ babel example.js -o compiled.js

# 整个目录转码
# --out-dir 或 -d 参数指定输出目录
$ babel src --out-dir lib
# 或者
$ babel src -d lib

# -s 参数生成source map文件
$ babel src -d lib -s
The above code is used for Babel transcoding in the global environment. This means that if the project is to run, the global environment must have Babel, which means that the project has a dependency on the environment. On the other hand, this also fails to support different projects using different versions of Babel.
One solution is to install babel-cli in the project.
# 安装
npm install --save-dev babel-cli
Then, rewrite package.json.
{
  // ...
  "devDependencies": {
    "babel-cli": "^6.0.0"
  },
  "scripts": {
    "build": "babel src -d lib"
  },
}When transcoding, execute the following command.
npm run build
After reading it 10,000 times, it’s better to practice it yourself
Step one: (Create a local project and directory)
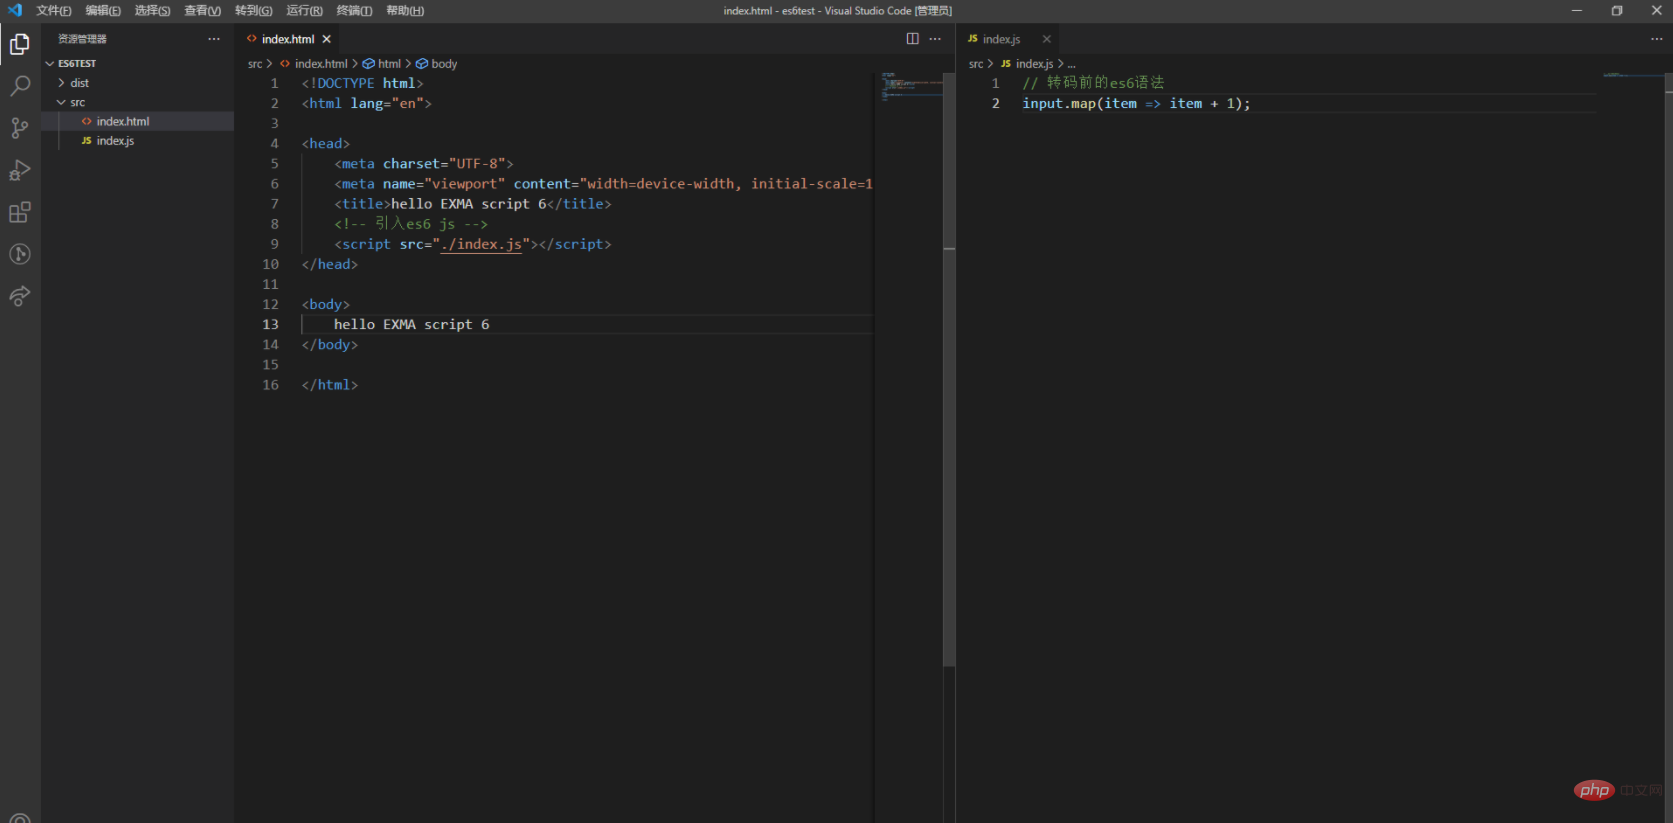
Create a new folder locally, rename it to es6test, open it with the vscode code editor, and create two new files under the folder, namely the project file src and the packaging file dist file, in the src folder Create a new index.html file, create a new index.js file side by side, and introduce the index.js file into index.html

Second step: ( Initialize the project and add the transcoding dependency package)
Open vscode terminal ctrl ~, initialize the project in the file root directory:
npm init -y
will generate a package.json file, The purpose of -y is to configure the default value during initialization, and then modify it in the generated file.

npm is too slow, first install cnpm
npm install -g cnpm --registry=https://registry.npm.taobao.org
Install the babel-cli tool globally in the terminal for command line transfer Code
cnpm install -g babel-cli
I can’t wait to try it out to see if it works and whether it can be transcoded, so I tested it on the terminal first
babel src/index.js -o dist/index.js
It’s not what I expected, it definitely won’t work! An index.js file was generated under the dist file, but it was not converted into es5 syntax

Then install two dependent packages locally
cnpm install --save-dev babel-preset-es2015 babel-cli
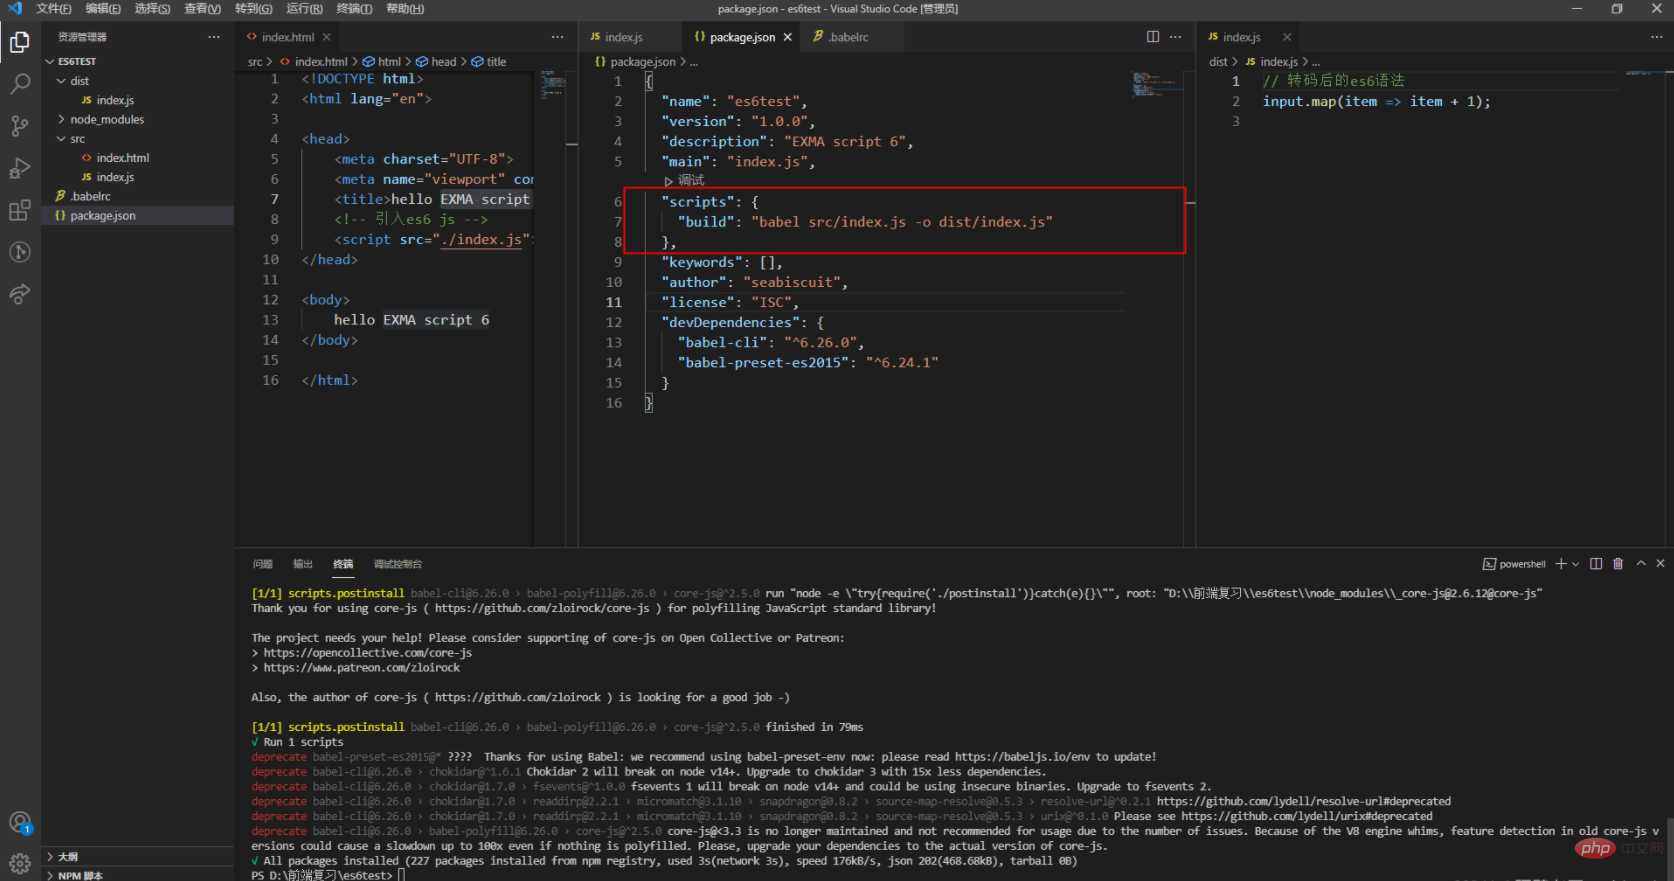
If the following content appears in package.json, congratulations, all dependent packages have been installed

Step 3: (root .babelrc file configuration in the directory)

第四步:(package.json中修改scripts命令执行项)

第五步:(验收成果,哈哈!)
cnpm run build
你也可以在src/index.js中再写些es6的语法,测试下。
【相关推荐:javascript视频教程、编程视频】
The above is the detailed content of How to build the es6 running environment. For more information, please follow other related articles on the PHP Chinese website!

Hot AI Tools

Undresser.AI Undress
AI-powered app for creating realistic nude photos

AI Clothes Remover
Online AI tool for removing clothes from photos.

Undress AI Tool
Undress images for free

Clothoff.io
AI clothes remover

Video Face Swap
Swap faces in any video effortlessly with our completely free AI face swap tool!

Hot Article

Hot Tools

Notepad++7.3.1
Easy-to-use and free code editor

SublimeText3 Chinese version
Chinese version, very easy to use

Zend Studio 13.0.1
Powerful PHP integrated development environment

Dreamweaver CS6
Visual web development tools

SublimeText3 Mac version
God-level code editing software (SublimeText3)

Hot Topics
 1386
1386
 52
52
 How do you connect React components to the Redux store using connect()?
Mar 21, 2025 pm 06:23 PM
Article discusses connecting React components to Redux store using connect(), explaining mapStateToProps, mapDispatchToProps, and performance impacts.
 React's Role in HTML: Enhancing User Experience
Apr 09, 2025 am 12:11 AM
React combines JSX and HTML to improve user experience. 1) JSX embeds HTML to make development more intuitive. 2) The virtual DOM mechanism optimizes performance and reduces DOM operations. 3) Component-based management UI to improve maintainability. 4) State management and event processing enhance interactivity.
 How do you define routes using the <Route> component?
Mar 21, 2025 am 11:47 AM
The article discusses defining routes in React Router using the <Route> component, covering props like path, component, render, children, exact, and nested routing.
 What are the limitations of Vue 2's reactivity system with regard to array and object changes?
Mar 25, 2025 pm 02:07 PM
Vue 2's reactivity system struggles with direct array index setting, length modification, and object property addition/deletion. Developers can use Vue's mutation methods and Vue.set() to ensure reactivity.
 What are Redux reducers? How do they update the state?
Mar 21, 2025 pm 06:21 PM
Redux reducers are pure functions that update the application's state based on actions, ensuring predictability and immutability.
 What are Redux actions? How do you dispatch them?
Mar 21, 2025 pm 06:21 PM
The article discusses Redux actions, their structure, and dispatching methods, including asynchronous actions using Redux Thunk. It emphasizes best practices for managing action types to maintain scalable and maintainable applications.
 What are the benefits of using TypeScript with React?
Mar 27, 2025 pm 05:43 PM
TypeScript enhances React development by providing type safety, improving code quality, and offering better IDE support, thus reducing errors and improving maintainability.
 How can you use useReducer for complex state management?
Mar 26, 2025 pm 06:29 PM
The article explains using useReducer for complex state management in React, detailing its benefits over useState and how to integrate it with useEffect for side effects.


