
 Web Front-end
Vue.js
How to use Vue to implement the drag and drop shuttle box function? Four ways to introduce
Web Front-end
Vue.js
How to use Vue to implement the drag and drop shuttle box function? Four ways to introduce
How to use Vue to implement the drag and drop shuttle box function? Four ways to introduce

How to implement the drag and drop shuttle box function? The following article will introduce to you four ways to implement the drag and drop shuttle box function in Vue. I hope it will be helpful to you.

[Related recommendations: vuejs video tutorial]
1. Use native js to implement drag and drop
Click to open the video for more detailed explanation
<meta>
<title>Lazyload</title>
<style>
.drag {
background-color: skyblue;
position: absolute;
line-height: 100px;
text-align: center;
width: 100px;
height: 100px;
}
</style>
<!-- left和top要写在行内样式里面 -->
<div>按住拖动</div>
<script></script>
<script>
// 获取DOM元素
let dragDiv = document.getElementsByClassName('drag')[0]
// 鼠标按下事件 处理程序
let putDown = function (event) {
dragDiv.style.cursor = 'pointer'
let offsetX = parseInt(dragDiv.style.left) // 获取当前的x轴距离
let offsetY = parseInt(dragDiv.style.top) // 获取当前的y轴距离
let innerX = event.clientX - offsetX // 获取鼠标在方块内的x轴距
let innerY = event.clientY - offsetY // 获取鼠标在方块内的y轴距
// 按住鼠标时为div添加一个border
dragDiv.style.borderStyle = 'solid'
dragDiv.style.borderColor = 'red'
dragDiv.style.borderWidth = '3px'
// 鼠标移动的时候不停的修改div的left和top值
document.onmousemove = function (event) {
dragDiv.style.left = event.clientX - innerX + 'px'
dragDiv.style.top = event.clientY - innerY + 'px'
// 边界判断
if (parseInt(dragDiv.style.left) <= 0) {
dragDiv.style.left = '0px'
}
if (parseInt(dragDiv.style.top) <= 0) {
dragDiv.style.top = '0px'
}
if (
parseInt(dragDiv.style.left) >=
window.innerWidth - parseInt(dragDiv.style.width)
) {
dragDiv.style.left =
window.innerWidth - parseInt(dragDiv.style.width) + 'px'
}
if (
parseInt(dragDiv.style.top) >=
window.innerHeight - parseInt(dragDiv.style.height)
) {
dragDiv.style.top =
window.innerHeight - parseInt(dragDiv.style.height) + 'px'
}
}
// 鼠标抬起时,清除绑定在文档上的mousemove和mouseup事件
// 否则鼠标抬起后还可以继续拖拽方块
document.onmouseup = function () {
document.onmousemove = null
document.onmouseup = null
// 清除border
dragDiv.style.borderStyle = ''
dragDiv.style.borderColor = ''
dragDiv.style.borderWidth = ''
}
}
// 绑定鼠标按下事件
dragDiv.addEventListener('mousedown', putDown, false)
</script>
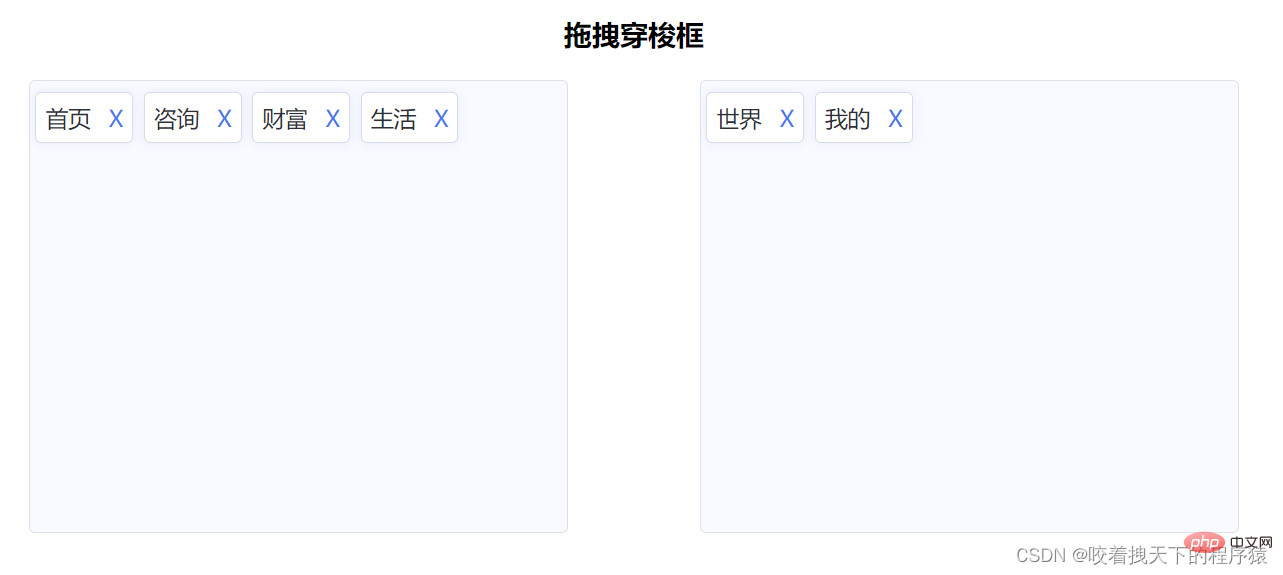
2. VUe uses js to implement drag and drop shuttle boxes
<template>
  <div>
    <h3 id="拖拽穿梭框">拖拽穿梭框</h3>
    <div>
      <div>
        <span>
          <span>{{ item.label }}</span>
          <span>X</span>          >
        </span>
      </div>
      <div>
        <span>
          <span>{{ item.label }}</span>
          <span>X</span>          >
        </span>
      </div>
    </div>
  </div>
</template>

<script>
export default {
  name: "home",
  data() {
    return {
      leftData: [
        { label: "首页", id: 1 },
        { label: "咨询", id: 2 },
        { label: "生活", id: 3 },
        { label: "财富", id: 4 },
        { label: "我的", id: 5 },
      ],
      rightData: [{ label: "世界", id: 6 }],
      isMoveTrue: false,
      isMove: false,
      moveId: "",
    };
  },
  mounted() {},
  components: {},
  methods: {
    mousedown(index, val) {
      this.isMoveTrue = true;
      if (val == 1) {
        this.moveId = "mouse" + index;
      } else {
        this.moveId = "deleteMouse" + index;
      }
    },
    mousemove(event) {
      if (this.isMoveTrue) {
        this.isMove = true;
        document.getElementById(this.moveId).style.position = "absolute";
        document.getElementById(this.moveId).style.top = event.clientY + "px";
        document.getElementById(this.moveId).style.left = event.clientX + "px";
        document.getElementById(this.moveId).style.transform =
          "translate(-50%,-50%)";
      }
    },
    mouseup(item, val, index) {
      if (!this.isMove) {
        this.isMoveTrue = false;
        this.moveId = "";
      }
      if (this.isMoveTrue && val == 2) {
        this.$nextTick(() => {
          this.rightData.splice(index, 1);
          this.leftData.push(item);
        });
      } else if (this.isMoveTrue && val) {
        this.leftData.splice(index, 1);
        this.rightData.push(item);
      }
      document.getElementById(this.moveId).style.display = "none";
      this.isMoveTrue = false;
      this.isMove = false;
      this.moveId = "";
    },
    handerClickX(item, index, val) {
      if (val == 1) {
        this.leftData.splice(index, 1);
        this.rightData.push(item);
      } else {
        this.rightData.splice(index, 1);
        this.leftData.push(item);
      }
    },
  },
};
</script>

<style>
#home {
  display: flex;
  justify-content: space-around;
}
.tree-select-content {
  width: 40%;
  height: 300px;
  background: #f9faff;
  border: 1px solid #dee0ec;
  border-radius: 4px;
  display: flex;
  flex-wrap: wrap;
  align-content: baseline;
}
.select-content {
  width: max-content;
  height: 20px;
  padding: 1.6%;
  border: 1px solid #d6dbed;
  margin: 2% 1% 0;
  background: #ffffff;
  box-shadow: 0 0 8px 0 rgba(72, 119, 236, 0.1);
  border-radius: 4px;
}
.select-content:hover span {
  color: #4877ec;
}
.select-content:hover {
  cursor: pointer;
  background: #f8faff;
  border: 1px solid #3e75f4;
}
.select-text {
  font-size: 15px;
  color: #2e2f36;
  text-align: center;
  font-weight: 400;
}
.select-text-X {
  font-size: 15px;
  color: #4877ec;
  letter-spacing: 0;
  font-weight: 400;
  margin-left: 12px;
  cursor: pointer;
}
</style>Rendering:
##3. Vue drag and drop component vuedraggable
vuedraggable is standard Component encapsulation, and draggable elements are placed on transition-group, and the transition animation is better.
How to use:
yarn add vuedraggable

import vuedraggable from 'vuedraggable';
Case:
<template>
  <div>
    <div>{{ drag ? "拖拽中" : "拖拽停止" }}</div>
    <!--使用draggable组件-->
    <draggable>
      <transition-group>
        <div>
          {{ element.name }}
        </div>
      </transition-group>
    </draggable>
    <div>
      <div>
        {{ color.text }}
      </div>
    </div>
  </div>
</template>
  <style>
/*被拖拽对象的样式*/
.item {
  padding: 6px;
  background-color: #fdfdfd;
  border: solid 1px #eee;
  margin-bottom: 10px;
  cursor: move;
}
/*选中样式*/
.chosen {
  border: solid 1px #3089dc !important;
}
</style>
  <script>
//导入draggable组件
import draggable from "vuedraggable";
export default {
  //注册draggable组件
  components: {
    draggable,
  },
  data() {
    return {
      drag: false,
      //定义要被拖拽对象的数组
      myArray: [
        { people: "cn", id: 10, name: "www.itxst.com" },
        { people: "cn", id: 20, name: "www.baidu.com" },
        { people: "cn", id: 30, name: "www.taobao.com" },
        { people: "us", id: 40, name: "www.yahoo.com" },
      ],
      colors: [
        {
          text: "Aquamarine",
        },
        {
          text: "Hotpink",
        },
        {
          text: "Gold",
        },
        {
          text: "Crimson",
        },
        {
          text: "Blueviolet",
        },
        {
          text: "Lightblue",
        },
        {
          text: "Cornflowerblue",
        },
        {
          text: "Skyblue",
        },
        {
          text: "Burlywood",
        },
      ],
    };
  },
  methods: {
    //开始拖拽事件
    onStart() {
      this.drag = true;
    },
    //拖拽结束事件
    onEnd() {
      this.drag = false;
    },
  },
};
</script>4. Awe-dnd instruction encapsulation
The name of the npm package of vue-dragging is awe -dnd is not vue-dragging. The characteristic of this library is that it encapsulates v-dragging global instructions, and then uses global instructions to perform data binding, etc. Compared with vuedraggable, awe-dnd does not have two-way binding (the absence of two-way binding here is not very rigorous, to be precise, there is no way to expose two-way binding), so it provides events. It is used to update the list when dragging ends (no need to manually update the list, in fact, two-way binding is implemented internally) or to trigger events listened by the parent component.Installation dependencies:
npm install awe-dnd --save
yarn add awe-and
main.js
import VueDND from 'awe-dnd'

Vue.use(VueDND)
Case:
<template>
  <div>
    <div>
      <div>
        {{ color.text }}
      </div>
    </div>
  </div>
</template>
<style>
/*被拖拽对象的样式*/
.item {
  padding: 6px;
  background-color: #fdfdfd;
  border: solid 1px #eee;
  margin-bottom: 10px;
  cursor: move;
}
/*选中样式*/
.chosen {
  border: solid 1px #3089dc !important;
}
</style>
<script>
export default {
  data() {
    return {
      drag: false,
      colors: [
        {
          text: "Aquamarine",
        },
        {
          text: "Hotpink",
        },
        {
          text: "Gold",
        },
        {
          text: "Crimson",
        },
        {
          text: "Blueviolet",
        },
        {
          text: "Lightblue",
        },
        {
          text: "Cornflowerblue",
        },
        {
          text: "Skyblue",
        },
        {
          text: "Burlywood",
        },
      ],
    };
  },
  methods: {},
};
</script>web front-end development, Basic programming video)
The above is the detailed content of How to use Vue to implement the drag and drop shuttle box function? Four ways to introduce. For more information, please follow other related articles on the PHP Chinese website!

Hot AI Tools

Undresser.AI Undress
AI-powered app for creating realistic nude photos

AI Clothes Remover
Online AI tool for removing clothes from photos.

Undress AI Tool
Undress images for free

Clothoff.io
AI clothes remover

AI Hentai Generator
Generate AI Hentai for free.

Hot Article
Hot Tools

Notepad++7.3.1
Easy-to-use and free code editor

SublimeText3 Chinese version
Chinese version, very easy to use

Zend Studio 13.0.1
Powerful PHP integrated development environment

Dreamweaver CS6
Visual web development tools

SublimeText3 Mac version
God-level code editing software (SublimeText3)
Hot Topics
 1378
1378
 52
52

 How to add functions to buttons for vue
Apr 08, 2025 am 08:51 AM
How to add functions to buttons for vue
Apr 08, 2025 am 08:51 AM
You can add a function to the Vue button by binding the button in the HTML template to a method. Define the method and write function logic in the Vue instance.
 How to use bootstrap in vue
Apr 07, 2025 pm 11:33 PM
How to use bootstrap in vue
Apr 07, 2025 pm 11:33 PM
Using Bootstrap in Vue.js is divided into five steps: Install Bootstrap. Import Bootstrap in main.js. Use the Bootstrap component directly in the template. Optional: Custom style. Optional: Use plug-ins.
 How to reference js file with vue.js
Apr 07, 2025 pm 11:27 PM
How to reference js file with vue.js
Apr 07, 2025 pm 11:27 PM
There are three ways to refer to JS files in Vue.js: directly specify the path using the <script> tag;; dynamic import using the mounted() lifecycle hook; and importing through the Vuex state management library.
 How to use watch in vue
Apr 07, 2025 pm 11:36 PM
How to use watch in vue
Apr 07, 2025 pm 11:36 PM
The watch option in Vue.js allows developers to listen for changes in specific data. When the data changes, watch triggers a callback function to perform update views or other tasks. Its configuration options include immediate, which specifies whether to execute a callback immediately, and deep, which specifies whether to recursively listen to changes to objects or arrays.
 How to return to previous page by vue
Apr 07, 2025 pm 11:30 PM
How to return to previous page by vue
Apr 07, 2025 pm 11:30 PM
Vue.js has four methods to return to the previous page: $router.go(-1)$router.back() uses <router-link to="/" component window.history.back(), and the method selection depends on the scene.
 Vue realizes marquee/text scrolling effect
Apr 07, 2025 pm 10:51 PM
Vue realizes marquee/text scrolling effect
Apr 07, 2025 pm 10:51 PM
Implement marquee/text scrolling effects in Vue, using CSS animations or third-party libraries. This article introduces how to use CSS animation: create scroll text and wrap text with <div>. Define CSS animations and set overflow: hidden, width, and animation. Define keyframes, set transform: translateX() at the beginning and end of the animation. Adjust animation properties such as duration, scroll speed, and direction.
 How to use vue pagination
Apr 08, 2025 am 06:45 AM
How to use vue pagination
Apr 08, 2025 am 06:45 AM
Pagination is a technology that splits large data sets into small pages to improve performance and user experience. In Vue, you can use the following built-in method to paging: Calculate the total number of pages: totalPages() traversal page number: v-for directive to set the current page: currentPage Get the current page data: currentPageData()
 How to query the version of vue
Apr 07, 2025 pm 11:24 PM
How to query the version of vue
Apr 07, 2025 pm 11:24 PM
You can query the Vue version by using Vue Devtools to view the Vue tab in the browser's console. Use npm to run the "npm list -g vue" command. Find the Vue item in the "dependencies" object of the package.json file. For Vue CLI projects, run the "vue --version" command. Check the version information in the <script> tag in the HTML file that refers to the Vue file.
