Take you to develop a VS Code plug-in that prompts color codes
Record the process of my self-study and development of VSCode plug-in. Implement a Visual Studio Code extension that uses color code prompts to obtain traditional Chinese colors.

Reference materials
Official documents:code.visualstudio.com/api
Various types of official documents provided Plug-in example: github.com/microsoft/v…
Requirements
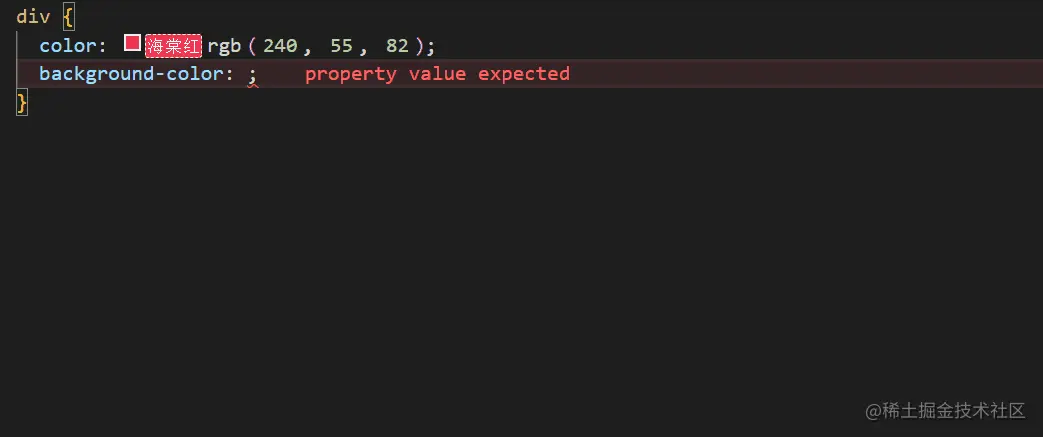
When I write css, I often have difficulty selecting colors. Although VS Code has a built-in plug-in A color picker is provided, but when selecting from 256^3 colors, you may not be able to find the color that meets your expectations. So I wanted to have a color prompt plug-in. As long as I enter # color name, the corresponding colors can be listed for me to choose in the form of code prompts. [Recommended learning: "vscode introductory tutorial"]
I searched around in the VS Code plug-in market and couldn't find a similar plug-in. I finally decided to write one myself, with a learning attitude. , I recorded the learning process.
This is the final result:

The demonstration uses Pinyin, but it is also feasible to use Chinese characters directly.
Search Chinese Colors or "Chinese Color" in the VS Code plug-in market to find the plug-in I wrote.
Warehouse address: taiyuuki/chinese-colors
Get the color
The first thing is to have a ready-made color code, soon I will I found this website: 中国色
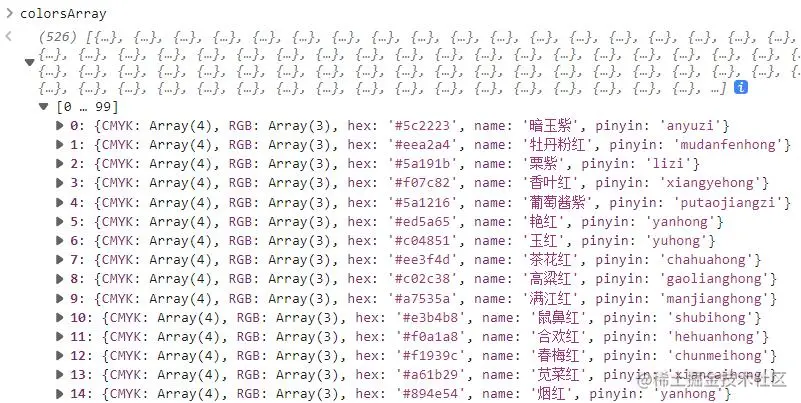
This website provides RGB values and hex values for more than 500 colors. Open the browser console and enter colorsArray to get them all. Here Just what I want.

Judging from the information at the bottom of the website, this website is a fake Japanese color, and the color is said to come from the Editorial Committee of Science and Technology Information of the Chinese Academy of Sciences "Chromatography" was written by Glossary and published by Science Press in 1957.
I have no way of verifying whether the source of this color is trustworthy. If you search "Traditional Chinese Color" on Baidu, you can find many versions of the so-called Chinese color. I also found another Chinese color with close to 2k stars on github. Project: Chinese Traditional Color Manual. The colors used on this website are completely different from the former. They come from a Sina blog that is now unavailable. I have no statistics on the number of colors, but it is roughly estimated to be within 200.
Initialize project
Install development tools
npm i -g yo generator-code
New project
yo code
The configurations are as follows:

Hello World
There is a Hello World in the initial project, open the project with VS Code, and then press F5 (or click "Run -- >Start debugging") to open the debugging window.
Then in the debugging window Ctrl Shift P (or click "Settings-->Command Panel"), enter and select the Hello World command, a message prompt will pop up in the lower right corner of the editor.
extension.ts is the entry file of the plug-in:
 import * as vscode from 'vscode';

 // activate方法会在插件被激活时调用
 export function activate(context: vscode.ExtensionContext) {

     // 注册命令,第一个参数是命令名称,第二参数是回调
     let disposable = vscode.commands.registerCommand('chinese-colors.helloWorld', () => {
         // 弹出消息提示
         vscode.window.showInformationMessage('Hello World from Chinese Colors!');
     });

     // 添加到插件上下文
     context.subscriptions.push(disposable);
 }

 // deactivate方法会在插件失活时调用
export function deactivate() {}package.json
View package.json , two of the more important ones:
 {
     "activationEvents": [
         "onCommand:chinese-colors.helloWorld"
     ],
     "contributes": {
         "commands": [
             {
                 "command": "chinese-colors.helloWorld",
                 "title": "Hello World"
             }
         ]
     },
}activationEvents is the activation configuration of the plug-in. It is an array. Each item corresponds to a condition for activating the plug-in. The format is "
contributes: Generally translated as contribution points, a "chinese-colors.helloWorld" is configured, corresponding to the activationEvents configuration item.
Other package.json configurations are shown in the table below:
| 名称 | 必要 | 类型 | 说明 |
|---|---|---|---|
name | 是 | string | 插件名称,必须为小写且不能有空格。 |
version | 是 | string | 插件版本 |
publisher | 是 | string | 发布者 |
engines | 是 | object | 一个至少包含vscode键值对的对象,该键表示的是本插件可兼容的VS Code的版本,其值不能为*。比如 ^0.10.5 表示插件兼容VS Code的最低版本是0.10.5。 |
license | 否 | string | 授权。如果有授权文档LICENSE.md,可以把license值设为"SEE LICENSE IN LICENSE.md"。 |
displayName | 否 | string | 插件市场中显示的名字。 |
description | 否 | string | 描述,说明本插件是什么以及做什么。 |
categories | 否 | string[] | 插件类型:[Languages, Snippets, Linters, Themes, Debuggers, Other] |
keywords | 否 | array | 一组 关键字 或者 标记,方便在插件市场中查找。 |
galleryBanner | 否 | object | 插件市场中横幅的样式。 |
preview | 否 | boolean | 在市场中把本插件标记为预览版本。 |
main | 否 | string | 插件的入口文件。 |
contributes | 否 | object | 一个描述插件 贡献点 的对象。 |
activationEvents | 否 | array | 一组用于本插件的激活事件。 |
dependencies | 否 | object | 生产环境Node.js依赖项。 |
devDependencies | 否 | object | 开发环境Node.js依赖项。 |
extensionDependencies | 否 | array | 一组本插件所需的其他插件的ID值。格式 ${publisher}.${name}。比如:vscode.csharp。 |
scripts | 否 | object | 和 npm的 scripts一样,但还有一些额外VS Code特定字段。 |
icon | 否 | string | 一个128x128像素图标的路径。 |
用户自定配置项
颜色代码有多种表示方式,比较常用的是16进制(#ffffff)和rgb(255,255,255)这两种,因此我需要让用户自己选择采用哪种方式。
在contributes中有个configuration,允许用户对插件进行一些自定义配置。
package.json:
 {
     // ...
     "contributes": {
         "configuration": [{
             "title": "color mode",// 配置项名称
             "properties": {
                 // 配置属性
                 "RGB": {
                     "type": "boolean",  // 属性值类型
                     "default": false,   // 属性默认值
                     "description": "控制预设的中国色采用RGB格式"    // 属性描述
                 }
             }
         }]
     },
}这样就可以在扩展设置中进行一些自定义的设置:

我们可以通过workspace.getConfiguration()获取用户的配置。
 import { workspace } from "vscode";
 const configuration = workspace.getConfiguration();
const isRGB = configuration.RGB;代码补全
API
代码补全API:
vscode.languages.registerCompletionItemProvider(selector, provider, …triggerCharacters)
该方法有三个参数:
| 参数 | Description |
|---|---|
| selector: string/string[] | 选择编程语言,比如python |
| provider | 供应者配置对象 |
| triggerCharacters: string/string[] | 触发字符, 比如 . 或 : |
register completion item provider(注册完成件供应者),这个provider也是比较费解的一个词,直译是供应者,我猜:代码补全就相当于插件给我们供应了代码,所以叫provider。
provider是一个对象,要求必须包含一个叫provideCompletionItems的方法,该方法需要返回一个数组,数组的每一项是一个CompletionItem对象,规定了代码提示和补全的规则。
官方示例
 import * as vscode from 'vscode';

 export function activate(context: vscode.ExtensionContext) {

     // 注册供应者:languages.registerCompletionItemProvider
     const provider2 = vscode.languages.registerCompletionItemProvider(
         'plaintext',// plaintext,表示对txt文档激活该插件
         {
             // 实现provideCompletionItems方法
             // document的内容见下文,position为当前光标的位置
             provideCompletionItems(document: vscode.TextDocument, position: vscode.Position) {

                 // 获取当前这行代码
                 const linePrefix = document.lineAt(position).text.substr(0, position.character);
                 // 如果这行代码不是以console.结尾,返回undefined,表示不会弹出代码提示
                 if (!linePrefix.endsWith('console.')) {
                     return undefined;
                 }

                 // 返回CompletionItem对象组成的数组,补全代码列表:log、warn、error
                 // CompletionItem对象可以自己创建,也可以像下面这样new vscode.CompletionItem的方式创建
                 // vscode.CompletionItem()有两个参数:
                 // 第一个是补全的代码,第二个是代码类型,用于控制显示在每一行提示前的图标
                 // vscode.CompletionItemKind.Method表示该代码是一个方法
                 return [
                     new vscode.CompletionItem('log', vscode.CompletionItemKind.Method),
                     new vscode.CompletionItem('warn', vscode.CompletionItemKind.Method),
                     new vscode.CompletionItem('error', vscode.CompletionItemKind.Method),
                 ];
             }
         },
         '.' // 以.作为触发
     );

     context.subscriptions.push(provider2);
}provideCompletionItems参数:
position:当前光标所处的位置。
document:用于获取、控制文档的内容或状态,这里列举几个常用的方法和属性:
方法:
- getWordRangeAtPosition(position): Range:获取指定位置单词的范围(起始位置)
- getText(Range):string:获取指定范围的文本
- lineAt(position):string:获取指定位置的文本
- validatePosition(position):Position:获取鼠标停留的位置
属性
- lineCount:总代码行数
- languageId:语言名称
- isClosed:当前文件是否关闭
- isDirty:当前文件的代码是否更改未保存
CompletionItem对象
CompletionItem对象可以通过new vscode.CompletionItem()的方式创建,但它默认只能补全代码,不能自定义替换,并不能满足我的需求,因此需要自己创建。
CompletionItem对象包含的属性:
| 属性 | 说明 |
|---|---|
| detail: string | 语义化描述 |
| documentation: string | 语义化描述 |
| filterText: string | 代码过滤。匹配输入的内容,没有设置时,使用label |
| insertText: string | 插入、补全的代码。没有设置时,使用label |
| label: string | 默认的匹配代码、补全代码 |
| kind | 代码类型,控制显示代码提示前的图标 |
| sortText: string | 排序文本,与sortText匹配的提示代码会排在靠前的位置 |
| textEdit | 对补全代码进行编辑,如果设置了textEdit,insertText会失效 |

kind的取值:
- Class
- Color
- Constructor
- Enum
- Field
- File
- Function
- Interface
- Keyword
- Method
- Module
- Property
- Reference
- Snippet
- Text
- Unit
- Value
- Variable
简单的示例
 import * as vscode from "vscode";
 import { CompletionItemKind } from "vscode";

 export function activate(context: vscode.ExtensionContext) {
   const cc = vscode.languages.registerCompletionItemProvider(
     "css",
     {
       provideCompletionItems() {
         return [
             {
                 detail: '#66ccff',
                 documentation: '天依蓝',
                 kind: CompletionItemKind.Color,
                 filterText: `#66ccff天依蓝`,
                 label: '天依蓝',
                 insertText: '#66ccff'
             },
             {
                 detail: '#39c5bb',
                 documentation: '初音绿',
                 kind: CompletionItemKind.Color,
                 filterText: `#39c5bb初音绿`,
                 label: '初音绿',
                 insertText: '#39c5bb'
             }
         ];
       },
     },
     "#"
   );
   context.subscriptions.push(cc);
 }

export function deactivate() {}记得要在package.json里配置激活:
"activationEvents": [
    "onLanguage:css"
]中国色插件
package.json关键配置:
 {
     "activationEvents": [
         "onLanguage:css",
         "onLanguage:scss",
         "onLanguage:sass",
         "onLanguage:less",
         "onLanguage:stylus",
         "onLanguage:html",
         "onLanguage:xml",
         "onLanguage:json",
         "onLanguage:javascript",
         "onLanguage:typescript",
         "onLanguage:javascriptreact",
         "onLanguage:typescriptreact",
         "onLanguage:vue",
         "onLanguage:vue-html"
     ],
     "contributes": {
         "configuration": [{
             "title": "Chinese Colors",
             "properties": {
                 "RGB": {
                     "type": "boolean",
                     "default": false,
                     "description": "控制预设的中国色采用RGB格式"
                 }
             }
         }]
     },
}颜色列表colors.ts:
 // 声明Color类型
 export type Color = {
   rgb: number[];
   hex: string;
   name: string;
   phonics: string;
 };

 // 这里只列两个颜色
 export const colors: Color[] = [
   {
     rgb: [92, 34, 35],
     hex: "#5c2223",
     name: "暗玉紫",
     phonics: "anyuzi",
   },
   {
     rgb: [238, 162, 164],
     hex: "#eea2a4",
     name: "牡丹粉红",
     phonics: "mudanfenhong",
   },
   // ...
]extensions.ts
 import * as vscode from "vscode";
 import { workspace, CompletionItemKind } from "vscode";
 import { colors, Color } from "./colors";

 const isRgb = workspace.getConfiguration().RGB;

 export function activate(context: vscode.ExtensionContext) {
   const cc = vscode.languages.registerCompletionItemProvider(
     [
       "css",
       "scss",
       "sass",
       "less",
       "stylus",
       "html",
       "xml",
       "json",
       "javascript",
       "typescript",
       "javascriptreact",
       "typescriptreact",
       "vue",
       "vue-html",
     ],// activationEvents
     {
       provideCompletionItems() {
         const list = [] as CompletionItemKind[];

         colors.forEach((color: Color) => {
           list.push({
             detail: isRgb ? rgb : hex,
             documentation: color.name,
             kind: CompletionItemKind.Color,
             filterText: "#" + color.name + color.phonics,
             label: color.name,
             insertText: isRgb ? rgb : hex,
           });
         });
         return list;
       },
     },
     "#"
   );
   context.subscriptions.push(cc);
 }

export function deactivate() {}如此,代码补全的功能已经基本实现,实际开发时,为了便于维护,需要将这部分逻辑抽离出来。
颜色预览
接下来,需要实现颜色的预览,虽然VS Code内置的插件已经实现了这项功能,但我的需求是:不仅能预览颜色,还得显示颜色名称。

API
实现颜色预览需要用到装饰效果,涉及以下这些API:
window.createTextEditorDecorationType(options):创建装饰效果的类型
window.activeTextEditor.setDecorations(decorationType, decorations):添加装饰效果至文档
window.onDidChangeActiveTextEditor:文档内容变化事件
workspace.onDidChangeTextDocument:切换文档事件
官方示例
首先来看一下官方提供的示例片段
完整实例: github.com/microsoft/v…
import * as vscode from 'vscode';

// 插件激活时调用
export function activate(context: vscode.ExtensionContext) {

	console.log('decorator sample is activated');

	let timeout: NodeJS.Timer | undefined = undefined;

    // 为small numbers创建装饰效果类型
	const smallNumberDecorationType = vscode.window.createTextEditorDecorationType({
        // 以下是装饰效果的样式
		borderWidth: '1px',
		borderStyle: 'solid',
		overviewRulerColor: 'blue',
		overviewRulerLane: vscode.OverviewRulerLane.Right,
		light: {
			// 亮色主题下的边框颜色
			borderColor: 'darkblue'
		},
		dark: {
			// 暗色主题下的边框颜色
			borderColor: 'lightblue'
		}
	});

	// 为large numbers创建装饰效果类型
	const largeNumberDecorationType = vscode.window.createTextEditorDecorationType({
		cursor: 'crosshair',
		// 设置装饰的背景颜色, 在package.json中可以配置该名称对应的颜色
		backgroundColor: { id: 'myextension.largeNumberBackground' }
	});

    // activeEditor是当前活跃(展示)的文档编辑器实例
	let activeEditor = vscode.window.activeTextEditor;

    // updateDecorations方法,在每次文档被更新或切换文档时调用。
	function updateDecorations() {
		if (!activeEditor) {
			return;
		}
        // 匹配数字的正则
		const regEx = /\d+/g;
        // 获取文档的文本
		const text = activeEditor.document.getText();
        // 装饰效果数组,用于归集每一个Decoration对象
		const smallNumbers: vscode.DecorationOptions[] = [];
		const largeNumbers: vscode.DecorationOptions[] = [];
		let match;
		while ((match = regEx.exec(text))) {
            // 获取匹配结果的起始位置
			const startPos = activeEditor.document.positionAt(match.index);// 开始位置
			const endPos = activeEditor.document.positionAt(match.index + match[0].length);// 结束位置
            // Decoration对象
			const decoration = {
                // 装饰效果的位置
                range: new vscode.Range(startPos, endPos),
                // 鼠标悬停(hover)的提示信息
                hoverMessage: 'Number **' + match[0] + '**'
            };
            // 将符合的结果归集
			if (match[0].length < 3) {
				smallNumbers.push(decoration);
			} else {
				largeNumbers.push(decoration);
			}
		}
        // 添加装饰效果
		activeEditor.setDecorations(smallNumberDecorationType, smallNumbers);
		activeEditor.setDecorations(largeNumberDecorationType, largeNumbers);
	}

    // 给方法节流
	function triggerUpdateDecorations(throttle = false) {
		if (timeout) {
			clearTimeout(timeout);
			timeout = undefined;
		}
		if (throttle) {
			timeout = setTimeout(updateDecorations, 500);
		} else {
			updateDecorations();
		}
	}

    // 打开文档时调用一次
	if (activeEditor) {
		triggerUpdateDecorations();
	}

	// 切换文档时调用
	vscode.window.onDidChangeActiveTextEditor(editor => {
        // 这一步赋值是必须的,确保activeEditor是当前打开的文档编辑器实例
		activeEditor = editor;
		if (editor) {
			triggerUpdateDecorations();
		}
	}, null, context.subscriptions);

    // 文档内容发送改变时调用
	vscode.workspace.onDidChangeTextDocument(event => {
		if (activeEditor && event.document === activeEditor.document) {
			triggerUpdateDecorations(true);
		}
	}, null, context.subscriptions);

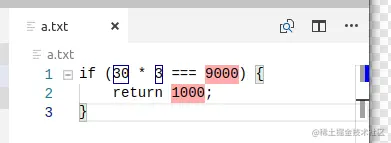
}效果如下:

DecorationType
DecorationType是通过window.createTextEditorDecorationType(options)创建的对象,它主要用来设置装饰效果的样式,其实就是css样式,比如border、color、backgroundColor等等。
如果要在匹配结果之前或之后添加装饰,可以添加before/after字段进行设置,还可以分别给dark、light模式配置不同的样式。
const decorationType =  window.createTextEditorDecorationType({
    // 在匹配位置之前添加装饰效果:
    before: {
        color: '#eee',
        backgroundColor: '#fff',
        width: 'fit-content'
    }
})由于该方法支持的样式字段有限,有些样式(比如line-height)无法在options里直接添加,但我们可以在任意字段后添加分号,将这些样式写在后面,比如:
const decorationType =  window.createTextEditorDecorationType({
    // 在匹配位置之后添加装饰效果:
    after: {
        color: '#333',
        backgroundColor: '#fff',
        width: 'fit-content',
        height: '0.8em',
        // fontSize: '0.6em', 这么设置是无效的,因为并不支持fontSize字段,
        // 但我们可以将其添加在任意字段后面
        fontStyle: 'normal;font-size:0.6em;line-height:0.8em'
    }
})具体支持哪些字段,可以查看此API的官方文档:
VS Code API | Visual Studio Code Extension API
Decoration对象
Decoration对象有三个属性:
range:装饰效果的位置,range对象可以通过new vscode.Range(start, end)创建hoverMessage:鼠标悬停时的提示信息renderOptions:和decorationType类似,可以单独对每一个装饰效果设置样式。但只支持before、after、dark、light四个字段,也就是说,无法再对匹配的内容本身设置样式。
示例
由于实现的代码比较长,和上述官方示例其实差不多,这里就不再贴出来了,感兴趣的可以我去文章开头的仓库地址查看。
值得一提的是,为了颜色的名称在不同的颜色背景下都能清晰的显现,我这里用到了一个计算对比色的方法,贴出来供参考:
// 通过hex值计算应该使用的字体颜色
function getContrastColor(hexcolor: string) {
  const r = parseInt(hexcolor.substring(1, 2), 16)
  const g = parseInt(hexcolor.substring(3, 4), 16)
  const b = parseInt(hexcolor.substring(5, 6), 16)
  const yiq = (r * 299 + g * 587 + b * 114) / 1000
  return yiq >= 8 ? 'black' : 'white'
}插件打包
打包命令:
vsce package
如果打包失败,可能的原因:
- packege.json缺少上文表格中必要的配置项
- VS Code版本与packege.json里设置的版本不兼容
- 根目录下缺少README.md文件
- 根目录下缺少LICENSE.md文件
更多关于VSCode的相关知识,请访问:vscode教程!
The above is the detailed content of Take you to develop a VS Code plug-in that prompts color codes. For more information, please follow other related articles on the PHP Chinese website!

Hot AI Tools

Undresser.AI Undress
AI-powered app for creating realistic nude photos

AI Clothes Remover
Online AI tool for removing clothes from photos.

Undress AI Tool
Undress images for free

Clothoff.io
AI clothes remover

AI Hentai Generator
Generate AI Hentai for free.

Hot Article

Hot Tools

Notepad++7.3.1
Easy-to-use and free code editor

SublimeText3 Chinese version
Chinese version, very easy to use

Zend Studio 13.0.1
Powerful PHP integrated development environment

Dreamweaver CS6
Visual web development tools

SublimeText3 Mac version
God-level code editing software (SublimeText3)

Hot Topics
 How to view word documents in vscode How to view word documents in vscode
May 09, 2024 am 09:37 AM
First, open the vscode software on the computer, click the [Extension] icon on the left, as shown in ① in the figure. Then, enter [officeviewer] in the search box of the extension interface, as shown in ② in the figure. Then, from the search Select [officeviewer] to install in the results, as shown in ③ in the figure. Finally, open the file, such as docx, pdf, etc., as shown below
 How to draw a flow chart with vscode_How to draw a flow chart with visual_studio code
Apr 23, 2024 pm 02:13 PM
First, open visual studio code on the computer, click the four square buttons on the left, then enter draw.io in the search box to query the plug-in, click Install. After installation, create a new test.drawio file, then select the test.drawio file, enter the editing mode on the left There are various graphics on the side. You can draw the flow chart by selecting at will. After drawing, click File → Embed → svg and then select Embed. Copy the svg code. Paste the copied svg code into the html code. Open the html web page and you can see it. Click on the picture on the web page to jump to the flow chart. On this page, you can zoom in and out of the flow chart. Here, we choose to click on the pencil pattern in the lower right corner to jump to the web page.
 How to write Maude in Vscode_How to write Maude in Vscode
Apr 23, 2024 am 10:25 AM
First, you can search for the Maude plug-in in the vscode plug-in manager. Then, create a new file with the extension maude to use maude's code snippets and syntax highlighting. Terminal -> New Terminal can open the vscode built-in terminal in the current folder to run the maude or full-maude program. In maude's official tutorial, there are also examples of http clients, which can be called and run as shown in the figure. If you want to associate files with the fm extension, open settings, search for fileassociations in user settings, and open settings.json. Just add an entry to the file association, that is, the entry from *.fm to maude. But full
 Caltech Chinese use AI to subvert mathematical proofs! Speed up 5 times shocked Tao Zhexuan, 80% of mathematical steps are fully automated
Apr 23, 2024 pm 03:01 PM
LeanCopilot, this formal mathematics tool that has been praised by many mathematicians such as Terence Tao, has evolved again? Just now, Caltech professor Anima Anandkumar announced that the team released an expanded version of the LeanCopilot paper and updated the code base. Image paper address: https://arxiv.org/pdf/2404.12534.pdf The latest experiments show that this Copilot tool can automate more than 80% of the mathematical proof steps! This record is 2.3 times better than the previous baseline aesop. And, as before, it's open source under the MIT license. In the picture, he is Song Peiyang, a Chinese boy. He is
 How to enable background updates in vscode How to enable background updates in vscode
May 09, 2024 am 09:52 AM
1. First, after opening the interface, click the file menu in the upper left corner. 2. Then, click the settings button in the preferences column. 3. Then, in the settings page that jumps, find the update section. 4. Finally, click the mouse to check and enable it. Download and install the new VSCode version button in the background on Windows and restart the program.
 How to add files to vscode workspace How to add files to vscode workspace
May 09, 2024 am 09:43 AM
1. First, open the vscode software, click the explorer icon, and find the workspace window 2. Then, click the file menu in the upper left corner and find the add folder to workspace option 3. Finally, find the folder location in the local disk , click the add button
 How to disable wsl configuration file in vscode How to disable wsl configuration file in vscode
May 09, 2024 am 10:30 AM
1. First, open the settings option in the settings menu. 2. Then, find the terminal column in the commonly used page. 3. Finally, uncheck the usewslprofiles button on the right side of the column.
 How to set animation smooth insertion in VScode VScode tutorial to set animation smooth insertion
May 09, 2024 am 09:49 AM
1. First, after opening the interface, click the workspace interface 2. Then, in the open editing panel, click the File menu 3. Then, click the Settings button under the Preferences column 4. Finally, click the mouse to check the CursorSmoothCaretAnimation button and save Just set it


