This article is provided by the tutorial column of Pagoda Panel to introduce to you how to configure mongodb in Pagoda. I hope it will be helpful to you if you need it!

1. Install mongodb in the pagoda software store
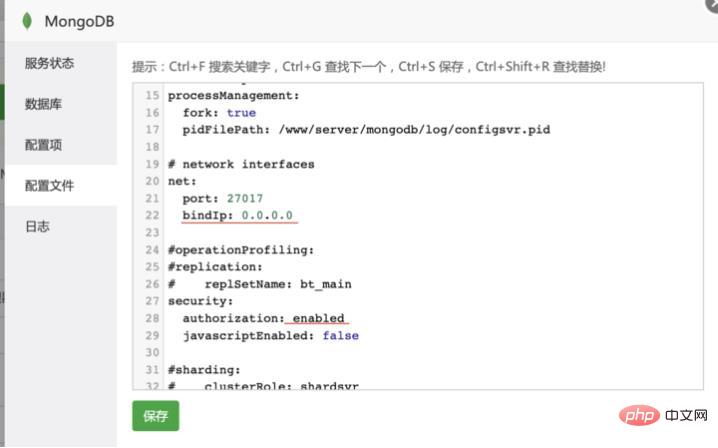
2. Modify the mongodb configuration
bindIp from 127.0.0.1 to 0.0 .0.0, release IP restrictions\
authorization default is disabled, if permission verification is required, change it to enabled (note to keep the space after the colon)

3. Pagoda releases port 27017
4. Alibaba Cloud Server, Network and Security-Security Group-Configure Rules, releases port 27017
5. Configure username and password
pass Pagoda terminal link mongodb
cd /www/server/mongodb/bin
mongo
Switch to the admin database, set the administrator account password
use admin
db.createUser({user:'root',pwd:'123456',roles:['root']})Verify whether the addition is successful, db.auth (user name, user password)
db.auth('root', '123456')
Create a role for a certain database
use mydata
db.createUser({user:'username',pwd:'123456',roles:['readWrite']})Verification
db.auth('username', '123456')
6. Modify the background project connection database configuration

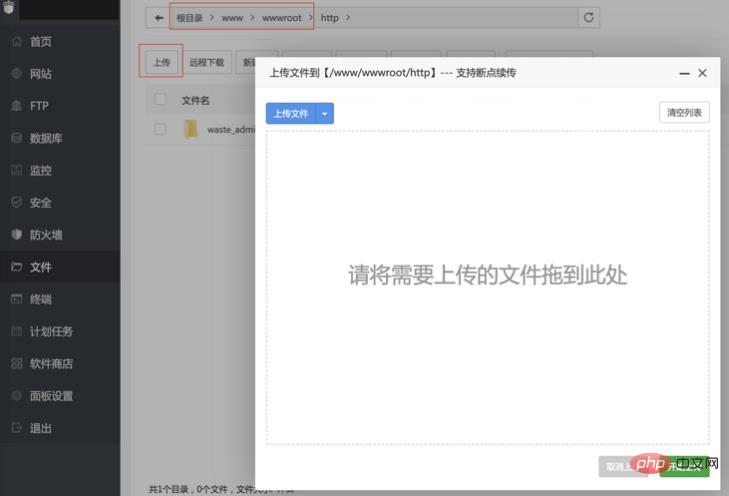
7. Upload the backend Project
Enter the www/wwwroot directory, create a new relevant folder, and upload it to the directory

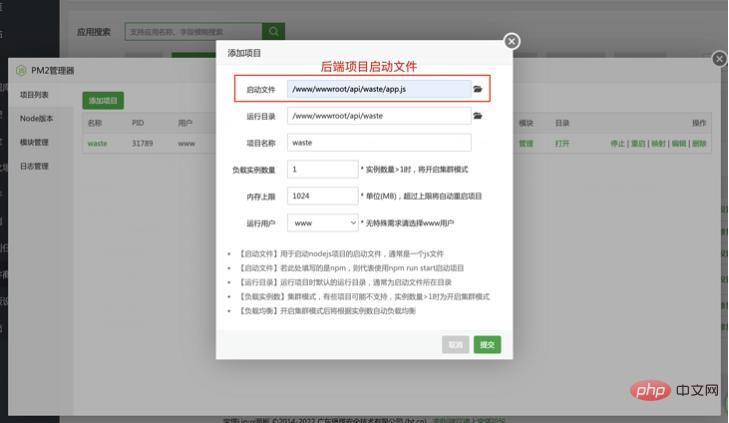
8. Install PM2 management in the Pagoda software store Explorer, start project
Add project, select the startup file path of your background project in the startup file. Other items will be filled in automatically

9. Verify the interface
Go to postman to verify whether the interface request can be successful.
If the request fails, try restarting pm2 and check the project running log to see if there are any errors.
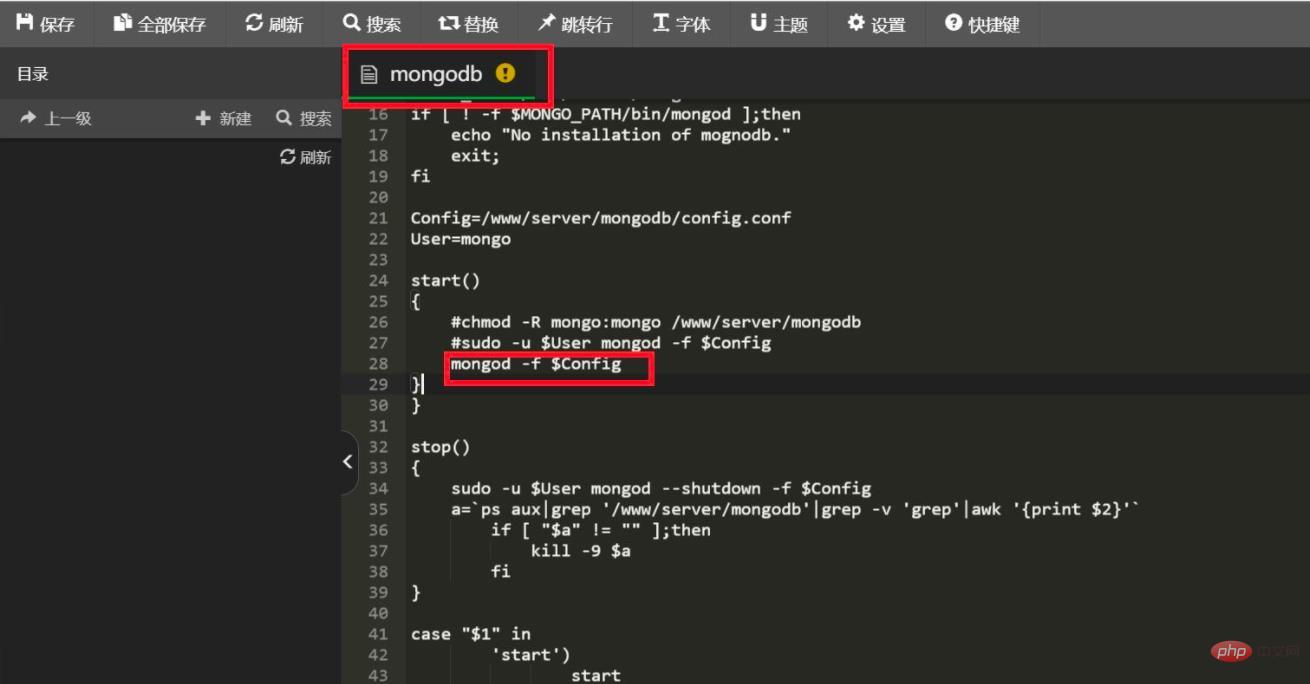
If you encounter mongoDB startup failure
//方案一:
mongod -f /www/server/mongodb/config.conf\
或者修改MongoDB的启动文件\

/etc/init.d/mongodb

//方案二:
改了配置文件,用更高的权限运行这条命令启动服务:
sudo mongod -f /www/server/mongodb/config.conf
把-f后面的路径改成你配置文件的路径即可
//方案三:
cd /www/server/mongodb/bin
输入命令:`mongod`
The above is the detailed content of Detailed graphic explanation of how to configure mongodb in Pagoda. For more information, please follow other related articles on the PHP Chinese website!
 The difference between mongodb and mysql
 mongodb startup command
 How to delete data in MongoDB
 Commonly used database software
 What are the application areas of mongodb?
 Which one has faster reading speed, mongodb or redis?
 How to completely delete mongodb if the installation fails
 Mongodb and mysql are easy to use and recommended


