Use vue-cropper to crop images in the vue project
vueHow to crop images in the project? The following article will introduce to you how to use vue-cropper to crop images. I hope it will be helpful to you!

Due to project needs, image cropping is required. The previous project has been implemented by cropper.js. Because vue is used this time, the vue-cropper component is used. It is very simple to use, but there are many pitfalls. (Learning video sharing: vue video tutorial)
1. Installation
npm install vue-cropper
main.js
import VueCropper from 'vue-cropper'
Vue.use(VueCropper)
2. Image cropping

1. Introduce the VueCropper component and set related properties.
<div    style="max-width:90%">
            <vueCropper
              @mouseenter.native="enter"
              @mouseleave.native="leave"
              ref="cropper"
              :img="uploadImg"
              :outputSize="option.size"
              :outputType="option.outputType"
              :info="true"
              :full="option.full"
              :canMove="option.canMove"
              :canMoveBox="option.canMoveBox"
              :original="option.original"
              :autoCrop="option.autoCrop"
              :fixed="option.fixed"
              :fixedNumber="option.fixedNumber"
              :centerBox="option.centerBox"
              :infoTrue="option.infoTrue"
              :fixedBox="option.fixedBox"
              style="background-image:none"
            ></vueCropper>
</div>option: {
info: true, // 裁剪框的大小信息
outputSize: 0.8, // 裁剪生成图片的质量
outputType: "jpeg", // 裁剪生成图片的格式
canScale: false, // 图片是否允许滚轮缩放
autoCrop: false, // 是否默认生成截图框
fixedBox: false, // 固定截图框大小 不允许改变
fixed: false, // 是否开启截图框宽高固定比例
fixedNumber: [7, 5], // 截图框的宽高比例
full: true, // 是否输出原图比例的截图
canMove: false, //时候可以移动原图
canMoveBox: true, // 截图框能否拖动
original: false, // 上传图片按照原始比例渲染
centerBox: false, // 截图框是否被限制在图片里面
infoTrue: true // true 为展示真实输出图片宽高 false 展示看到的截图框宽高
}❗️The background of the default cropped image has an ugly mosaic. In fact, it uses a mosaic image as the background. To remove it, just set the style to remove the background image on VueCropperstyle ="background-image:none".
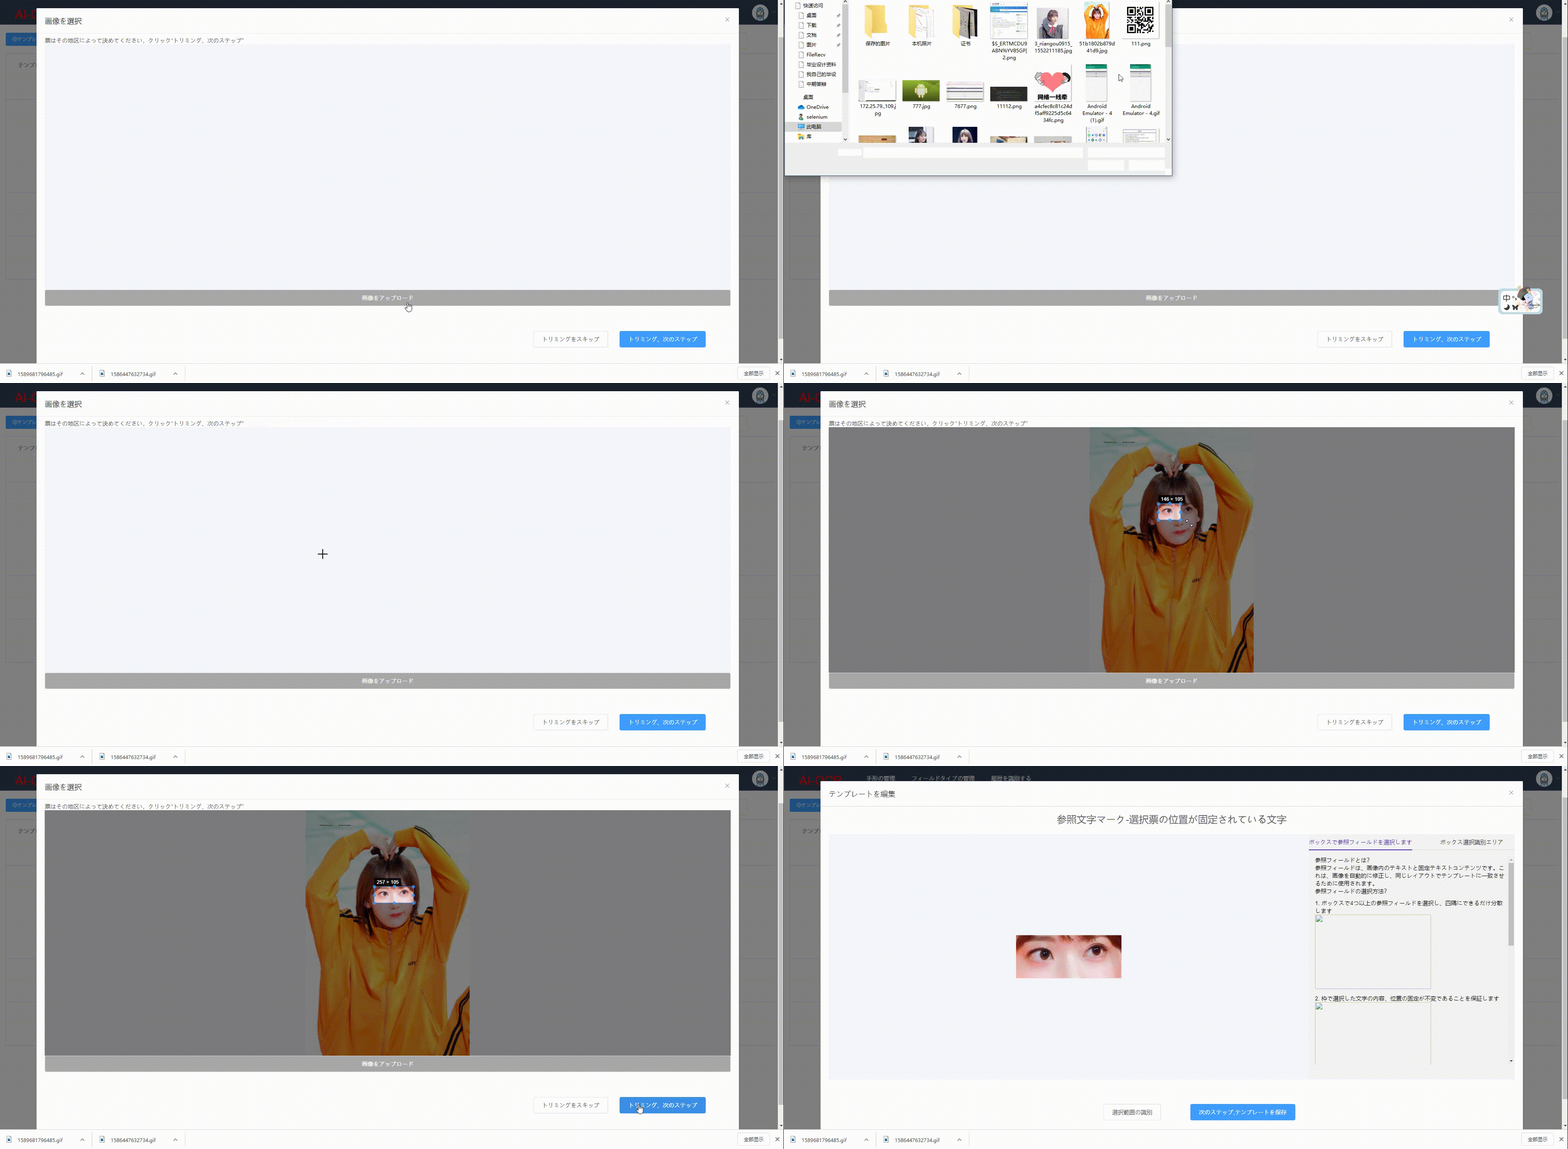
2. After the upload is completed, enter the VueCropper with the mouse to start cropping
Set on the VueCroper@mouseenter.native="enter "Event (⭐️ To use native events on components, you need to add the native keyword )
enter() {
 if (this.uploadImg == "") {
   return;
 }
 this.$refs.cropper.startCrop(); //开始裁剪
},3. Leave VueCropper to stop cropping and get the cropped picture.
Set on VueCroper@mouseleave.native="leave"Event
leave() {
   this.$refs.cropper.stopCrop();//停止裁剪
   this.$refs.cropper.getCropData(data => { //获取截图的base64格式数据
     this.cutImg = data;
   });
   // this.$refs.cropper.getCropBlob(data => { //获取截图的Blob格式数据
   //   this.cutImg = data;
   // });
},I will crop it when I leave p. After clicking the crop button, I will pass the cropped image, and You don’t have to click the crop button to crop, because if I click the crop button to crop, the picture I get is not cropped. I don’t know why, so I came up with this method.
vue-cropper image cropping problem
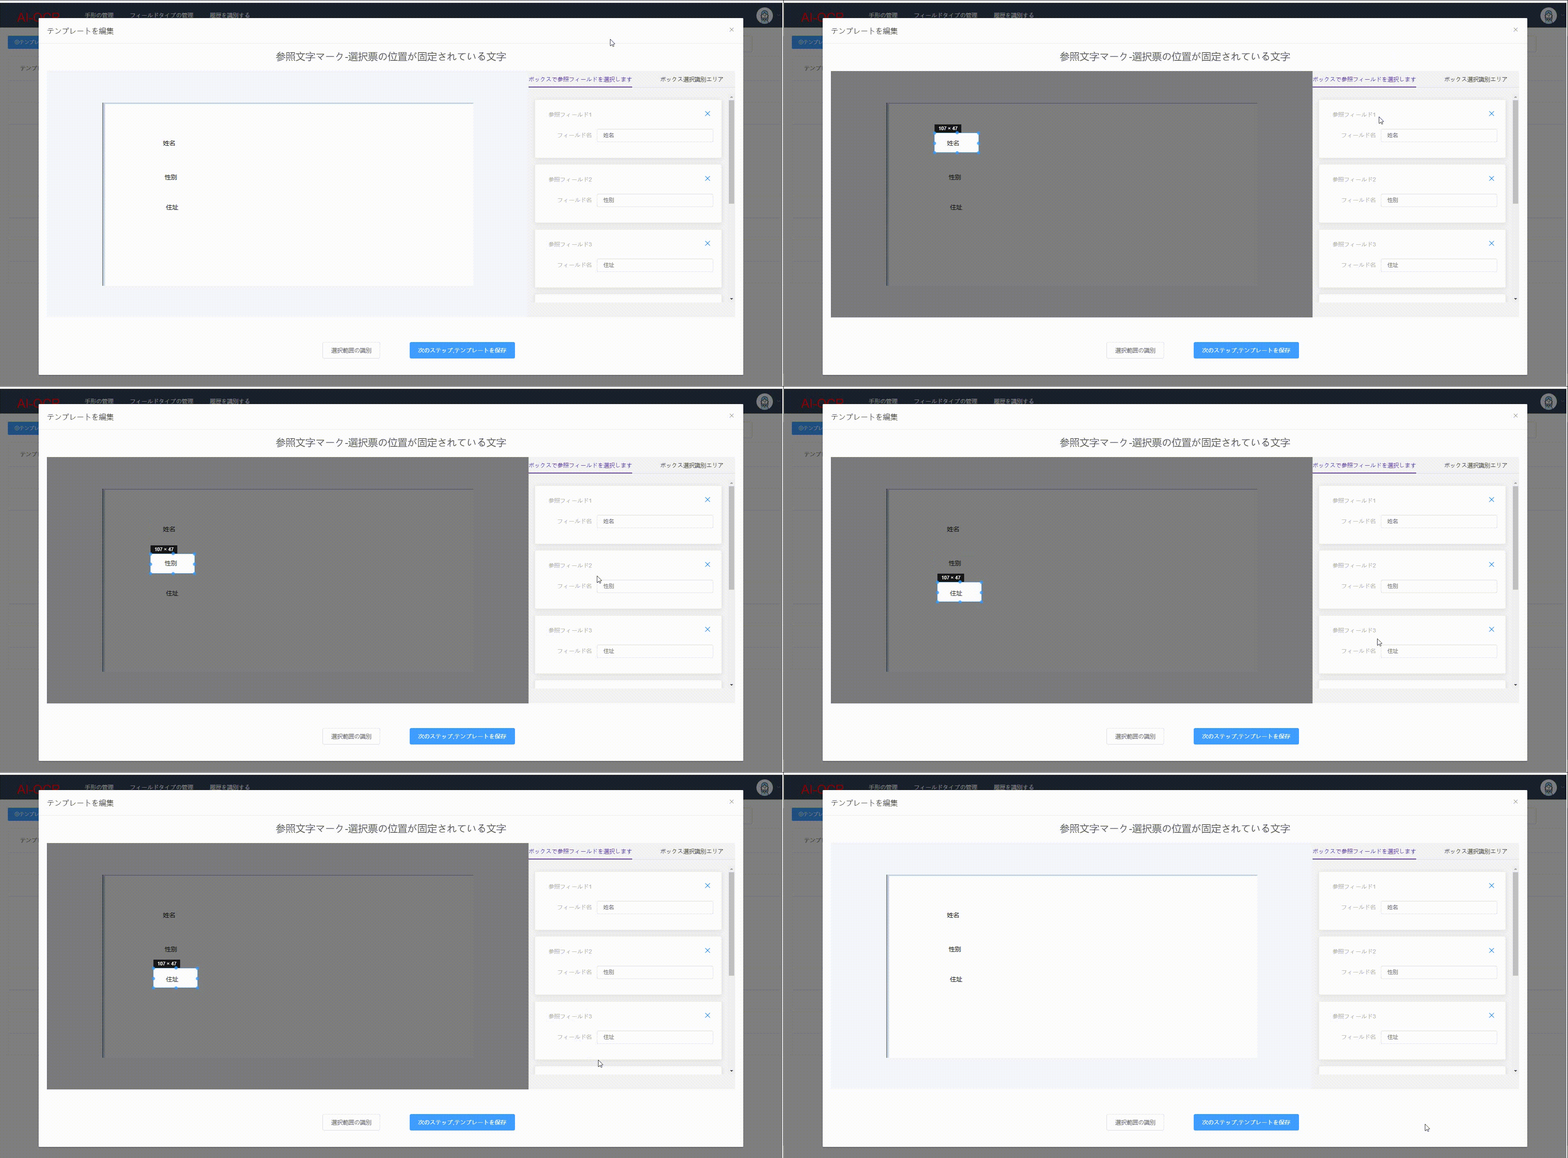
3. Echo the screenshot frame to the original image

Basic principle:
this.$refs.cropper.getCropAxis() //获取截图框基于容器的坐标点 {x1: 174, x2: 131, y1: 86, y2: 58}
this.$refs.cropper.cropW  //截图框宽
this.$refs.cropper.cropH //截图框高Use the above method to obtain the width, height and container-based coordinate points of the screenshot frame, then let VueCropper's automatic capture frame display and set the size and position of the automatic capture frame.
Take the name field as an example:
{
          id: 1,
          name: "姓名",
          cropInfo: {
            width: 108, //this.$refs.cropper.cropW
            height: 56, //this.$refs.cropper.cropH
            offsetX: 174, //this.$refs.cropper.getCropAxis().x1
            offsetY: 86  //this.$refs.cropper.getCropAxis().y1
}1. Set the enter event on the "name" el-card <el-card @mouseenter.native="enterCard(refWord) " />
enterCard(refWord) {
      this.$refs.cropper.goAutoCrop();//重新生成自动裁剪框
      this.$nextTick(() => {
        // if cropped and has position message, update crop box
        //设置自动裁剪框的宽高和位置
        this.$refs.cropper.cropOffsertX = refWord.cropInfo.offsetX;
        this.$refs.cropper.cropOffsertY = refWord.cropInfo.offsetY;
        this.$refs.cropper.cropW = refWord.cropInfo.width;
        this.$refs.cropper.cropH = refWord.cropInfo.height;
      });
}2. Set the leave event on all el-tabs in the outer layer of el-card<el-tabs @mouseleave.native="leaveCard()" / >
leaveCard() {
      this.$refs.cropper.clearCrop(); //取消裁剪框
}❗️Be careful not to set the leave event on el-card, otherwise when you move the mouse to the next el-card, the cropping box will be canceled and regenerated, causing the page to appear flickering phenomenon.
4. Others
Limit the screenshot frame to the image: https://github.com/xyxiao001/vue-cropper/issues /429
Solution: centerBox is set to true, and it will only take effect when autoCrop=trueThe project needs to send the position information and size of the crop box to the background. Let the background crop or perform OCR, but the cropped image after being sent to the background is always offset to the lower right corner: https://github.com/xyxiao001/vue-cropper/issues/386
Solution: The image is scaled Yes, when passing position, you need to use position*scale.. There is no problem in cropping most pictures, but there is always a deviation when cropping some pictures: https://github.com /xyxiao001/vue-cropper/issues/439
Solution: It turns out that the default cropped image size is limited. The maximum width and height are 2000px. Set this value to 10000 and the problem is solved.

[Related video tutorial recommendations: vuejs entry tutorial, web front-end entry]
The above is the detailed content of Use vue-cropper to crop images in the vue project. For more information, please follow other related articles on the PHP Chinese website!

Hot AI Tools

Undresser.AI Undress
AI-powered app for creating realistic nude photos

AI Clothes Remover
Online AI tool for removing clothes from photos.

Undress AI Tool
Undress images for free

Clothoff.io
AI clothes remover

AI Hentai Generator
Generate AI Hentai for free.

Hot Article

Hot Tools

Notepad++7.3.1
Easy-to-use and free code editor

SublimeText3 Chinese version
Chinese version, very easy to use

Zend Studio 13.0.1
Powerful PHP integrated development environment

Dreamweaver CS6
Visual web development tools

SublimeText3 Mac version
God-level code editing software (SublimeText3)

Hot Topics
 1359
1359
 52
52
 How to reference js file with vue.js
Apr 07, 2025 pm 11:27 PM
There are three ways to refer to JS files in Vue.js: directly specify the path using the <script> tag;; dynamic import using the mounted() lifecycle hook; and importing through the Vuex state management library.
 How to use bootstrap in vue
Apr 07, 2025 pm 11:33 PM
Using Bootstrap in Vue.js is divided into five steps: Install Bootstrap. Import Bootstrap in main.js. Use the Bootstrap component directly in the template. Optional: Custom style. Optional: Use plug-ins.
 Vue realizes marquee/text scrolling effect
Apr 07, 2025 pm 10:51 PM
Implement marquee/text scrolling effects in Vue, using CSS animations or third-party libraries. This article introduces how to use CSS animation: create scroll text and wrap text with <div>. Define CSS animations and set overflow: hidden, width, and animation. Define keyframes, set transform: translateX() at the beginning and end of the animation. Adjust animation properties such as duration, scroll speed, and direction.
 What does it mean to lazy load vue?
Apr 07, 2025 pm 11:54 PM
In Vue.js, lazy loading allows components or resources to be loaded dynamically as needed, reducing initial page loading time and improving performance. The specific implementation method includes using <keep-alive> and <component is> components. It should be noted that lazy loading can cause FOUC (splash screen) issues and should be used only for components that need lazy loading to avoid unnecessary performance overhead.
 How to use watch in vue
Apr 07, 2025 pm 11:36 PM
The watch option in Vue.js allows developers to listen for changes in specific data. When the data changes, watch triggers a callback function to perform update views or other tasks. Its configuration options include immediate, which specifies whether to execute a callback immediately, and deep, which specifies whether to recursively listen to changes to objects or arrays.
 What does the vue component pass value mean?
Apr 07, 2025 pm 11:51 PM
Vue component passing values is a mechanism for passing data and information between components. It can be implemented through properties (props) or events: Props: Declare the data to be received in the component and pass the data in the parent component. Events: Use the $emit method to trigger an event and listen to it in the parent component using the v-on directive.
 How to query the version of vue
Apr 07, 2025 pm 11:24 PM
You can query the Vue version by using Vue Devtools to view the Vue tab in the browser's console. Use npm to run the "npm list -g vue" command. Find the Vue item in the "dependencies" object of the package.json file. For Vue CLI projects, run the "vue --version" command. Check the version information in the <script> tag in the HTML file that refers to the Vue file.
 How to use vue pagination
Apr 08, 2025 am 06:45 AM
Pagination is a technology that splits large data sets into small pages to improve performance and user experience. In Vue, you can use the following built-in method to paging: Calculate the total number of pages: totalPages() traversal page number: v-for directive to set the current page: currentPage Get the current page data: currentPageData()


