 Development Tools
 VSCode
 Teach you step by step how to set up a PHP development environment in VSCode
Teach you step by step how to set up a PHP development environment in VSCode
How to develop PHP in VSCode? The following article will introduce to you how to configure the PHP development environment in VSCode. I hope it will be helpful to you!

##Configure the PHP development environment in VSCode
Official website address: Interface: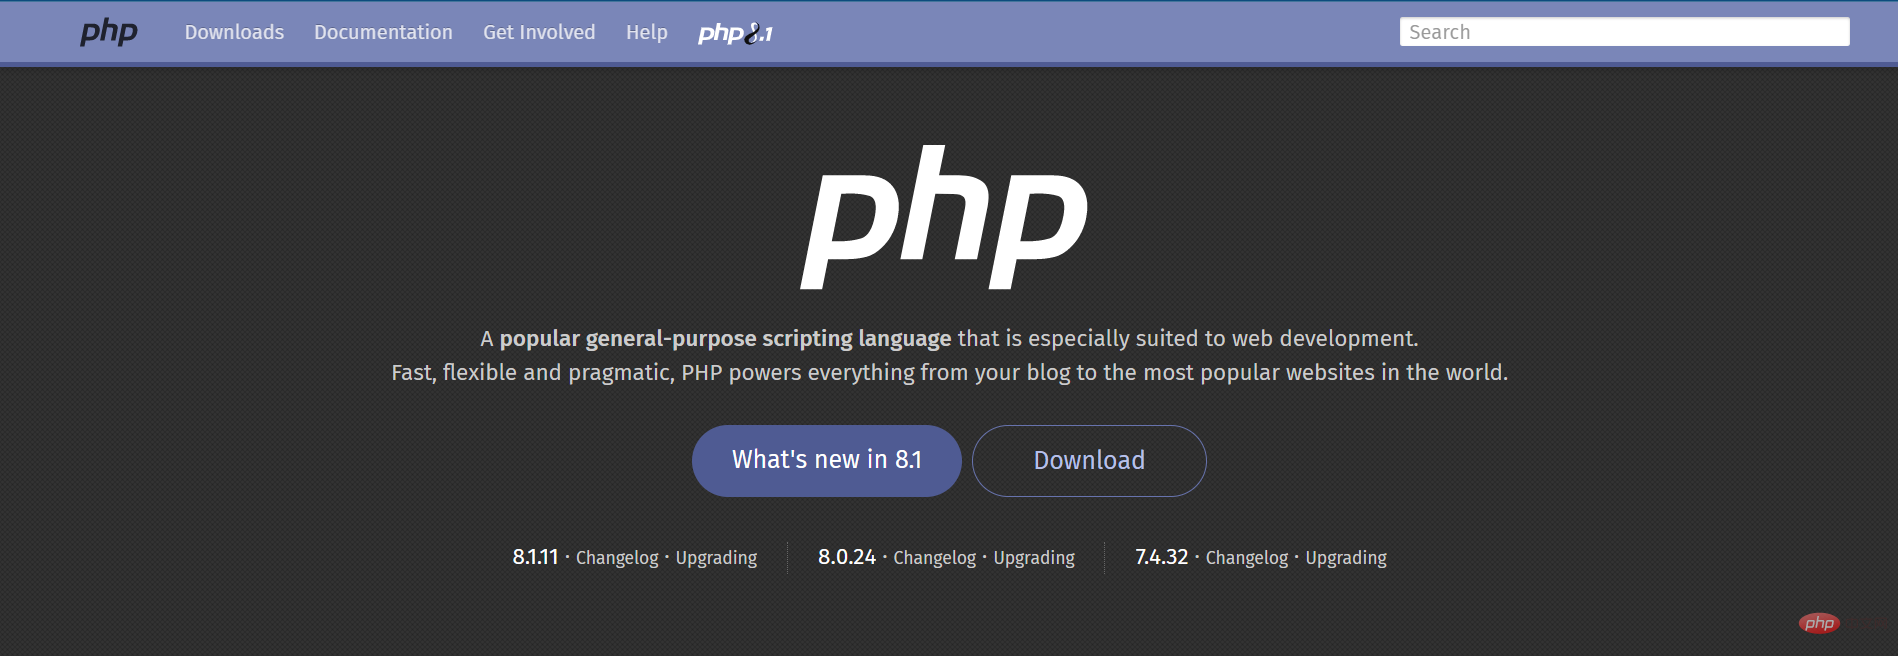
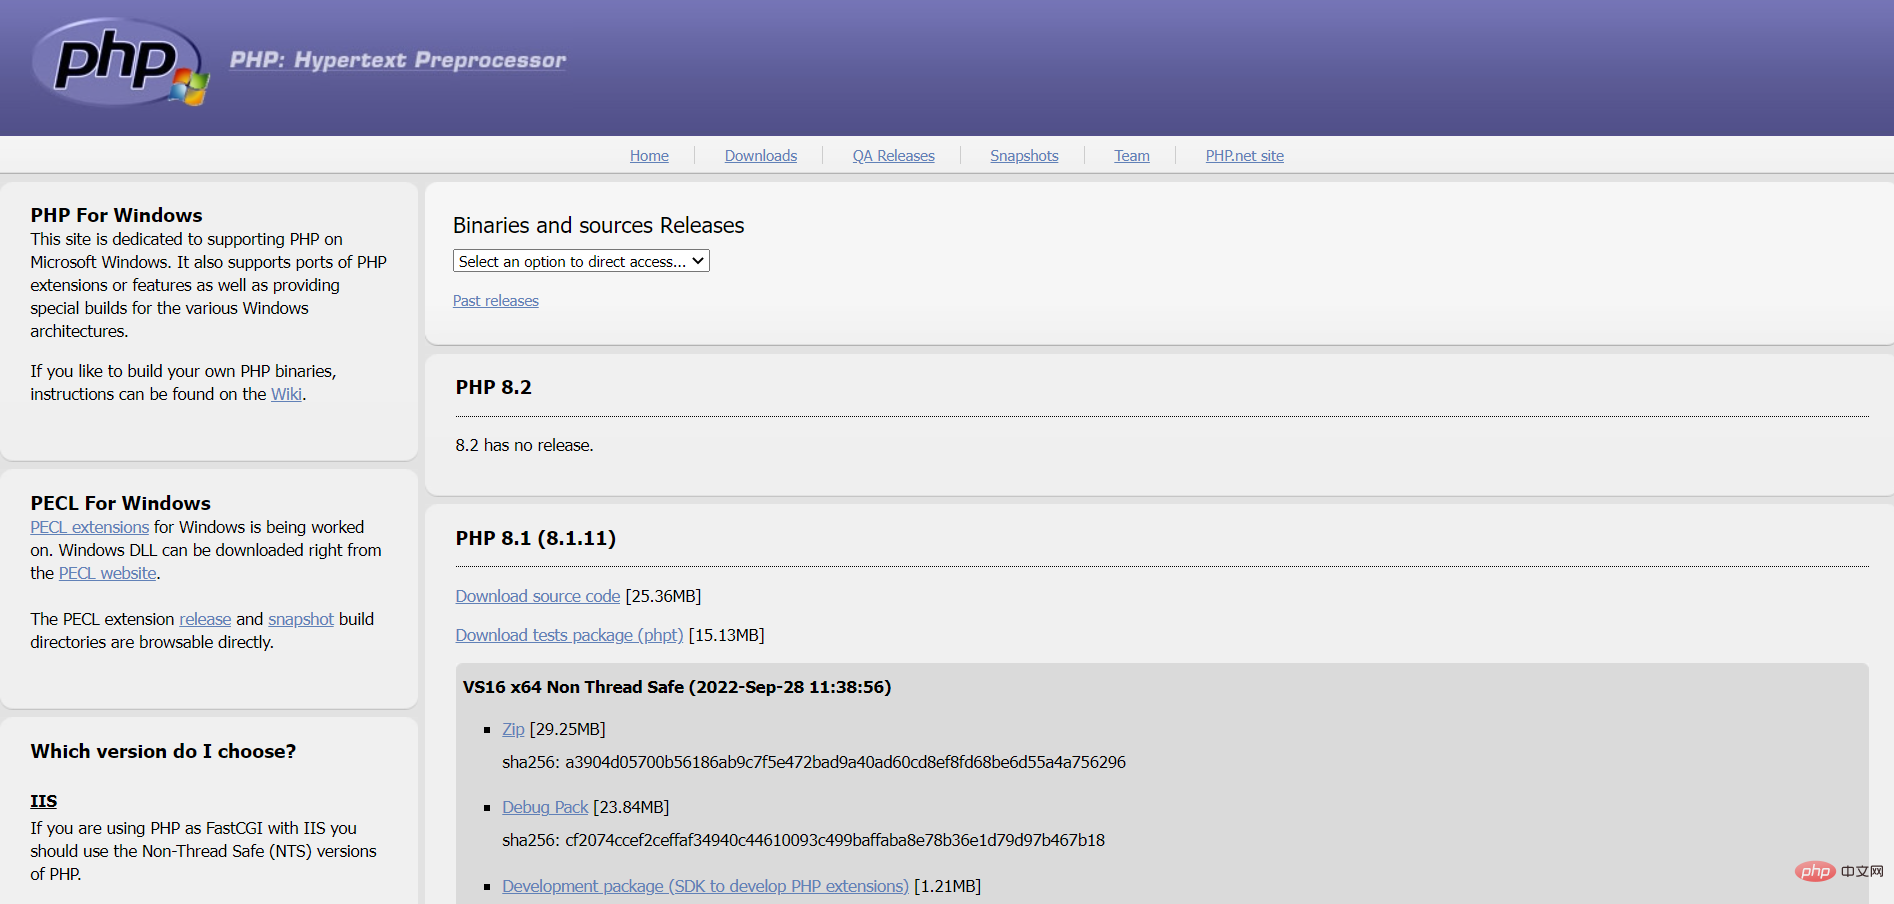
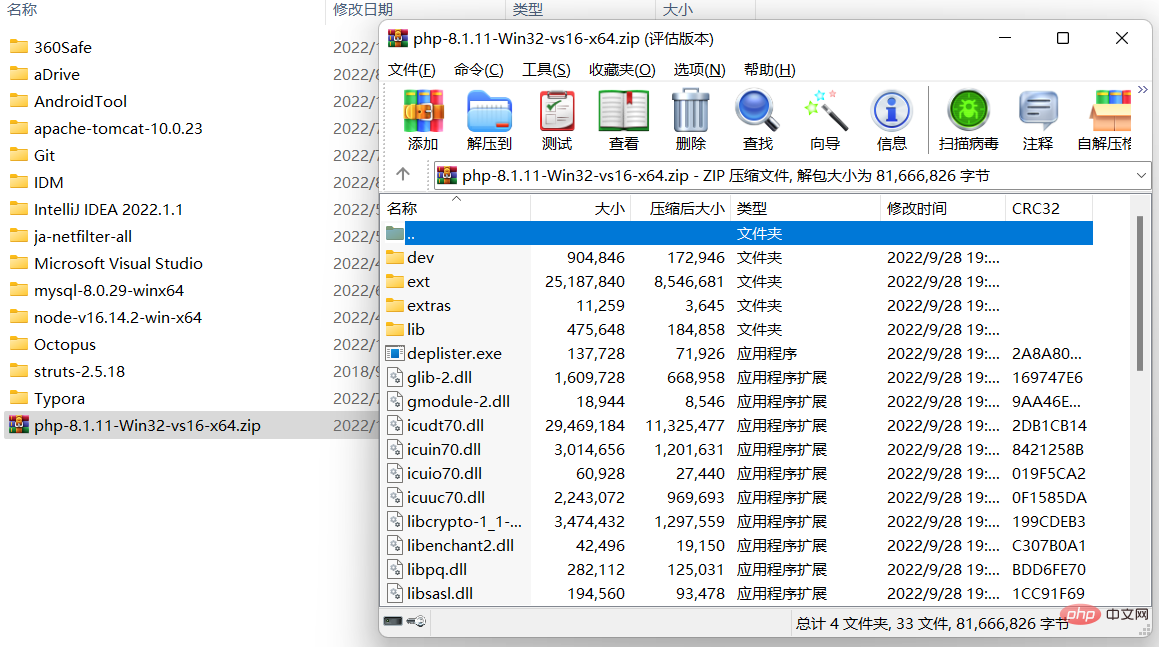
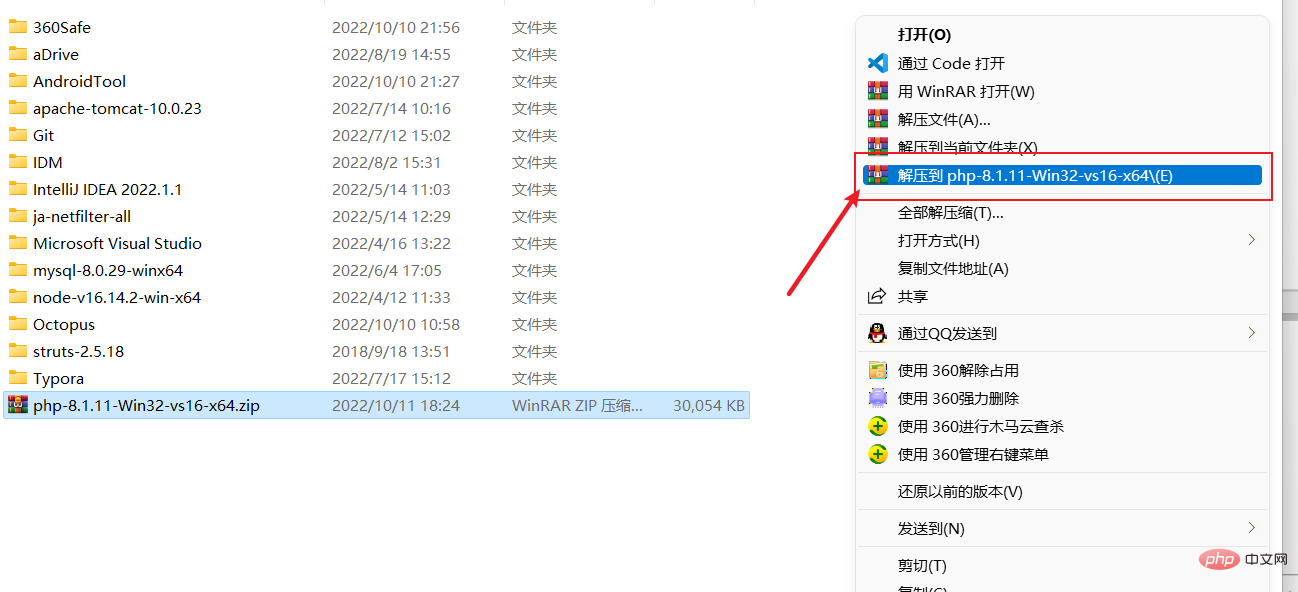
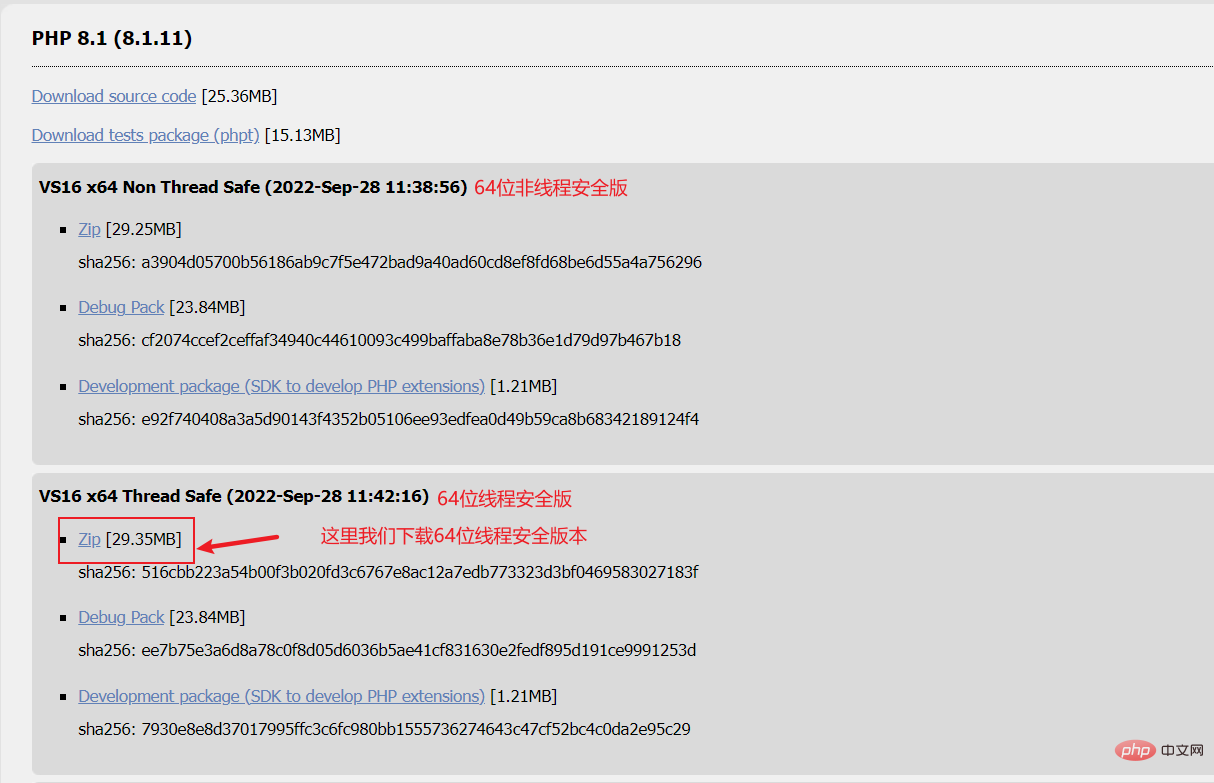 ② Unzip to the location where you want to install php (note that you should double-click to open the compressed package first to see if there is a root directory).
As shown below, if there is no root directory after opening, do not decompress it directly, otherwise the files will be mixed together. [Recommended learning:
vscode tutorial, Programming video]
4 Configure environment variables
① Right-click My Computer- > Properties -> Advanced System Settings -> Environment Variables or search "System Environment Variables" directly using win s -> Open "Edit System Environment Variables", as shown in the figure below.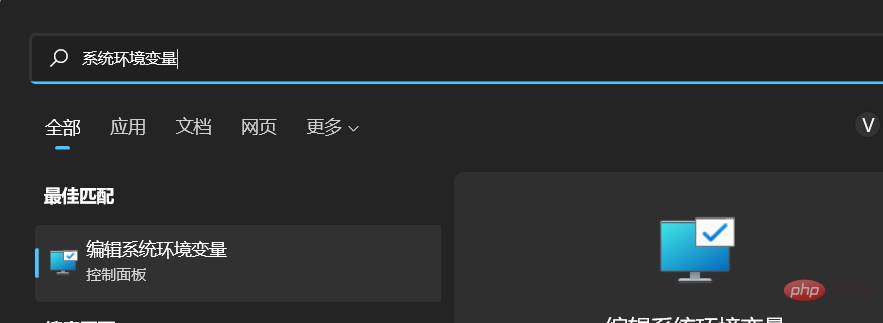 ② Open the php installation directory and copy the address as shown below.
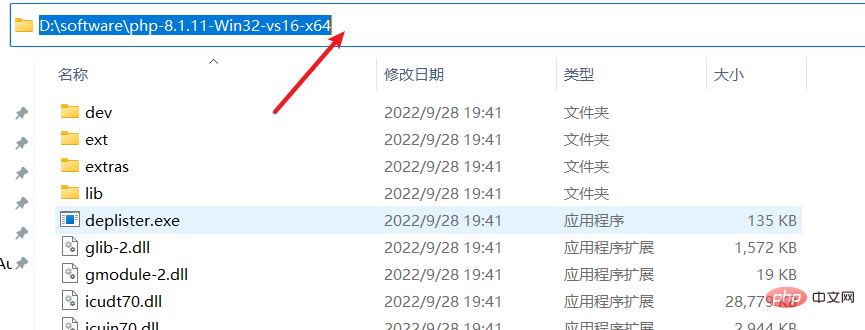 ③ Modify the path in "System Variables" and add the path copied in step ②.
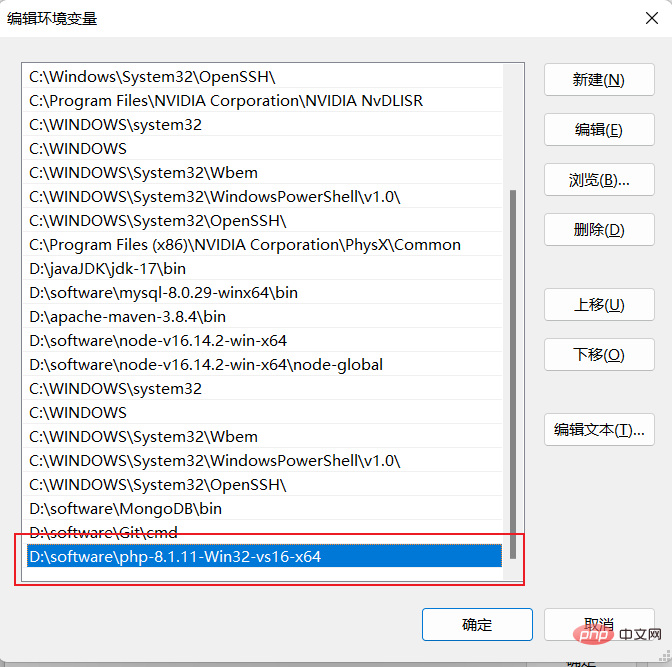
Note: Don’t forget to click OK after configuring the system variables.④ Test: Enter
php -v
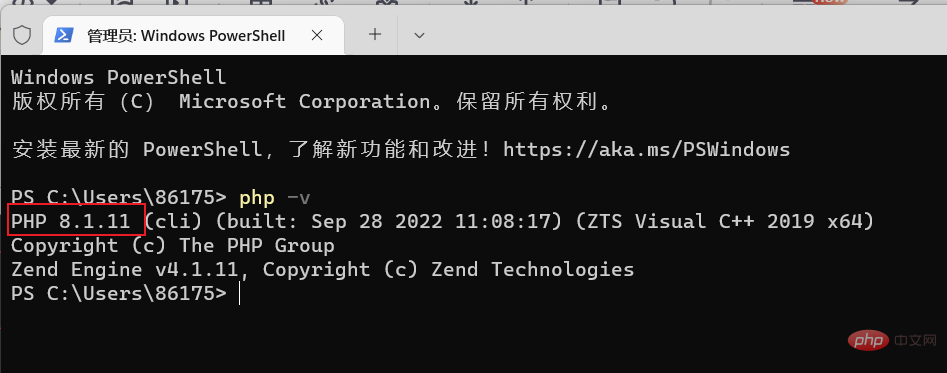
Download address:Xdebug: Downloads
## Download the php_xdebug-3.2.0RC1-8.1-vs16-x86_64 .dll file, copy it to the ext directory in the php root directory, and then find the php.ini file in the php root directory. There are two situations as follows. 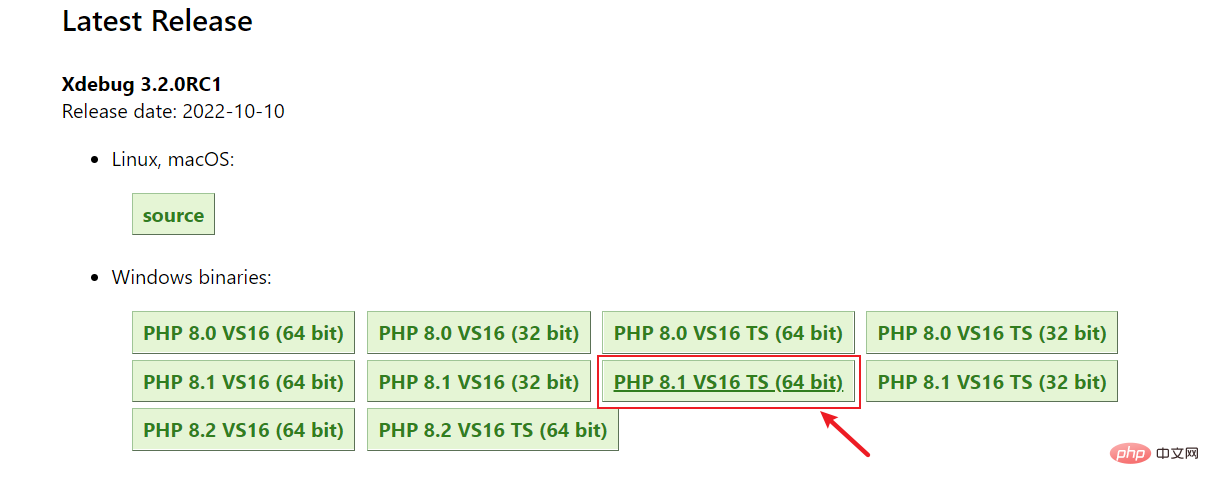 ① (With php.ini file) Just add the following configuration directly at the end of the php.ini file in the php directory (remember to modify the path).
[xdebug]zend_extension="D:\software\php-8.1.11-Win32-vs16-x64\ext\php_xdebug-3.2.0RC1-8.1-vs16-x86_64.dll"xdebug.remote_enable = 1xdebug.remote_autostart = 1
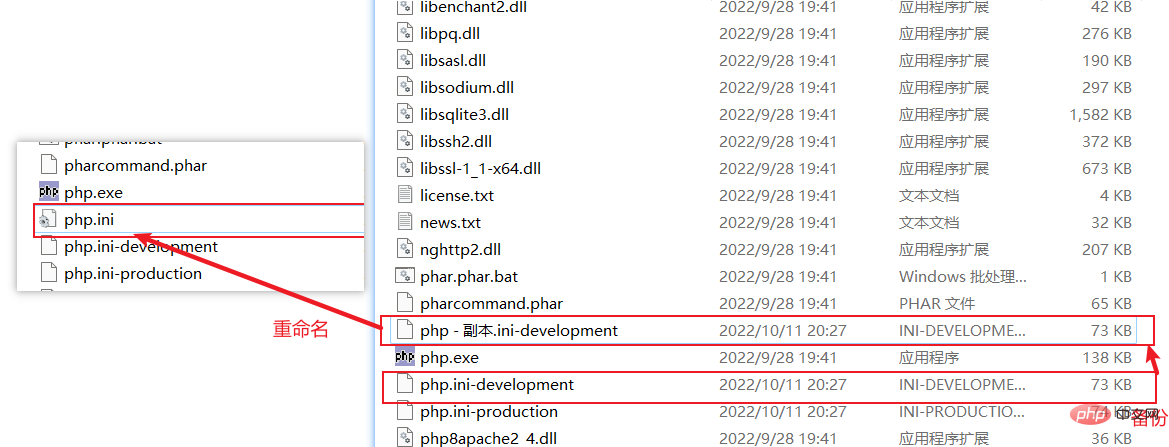
② (No php.ini file) Here we can find two files, php.ini-development (for development environment) and php.ini-production (for production environment) in the php root directory. Although there is no php.ini file here, php will still load php.ini as the configuration file. We only need to select one of them, back it up, then rename it to php.ini, and finally add our own personalized configuration. It is recommended to rename the php.ini-development file backup to php.ini, as shown in the figure below:
[xdebug]zend_extension="D:\software\php-8.1.11-Win32-vs16-x64\ext\php_xdebug-3.2.0RC1-8.1-vs16-x86_64.dll"xdebug.remote_enable = 1xdebug.remote_autostart = 1
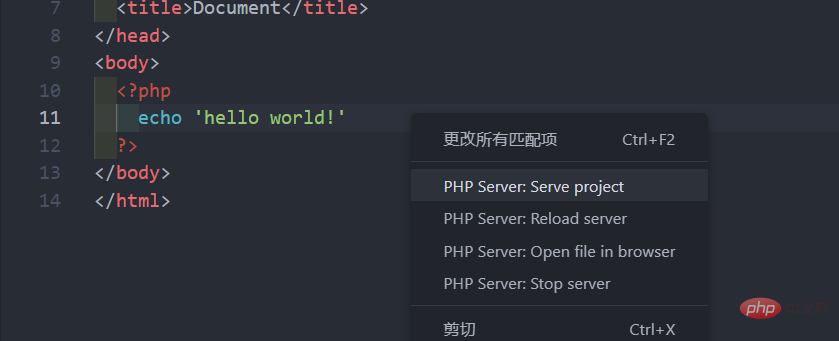
6 Configure PHP in VSCode ① 首先安装 PHP Debug 插件,如下图所示: ② 接着点击 文件 -> 首选项 -> 设置,输入 php,并点击“在 settings.json 中编辑”,如下图所示: ③ 然后添加如下配置(记得修改路径): ④ 随便创建个测试文件夹,用 vscode 打开,新建个 php 文件,如下图所示: ⑥ 安装插件 PHP Server 这个插件可以让 .php 文件直接右击运行于浏览器中,不需要借助于 xampp 的 Apache。 注意:该插件用于个人测试及小网站的开发是没有任何问题的,不过大型应用还是要配合 Nginx 或 Apache 以达到最高效率。 注意:这里我们在浏览器中输入的是 http://localhost:80/index.php,然而在浏览器地址中为什么显示的却是 localhost/index.php 呢?这是因为浏览网页服务默认的端口号都是 80,因此只需输入网址即可,不用输入": 80"了。另外如果 .php 页面为 index 命名,则只需要在浏览器输入 localhost 即可,因为服务器会自动为我们找到 index.php 这个页面。 最后推荐一些 PHP 的插件,以及其他常用VSCode 必备插件推荐。 更多关于VSCode的相关知识,请访问:vscode基础教程!
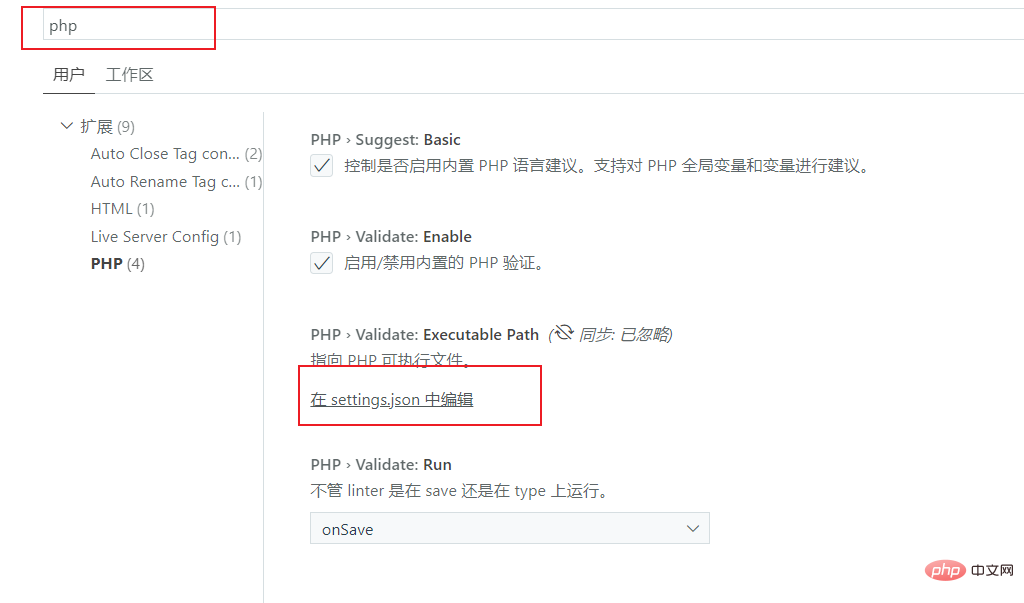
"php.validate.executablePath": "D:/software/php-8.1.11-Win32-vs16-x64/php.exe"
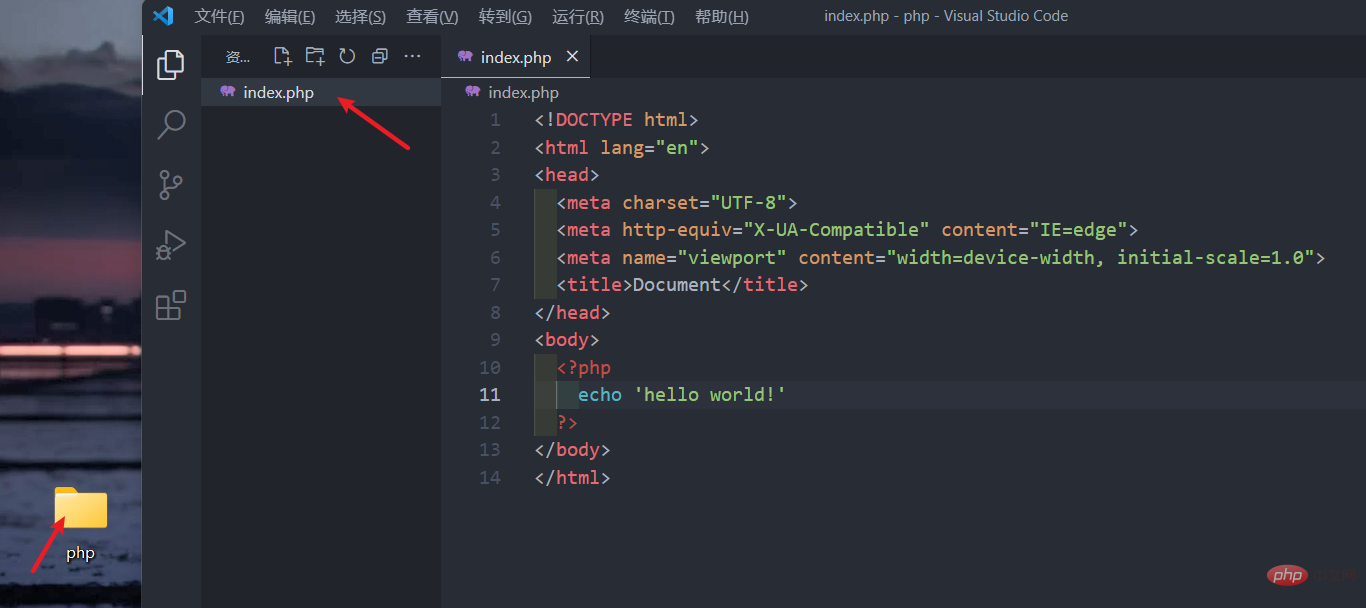
⑤ 设置断点调试,如下图所示: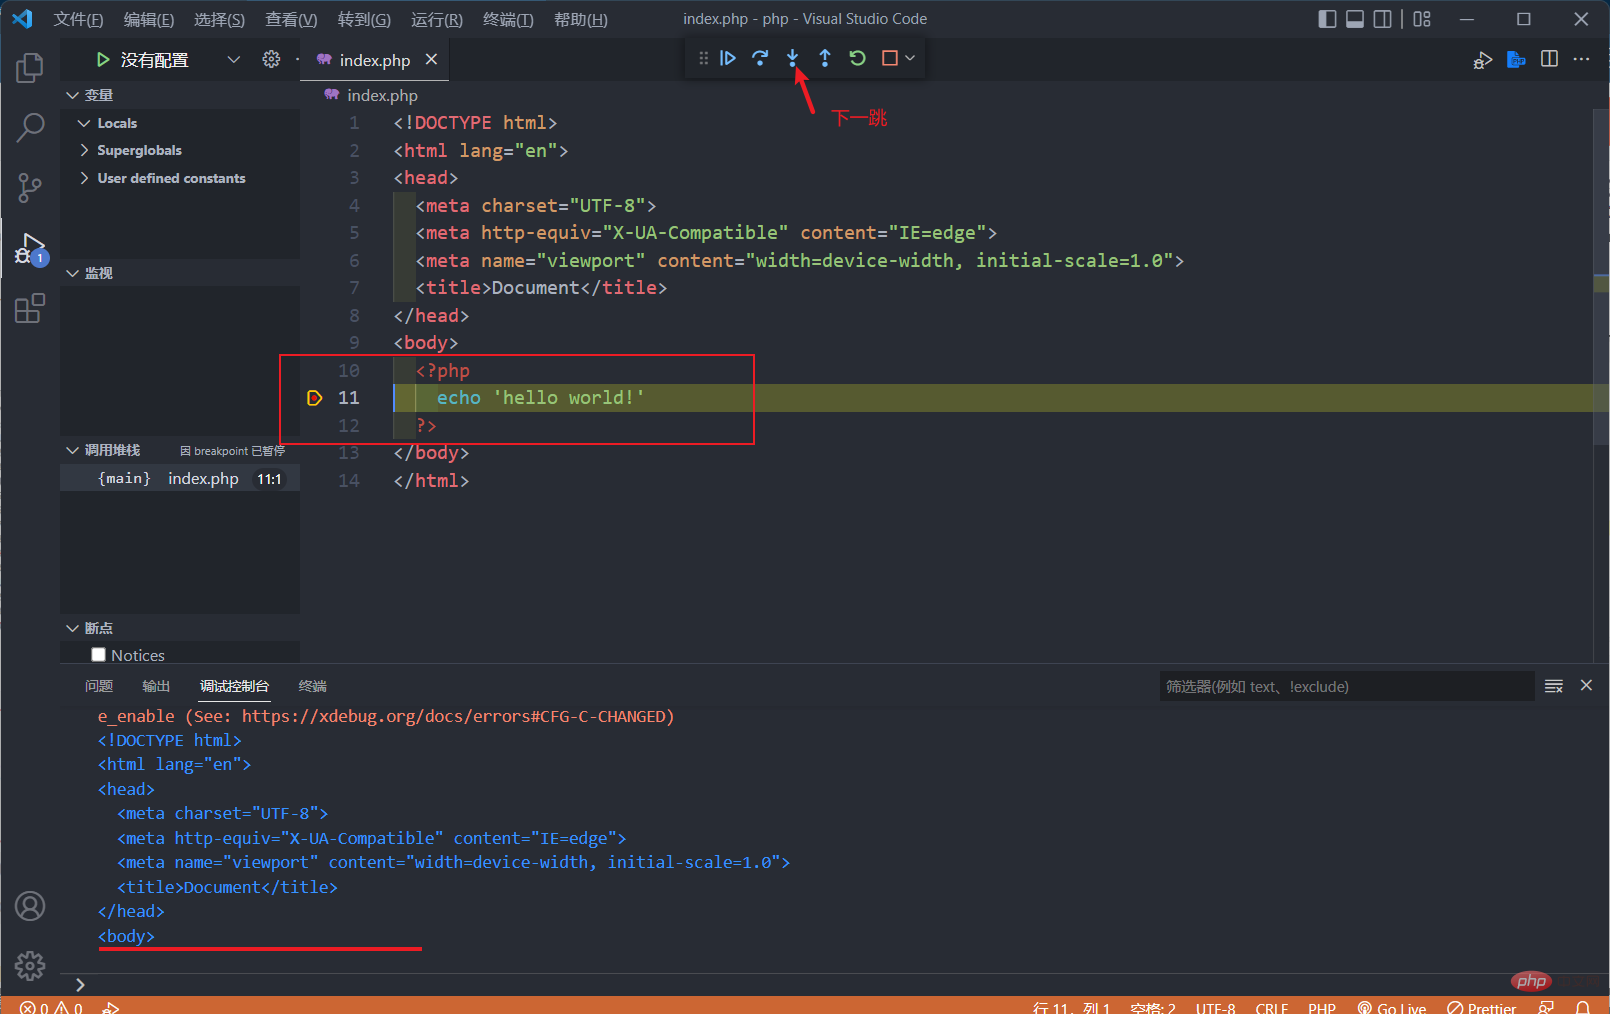


The above is the detailed content of Teach you step by step how to set up a PHP development environment in VSCode. For more information, please follow other related articles on the PHP Chinese website!

Hot AI Tools

Undresser.AI Undress
AI-powered app for creating realistic nude photos

AI Clothes Remover
Online AI tool for removing clothes from photos.

Undress AI Tool
Undress images for free

Clothoff.io
AI clothes remover

Video Face Swap
Swap faces in any video effortlessly with our completely free AI face swap tool!

Hot Article

Hot Tools

Notepad++7.3.1
Easy-to-use and free code editor

SublimeText3 Chinese version
Chinese version, very easy to use

Zend Studio 13.0.1
Powerful PHP integrated development environment

Dreamweaver CS6
Visual web development tools

SublimeText3 Mac version
God-level code editing software (SublimeText3)

Hot Topics
 1386
1386
 52
52
 PHP: An Introduction to the Server-Side Scripting Language
Apr 16, 2025 am 12:18 AM
PHP is a server-side scripting language used for dynamic web development and server-side applications. 1.PHP is an interpreted language that does not require compilation and is suitable for rapid development. 2. PHP code is embedded in HTML, making it easy to develop web pages. 3. PHP processes server-side logic, generates HTML output, and supports user interaction and data processing. 4. PHP can interact with the database, process form submission, and execute server-side tasks.
 Why Use PHP? Advantages and Benefits Explained
Apr 16, 2025 am 12:16 AM
The core benefits of PHP include ease of learning, strong web development support, rich libraries and frameworks, high performance and scalability, cross-platform compatibility, and cost-effectiveness. 1) Easy to learn and use, suitable for beginners; 2) Good integration with web servers and supports multiple databases; 3) Have powerful frameworks such as Laravel; 4) High performance can be achieved through optimization; 5) Support multiple operating systems; 6) Open source to reduce development costs.
 PHP and the Web: Exploring its Long-Term Impact
Apr 16, 2025 am 12:17 AM
PHP has shaped the network over the past few decades and will continue to play an important role in web development. 1) PHP originated in 1994 and has become the first choice for developers due to its ease of use and seamless integration with MySQL. 2) Its core functions include generating dynamic content and integrating with the database, allowing the website to be updated in real time and displayed in personalized manner. 3) The wide application and ecosystem of PHP have driven its long-term impact, but it also faces version updates and security challenges. 4) Performance improvements in recent years, such as the release of PHP7, enable it to compete with modern languages. 5) In the future, PHP needs to deal with new challenges such as containerization and microservices, but its flexibility and active community make it adaptable.
 What computer configuration is required for vscode
Apr 15, 2025 pm 09:48 PM
VS Code system requirements: Operating system: Windows 10 and above, macOS 10.12 and above, Linux distribution processor: minimum 1.6 GHz, recommended 2.0 GHz and above memory: minimum 512 MB, recommended 4 GB and above storage space: minimum 250 MB, recommended 1 GB and above other requirements: stable network connection, Xorg/Wayland (Linux)
 PHP vs. Python: Use Cases and Applications
Apr 17, 2025 am 12:23 AM
PHP is suitable for web development and content management systems, and Python is suitable for data science, machine learning and automation scripts. 1.PHP performs well in building fast and scalable websites and applications and is commonly used in CMS such as WordPress. 2. Python has performed outstandingly in the fields of data science and machine learning, with rich libraries such as NumPy and TensorFlow.
 How to switch Chinese mode with vscode
Apr 15, 2025 pm 11:39 PM
VS Code To switch Chinese mode: Open the settings interface (Windows/Linux: Ctrl, macOS: Cmd,) Search for "Editor: Language" settings Select "Chinese" in the drop-down menu Save settings and restart VS Code
 Common commands for vscode terminal
Apr 15, 2025 pm 10:06 PM
Common commands for VS Code terminals include: Clear the terminal screen (clear), list the current directory file (ls), change the current working directory (cd), print the current working directory path (pwd), create a new directory (mkdir), delete empty directory (rmdir), create a new file (touch) delete a file or directory (rm), copy a file or directory (cp), move or rename a file or directory (mv) display file content (cat) view file content and scroll (less) view file content only scroll down (more) display the first few lines of the file (head)
 vscode Previous Next Shortcut Key
Apr 15, 2025 pm 10:51 PM
VS Code One-step/Next step shortcut key usage: One-step (backward): Windows/Linux: Ctrl ←; macOS: Cmd ←Next step (forward): Windows/Linux: Ctrl →; macOS: Cmd →


