
 Web Front-end
JS Tutorial
Take you step by step to create and publish npm packages from scratch
Web Front-end
JS Tutorial
Take you step by step to create and publish npm packages from scratch
Take you step by step to create and publish npm packages from scratch

It’s 2202, is there anyone who still doesn’t know how to publish npm packages? The following article will share with you the whole process of creating and publishing npm from scratch. I hope it will be helpful to you!
Background
An article was published in April, Come and upgrade the axios package in your project, Repeated requests say goodbye, introduces the secondary encapsulation of axios to support regular requests and custom requests, and intercepts the same requests within the same time (If you have not read this article, it is recommended that you spend 3 minutes to understand it roughly). It just so happens that I am preparing to write a cross-framework component library recently (the workload is very heavy, and the three front-end friends are working on it in their free time. They will share it with everyone after the component library is completed, so stay tuned). I need to learn to publish npm packages. Yesterday I I thought about using my free time to publish the axios package I wrote before to remove duplicate requests as an npm package to facilitate code reuse and apply what I learned while giving back to the community.
Read this article, you will gain:
The whole process of creating and publishing npm from scratch. [Recommended related tutorials: nodejs video tutorial, Programming teaching]
A continuously iterative and simple and practical axios request deduplication tool library.
Tool library preparation
Create a new project, including package.json
{
    "name": "drrq",
    "type": "module",
    "version": "1.0.0"
}Function implementation/src/index.js
npm i qs axios
The main idea is to use the requested URL and parameters as keys to record the request queue. When repeated requests occur, subsequent requests are interrupted and the results of the previous requests are returned and shared with subsequent requests. .
import qs from "qs";
import axios from "axios";
let pending = []; //用于存储每个ajax请求的取消函数和ajax标识
let task = {}; //用于存储每个ajax请求的处理函数,通过请求结果调用,以ajax标识为key
//请求开始前推入pending
const pushPending = (item) => {
pending.push(item);
};
//请求完成后取消该请求,从列表删除
const removePending = (key) => {
for (let p in pending) {
if (pending[p].key === key) {
//当前请求在列表中存在时
pending[p].cancelToken(); //执行取消操作
pending.splice(p, 1); //把这条记录从列表中移除
}
}
};
//请求前判断是否已存在该请求
const existInPending = (key) => {
return pending.some((e) => e.key === key);
};
// 创建task
const createTask = (key, resolve) => {
let callback = (response) => {
resolve(response.data);
};
if (!task[key]) task[key] = [];
task[key].push(callback);
};
// 处理task
const handleTask = (key, response) => {
for (let i = 0; task[key] && i < task[key].length; i++) {
task[key][i](response);
}
task[key] = undefined;
};
const getHeaders = { 'Content-Type': 'application/json' };
const postHeaders = { 'Content-Type': 'application/x-www-form-urlencoded' };
const fileHeaders = { 'Content-Type': 'multipart/form-data' };
const request = (method, url, params, headers, preventRepeat = true, uploadFile = false) => {
let key = url + '?' + qs.stringify(params);
return new Promise((resolve, reject) => {
const instance = axios.create({
baseURL: url,
headers,
timeout: 30 * 1000,
});
instance.interceptors.request.use(
(config) => {
if (preventRepeat) {
config.cancelToken = new axios.CancelToken((cancelToken) => {
// 判断是否存在请求中的当前请求 如果有取消当前请求
if (existInPending(key)) {
cancelToken();
} else {
pushPending({ key, cancelToken });
}
});
}
return config;
},
(err) => {
return Promise.reject(err);
}
);
instance.interceptors.response.use(
(response) => {
if (preventRepeat) {
removePending(key);
}
return response;
},
(error) => {
return Promise.reject(error);
}
);
// 请求执行前加入task
createTask(key, resolve);
instance(Object.assign({}, { method }, method === 'post' || method === 'put' ? { data: !uploadFile ? qs.stringify(params) : params } : { params }))
.then((response) => {
// 处理task
handleTask(key, response);
})
.catch(() => {});
});
};
export const get = (url, data = {}, preventRepeat = true) => {
return request('get', url, data, getHeaders, preventRepeat, false);
};
export const post = (url, data = {}, preventRepeat = true) => {
return request('post', url, data, postHeaders, preventRepeat, false);
};
export const file = (url, data = {}, preventRepeat = true) => {
return request('post', url, data, fileHeaders, preventRepeat, true);
};
export default { request, get, post, file };New sample code folder/example
Sample entry index.js
import { exampleRequestGet } from './api.js';
const example = async () => {
    let res = await exampleRequestGet();
    console.log('请求成功 ');
};
example();api list api.js
import { request } from './request.js';
// 示例请求Get
export const exampleRequestGet = (data) => request('get', '/xxxx', data);

// 示例请求Post
export const exampleRequestPost = (data) => request('post', '/xxxx', data);

// 示例请求Post 不去重
export const exampleRequestPost2 = (data) => request('post', '/xxxx', data, false);

// 示例请求Post 不去重
export const exampleRequestFile = (data) => request('file', '/xxxx', data, false);Global request encapsulation request. js
import drrq from '../src/index.js';
const baseURL = 'https://xxx';

// 处理请求数据  (拼接url,data添加token等) 请根据实际情况调整
const paramsHandler = (url, data) => {
    url = baseURL + url;
    data.token = 'xxxx';
    return { url, data };
};

// 处理全局接口返回的全局处理相关逻辑  请根据实际情况调整
const resHandler = (res) => {
    // TODO 未授权跳转登录,状态码异常报错等
    return res;
};

export const request = async (method, _url, _data = {}, preventRepeat = true) => {
    let { url, data } = paramsHandler(_url, _data);
    let res = null;
    if (method == 'get' || method == 'GET' || method == 'Get') {
        res = await drrq.get(url, data, preventRepeat);
    }
    if (method == 'post' || method == 'POST' || method == 'Post') {
        res = await drrq.post(url, data, preventRepeat);
    }
    if (method == 'file' || method == 'FILE' || method == 'file') {
        res = await drrq.file(url, data, preventRepeat);
    }
    return resHandler(res);
};Test function
After the code is written, we need to verify whether the function is normal. Add
    "scripts": {
        "test": "node example"
},to package.json to execute npm run test
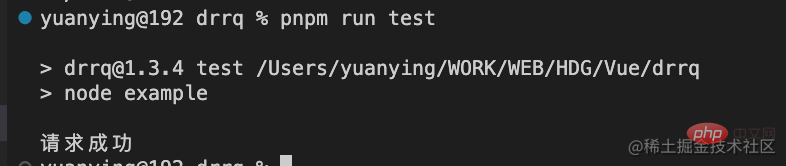
The function is normal and the tool library is ready.
(eslint and prettier readers can choose according to the situation)
Packaging
Generally, webpack is used for packaging of projects, while rollup is used for packaging of tool libraries
Install Rollup
Install through the following commandRollup:
npm install --save-dev rollup
Create configuration file
Create a new file in the root directory rollup.config.js
export default {
  input: "src/index.js",
  output: {
    file: "dist/drrp.js",
    format: "esm",
    name: 'drrp'
  }
};- input - the file to be packaged
- output.file - the output file (if there is no this parameter, it will be output directly to the console)
- output.format - File type output by Rollup
Install babel
If you want to use es6 syntax for development, you also need to use babel to compile the code into es5 . Because the module mechanism of rollup is ES6 Modules, other es6 syntaxes will not be compiled.
Installation module
rollup-plugin-babel Perfectly combines rollup and babel.
npm install --save-dev rollup-plugin-babel@latest
npm install --save-dev @babel/core
npm install --save-dev @babel/preset-env
Create .babelrc in the root directory
{
    "presets": [
      [
        "@babel/preset-env",
        {
          "modules": false
        }
      ]
    ]
}Compatible with commonjs
rollup provides the plug-in rollup-plugin-commonjs so that For referencing the commonjs specification package in rollup. The function of this plug-in is to convert commonjs modules into es6 modules.
rollup-plugin-commonjs is usually used together with rollup-plugin-node-resolve, which is used to resolve dependent module paths.
Install module
npm install --save-dev rollup-plugin-commonjs rollup-plugin-node-resolve
Compress bundle
Adding UglifyJS can be greatly improved by removing comments, shortening variable names, and reorganizing the code. Reduce the size of the bundle - This reduces the readability of the code to a certain extent, but makes network communication more efficient.
Install plugin
Use the following command to install rollup-plugin-uglify:
npm install --save-dev rollup-plugin-uglify
完整配置
rollup.config.js 最终配置如下
import resolve from 'rollup-plugin-node-resolve';
import commonjs from 'rollup-plugin-commonjs';
import babel from 'rollup-plugin-babel';
import { uglify } from 'rollup-plugin-uglify';
import json from '@rollup/plugin-json'

const paths = {
    input: {
        root:  'src/index.js',
    },
    output: {
        root:  'dist/',
    },
};

const fileName = `drrq.js`;

export default {
    input: `${paths.input.root}`,
    output: {
        file: `${paths.output.root}${fileName}`,
        format: 'esm',
        name: 'drrq',
    },
    plugins: [
        json(),
        resolve(),
        commonjs(),
        babel({
            exclude: 'node_modules/**',
            runtimeHelpers: true,
        }),
        uglify(),
    ],
};在package.json中加上
"scripts": {
    "build": "rollup -c"
},即可执行npm run build将/src/index.js打包为/dist/drrq.js
发包前的准备
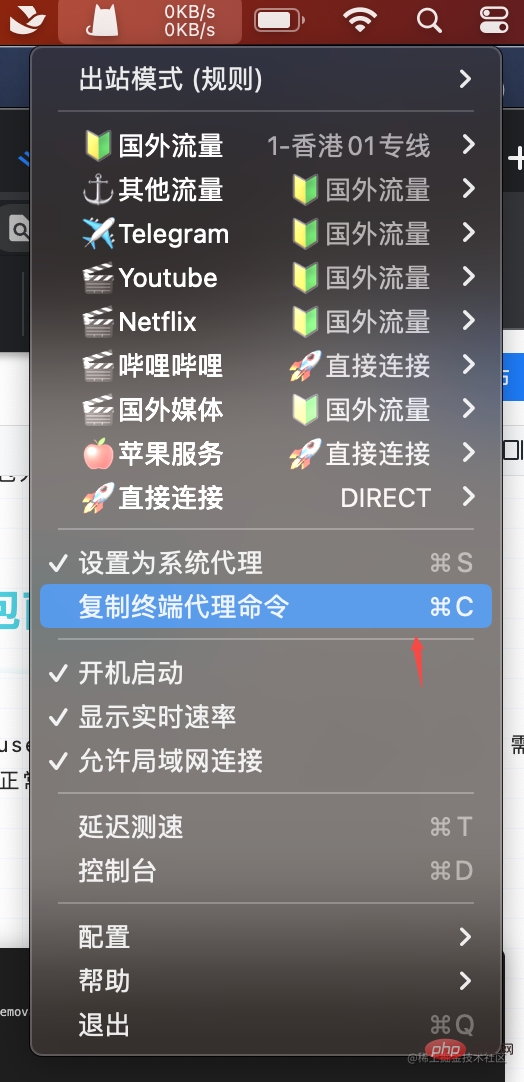
准备npm账号,通过npm login或npm adduser。这里有一个坑,终端内连接不上npm源,需要在上网工具内复制终端代理命令后到终端执行才能正常连接。
准备一个简单清晰的readme.md
修改package.json
完整的package.json如下
{
"name": "drrq",
"private": false,
"version": "1.3.5",
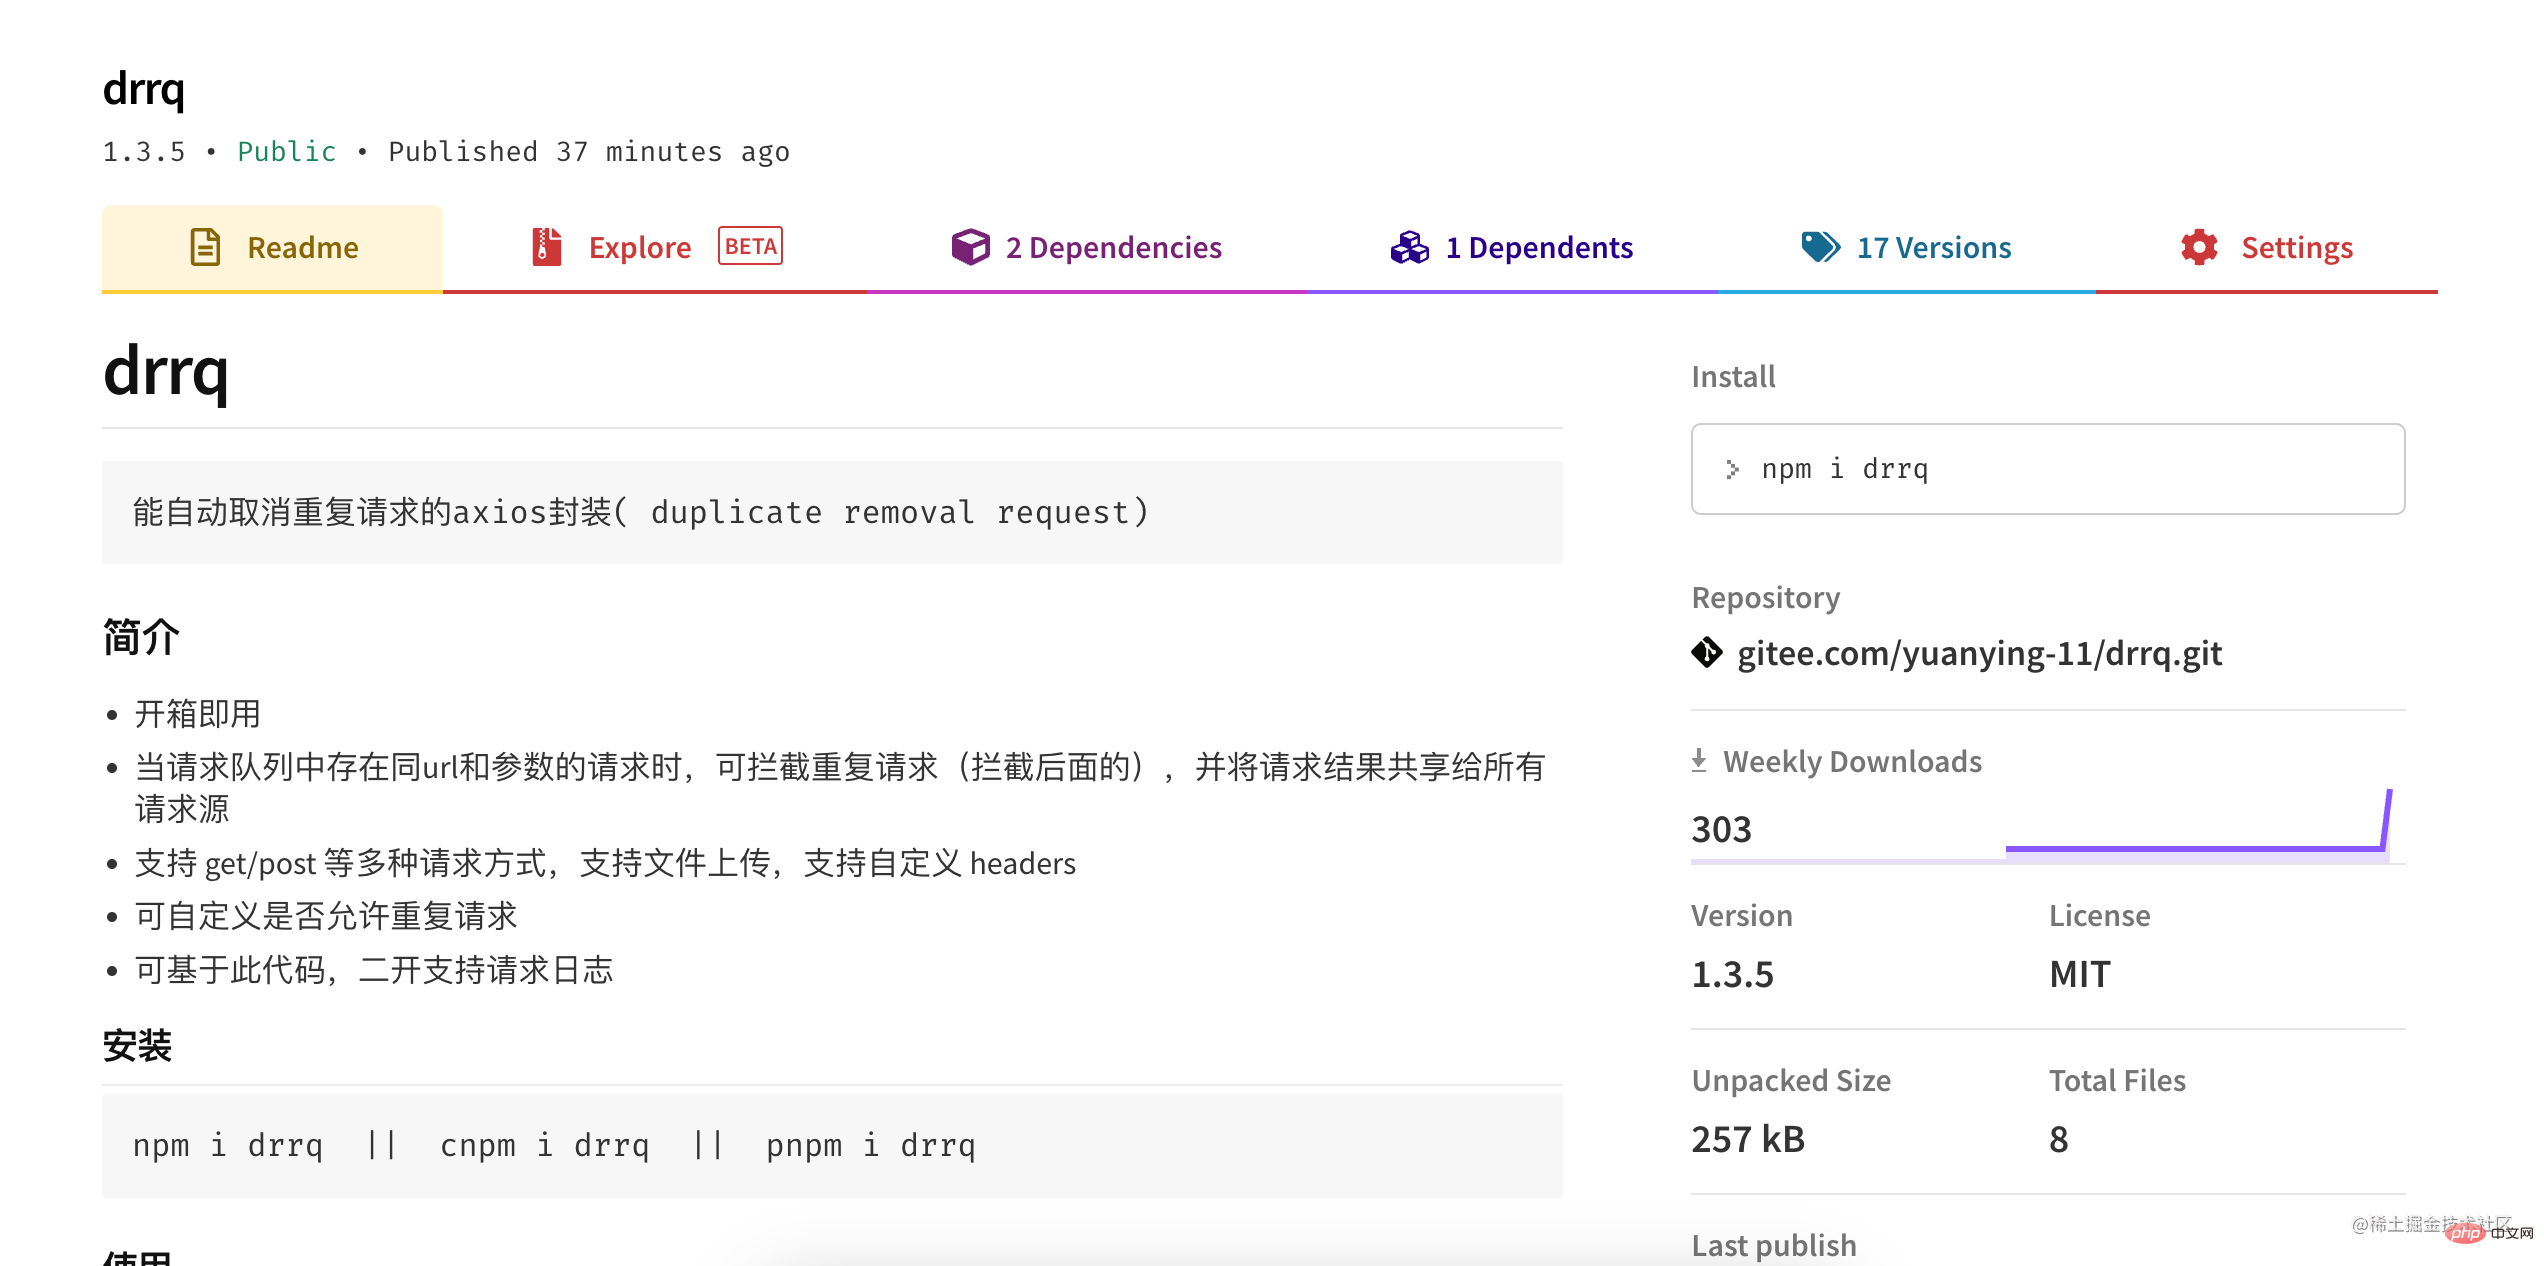
"main": "/dist/drrq.js",
"repository": "https://gitee.com/yuanying-11/drrq.git",
"author": "it_yuanying",
"license": "MIT",
"description": "能自动取消重复请求的axios封装",
"type": "module",
"keywords": [
"取消重复请求",
],
"dependencies": {
"axios": "^1.2.0",
"qs": "^6.11.0"
},
"scripts": {
"test": "node example",
"build": "rollup -c"
},
"devDependencies": {
...
}
}- name 包名称 一定不能与npm已有的包名重复,想一个简单易记的
- private 是否为私有
- version 版本
- main 入口文件位置
- repository git仓库地址
- author 作者
- license 协议
- description 描述
- keywords 关键词,便于检索
每个 npm 包都需要一个版本,以便开发人员在安全地更新包版本的同时不会破坏其余的代码。npm 使用的版本系统被叫做 SemVer,是 Semantic Versioning 的缩写。
不要过分担心理解不了相较复杂的版本名称,下面是他们对基本版本命名的总结: 给定版本号 MAJOR.MINOR.PATCH,增量规则如下:
MAJOR 版本号的变更说明新版本产生了不兼容低版本的 API 等,
MINOR 版本号的变更说明你在以向后兼容的方式添加功能,接下来
PATCH 版本号的变更说明你在新版本中做了向后兼容的 bug 修复。
表示预发布和构建元数据的附加标签可作为 MAJOR.MINOR.PATCH 格式的扩展。
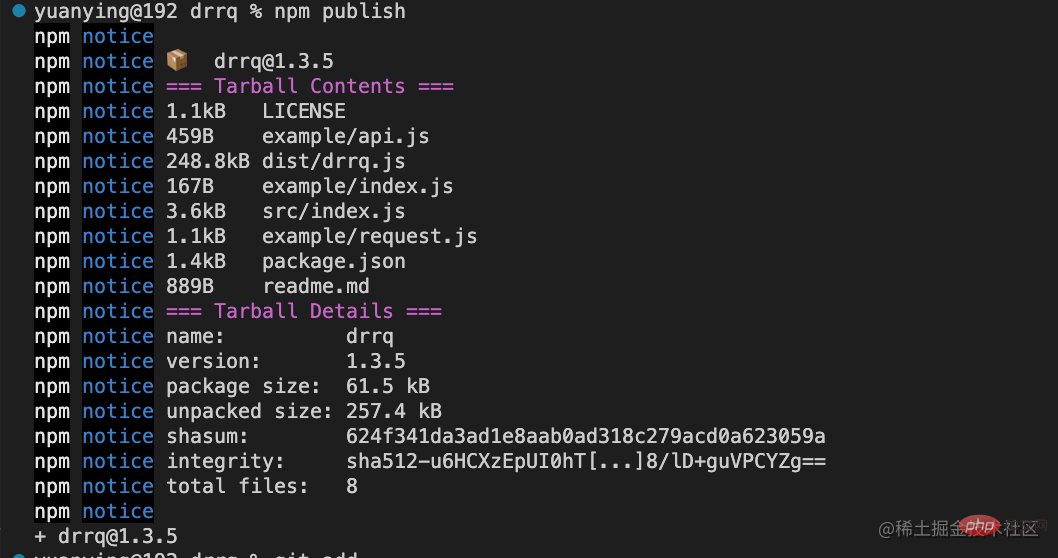
最后,执行npm publish就搞定啦
本文的完整代码已开源至gitee.com/yuanying-11… ,感兴趣的读者欢迎fork和star!
转载地址:https://juejin.cn/post/7172240485778456606
更多node相关知识,请访问:nodejs 教程!
The above is the detailed content of Take you step by step to create and publish npm packages from scratch. For more information, please follow other related articles on the PHP Chinese website!

Hot AI Tools

Undresser.AI Undress
AI-powered app for creating realistic nude photos

AI Clothes Remover
Online AI tool for removing clothes from photos.

Undress AI Tool
Undress images for free

Clothoff.io
AI clothes remover

Video Face Swap
Swap faces in any video effortlessly with our completely free AI face swap tool!

Hot Article
Hot Tools

Notepad++7.3.1
Easy-to-use and free code editor

SublimeText3 Chinese version
Chinese version, very easy to use

Zend Studio 13.0.1
Powerful PHP integrated development environment

Dreamweaver CS6
Visual web development tools

SublimeText3 Mac version
God-level code editing software (SublimeText3)
Hot Topics
 1386
1386
 52
52

 What to do if npm react installation error occurs
Dec 27, 2022 am 11:25 AM
What to do if npm react installation error occurs
Dec 27, 2022 am 11:25 AM
Solution to npm react installation error: 1. Open the "package.json" file in the project and find the dependencies object; 2. Move "react.json" to "devDependencies"; 3. Run "npm audit in the terminal --production" to fix the warning.
 How to delete node in nvm
Dec 29, 2022 am 10:07 AM
How to delete node in nvm
Dec 29, 2022 am 10:07 AM
How to delete node with nvm: 1. Download "nvm-setup.zip" and install it on the C drive; 2. Configure environment variables and check the version number through the "nvm -v" command; 3. Use the "nvm install" command Install node; 4. Delete the installed node through the "nvm uninstall" command.
 How to use express to handle file upload in node project
Mar 28, 2023 pm 07:28 PM
How to use express to handle file upload in node project
Mar 28, 2023 pm 07:28 PM
How to handle file upload? The following article will introduce to you how to use express to handle file uploads in the node project. I hope it will be helpful to you!
 An in-depth analysis of Node's process management tool 'pm2”
Apr 03, 2023 pm 06:02 PM
An in-depth analysis of Node's process management tool 'pm2”
Apr 03, 2023 pm 06:02 PM
This article will share with you Node's process management tool "pm2", and talk about why pm2 is needed, how to install and use pm2, I hope it will be helpful to everyone!
 Pi Node Teaching: What is a Pi Node? How to install and set up Pi Node?
Mar 05, 2025 pm 05:57 PM
Pi Node Teaching: What is a Pi Node? How to install and set up Pi Node?
Mar 05, 2025 pm 05:57 PM
Detailed explanation and installation guide for PiNetwork nodes This article will introduce the PiNetwork ecosystem in detail - Pi nodes, a key role in the PiNetwork ecosystem, and provide complete steps for installation and configuration. After the launch of the PiNetwork blockchain test network, Pi nodes have become an important part of many pioneers actively participating in the testing, preparing for the upcoming main network release. If you don’t know PiNetwork yet, please refer to what is Picoin? What is the price for listing? Pi usage, mining and security analysis. What is PiNetwork? The PiNetwork project started in 2019 and owns its exclusive cryptocurrency Pi Coin. The project aims to create a one that everyone can participate
 What should I do if node cannot use npm command?
Feb 08, 2023 am 10:09 AM
What should I do if node cannot use npm command?
Feb 08, 2023 am 10:09 AM
The reason why node cannot use the npm command is because the environment variables are not configured correctly. The solution is: 1. Open "System Properties"; 2. Find "Environment Variables" -> "System Variables", and then edit the environment variables; 3. Find the location of nodejs folder; 4. Click "OK".
 Let's talk about how to use pkg to package Node.js projects into executable files.
Dec 02, 2022 pm 09:06 PM
Let's talk about how to use pkg to package Node.js projects into executable files.
Dec 02, 2022 pm 09:06 PM
How to package nodejs executable file with pkg? The following article will introduce to you how to use pkg to package a Node project into an executable file. I hope it will be helpful to you!
 What to do if npm node gyp fails
Dec 29, 2022 pm 02:42 PM
What to do if npm node gyp fails
Dec 29, 2022 pm 02:42 PM
npm node gyp fails because "node-gyp.js" does not match the version of "Node.js". The solution is: 1. Clear the node cache through "npm cache clean -f"; 2. Through "npm install -g n" Install the n module; 3. Install the "node v12.21.0" version through the "n v12.21.0" command.
