
 Web Front-end
JS Tutorial
An article to talk about Node multi-process model and project deployment
Web Front-end
JS Tutorial
An article to talk about Node multi-process model and project deployment
An article to talk about Node multi-process model and project deployment

nodeHow to implement multiple processes? How to deploy node project? The following article will help you master the relevant knowledge of Node.js multi-process model and project deployment. I hope it will be helpful to you!

Yesterday, a friend asked how to deploy the express project. So I compiled this article, which mainly talks about how to deploy a server program developed based on nodejs for the reference of friends in need.
The article contains several parts:
- Threads and processes
- node.js implements multi-process
- Server installation Node.js environment
- Use PM2 to manage Node.js projects
- Use Nginx to implement proxy forwarding of interface services
Process VS thread
Process
Process (process) is the basic unit for computer operating system to allocate and schedule tasks. Open the task manager and you can see that there are actually many programs running in the background of the computer, and each program is a process. [Related tutorial recommendations: nodejs video tutorial, Programming teaching]
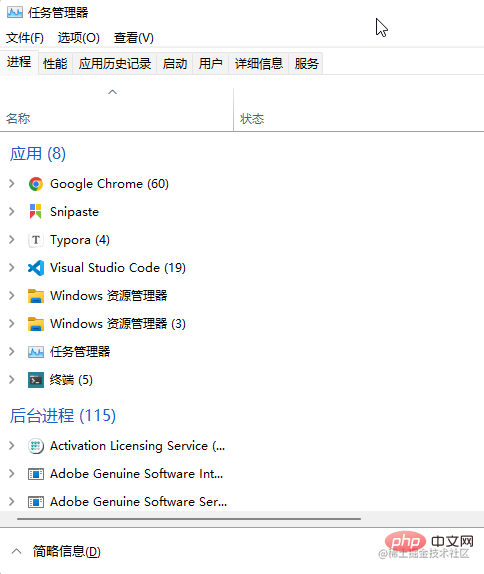
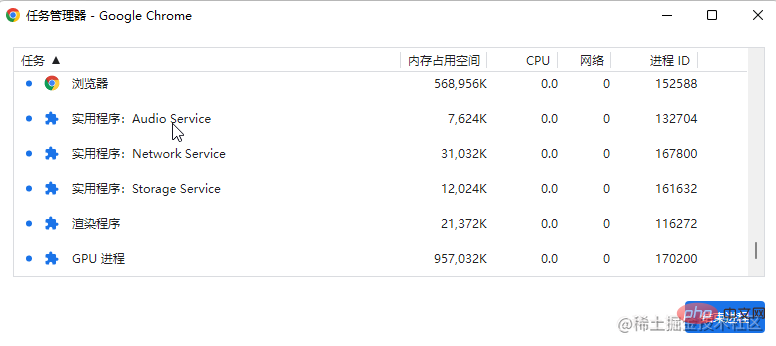
Modern browsers are basically multi-process architectures. Taking the Chrome browser as an example, open "More Tools" - "Task Manager" and you can see the process information of the current browser. One of the pages is a process. In addition, there are also network processes, GPU Process etc.
The multi-process architecture ensures more stable operation of the application. Taking the browser as an example, if all programs run in one process, if there is a network failure or page rendering error, it will cause the entire browser to crash. Through the multi-process architecture, even if the network process crashes, it will not affect the display of existing pages, and at worst, it will be temporarily unable to access the network.
Thread
Thread is the smallest unit that the operating system can perform calculation scheduling. It is included in the process and is the actual operating unit in the process. For example, a program is like a company with multiple departments, which are processes; the cooperation of each department allows the company to run normally, and the threads are the employees, the people who do the specific work.
We all know that JavaScript is a single-threaded language. This design is because in the early days, JS was mainly used to write scripts and was responsible for realizing the interactive effects of the page. If it is designed as a multi-threaded language, firstly, it is not necessary, and secondly, multiple threads jointly operate a DOM node, then whose advice should the browser listen to? Of course, with the development of technology, JS now also supports multi-threading, but it is only used to handle some logic unrelated to DOM operations.
Problems with single process
Single thread and single process brings a serious problem. Once the main thread of a running node.js program hangs up, the process will also hang up. , the entire application will hang up. Furthermore, most modern computers have multi-core CPUs, with four cores and eight threads, and eight cores and sixteen threads, which are very common devices. As a single-process program, node.js wastes the performance of multi-core CPUs.
In view of this situation, we need a suitable multi-process model to transform a single-process node.js program into a multi-process architecture.
Multi-process implementation of Node.js
There are two common solutions for Node.js to implement multi-process architecture, both of which use native modules, namely child_process module andcluster module.
child_process
child_process is a built-in module of node.js. You can guess from the name that it is responsible for things related to child processes.
We will not go into details about the specific usage of this module. In fact, it only has about six or seven methods, which are still very easy to understand. We use one of the fork methods to demonstrate how to implement multiple processes and communication between multiple processes.
First look at the directory structure of the prepared demonstration case:
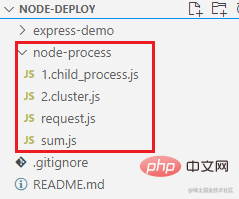
We created an http server using the http module. When a /sum request comes in, a child process will be created through the child_process module, and the child process will be notified to perform the calculation logic. At the same time, the parent process will also listen to the messages sent by the child process:
// child_process.jsconst http = require('http')const { fork } = require('child_process')const server = http.createServer((req, res) => {
if (req.url == '/sum') {
// fork 方法接收一个模块路径,然后开启一个子进程,将模块在子进程中运行
// childProcess 表示创建的子进程
let childProcess = fork('./sum.js')
// 发消息给子进程
childProcess.send('子进程开始计算')
// 父进程中监听子进程的消息
childProcess.on('message', (data) => {
res.end(data + '')
})
// 监听子进程的关闭事件
childProcess.on('close', () => {
// 子进程正常退出和报错挂掉,都会走到这里
console.log('子进程关闭')
childProcess.kill()
})
// 监听子进程的错误事件
childProcess.on('error', () => {
console.log('子进程报错')
childProcess.kill()
})
}
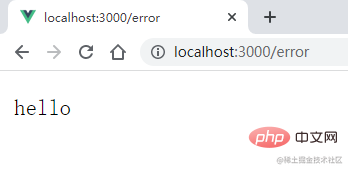
if (req.url == '/hello') {
res.end('hello')
}
// 模拟父进程报错
if (req.url == '/error') {
throw new Error('父进程出错')
res.end('hello')
}
})
server.listen(3000, () => {
console.log('Server is running on 3000')
})复制代码sum.js is used to simulate the tasks to be performed by the child process. The child process listens to the messages sent by the parent process, processes the calculation tasks, and then sends the results to the parent process:
// sum.jsfunction getSum() {
  let sum = 0
  for (let i = 0; i  {
  console.log('主进程的消息:', data)

  const result = getSum()
  // 将计算结果发送给父进程
  process.send(result)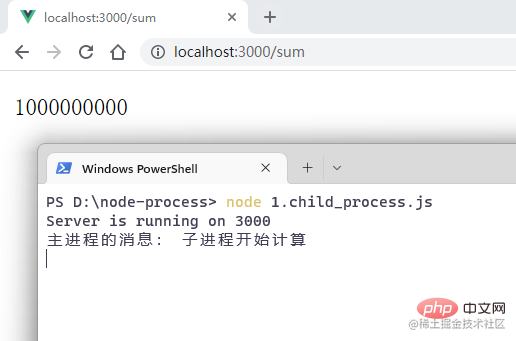
})复制代码Open the terminal and run the command node 1.child_process:

Visit the browser:
Then simulate the situation where the child process reports an error:
// sum.jsfunction getSum() {
  // ....}// 子进程运行5s后,模拟进程挂掉
 setTimeout(() => {
   throw new Error('报错')
 }, 1000 * 5)

process.on('message', (data) => {
// ...})复制代码Visit the browser again, Observe the console after 5 seconds:
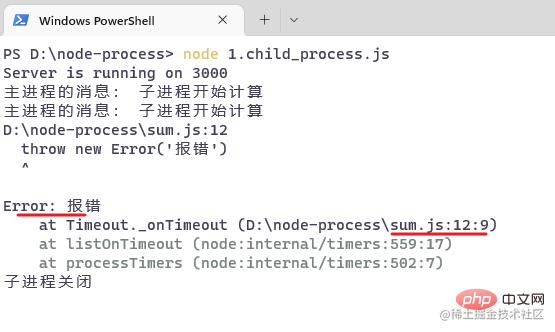
The child process has hung up, and then access another url: /hello,
It can be seen that the parent process can still handle the request correctly, indicating that the error reported by the child process will not affect the operation of the parent process.
Then we will simulate the scenario where the parent process reports an error, comment out the simulated error report of the sum.js module, then restart the service, and access /error with the browser:
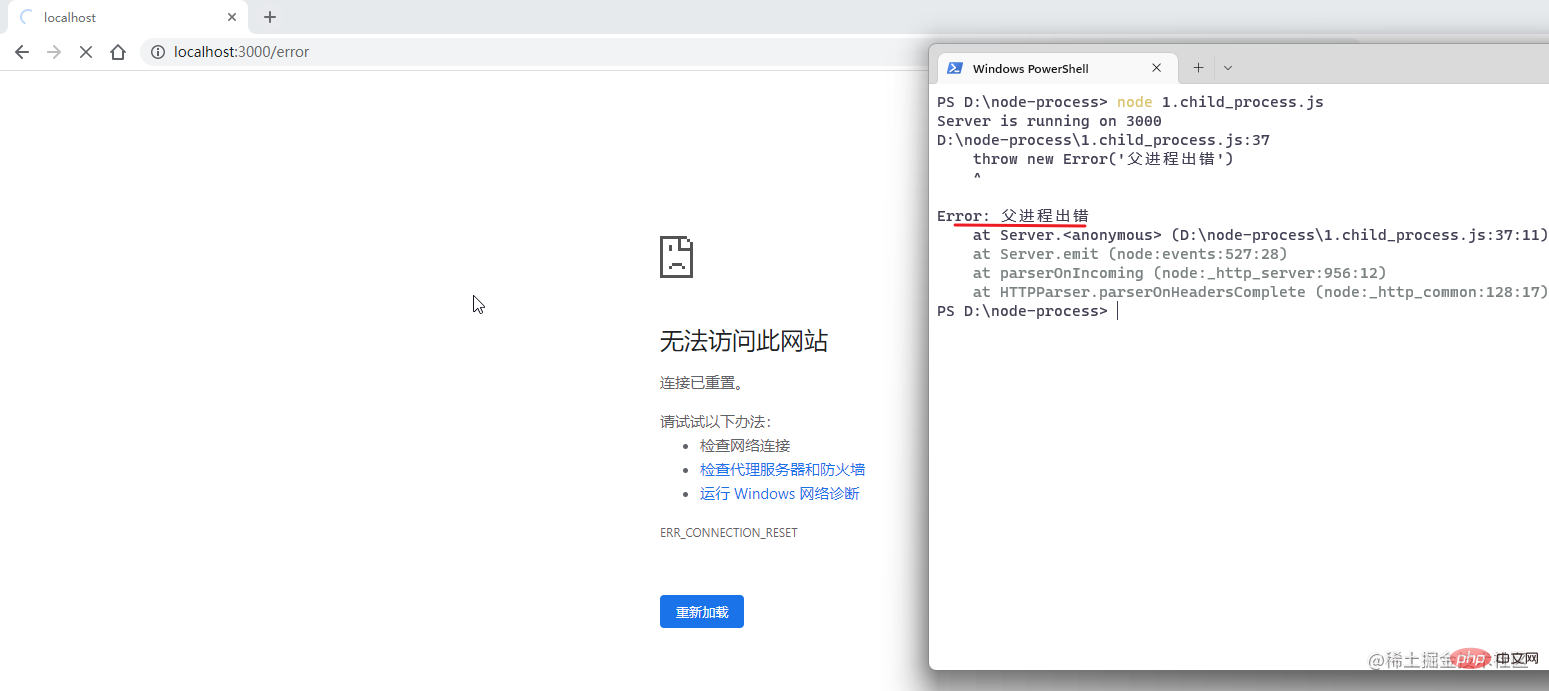
After it was discovered that the parent process hung up, the entire node.js program automatically exited, and the service completely collapsed, leaving no room for recovery.
It can be seen that it is not complicated to implement the multi-process architecture of node.js through the fork method of child_process. Communication between processes is mainly through the send and on methods. From this naming, we can also know that the bottom layer should be a publish-subscribe model.
But it has a serious problem. Although the child process does not affect the parent process, Once the parent process makes an error and hangs up, all the child processes will be "killed in one pot". Therefore, this solution is suitable for forking out a separate child process to do some complex and time-consuming operations. To be more precise, this usage is used to replace the implementation of multi-threading, not multi-processing.
cluster
Use the child_process module to implement multi-process, which seems to be useless. Therefore, it is generally recommended to use the cluster module to implement the multi-process model of node.js.
cluster, meaning cluster, I believe everyone is familiar with this term. For example, in the past, the company only had one front desk, and sometimes it was too busy to receive visitors in time. Now the company has allocated four front desks. Even if three are busy, there is still one that can receive new visitors. Clustering roughly means this. For the same thing, it is reasonably assigned to different people to do it, so as to ensure that the thing can be done best.
cluster The use of the module is also relatively simple. If the current process is the main process, create an appropriate number of child processes based on the number of CPU cores, and listen to the exit event of the child process. If a child process exits, re-fork the new child process. If it is not a child process, the actual business is processed.
const http = require('http')const cluster = require('cluster')const cpus = require('os').cpus()if (cluster.isMaster) {
  // 程序启动时首先走到这里,根据 CPU 的核数,创建出多个子进程
  for (let i = 0; i  {
    cluster.fork()
  })
} else {
  // fork 方法执行创建子进程,同时会再次执行该模块,此时逻辑就会走到这里
  const server = http.createServer((req, res) => {
    console.log(process.pid)
    res.end('ok')
  })

  server.listen(3000, () => {
    console.log('Server is running on 3000', 'pid: ' + process.pid)
  })
}复制代码Start the service:

You can see that the cluster module has created a lot of child processes, it seems Each child process is running the same web service.
It should be noted that at this time these child processes are not listening to the same port . The server created by the createServer method is still responsible for port monitoring and forwards requests to each child process.
We write a request script to request the above service and see the effect.
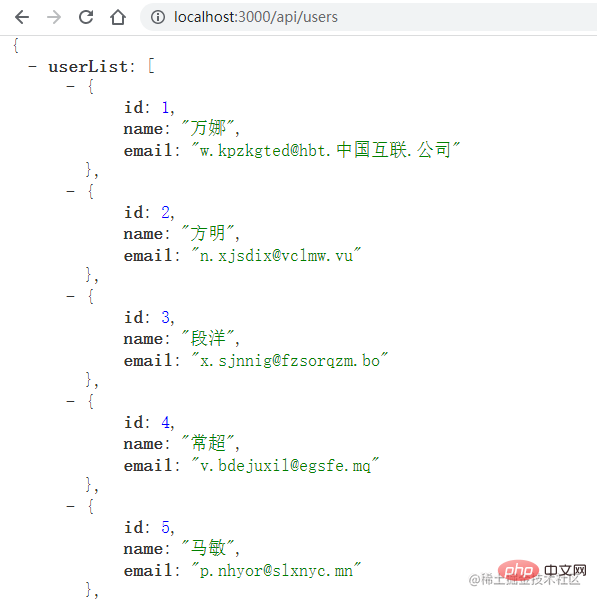
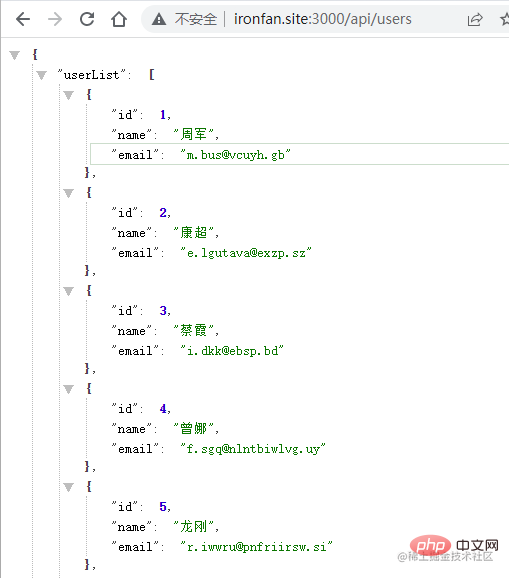
// request.jsconst http = require('http')for (let i = 0; i <blockquote><p>The http module can not only create an http server, but can also be used to send http requests. Axios supports browser and server environments. On the server side, the http module is used to send http requests. </p></blockquote><p>Use the <code>node</code> command to execute the file, and then look at the original console: </p><p style="text-align:center;"><img src="/static/imghw/default1.png" data-src="https://img.php.cn/upload/article/000/000/024/6acfb36f7a6b8401b888460a3a451efa-9.png" class="lazy" alt="An article to talk about Node multi-process model and project deployment"    style="max-width:90%" loading="lazy"></p><p> prints out the specific processing The process ID of the different child processes requested. </p><p>This is the multi-process architecture of nodd.js implemented through the <code>cluster</code> module. </p><p>当然,我们在部署 node.js 项目时不会这么干巴巴的写和使用 <code>cluster</code> 模块。有一个非常好用的工具,叫做 <strong>PM2</strong>,它是一个基于 cluster 模块实现的进程管理工具。在后面的章节中会介绍它的基本用法。</p><h3 id="小结">小结</h3><p>到此为止,我们花了一部分篇幅介绍 node.js 中多进程的知识,其实仅是想要交代下<strong>为什么需要使用 pm2 来管理 node.js 应用</strong>。本文由于篇幅有限,再加上描述不够准确/详尽,仅做简单介绍。如果是第一次接触这一块内容的朋友,可能没有太明白,也不打紧,后面会再出一篇更细节的文章。</p><h2 id="部署实践">部署实践</h2><h3 id="准备一个-express-项目">准备一个 express 项目</h3><p>本文已经准备了一个使用 express 开发的示例程序,<a href="https://www.php.cn/link/7e6bd4cd5be9faae7e6adca908e1995b" target="_blank" rel="nofollow noopener noreferrer" title="https://github.com/hsyq/ndoe-deploy/tree/main/express-demo" ref="nofollow noopener noreferrer">点此访问</a>。</p><p>它主要实现了一个接口服务,当访问 <code>/api/users</code> 时,使用 <code>mockjs</code> 模拟了10条用户数据,返回一个用户列表。同时会开启一个定时器,来模拟报错的情况:</p><pre class="brush:php;toolbar:false">const express = require('express')const Mock = require('mockjs')const app = express()

app.get("/api/users", (req, res) => {
  const userList = Mock.mock({
    'userList|10': [{
      'id|+1': 1,
      'name': '@cname',
      'email': '@email'
    }]
  })

  setTimeout(()=> {
      throw new Error('服务器故障')
  }, 5000)

  res.status(200)
  res.json(userList)
})

app.listen(3000, () => {
  console.log("服务启动: 3000")
})复制代码本地测试一下,在终端中执行命令:
node server.js复制代码
打开浏览器,访问用户列表接口:
五秒钟后,服务器会挂掉:
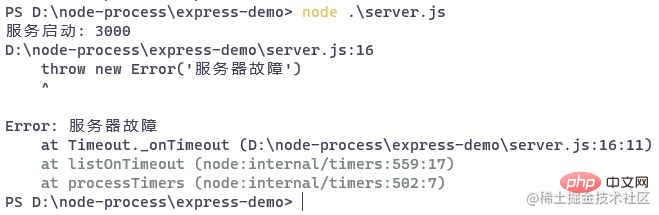
后面我们使用 pm2 来管理应用后,就可以解决这个问题。
讨论:express 项目是否需要打包
通常完成一个 vue/react 项目后,我们都会先执行打包,再进行发布。其实前端项目要进行打包,主要是因为程序最终的运行环境是浏览器,而浏览器存在各种兼容性问题和性能问题,比如:
- 高级语法的不支持,需要将 ES6+ 编译为 ES5 语法
- 不能识别
.vue,.jsx,.ts文件,需要编译 - 减少代码体积,节省带宽资源,提高资源加载速度
- ......
而使用 express.js 或者 koa.js 开发的项目,并不存在这些问题。并且,Node.js 采用 CommonJS 模块化规范,有缓存的机制;同时,只有当模块在被用到时,才会被导入。如果进行打包,打包成一个文件,其实就浪费了这个优势。所以针对 node.js 项目,并不需要打包。
服务器安装 Node.js
本文以 CentOS 系统为例进行演示。
NVM
为了方便切换 node 的版本,我们使用 nvm 来管理 node。
Nvm(Node Version Manager) ,就是 Node.js 的版本管理工具。通过它,可以让 node 在多个版本之间进行任意切换,避免了需要切换版本时反复的下载和安装的操作。
Nvm的官方仓库是 github.com/nvm-sh/nvm。因为它的安装脚本存放在 githubusercontent 站点上,经常访问不了。所以我在 gitee 上新建了它的镜像仓库,这样就能从 gitee 上访问到它的安装脚本了。
通过 curl 命令下载安装脚本,并使用 bash 执行脚本,会自动完成 nvm 的安装工作:
# curl -o- https://gitee.com/hsyq/nvm/raw/master/install.sh | bash复制代码
当安装完成之后,我们再打开一个新的窗口,来使用 nvm :
[root@ecs-221238 ~]# nvm -v0.39.1复制代码
可以正常打印版本号,说明 nvm 已经安装成功了。
安装 Node.js
现在就可以使用 nvm 来安装和管理 node 了。
查看可用的 node 版本:
# nvm ls-remote复制代码
安装 node:
# nvm install 18.0.0复制代码
查看已经安装的 node 版本:
[root@ecs-221238 ~]# nvm list->      v18.0.0default -> 18.0.0 (-> v18.0.0)
iojs -> N/A (default)
unstable -> N/A (default)
node -> stable (-> v18.0.0) (default)
stable -> 18.0 (-> v18.0.0) (default)复制代码
选择一个版本进行使用:
# nvm use 18.0.0复制代码
需要注意的一点,在 Windows 上使用 nvm 时,需要使用管理员权限执行 nvm 命令。在 CentOS 上,我默认使用 root 用户登录的,因而没有出现问题。大家在使用时遇到了未知错误,可以搜索一下解决方案,或者尝试下是否是权限导致的问题。
在安装 node 的时候,会自动安装 npm。查看 node 和 npm 的版本号:
[root@ecs-221238 ~]# node -vv18.0.0[root@ecs-221238 ~]# npm -v8.6.0复制代码
默认的 npm 镜像源是官方地址:
[root@ecs-221238 ~]# npm config get registryhttps://registry.npmjs.org/复制代码
切换为国内淘宝的镜像源:
[root@ecs-221238 ~]# npm config set registry https://registry.npmmirror.com复制代码
到此为止,服务器就已经安装好 node 环境和配置好 npm 了。
项目上传到服务器
方法有很多,或者从 Github / GitLab / Gitee 仓库中下载到服务器中,或者本地通过 ftp 工具上传。步骤很简单,不再演示。
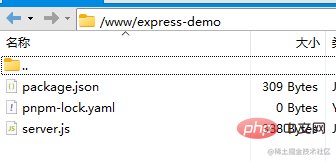
演示项目放到了 /www 目录 下:
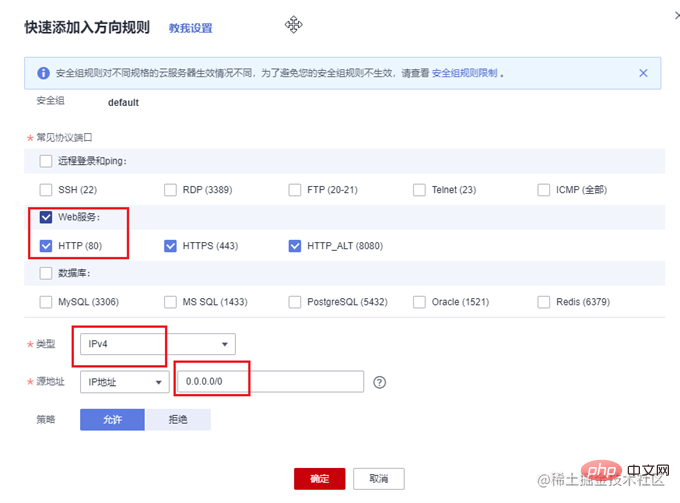
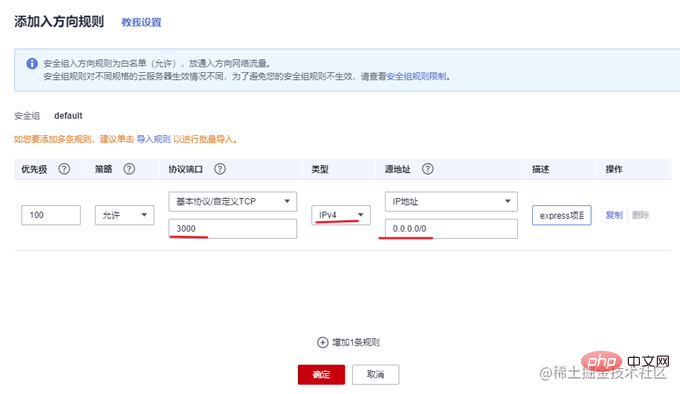
服务器开放端口
一般云服务器仅开放了 22 端口用于远程登录。而常用的80,443等端口并未开放。另外,我们准备好的 express 项目运行在3000端口上。所以需要先到云服务器的控制台中,找到安全组,添加几条规则,开放80和3000端口。
使用 PM2 管理应用
在开发阶段,我们可以使用 nodemon 来做实时监听和自动重启,提高开发效率。在生产环境,就需要祭出大杀器—PM2了。
基本使用
首先全局安装 pm2:
# npm i -g pm2复制代码
执行 pm2 -v 命令查看是否安装成功:
[root@ecs-221238 ~]# pm2 -v5.2.0复制代码
切换到项目目录,先把依赖装上:
cd /www/express-demo
npm install复制代码
然后使用 pm2 命令来启动应用。
pm2 start app.js -i max// 或者pm2 start server.js -i 2复制代码
PM2 管理应用有 fork 和 cluster 两种模式。在启动应用时,通过使用 -i 参数来指定实例的个数,会自动开启 cluster 模式。此时就具备了负载均衡的能力。
-i :instance,实例的个数。可以写具体的数字,也可以配置成 max,
PM2会自动检查可用的CPU的数量,然后尽可能多地启动进程。
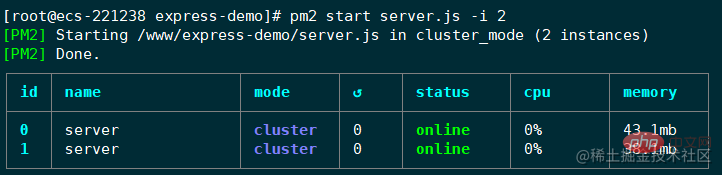
此时应用就启动好了。PM2 会以守护进程的形式管理应用,这个表格展示了应用运行的一些信息,比如运行状态,CPU使用率,内存使用率等。
在本地的浏览器中访问接口:
Cluster 模式是一个多进程多实例的模型,请求进来后会分配给其中一个进程处理。正如前面我们看过的 cluster 模块的用法一样,由于 pm2 的守护,即使某个进程挂掉了,也会立刻重启该进程。
回到服务器终端,执行 pm2 logs 命令,查看下 pm2 的日志:
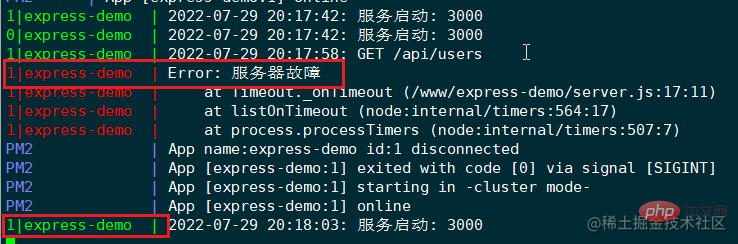
可见,id 为1的应用实例挂掉了,pm2 会立刻重启该实例。注意,这里的 id 是应用实例的 id,并非进程 id。
到这里,一个 express 项目的简单部署就完成了。通过使用 pm2 工具,基本能保证我们的项目可以稳定可靠的运行。
PM2 常用命令小结
这里整理了一些 pm2 工具常用的命令,可供查询参考。
# Fork模式pm2 start app.js --name app # 设定应用的名字为 app# Cluster模式# 使用负载均衡启动4个进程pm2 start app.js -i 4

# 将使用负载均衡启动4个进程,具体取决于可用的 CPUpm2 start app.js -i 0

# 等同于上面命令的作用pm2 start app.js -i max

 # 给 app 扩展额外的3个进程pm2 scale app +3# 将 app 扩展或者收缩到2个进程pm2 scale app 2              # 查看应用状态# 展示所有进程的状态pm2 list  # 用原始 JSON 格式打印所有进程列表pm2 jlist# 用美化的 JSON 打印所有进程列表pm2 prettylist  # 展示特定进程的所有信息pm2 describe 0# 使用仪表盘监控所有进程pm2 monit

# 日志管理# 实时展示所有应用的日志pm2 logs          # 实时展示 app 应用的日志 pm2 logs app# 使用json格式实时展示日志,不输出旧日志,只输出新产生的日志pm2 logs --json# 应用管理# 停止所有进程pm2 stop all# 重启所有进程pm2 restart all

# 停止指定id的进程pm2 stop 0

# 重启指定id的进程pm2 restart 0

# 删除id为0进程pm2 delete 0# 删除所有的进程pm2 delete all
复制代码
每一条命令都可以亲自尝试一下,看看效果。
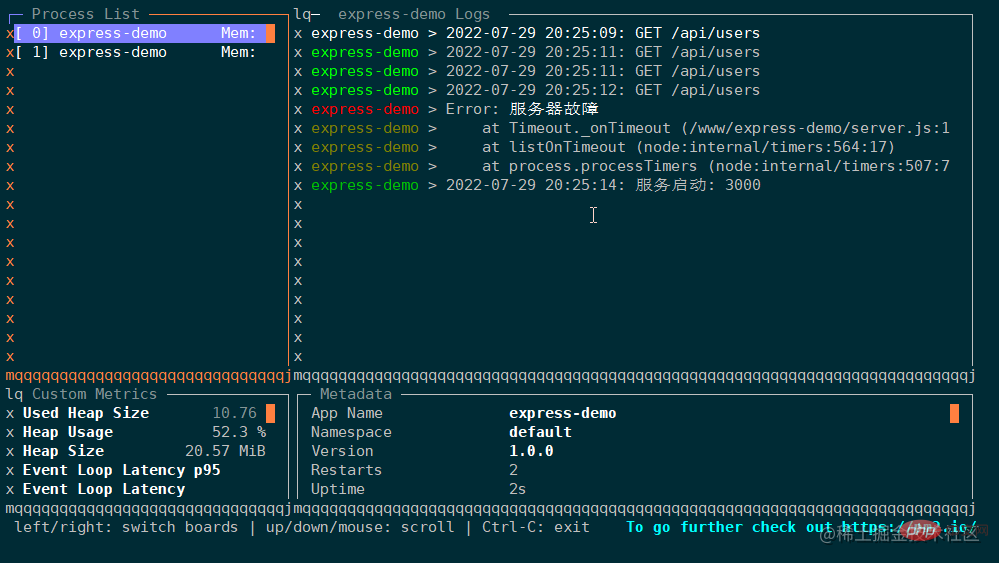
这里特别展示下 monit 命令,它可以在终端中启动一个面板,实时展示应用的运行状态,通过上下箭头可以切换 pm2 管理的所有应用:
进阶:使用 pm2 配置文件
PM2 的功能十分强大,远不止上面的这几个命令。在真实的项目部署中,可能还需要配置日志文件,watch 模式,环境变量等等。如果每次都手敲命令是十分繁琐的,所以 pm2 提供了配置文件来管理和部署应用。
可以通过以下命令来生成一份配置文件:
[root@ecs-221238 express-demo]# pm2 init simpleFile /www/express-demo/ecosystem.config.js generated复制代码
会生成一个ecosystem.config.js 文件:
module.exports = {
  apps : [{
    name   : "app1",
    script : "./app.js"
  }]
}复制代码也可以自己创建一个配置文件,比如 app.config.js:
const path = require('path')module.exports = {  // 一份配置文件可以同时管理多个 node.js 应用
  // apps 是一个数组,每一项都是一个应用的配置
  apps: [{
    // 应用名称
    name: "express-demo",

    // 应用入口文件
    script: "./server.js",

    // 启动应用的模式, 有两种:cluster和fork,默认是fork
    exec_mode: 'cluster',

    // 创建应用实例的数量
    instances: 'max',

    // 开启监听,当文件变化后自动重启应用
    watch: true,

    // 忽略掉一些目录文件的变化。
    // 由于把日志目录放到了项目路径下,一定要将其忽略,否则应用启动产生日志,pm2 监听到变化就会重启,重启又产生日志,就会进入死循环
    ignore_watch: [
      "node_modules",
      "logs"
    ],
    // 错误日志存放路径
    err_file: path.resolve(__dirname, 'logs/error.log'),

    // 打印日志存放路径
    out_file: path.resolve(__dirname, 'logs/out.log'),

    // 设置日志文件中每条日志前面的日期格式
    log_date_format: "YYYY-MM-DD HH:mm:ss",
  }]
}复制代码让 pm2 使用配置文件来管理 node 应用:
pm2 start app.config.js复制代码
现在 pm2 管理的应用,会将日志放到项目目录下(默认是放到 pm2 的安装目录下),并且能监听文件的变化,自动重启服务。
更多有用的配置可以参考 PM2 官方文档,点此访问。
Nginx 代理转发接口
上面我们直接将 nodejs 项目的3000端口暴露了出去。一般我们都会使用 nginx 做一个代理转发,只对外暴露 80 端口。
安装 Nginx
首先服务器中需要安装 nginx ,有三种方式:
- 下载源码编译安装
- 使用 docker 安装
- 使用包管理工具安装
我这里的系统是 CentOS 8,已经更换了可用的 yum 源,可以直接安装 nginx。如果你的操作系统为 CentOS 7 或者其他发行版,可以搜索适合的安装方法。
使用 yum 安装:
# yum install -y nginx复制代码
然后启动 nginx:
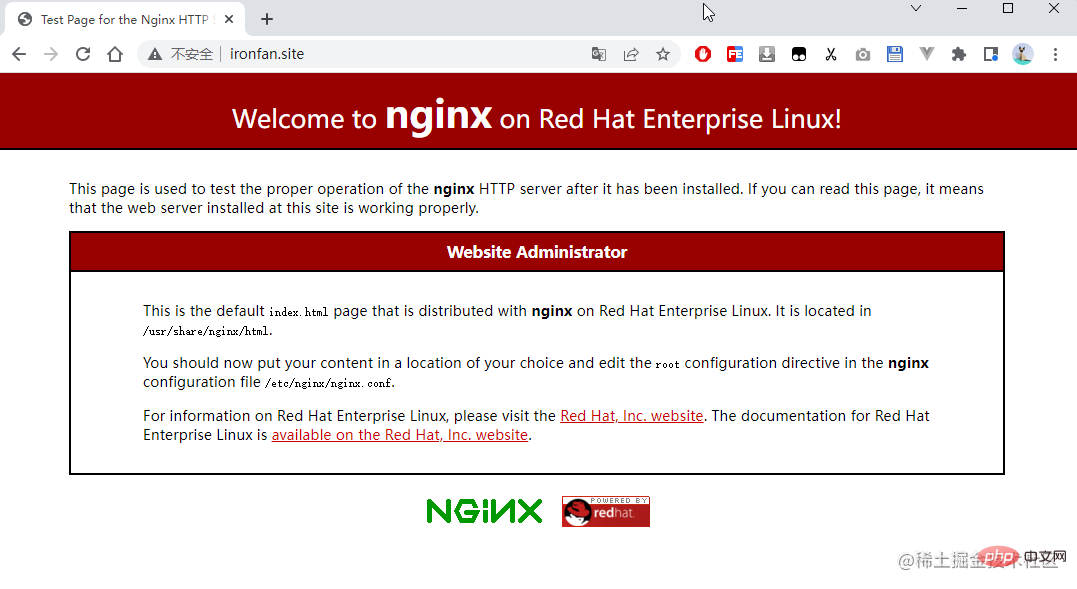
# systemctl start nginx复制代码
打开浏览器访问服务器地址,可以看到 nginx 默认的主页:
配置接口转发
为项目新建一个配置文件:
# vim /etc/nginx/conf.d/express.conf复制代码
监听80端口,将所有请求转发给服务器本地的3000端口的程序处理:
server {
    listen       80;
    server_name  ironfan.site;
    location / {
          proxy_pass http://localhost:3000;
    }
}复制代码conf 目录下的配置文件,会被主配置文件 /etc/nginx/nginx.conf 加载:

修改完配置文件,一定要重启服务:
# systemctl restart nginx复制代码
然后本地打开浏览器,去掉原来的3000端口号,直接访问完整的 url:
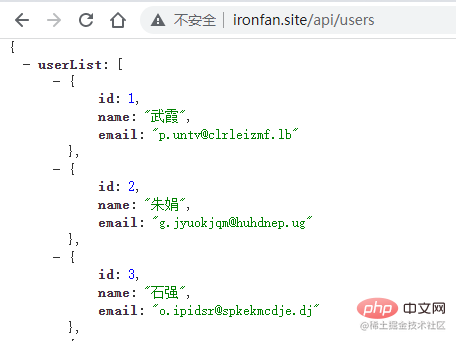
到这里,就完成了接口转发的配置。从用户的角度出发,这个也叫反向代理。
总结
首先我们比较系统的讲解了为何需要在 node.js 项目中开启多进程,以及两种实现方式:
-
child_process模块的fork方法 -
cluster 模块的fork方法
之后,又讲解了如何在 Linux 服务器中安装 node 环境,以及部署一个 node.js 项目的大致流程,并着重介绍了 pm2 的使用:
- 上传项目到服务器中
- 安装项目依赖
- 使用 pm2 管理应用
最后,讲解了使用 nginx 实现接口的代理转发,将用户请求转发到本地的3000端口的服务。
至此,我们完成了本文的目标,将一个 express 项目部署到服务器,并能稳定可靠的运行。
下篇文章,我们会使用 Github Actions 实现 CI/CD,让项目的部署更加便捷高效。
本文演示代码,已上传至 Github,点击访问。
更多node相关知识,请访问:nodejs 教程!
The above is the detailed content of An article to talk about Node multi-process model and project deployment. For more information, please follow other related articles on the PHP Chinese website!

Hot AI Tools

Undresser.AI Undress
AI-powered app for creating realistic nude photos

AI Clothes Remover
Online AI tool for removing clothes from photos.

Undress AI Tool
Undress images for free

Clothoff.io
AI clothes remover

AI Hentai Generator
Generate AI Hentai for free.

Hot Article
Hot Tools

Notepad++7.3.1
Easy-to-use and free code editor

SublimeText3 Chinese version
Chinese version, very easy to use

Zend Studio 13.0.1
Powerful PHP integrated development environment

Dreamweaver CS6
Visual web development tools

SublimeText3 Mac version
God-level code editing software (SublimeText3)
Hot Topics
 1386
1386
 52
52

 PHP and Vue: a perfect pairing of front-end development tools
Mar 16, 2024 pm 12:09 PM
PHP and Vue: a perfect pairing of front-end development tools
Mar 16, 2024 pm 12:09 PM
PHP and Vue: a perfect pairing of front-end development tools. In today's era of rapid development of the Internet, front-end development has become increasingly important. As users have higher and higher requirements for the experience of websites and applications, front-end developers need to use more efficient and flexible tools to create responsive and interactive interfaces. As two important technologies in the field of front-end development, PHP and Vue.js can be regarded as perfect tools when paired together. This article will explore the combination of PHP and Vue, as well as detailed code examples to help readers better understand and apply these two
 Questions frequently asked by front-end interviewers
Mar 19, 2024 pm 02:24 PM
Questions frequently asked by front-end interviewers
Mar 19, 2024 pm 02:24 PM
In front-end development interviews, common questions cover a wide range of topics, including HTML/CSS basics, JavaScript basics, frameworks and libraries, project experience, algorithms and data structures, performance optimization, cross-domain requests, front-end engineering, design patterns, and new technologies and trends. . Interviewer questions are designed to assess the candidate's technical skills, project experience, and understanding of industry trends. Therefore, candidates should be fully prepared in these areas to demonstrate their abilities and expertise.
 How to use Go language for front-end development?
Jun 10, 2023 pm 05:00 PM
How to use Go language for front-end development?
Jun 10, 2023 pm 05:00 PM
With the development of Internet technology, front-end development has become increasingly important. Especially the popularity of mobile devices requires front-end development technology that is efficient, stable, safe and easy to maintain. As a rapidly developing programming language, Go language has been used by more and more developers. So, is it feasible to use Go language for front-end development? Next, this article will explain in detail how to use Go language for front-end development. Let’s first take a look at why Go language is used for front-end development. Many people think that Go language is a
 C# development experience sharing: front-end and back-end collaborative development skills
Nov 23, 2023 am 10:13 AM
C# development experience sharing: front-end and back-end collaborative development skills
Nov 23, 2023 am 10:13 AM
As a C# developer, our development work usually includes front-end and back-end development. As technology develops and the complexity of projects increases, the collaborative development of front-end and back-end has become more and more important and complex. This article will share some front-end and back-end collaborative development techniques to help C# developers complete development work more efficiently. After determining the interface specifications, collaborative development of the front-end and back-end is inseparable from the interaction of API interfaces. To ensure the smooth progress of front-end and back-end collaborative development, the most important thing is to define good interface specifications. Interface specification involves the name of the interface
 Is Django front-end or back-end? check it out!
Jan 19, 2024 am 08:37 AM
Is Django front-end or back-end? check it out!
Jan 19, 2024 am 08:37 AM
Django is a web application framework written in Python that emphasizes rapid development and clean methods. Although Django is a web framework, to answer the question whether Django is a front-end or a back-end, you need to have a deep understanding of the concepts of front-end and back-end. The front end refers to the interface that users directly interact with, and the back end refers to server-side programs. They interact with data through the HTTP protocol. When the front-end and back-end are separated, the front-end and back-end programs can be developed independently to implement business logic and interactive effects respectively, and data exchange.
 Exploring Go language front-end technology: a new vision for front-end development
Mar 28, 2024 pm 01:06 PM
Exploring Go language front-end technology: a new vision for front-end development
Mar 28, 2024 pm 01:06 PM
As a fast and efficient programming language, Go language is widely popular in the field of back-end development. However, few people associate Go language with front-end development. In fact, using Go language for front-end development can not only improve efficiency, but also bring new horizons to developers. This article will explore the possibility of using the Go language for front-end development and provide specific code examples to help readers better understand this area. In traditional front-end development, JavaScript, HTML, and CSS are often used to build user interfaces
 Can golang be used as front-end?
Jun 06, 2023 am 09:19 AM
Can golang be used as front-end?
Jun 06, 2023 am 09:19 AM
Golang can be used as a front-end. Golang is a very versatile programming language that can be used to develop different types of applications, including front-end applications. By using Golang to write the front-end, you can get rid of a series of problems caused by languages such as JavaScript. For example, problems such as poor type safety, low performance, and difficult to maintain code.
 How to implement instant messaging on the front end
Oct 09, 2023 pm 02:47 PM
How to implement instant messaging on the front end
Oct 09, 2023 pm 02:47 PM
Methods for implementing instant messaging include WebSocket, Long Polling, Server-Sent Events, WebRTC, etc. Detailed introduction: 1. WebSocket, which can establish a persistent connection between the client and the server to achieve real-time two-way communication. The front end can use the WebSocket API to create a WebSocket connection and achieve instant messaging by sending and receiving messages; 2. Long Polling, a technology that simulates real-time communication, etc.
