Web Front-end
JS Tutorial
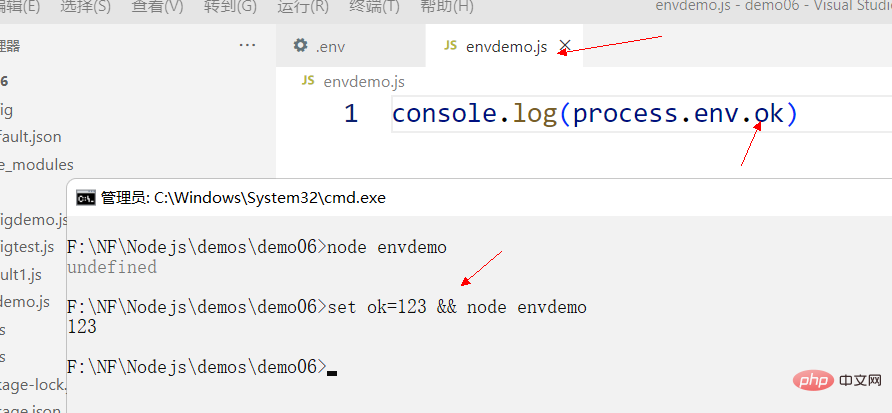
An article explaining modularity, file system and environment variables in Node in detail
Web Front-end
JS Tutorial
An article explaining modularity, file system and environment variables in Node in detail
An article explaining modularity, file system and environment variables in Node in detail

This article will give you an in-depth understanding of the modularization, file system and environment variables in Node. It has certain reference value. Friends in need can refer to it. I hope it will be helpful to everyone.

1. Node.js modularization
1.0. Variable scope
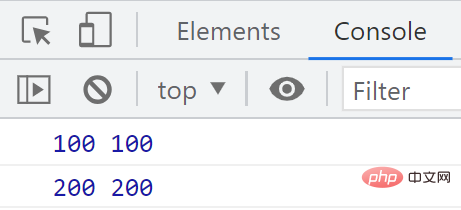
(1). Variables defined using var or without keywords on the browser side belong to the global scope, that is, they can be accessed using the window object. [Related tutorial recommendations: nodejs video tutorial, Programming teaching]
    <script>
      var a = 100;

      (function () {
        b = 200;
      })();

      console.log(window.a, a);
      console.log(window.b, b);
</script>Result:
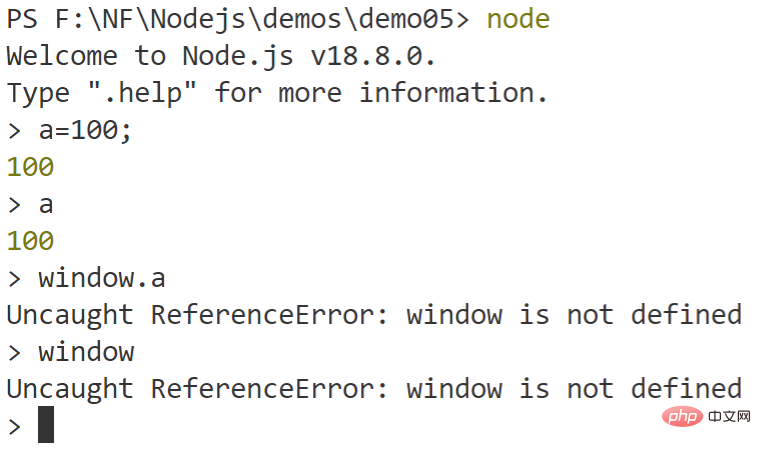
(2). There is no window object in Node.js
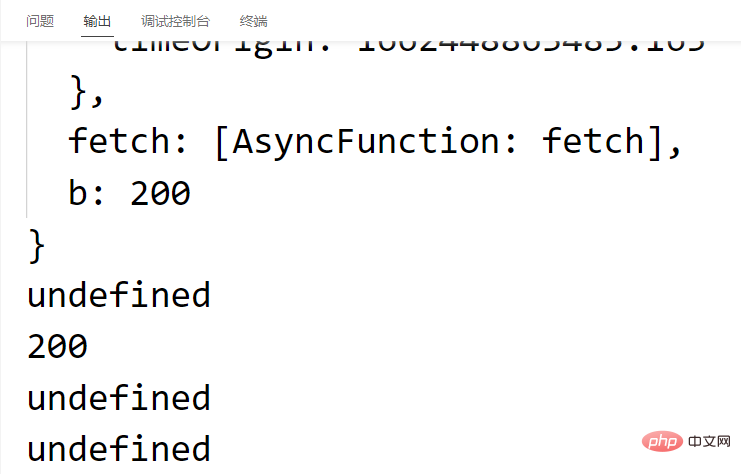
(3) In the interactive environment of Node.js, the defined variables belong to global. Global is similar to the window object on the browser side
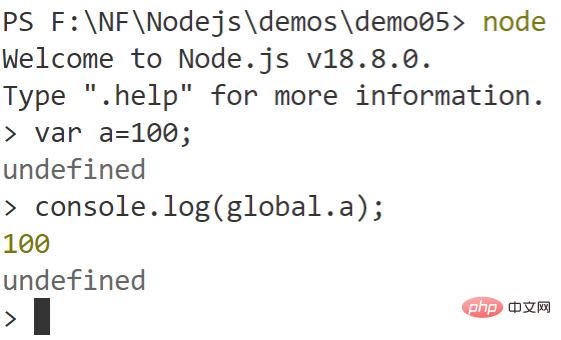
var a=100;
b=200;
let c=300;
const d=400;
console.log(global);
console.log(global.a);
console.log(global.b);
console.log(global.c);
console.log(global.d);
终端输出:
1.1、模块概要
早期的javascript版本没有块级作用域、没有类、没有包、也没有模块,这样会带来一些问题,如复用、依赖、冲突、代码组织混乱等,随着前端的膨胀,模块化显得非常迫切。

前端模块化规范如下:

常见的的JavaScript模块规范有:CommonJS、AMD、CMD、UMD、原生模块化。
虽然我们学习过ES6的模块化但是ES6与NodeJS使用不同的模块化规范,单独学习NodeJS的模块化非常有必要。
模块化是指解决一个复杂问题时,自顶向下逐层把系统划分成若干模块的过程。对于整个系统来说,模块是可组合、分解和更换 的单元。
JavaScript在早期的设计中就没有模块、包、类的概念,开发者需要模拟出类似的功能,来隔离、组织复杂的JavaScript代码,我们称为模块化。
模块就是一个实现特定功能的文件,有了模块我们就可以更方便的使用别人的代码,要用什么功能就加载什么模块。
模块化开发的四点好处:
(1)、 避免变量污染,命名冲突
(2)、提高代码复用率
(3)、提高了可维护性
(4)、方便依赖关系管理
nodejs中根据模块的来源不同,将模块分为了3大类,分别是:
- 内置模块(内置模块是由Node.js官方提供的,例如fs、path、http等)
- 自定义模块 (用户创建的每个 .js文件,都是自定义模块)
- 第三方模块 (由第三方开发出来的模块,并非官方提供的内置模块,也不是用户创建的自定义模块,使用前需要先下载)
模块作用域。
和函数作用域类似,在自定义模块中定义的变量、方法等成员,只能在当前模块内被访问,这种模块级别的访问限制,叫做模块作用域。
模块作用域的好处:防止了全局变量污染的问题
1.2、CommonJS
CommonJS就是一个JavaScript模块化的规范,该规范最初是用在服务器端NodeJS中,前端的webpack也是对CommonJS原生支持的。
根据这个规范
(1)、每一个文件就是一个模块,其内部定义的变量是属于这个模块的,不会对外暴露,也就是说不会污染全局变量。
(2)、导入自定义的模块时路径需要以./或../开始,同一路径下也不能省略。
(3)、如果反复多次require模块,只加载一次。
(4)、require引入模块时,后缀名.js可以省略
(5)、每个模块文件都是一个独立的函数级作用域,在其它模块中不能直接访问
m1.js:
console.log("这是模块m1");
let a=100;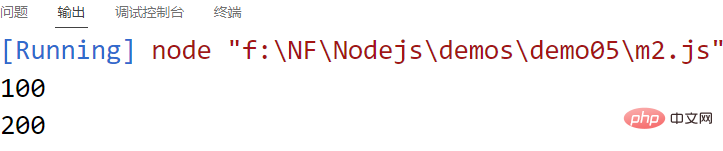
b=200;m2.js
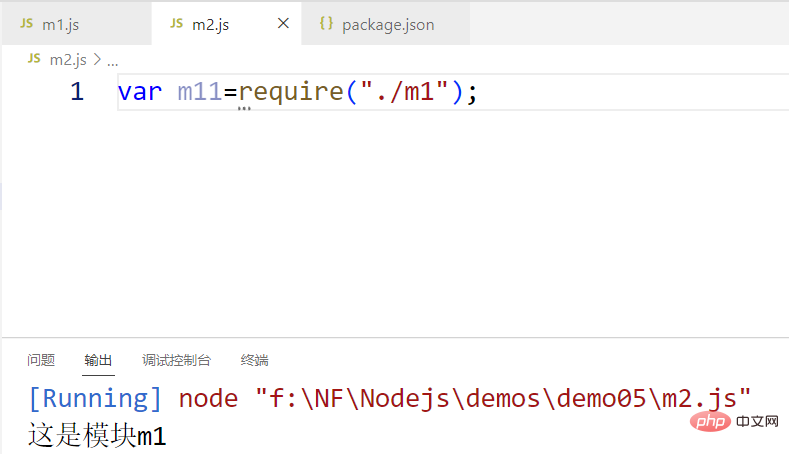
var m11=require("./m1");
console.log(a);
console.log(b);结果:
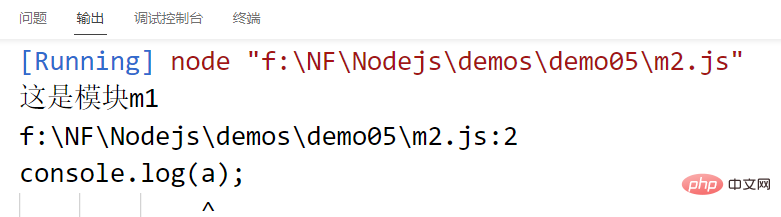
从上面的示例可以看出a在模块2中是访问不到的,模块其实就是一个封闭的函数:
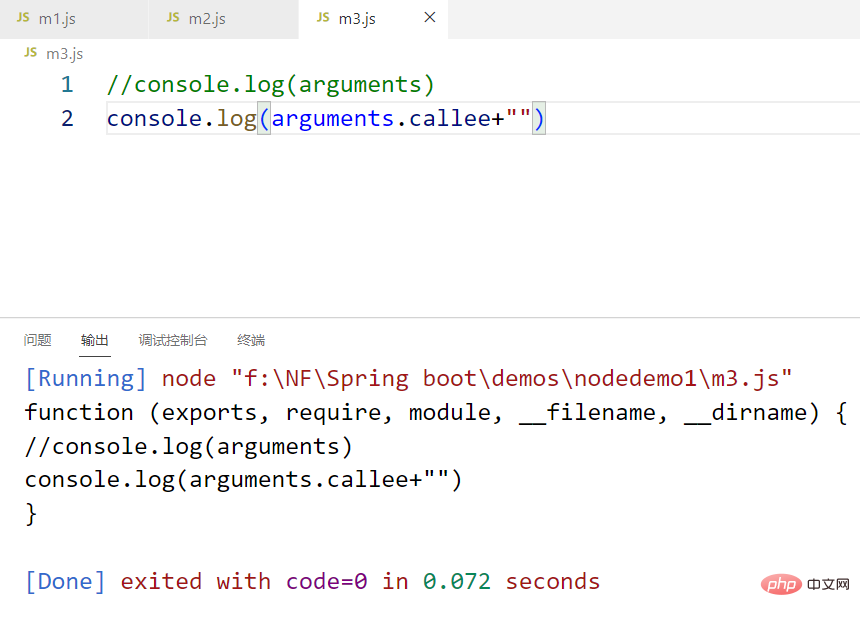
m1.js的代码如下:
console.log("这是模块m1");
let a=100;
b=200;
//输出当前函数
console.log(arguments.callee+"");实际输出结果:
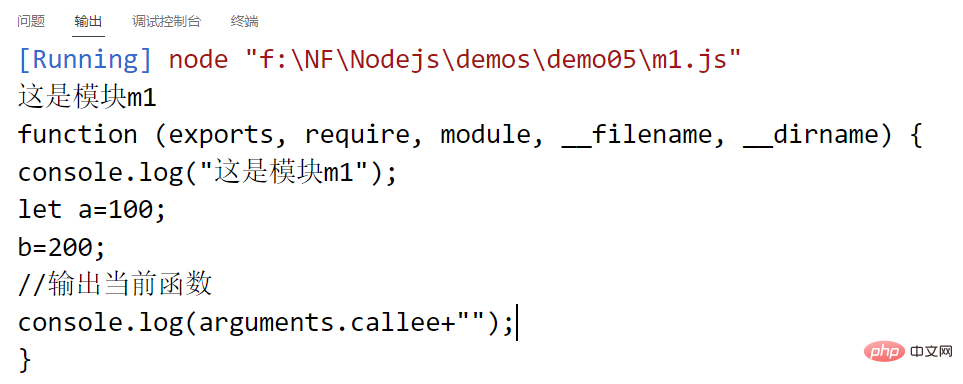
function (exports, require, module, __filename, __dirname) {
console.log("这是模块m1");
let a=100;
b=200;
//输出当前函数
console.log(arguments.callee+"");
}(6)、每个模块中都包含如下5个对象:
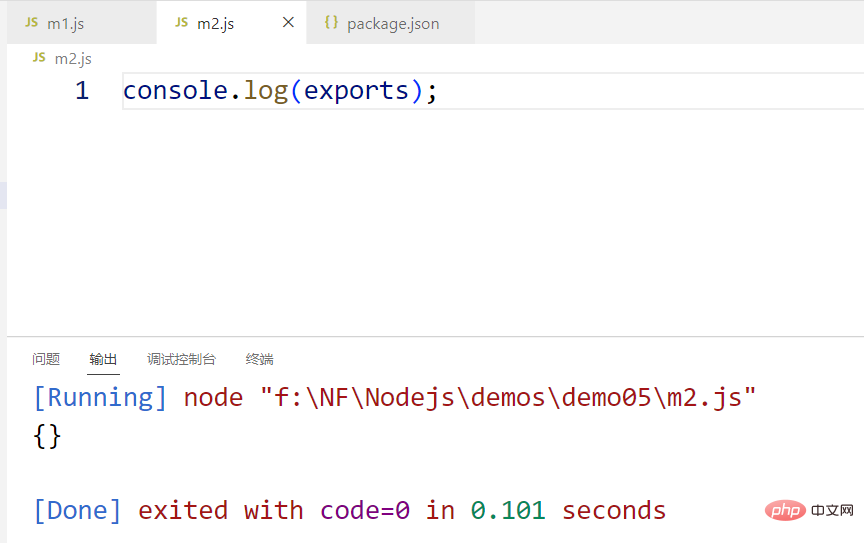
exports:导出对象,默认为{}
require:导入函数,使用该函数可以实现模块的依赖
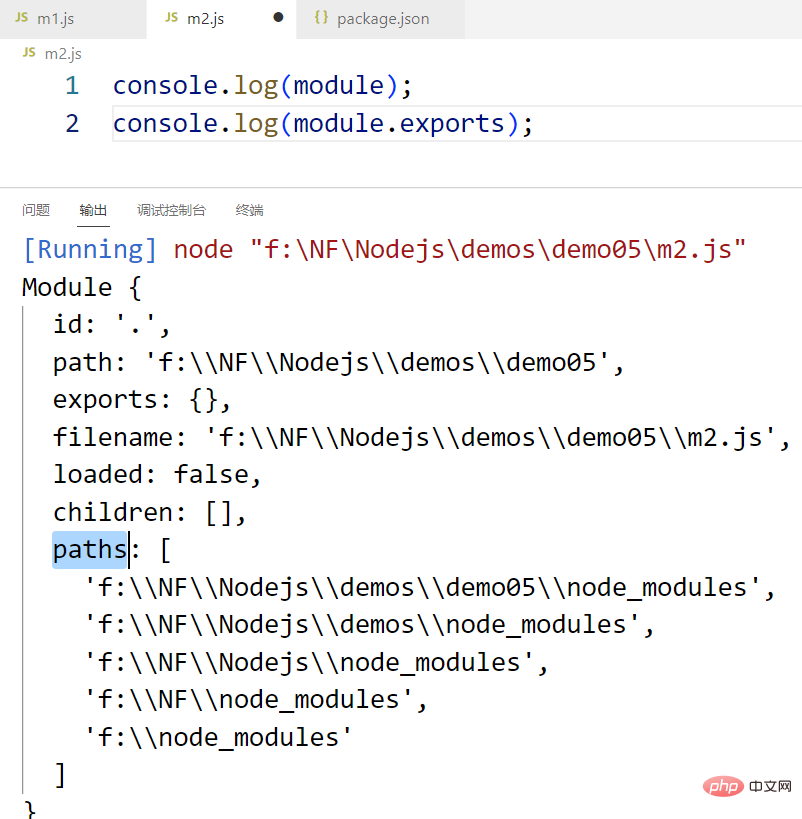
module:模块信息,用于记录当前模块的所有信息
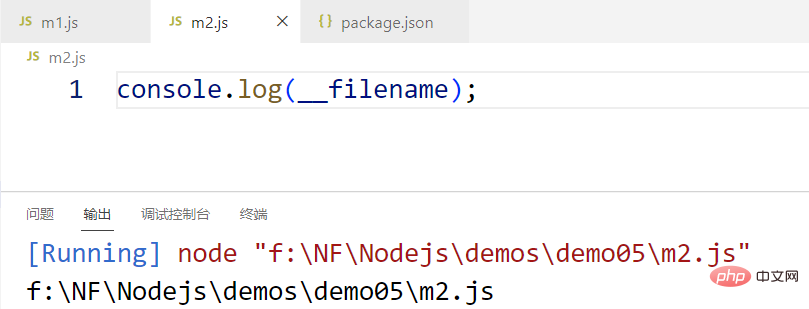
__filename:当前模块的文件全路径,含文件名
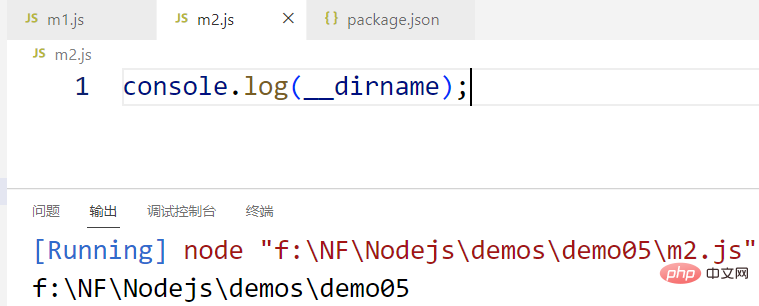
__dirname:当前模块的文件路径不含文件名
(7)、使用exports或module.exports对象可以将当前模块中需要导出的内容暴露出去。
m1.js
let a=100;
let b=()=>{
return 200;
};
exports.a=a;
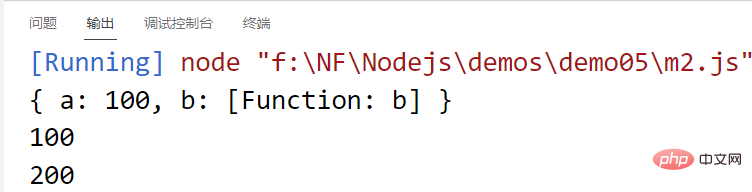
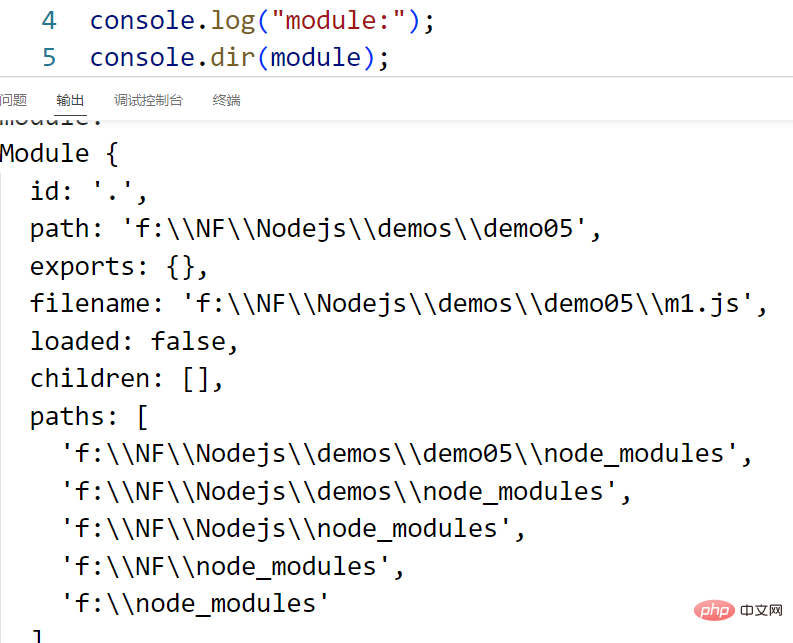
exports.b=b;m2.js
const m1=require("./m1");
console.log(m1);
console.log(m1.a);
console.log(m1.b());结果:
(8)、导入模块内容可以结合结构语法
m1.js
exports.a=100;
exports.b=function(){
    return 200;
};m2.js
const {a,b:fun}=require("./m1");
console.log(a);
console.log(fun());结果:
1.3、NodeJS中使用CommonJS模块管理
CommonJS的核心思想就是通过 require 方法来同步加载所要依赖的其他模块,然后通过 exports 或者 module.exports 来导出需要暴露的接口。
CommonJS API编写应用程序,然后这些应用可以运行在不同的JavaScript解释器和不同的主机环境中。
2009年,美国程序员Ryan Dahl创造了node.js项目,将javascript语言用于服务器端编程。这标志"Javascript模块化编程"正式诞生。因为老实说,在浏览器环境下,以前没有模块也不是特别大的问题,毕竟网页程序的复杂性有限;但是在服务器端,一定要有模块,与操作系统和其他应用程序互动,否则根本没法编程。NodeJS是CommonJS规范的实现,webpack 也是以CommonJS的形式来书写。
CommonJS定义的模块分为:{模块引用(require)} {模块定义(exports)} {模块标识(module)}
//require()用来引入外部模块;
//exports对象用于导出当前模块的方法或变量,唯一的导出口;
//module对象就代表模块本身。Nodejs的模块是基于CommonJS规范实现的,通过转换也可以运行在浏览器端。

特点:
1.3.1、模块定义
根据commonJS规范,一个单独的文件是一个模块,每一个模块都是一个单独的作用域,也就是说,在该模块内部定义的变量,无法被其他模块读取,除非为global对象的属性。
模块拥有像函数一样的函数级作用域:
每个模块内部,module变量代表当前模块
module变量是一个对象,它的exports属性(即module.exports)是对外的接口
加载某个模块,其实是加载该模块的module.exports属性。require()方法用于加载模块。
模块只有一个出口,module.exports对象,我们需要把模块希望输出的内容放入该对象。
mathLib.js模块定义
var message="Hello CommonJS!";

module.exports.message=message;
module.exports.add=(m,n)=>console.log(m+n);
在 Node.js 中,创建一个模块非常简单,如下我们创建一个 'main.js' 文件,代码如下:
var hello = require('./hello');
hello.world();
以上实例中,代码 require('./hello') 引入了当前目录下的hello.js文件(./ 为当前目录,node.js默认后缀为js)。
Node.js 提供了exports 和 require 两个对象,其中 exports 是模块公开的接口,require 用于从外部获取一个模块的接口,即所获取模块的 exports 对象。
接下来我们就来创建hello.js文件,代码如下:
exports.world = function() {
  console.log('Hello World');
}在以上示例中,hello.js 通过 exports 对象把 world 作为模块的访 问接口,在 main.js 中通过 require('./hello') 加载这个模块,然后就可以直接访 问main.js 中 exports 对象的成员函数了。
有时候我们只是想把一个对象封装到模块中,格式如下:
module.exports = function() { // ...}例如:
//hello.js
function Hello() {
    varname;
    this.setName = function(thyName) {
        name = thyName;
    };
    this.sayHello = function() {
        console.log('Hello ' + name);
    };
};
module.exports = Hello;这样就可以直接获得这个对象了:
//main.js
var Hello = require('./hello');
hello = new Hello();
hello.setName('BYVoid');
hello.sayHello();
模块接口的唯一变化是使用 module.exports = Hello 代替了exports.world = function(){}。 在外部引用该模块时,其接口对象就是要输出的 Hello 对象本身,而不是原先的 exports。
1.3.2、模块依赖
加载模块用require方法,该方法读取一个文件并且执行,返回文件内部的module.exports对象。
在用require加载自定义模块期间,可以省略.js这个后缀名。
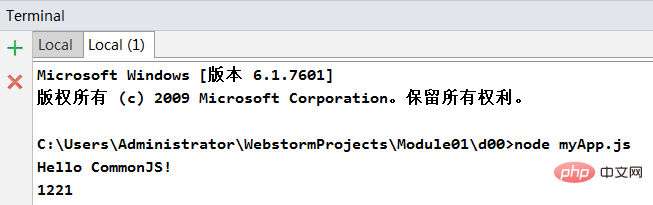
myApp.js 模块依赖
var math=require('./mathLib');
console.log(math.message);
math.add(333,888);
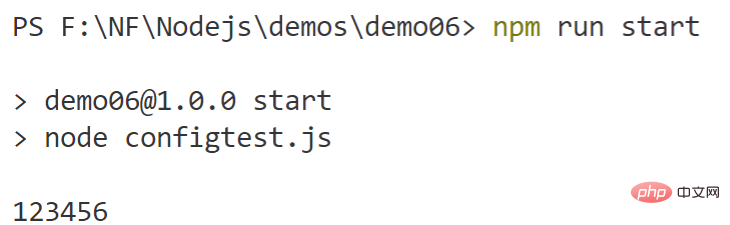
3、测试运行
安装好node.JS
打开控制台,可以使用cmd命令,也可以直接在开发工具中访问

运行
1.3.3、内置模块加载
也许你已经注意到,我们已经在代码中使用了模块了。像这样:
var http = require("http");

...

http.createServer(...);Node.js中自带了一个叫做"http"的模块,我们在我们的代码中请求它并把返回值赋给一个本地变量。
这把我们的本地变量变成了一个拥有所有 http 模块所提供的公共方法的对象。
Node.js 的 require方法中的文件查找策略如下:
由于Node.js中存在4类模块(原生模块和3种文件模块),尽管require方法极其简单,但是内部的加载却是十分复杂的,其加载优先级也各自不同。如下图所示:
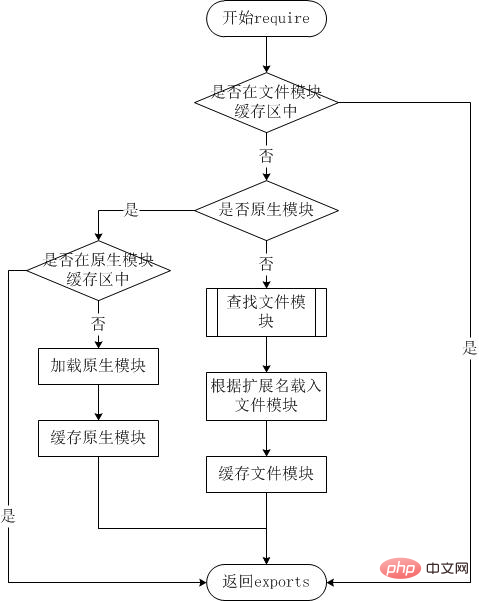
从文件模块缓存中加载
尽管原生模块与文件模块的优先级不同,但是都不会优先于从文件模块的缓存中加载已经存在的模块。
从原生模块加载
原生模块的优先级仅次于文件模块缓存的优先级。require方法在解析文件名之后,优先检查模块是否在原生模块列表中。以http模块为例,尽管在目录下存在一个http/http.js/http.node/http.json文件,require("http")都不会从这些文件中加载,而是从原生模块中加载。
原生模块也有一个缓存区,同样也是优先从缓存区加载。如果缓存区没有被加载过,则调用原生模块的加载方式进行加载和执行。
从文件加载
当文件模块缓存中不存在,而且不是原生模块的时候,Node.js会解析require方法传入的参数,并从文件系统中加载实际的文件,加载过程中的包装和编译细节在前一节中已经介绍过,这里我们将详细描述查找文件模块的过程,其中,也有一些细节值得知晓。
require方法接受以下几种参数的传递:
- http、fs、path等,原生模块。
- ./mod或../mod,相对路径的文件模块。
- /pathtomodule/mod,绝对路径的文件模块。
- mod,非原生模块的文件模块。
node_modules文件夹用来存放所有已安装到项目中的包。require()导入第三方包时,就是从这个目录中查找并加载包。
package-lock.json配置文件用来记录node_modules目录下的每一个包的下载信息,例如包的名字、版本号、下载地址等。
注意:不要手动修改node_modules或package-lock.json文件中的任何代码,npm包管理工具会自动维护它们。
1.3.4、module对象
在每个.js自定义模块中都有一个module对象,它里面存储了和当前模块有关的信息
每个模块内部,module变量代表当前模块
module变量是一个对象,它的exports属性(即module.exports)是对外的接口
加载某个模块,其实是加载该模块的module.exports属性。require()方法用于加载模块。
二、Node.js 文件系统
Node.js 提供一组类似 UNIX(POSIX)标准的文件操作API。 Node 导入文件系统模块(fs)语法如下所示:
var fs = require("fs")2.1、异步和同步
Node.js 文件系统(fs 模块)模块中的方法均有异步和同步版本,例如读取文件内容的函数有异步的 fs.readFile() 和同步的 fs.readFileSync()。
异步的方法函数最后一个参数为回调函数,回调函数的第一个参数包含了错误信息(error)。
建议大家是用异步方法,比起同步,异步方法性能更高,速度更快,而且没有阻塞。
实例
创建 input.txt 文件,内容如下:
foo
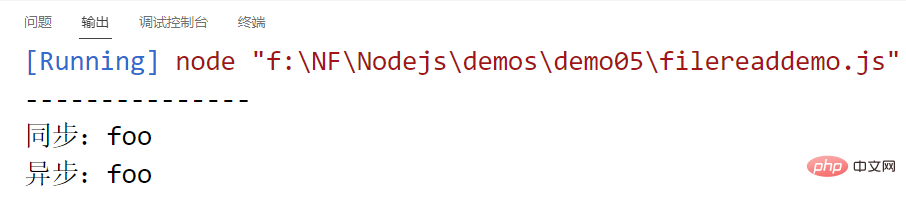
创建 filereaddemo.js 文件, 代码如下:
const fs=require("fs");  //依赖内置模块fs,用于文件管理

//异步读取文件students.txt,设置读取成功时的回调函数,err表示错误信息,data表示数据
fs.readFile("students.txt",function(err,data){
    if(err) throw err;
    console.log("异步:"+data+"");
});

console.log("---------------");

//同步读取
let data=fs.readFileSync("students.txt");
console.log("同步:"+data+"");以上代码执行结果如下:
接下来,让我们来具体了解下 Node.js 文件系统的方法。
2.2、获取文件信息
以下为通过异步模式获取文件信息的语法格式:
fs.stat(path, callback)
参数使用说明如下:
path - 文件路径。
callback - 回调函数,带有两个参数如:(err, stats), stats 是 fs.Stats 对象。
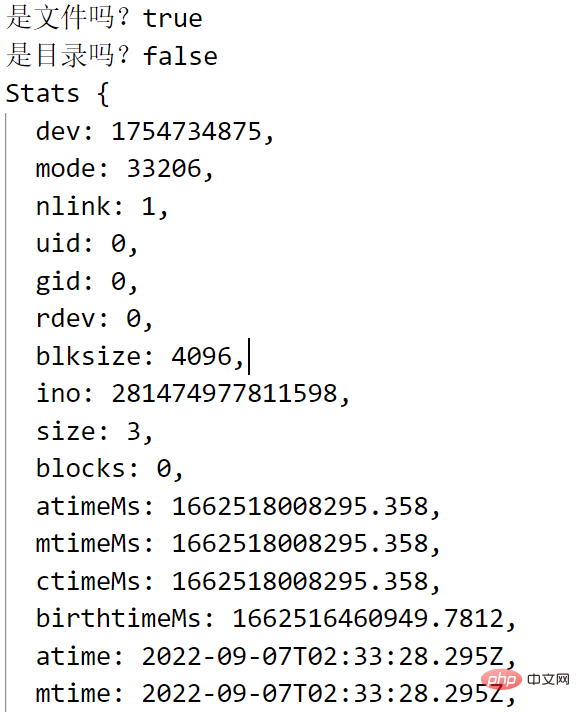
fs.stat(path)执行后,会将stats类的实例返回给其回调函数。可以通过stats类中的提供方法判断文件的相关属性。例如判断是否为文件:
const fs=require("fs");

fs.stat("students.txt",(err,stats)=>{
    console.log("是文件吗?"+stats.isFile());
    console.log("是目录吗?"+stats.isDirectory());
    console.log(stats);
});Result:
The methods in the stats class are:
| Method | Description |
|---|---|
| stats.isFile() | Returns true if it is a file, otherwise returns false. |
| stats.isDirectory() | Returns true if it is a directory, otherwise returns false. |
| stats.isBlockDevice() | Returns true if it is a block device, otherwise returns false. |
| stats.isCharacterDevice() | Returns true if it is a character device, otherwise returns false. |
| stats.isSymbolicLink() | Returns true if it is a soft link, otherwise returns false. |
| stats.isFIFO() | If it is FIFO, return true, otherwise return false. FIFO is a special type of command pipe in UNIX. |
| stats.isSocket() | If it is a Socket, return true, otherwise return false. |
接下来我们创建 file.js 文件,代码如下所示:
var fs = require("fs");

console.log("准备打开文件!");
fs.stat('input.txt', function (err, stats) {
   if (err) {
       return console.error(err);
   }
   console.log(stats);
   console.log("读取文件信息成功!");

   // 检测文件类型
   console.log("是否为文件(isFile) ? " + stats.isFile());
   console.log("是否为目录(isDirectory) ? " + stats.isDirectory());
});以上代码执行结果如下:
$ node file.js
准备打开文件!
{ dev: 16777220,
  mode: 33188,
  nlink: 1,
  uid: 501,
  gid: 20,
  rdev: 0,
  blksize: 4096,
  ino: 40333161,
  size: 61,
  blocks: 8,
  atime: Mon Sep 07 2015 17:43:55 GMT+0800 (CST),
  mtime: Mon Sep 07 2015 17:22:35 GMT+0800 (CST),
  ctime: Mon Sep 07 2015 17:22:35 GMT+0800 (CST) }
读取文件信息成功!
是否为文件(isFile) ? true
是否为目录(isDirectory) ? false2.3、写入文件
以下为异步模式下写入文件的语法格式:
fs.writeFile(filename, data[, options], callback)
如果文件存在,该方法写入的内容会覆盖旧的文件内容。
参数使用说明如下:
path - 文件路径。
data - 要写入文件的数据,可以是 String(字符串) 或 Buffer(流) 对象。
options - 该参数是一个对象,包含 {encoding, mode, flag}。默认编码为 utf8, 模式为 0666 , flag 为 'w'
callback - 回调函数,回调函数只包含错误信息参数(err),在写入失败时返回。
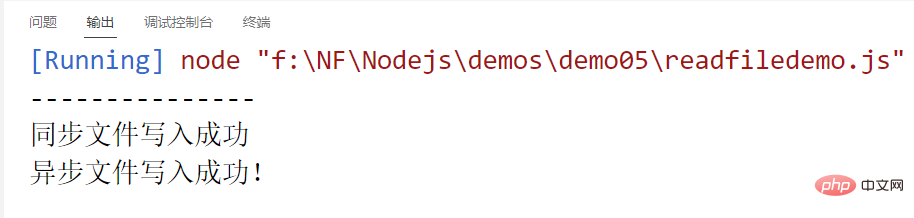
接下来我们创建 file.js 文件,代码如下所示:
const fs=require("fs");

fs.writeFile("output1.txt","异步hello","utf-8",function(err){
    if(!err){
        console.log("异步文件写入成功!");
    }
    else{
        throw err;
    }
});
console.log("---------------");
fs.writeFileSync("output2.txt","同步hello","utf-8");
console.log("同步文件写入成功");以上代码执行结果如下:
2.4、删除文件
以下为删除文件的语法格式:
fs.unlink(path, callback)
参数使用说明如下:
path - 文件路径。
callback - 回调函数,没有参数。
接下来我们创建 file.js 文件,代码如下所示:
const fs=require("fs");

fs.unlink("output1.txt",function(err){
    if(err){
        throw err;
    }
    else{
        console.log("异步删除文件成功!");
    }
});
console.log("--------------------");
fs.unlinkSync("output2.txt");
console.log("同步删除文件成功!");以上代码执行结果如下:

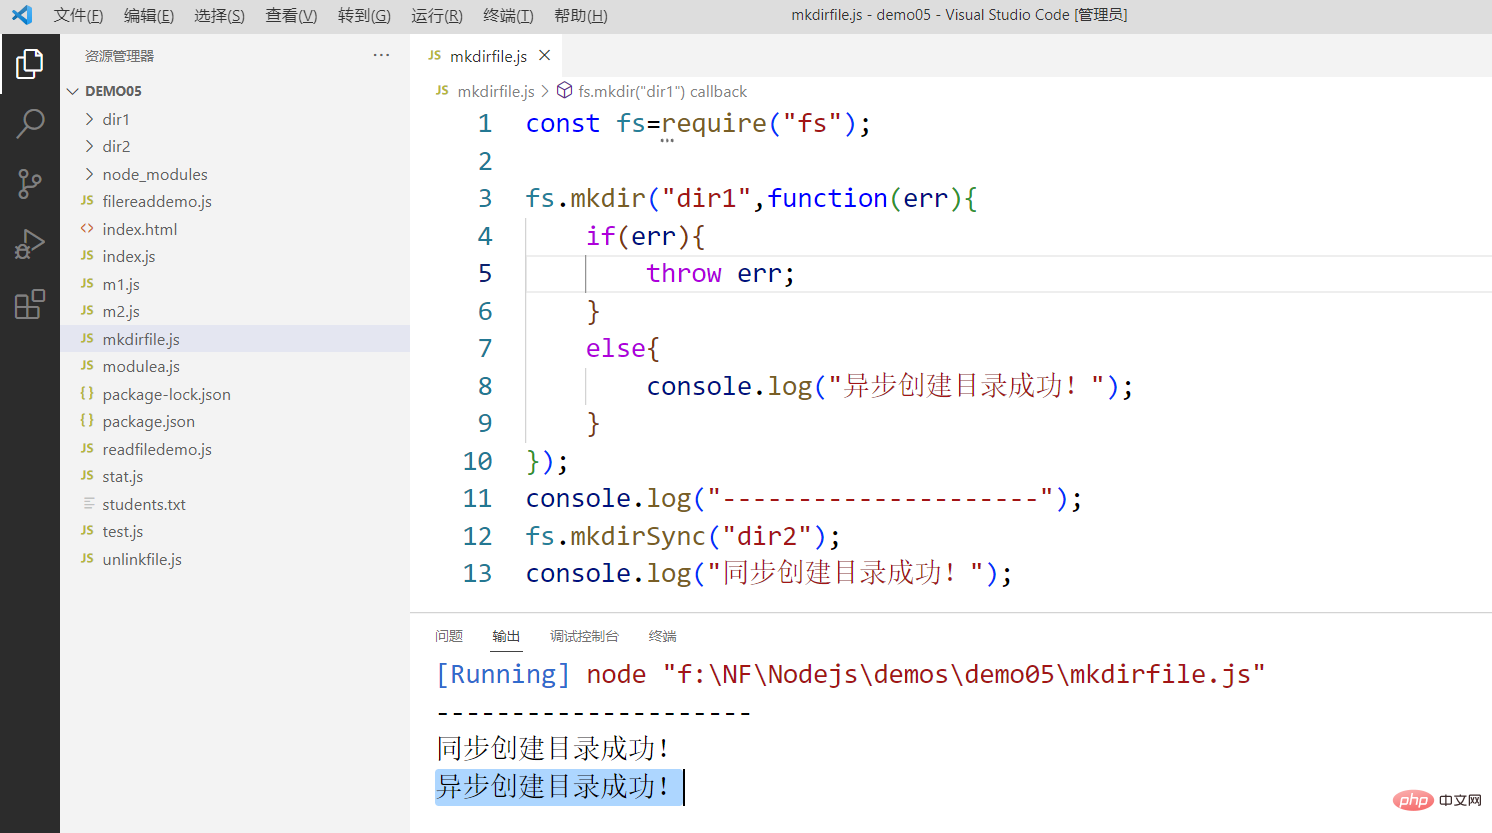
2.5、创建目录
以下为创建目录的语法格式:
fs.mkdir(path[, mode], callback)
参数使用说明如下:
path - 文件路径。
mode - 设置目录权限,默认为 0777。
callback - 回调函数,没有参数。
接下来我们创建mkdirfile.js 文件,代码如下所示:
const fs=require("fs");

fs.mkdir("dir1",function(err){
    if(err){
        throw err;
    }
    else{
        console.log("异步创建目录成功!");
    }
});
console.log("---------------------");
fs.mkdirSync("dir2");
console.log("同步创建目录成功!");以上代码执行结果如下:
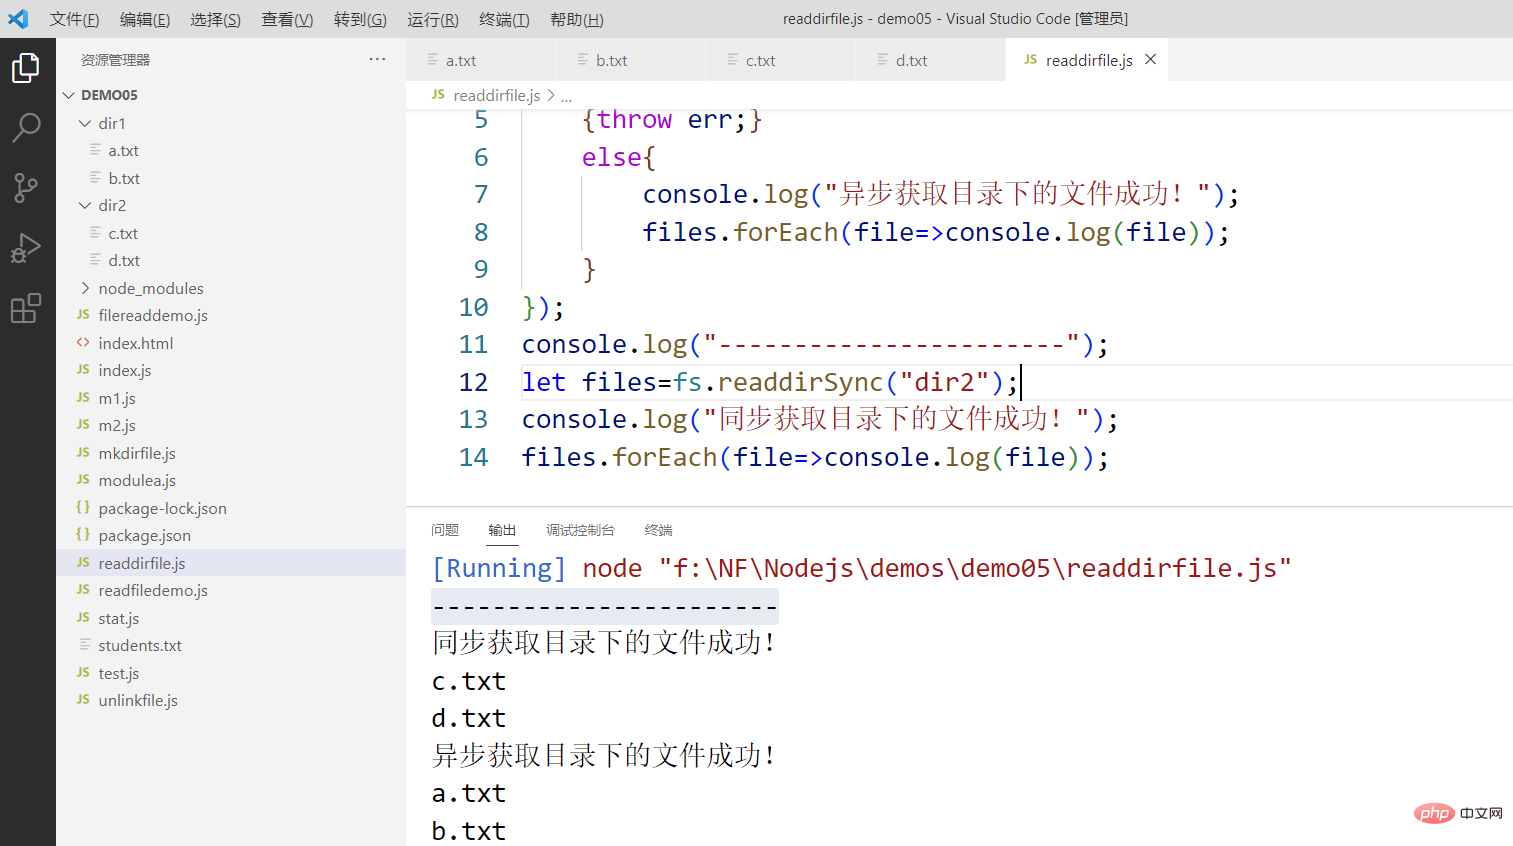
2.6、读取目录
以下为读取目录的语法格式:
fs.readdir(path, callback)
参数使用说明如下:
path - 文件路径。
callback - 回调函数,回调函数带有两个参数err, files,err 为错误信息,files 为 目录下的文件数组列表。
接下来我们创建 file.js 文件,代码如下所示:
const fs=require("fs");

fs.readdir("dir1",(err,files)=>{
    if(err)
    {throw err;}
    else{
        console.log("异步获取目录下的文件成功!");
        files.forEach(file=>console.log(file));
    }
});
console.log("-----------------------");
let files=fs.readdirSync("dir2");
console.log("同步获取目录下的文件成功!");
files.forEach(file=>console.log(file));以上代码执行结果如下:
2.7、删除目录
以下为删除目录的语法格式:
fs.rmdir(path, callback)
参数使用说明如下:
path - 文件路径。
callback - 回调函数,没有参数。
接下来我们创建 file.js 文件,代码如下所示:
var fs = require("fs");

console.log("准备删除目录 /tmp/test");
fs.rmdir("/tmp/test",function(err){
   if (err) {
       return console.error(err);
   }
   console.log("读取 /tmp 目录");
   fs.readdir("/tmp/",function(err, files){
      if (err) {
          return console.error(err);
      }
      files.forEach( function (file){
          console.log( file );
      });
   });
});以上代码执行结果如下:
$ node file.js
准备删除目录 /tmp/test
input.out
output.out
test
test.txt
读取 /tmp 目录
……
2.8、文件模块方法参考手册
以下为 Node.js 文件模块相同的方法列表:
| Method | Description |
|---|---|
| Asynchronous rename(). The callback function has no parameters, but may throw an exception. | |
| Asynchronous ftruncate(). The callback function has no parameters, but may throw an exception. | |
| Synchronized ftruncate() | |
| Asynchronous truncate(). The callback function has no parameters, but may throw an exception. | |
| Synchronous truncate() | |
| Asynchronous chown(). The callback function has no parameters, but may throw an exception. | |
| Sync chown() | |
| Asynchronous fchown(). The callback function has no parameters, but may throw an exception. | |
| Sync fchown() | |
| Asynchronous lchown(). The callback function has no parameters, but may throw an exception. | |
| Sync lchown() | |
| Asynchronous chmod(). The callback function has no parameters, but may throw an exception. | |
| Sync chmod(). | |
| Asynchronous fchmod(). The callback function has no parameters, but may throw an exception. | |
| Sync fchmod(). | |
| Asynchronous lchmod(). The callback function has no parameters, but may throw an exception. Only available on Mac OS X. | |
| Sync lchmod(). | |
| Asynchronous stat(). The callback function has two parameters err, stats, and stats is the fs.Stats object. | |
| Asynchronous lstat(). The callback function has two parameters err, stats, and stats is the fs.Stats object. | |
| Asynchronous fstat(). The callback function has two parameters err, stats, and stats is the fs.Stats object. | |
| Synchronize stat(). Returns an instance of fs.Stats. | |
| Synchronize lstat(). Returns an instance of fs.Stats. | |
| Synchronize fstat(). Returns an instance of fs.Stats. | |
| Asynchronous link(). The callback function has no parameters, but may throw an exception. | |
| Sync link(). | |
| Asynchronous symlink(). The callback function has no parameters, but may throw an exception. The type parameter can be set to 'dir', 'file', or 'junction' (default is 'file'). | |
| Synchronize symlink(). | |
| Asynchronous readlink(). The callback function has two parameters err, linkString. | |
| Asynchronous realpath(). The callback function has two parameters: err, resolvedPath. | |
| Synchronize realpath(). Returns the absolute path. | |
| Asynchronous unlink(). The callback function has no parameters, but may throw an exception. | |
| Sync unlink(). | |
| Asynchronous rmdir(). The callback function has no parameters, but may throw an exception. | |
| Sync rmdir(). | ##fs.mkdir(path[, mode] , callback) |
| fs.mkdirSync(path[, mode]) | |
| fs.readdir(path, callback) | |
| fs.readdirSync(path) | |
| fs.close(fd, callback) | |
| fs.closeSync(fd) | |
| fs.open(path, flags[, mode], callback) | |
| fs.openSync(path, flags[, mode]) | |
| fs.utimes(path, atime, mtime, callback) | |
| ##fs.utimesSync(path, atime, mtime) | |
| fs.futimes(fd, atime, mtime, callback) | |
| fs.futimesSync(fd, atime , mtime) | |
| fs.fsync(fd, callback) | |
| fs.fsyncSync(fd) | Sync fsync. |
| Write the buffer contents to the file specified by the file descriptor. | |
| Write the file content through the file descriptor fd. | |
| Synchronized version of fs.write(). | |
| Synchronized version of fs.write(). | |
| Read the file content through the file descriptor fd. | |
| Synchronized version of fs.read. | |
| Read the file content asynchronously. | |
| Write file content asynchronously. | |
| Synchronized version of fs.writeFile. | |
| Append file content asynchronously. | |
| The synchronization version of fs.appendFile. | |
| View file modifications. | |
| Stop viewing modifications to filename. | |
| View the modification of filename, filename can be a file or directory. Returns an fs.FSWatcher object. | |
| Detect whether the given path exists. | |
| Synchronized version of fs.exists. | |
| Test the user permissions of the specified path. | |
| Synchronized version of fs.access. | |
| Returns the ReadStream object. | |
| Return the WriteStream object. | |
| Asynchronous symlink(). The callback function has no parameters, but may throw an exception. |