

Apache+MySQL+PHP environment installation (example summary)

This article brings you relevant knowledge about PHP, which mainly introduces the relevant content about the installation of Apache, MySQL, and PHP environments. Let's take a look at it together. I hope it will be helpful to everyone.

Preface
Since I am learning PHP development recently, it is inevitable to involve environments such as AMP and NMP. Of course, I initially used integrated environments such as PHPWAMP and PHPStudy. However, since I have installed MySQL server before, when I open my own MySQL again, it seems that due to these integrated environments, the MySQL I installed cannot be opened (because my programming skills are weak, so I am busy I guess it was because the service or something was changed to an integrated environment, so I couldn't connect). In short, I couldn't solve this problem in the end.
But I believe there must be a way to solve it, although in the end I decided to install this AMP environment by myself, and by the way, I could learn Apache and PHP by myself instead of simply becoming someone else's user.
Preparation work
So I need to say here that the order of my installation is APM (Apache->PHP->MySQL). As far as I understand, Apache must be Install it first, because later debugging, environment and other things require the use of Apache.
Apache installation
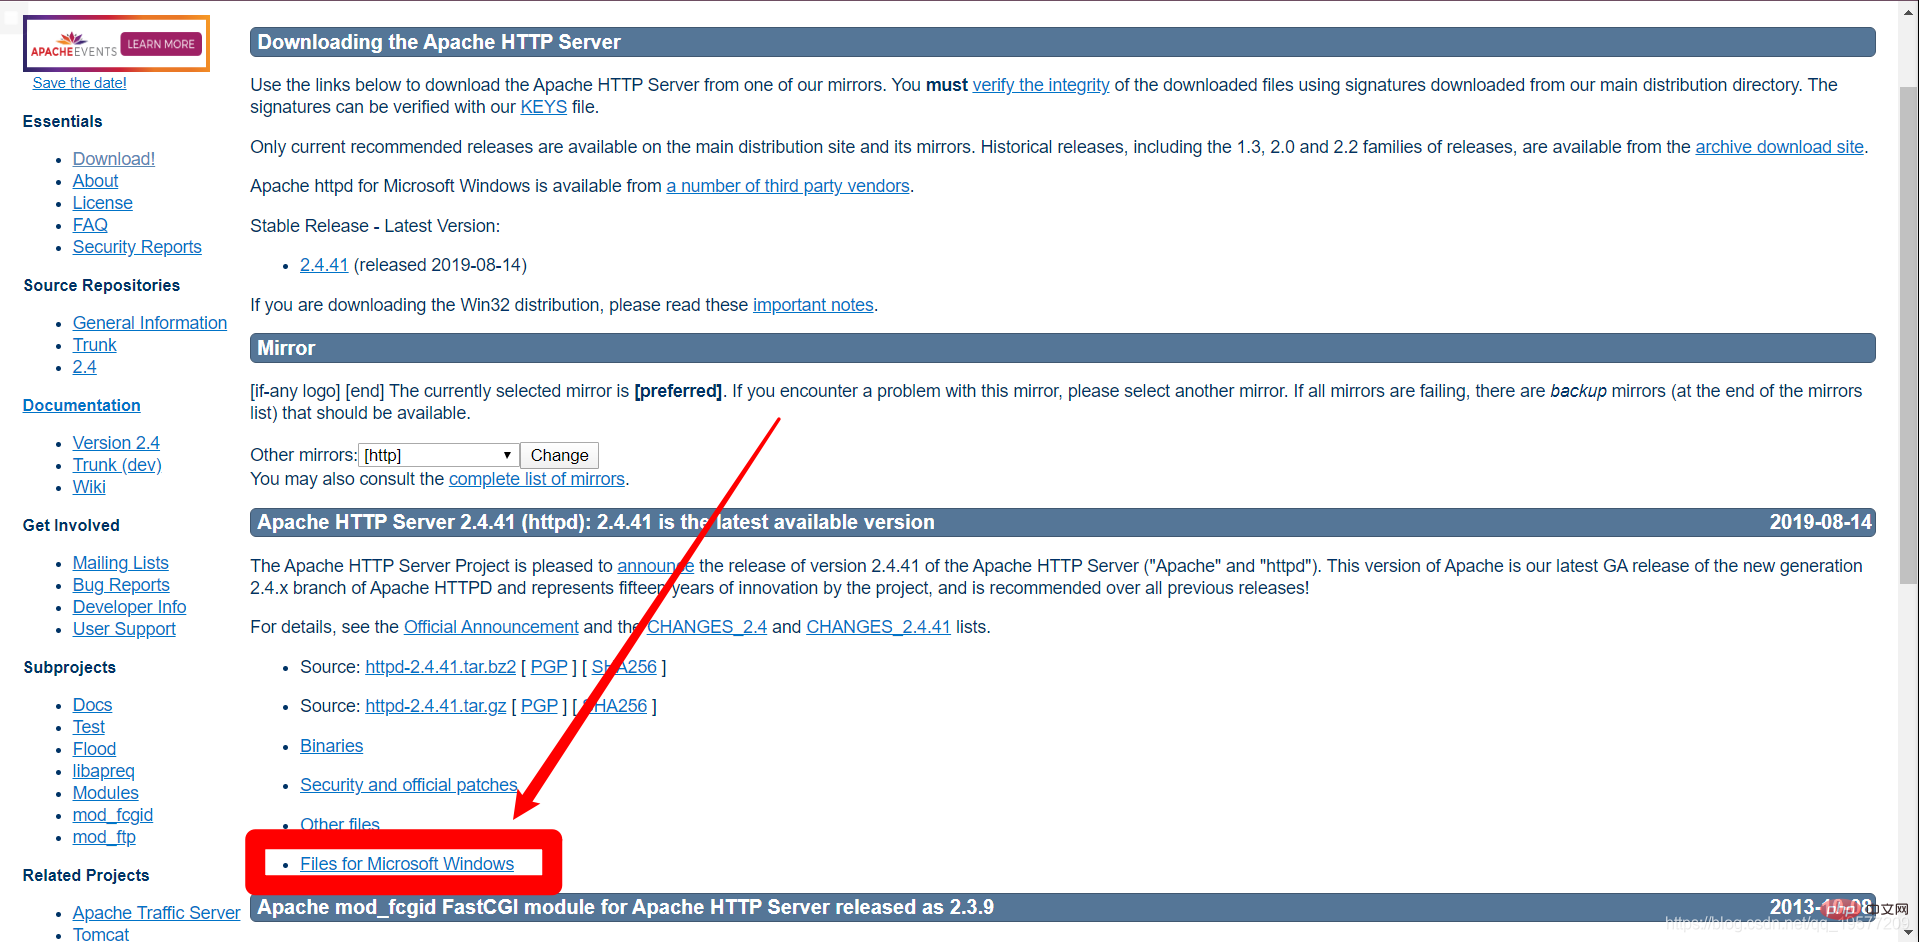
- Download link:Click to jump
This is the official website of Apache. If we click on the link below, the interface version may be different. After all, the times It will change, sir. Generally speaking, I choose the latest version.
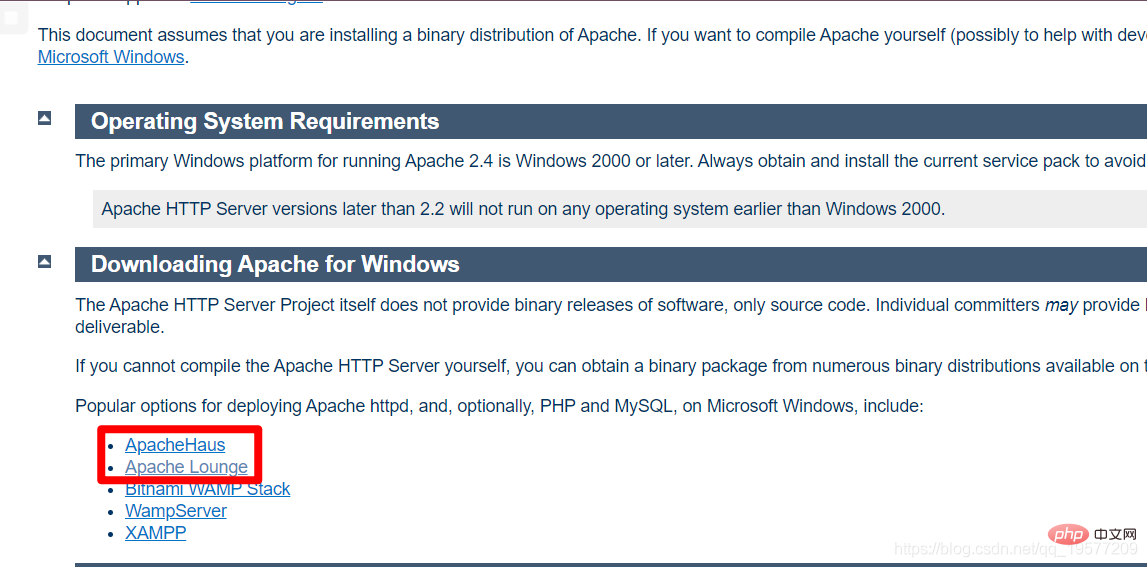
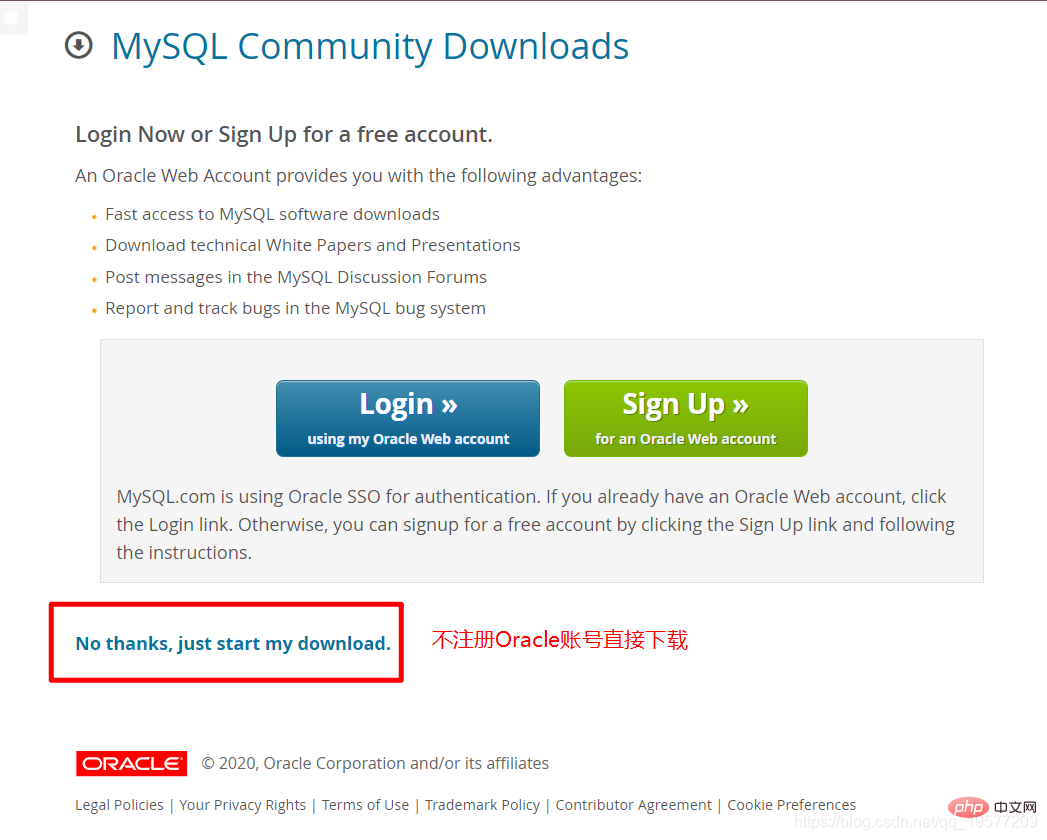
Then jump to the following interface. The one in the red box is the compiled environment. The following three are integrated environments. Because you need to develop and build the environment locally, please select the one in the red box. Link.
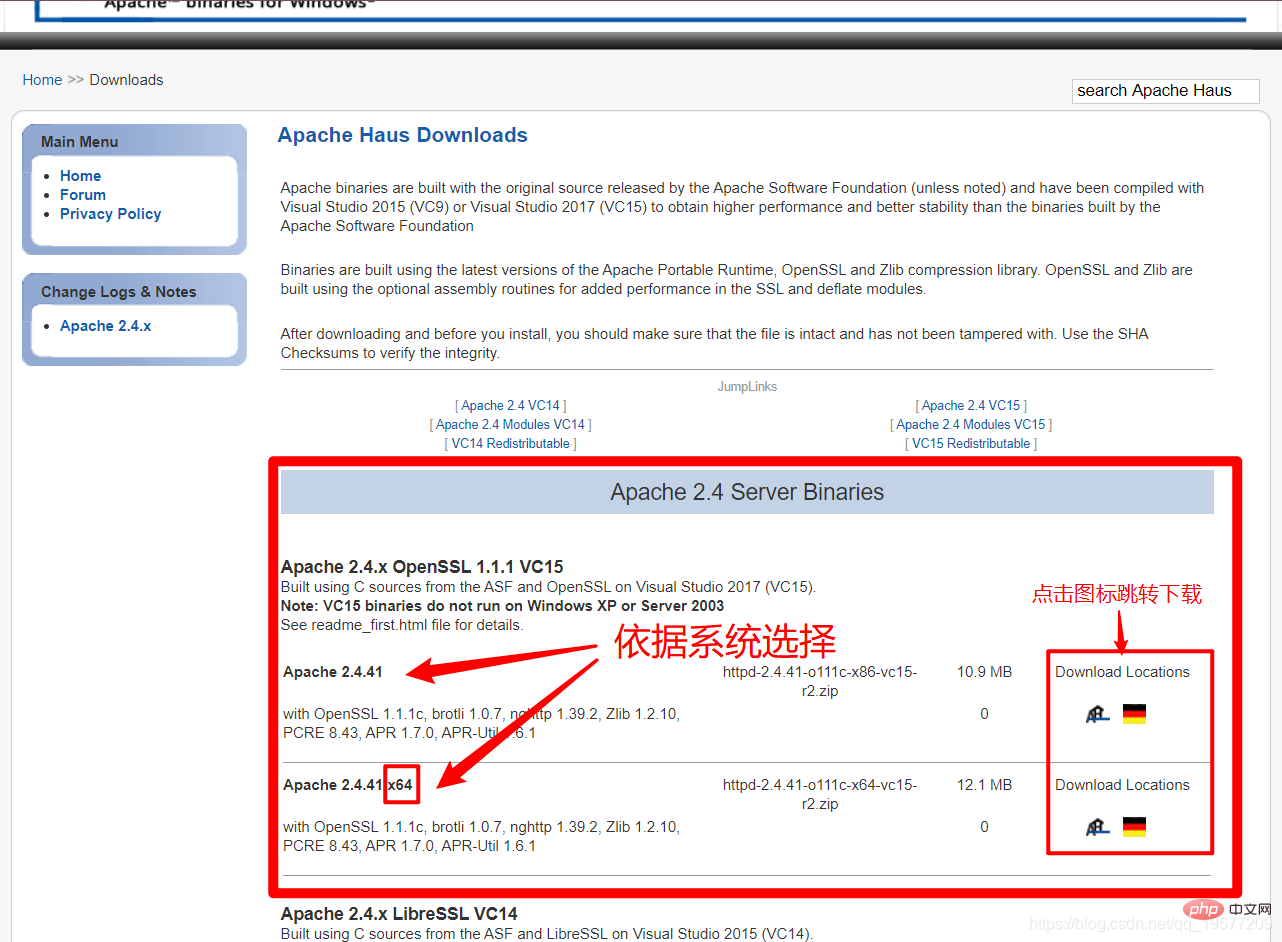
Here I chose Apache Haus, but you can also choose Apache Lounge. Of course, I believe everyone will download this interface, but I still post it.
After downloading, unzip it to the folder you want to store it. Here I put it on the C drive. The path is C://Apache/
Next, open the conf folder under the directory and open the httpd.conf configuration file. - The default path of Apache is: "c:\Apache24" (the version number may be different). If it is different from your installation path, you need to modify the path parameter configuration:
Define SRVROOT "Your Apache installation directory"
So here I should writeDefine SRVROOT "C:/ Apache"
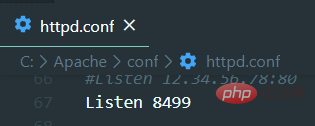
- # Of course, there is also the most important port, which defaults to 80, but there may be situations where the port is occupied. So before starting, please enter the following command in cmd to check:
netstat -ano
- If the port is occupied, change the port, in httpd Just change Listen in .conf. Here I use 8499 (my QQ number prefix)
- After doing all this, go to the bin folder under the Apache installation directory in cmd, and enter
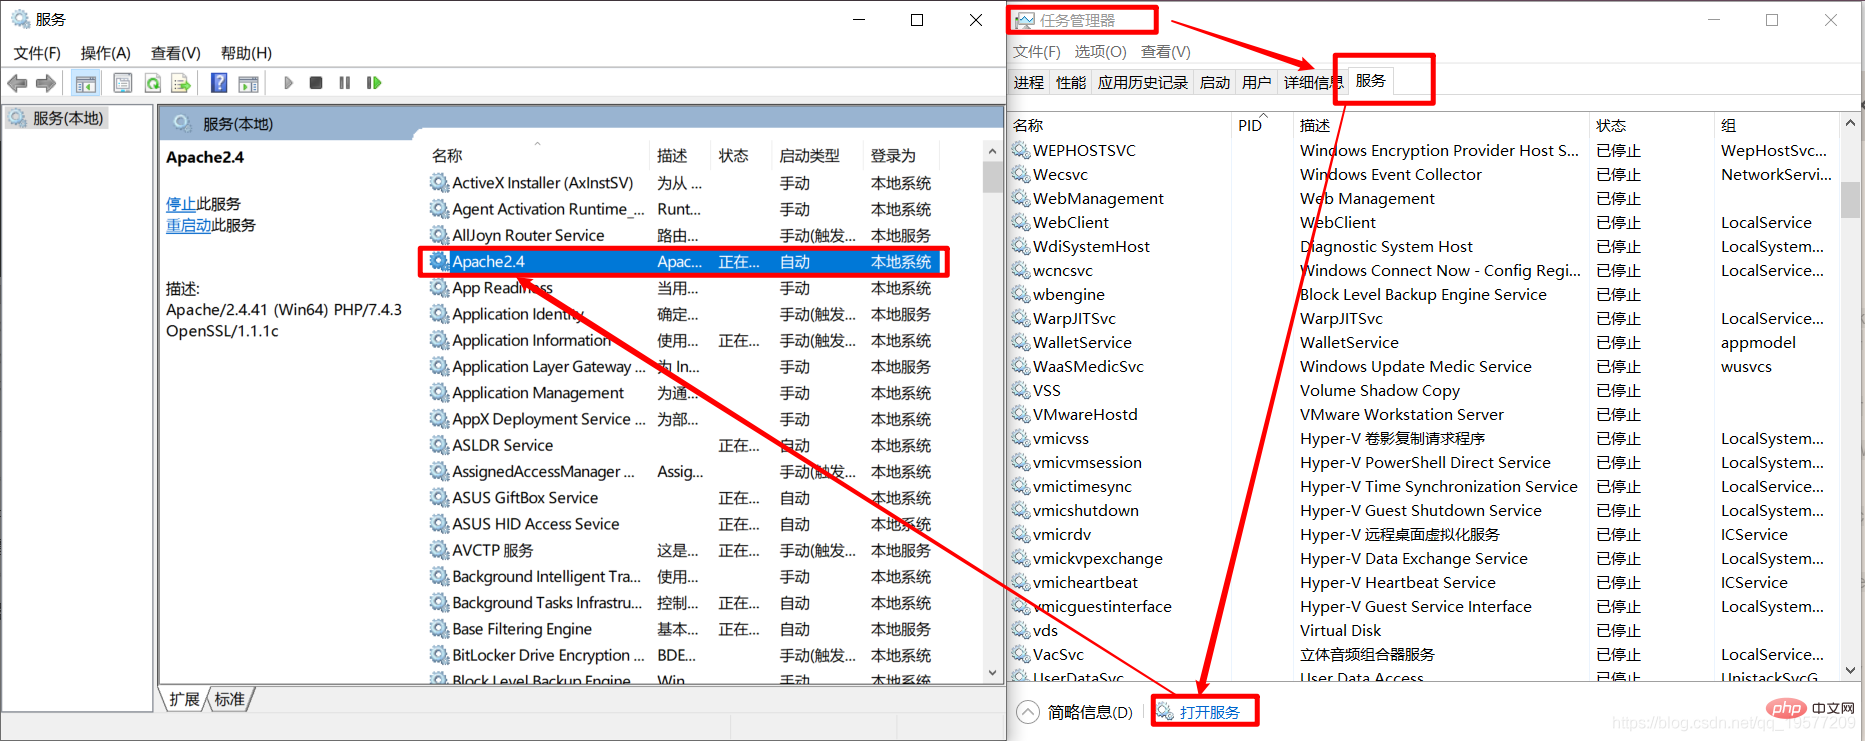
httpd -k installin cmd, because I have already It has been installed, so I cannot show a successful example. You can almost tell whether the installation is successful by reading English. - After completing the previous step, you can see that the Apache service has been installed. [View method: Task Manager->Service->View Service]
- At this time, use cmd to enter in the bin directory under Apache
httpd - k start, by the way, the restart command will be mentioned here.httpd -k restartwill be often used later. The Apache service will be started here. Of course, you can also start it manually in the service list. This is not good enough. Of course, in order to practice your skills, it is recommended to input using cmd yourself. - Now enter
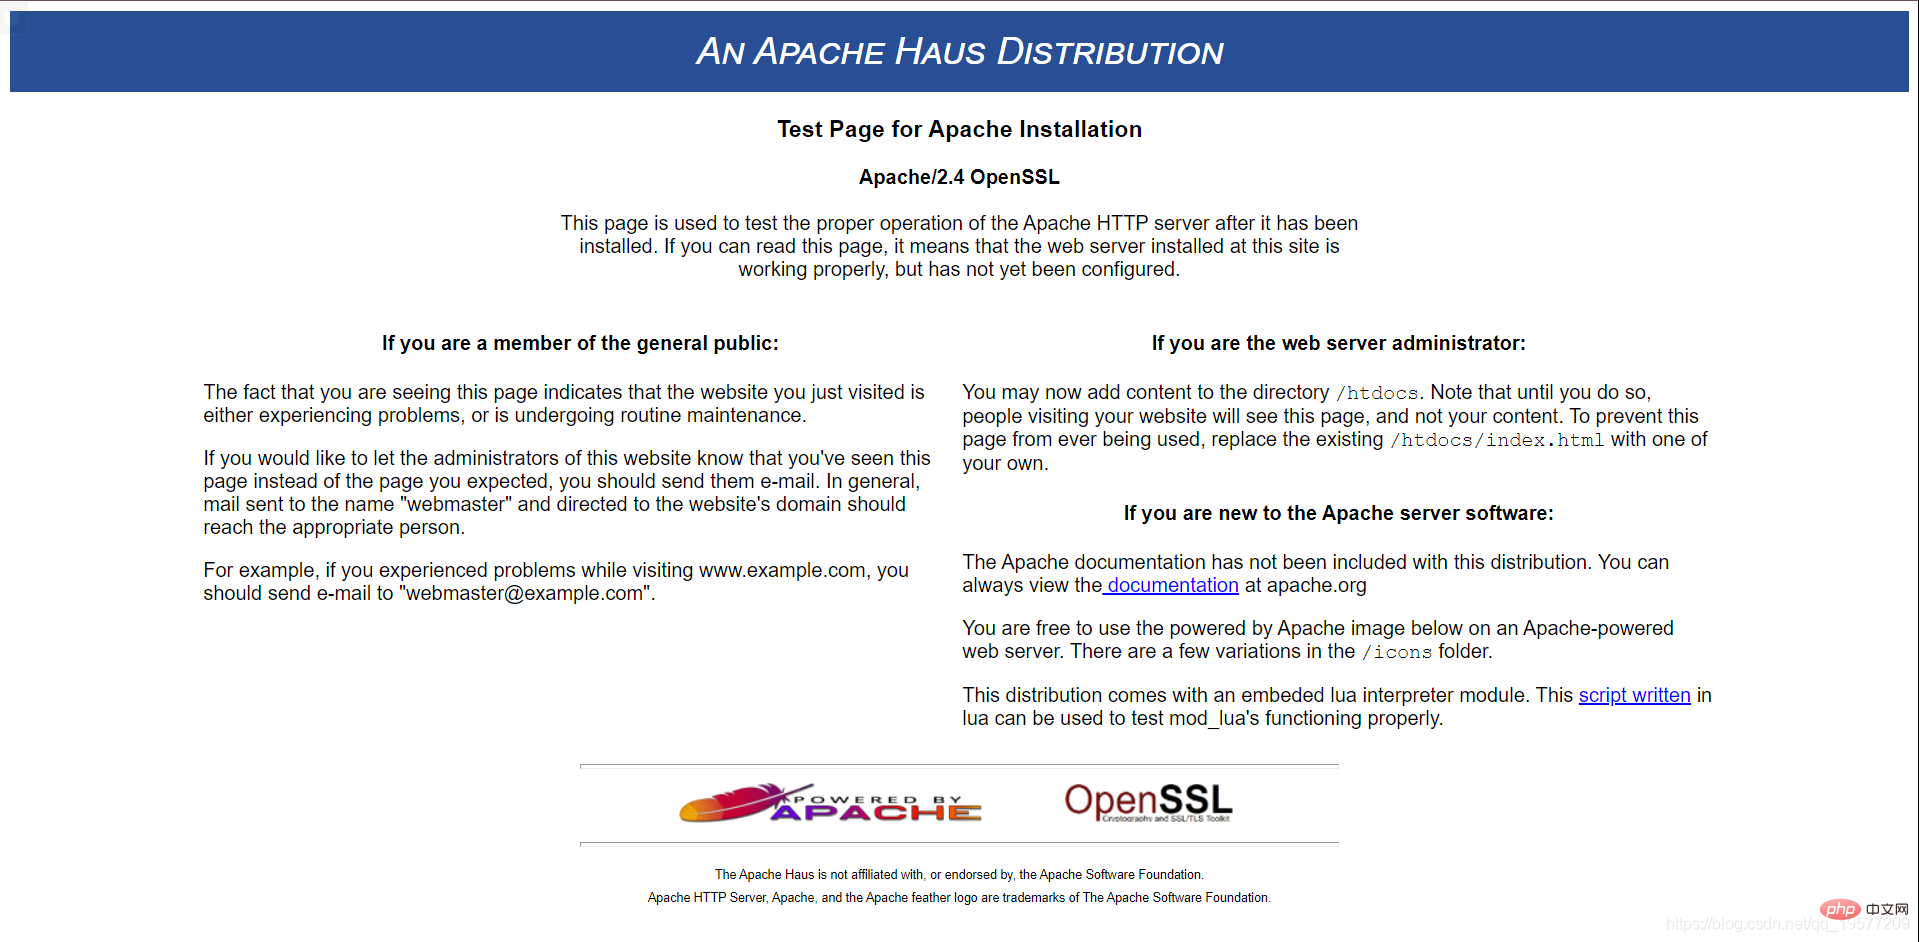
localhost:[port number]in the browser to check whether Apache has started successfully. The port number I prepared locally is 8499 (my name starts with QQ), so I enteredlocalhost:8499in the browser, and when I saw the following interface, the installation was successful.
- Due to the need for subsequent installation, here we still use cmd to enter
httpd -k stopin the bin folder under the Apache installation directory to pause the Apache service to facilitate our next step. For PHP installation, if you only need Apache, of course it will be completely ojbk at this point.


PHP installation
- First of all, let me post the PHP download address: Miaoah
- Here I downloaded the thread-safe version (I don’t know what the difference is, the more the merrier)
- Then unzip it to the directory where you want to put PHP. I still put it hereC://PHP/
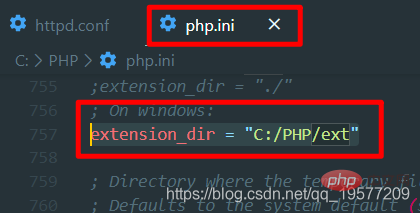
- Then copy php.ini-development in the root directory of PHP and rename it php.ini as the PHP configuration file, and then we open php.iniMake changes. Find extension_dir in php.ini, remove the comment and modify it to **"PHP installation path\ext", I installed it in C:/PHP /**, so here is
extension_dir = "C:/PHP/ext"

MySQL installation
- Actually, I am a little too lazy to write, but you can go to Noob [MySQL Installation Tutorial] to take a look, or I will write more about it later.
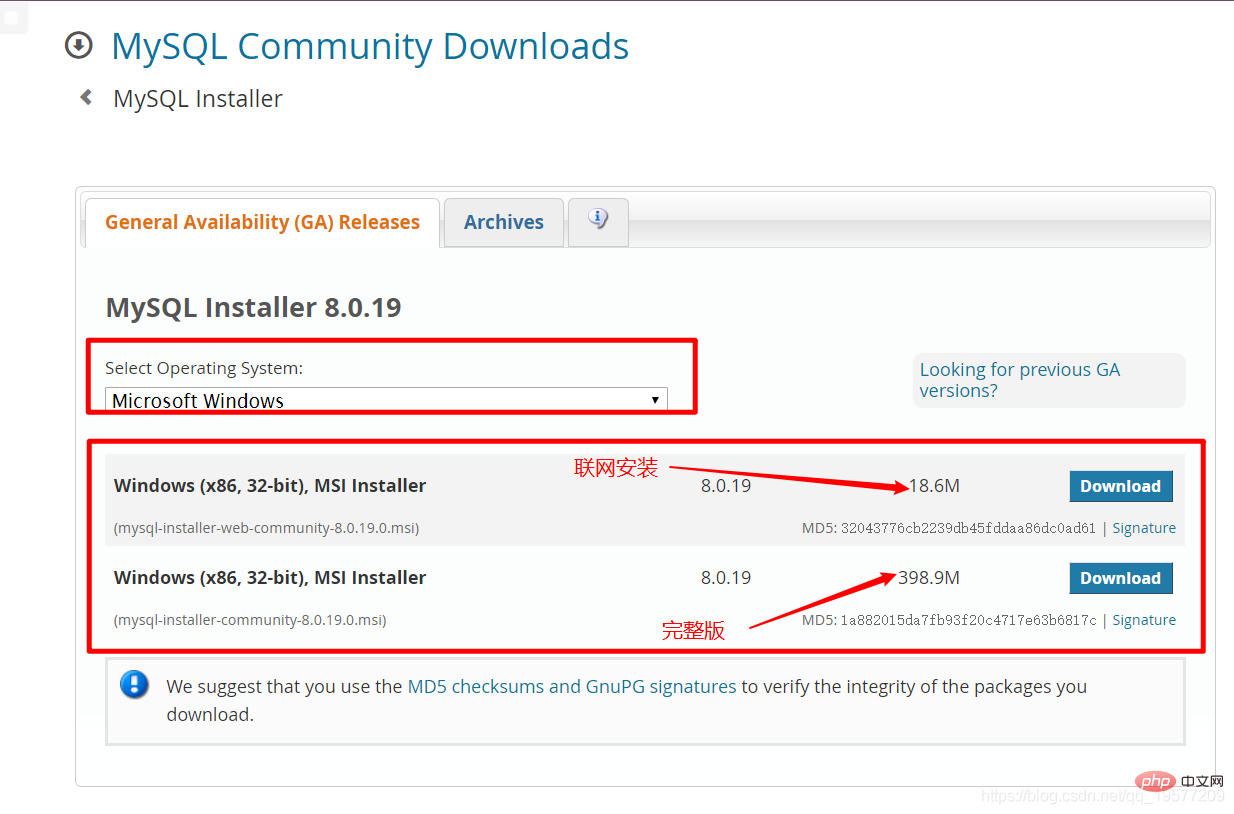
- Here is the latest version of MySQL [Address]
- But if you install it, because I don’t need other services, so Only MySQLServer is installed. Because I didn’t save the MySQL installation package for this part of the installation, you can check out the novice tutorials or browse CSDN. I won’t go into details here, but let’s talk about the Server Only I chose. After your MySQL is installed, the preparations are all over. Next, we start Apache to connect to PHP, and PHP to connect to MySQL. .
AMP connection work
Apache connection to PHP
The main thing we have to do here is to modify the httpd in the conf folder under the Apache installation root directory .conf to configure Apache and PHP to work together.
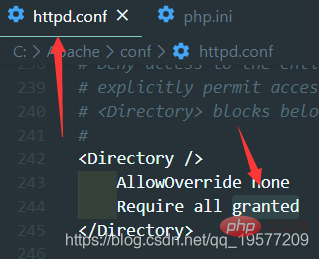
- Change Require all denied to Require all granted (I came here for free, I don’t know why)
<directory></directory>
    AllowOverride none
    Require all granted
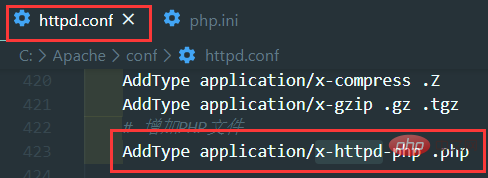
增加一行AddType application/x-httpd-php .php,这个是用来增加Apache1对于php后缀文件的支持的。
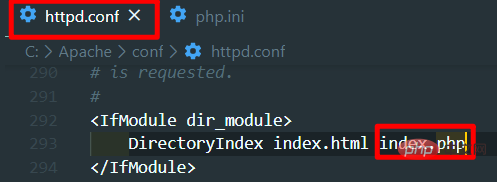
现在需要Apache+MySQL+PHP environment installation (example summary)可以作为自己索引页,具体做法就是在DirectoryIndex index.html后面增加索引页index.php。
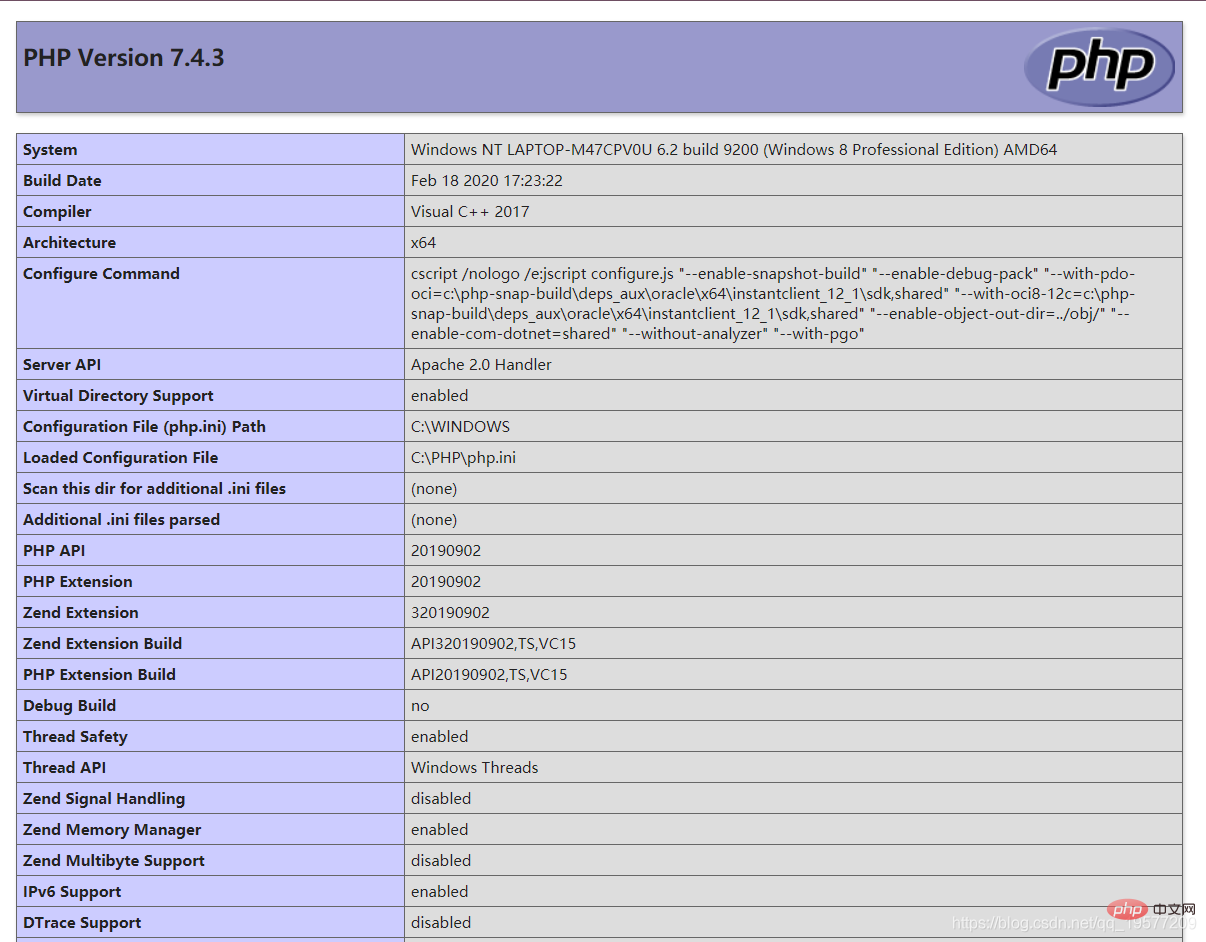
到了这一步我们基本完成了步骤,这时候我们可以在Apache根目录/htdocs/【我这里是C:\Apache\htdocs】下创建一个HelloPHP.php (只是我想这么叫) ,里面输入:
<?phpphpinfo ();?>
- 接下来测试一下吧,在Apache根目录下的bin目录打开cmd输入
httpd -k start启动Apache,然后打开浏览器,输入:localhost:【你的端口】/HelloPHP.php,这里我是localhost:8499/HelloPHP.php,不记得端口号的可以查看上面,配置在httpd.conf里面啦,Listen对应的值。打开之后大概显示如下。
- 这时候我们还是要再次关闭Apache+MySQL+PHP environment installation (example summary),依旧是在Apache根目录下的bin文件夹中打开cmd输入
httpd -k stop,然后接下来我们配置PHP+MySQL。
PHP连接MySQL
这里我们要做的就是在PHP中加载连接MySQL的程序集。这边有PHP官网的教程【怎么打不开?!!】
- 打开php.ini ,在extension板块中找到extension=php_mysqli.dll然后给它去掉注释就行了。
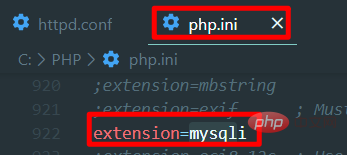
说明:不同的PHP版本可能提供不同的连接mysq的程序集,去ext文件夹下看看PHP提供的是什么这里就写什么。不同的程序集可能在连接数据库的时候使用的函数也不一样。
- 这时候我们找到前文的HelloPHP.php修改为如下内容:
<?php
    $mysqli = mysqli_connect("localhost","root","这里是你安装MySQL时候的密码") or die("cannt connet");
?>- 启动Apache+MySQL+PHP environment installation (example summary) ,在Apache根目录下的bin目录打开cmd输入
httpd -k start启动Apache,然后打开浏览器,输入:localhost:【你的端口】/HelloPHP.php,这里我是localhost:8499/HelloPHP.php,不记得端口号的可以查看上面,配置在httpd.conf里面啦,Listen对应的值。然后发现没有错误信息,那么到此AMP环境的搭建就完成了。
推荐学习:《PHP视频教程》
The above is the detailed content of Apache+MySQL+PHP environment installation (example summary). For more information, please follow other related articles on the PHP Chinese website!

Hot AI Tools

Undresser.AI Undress
AI-powered app for creating realistic nude photos

AI Clothes Remover
Online AI tool for removing clothes from photos.

Undress AI Tool
Undress images for free

Clothoff.io
AI clothes remover

AI Hentai Generator
Generate AI Hentai for free.

Hot Article
Hot Tools

Notepad++7.3.1
Easy-to-use and free code editor

SublimeText3 Chinese version
Chinese version, very easy to use

Zend Studio 13.0.1
Powerful PHP integrated development environment

Dreamweaver CS6
Visual web development tools

SublimeText3 Mac version
God-level code editing software (SublimeText3)
Hot Topics
 1378
1378
 52
52

 PHP 8.4 Installation and Upgrade guide for Ubuntu and Debian
Dec 24, 2024 pm 04:42 PM
PHP 8.4 Installation and Upgrade guide for Ubuntu and Debian
Dec 24, 2024 pm 04:42 PM
PHP 8.4 brings several new features, security improvements, and performance improvements with healthy amounts of feature deprecations and removals. This guide explains how to install PHP 8.4 or upgrade to PHP 8.4 on Ubuntu, Debian, or their derivati
 How To Set Up Visual Studio Code (VS Code) for PHP Development
Dec 20, 2024 am 11:31 AM
How To Set Up Visual Studio Code (VS Code) for PHP Development
Dec 20, 2024 am 11:31 AM
Visual Studio Code, also known as VS Code, is a free source code editor — or integrated development environment (IDE) — available for all major operating systems. With a large collection of extensions for many programming languages, VS Code can be c
 7 PHP Functions I Regret I Didn't Know Before
Nov 13, 2024 am 09:42 AM
7 PHP Functions I Regret I Didn't Know Before
Nov 13, 2024 am 09:42 AM
If you are an experienced PHP developer, you might have the feeling that you’ve been there and done that already.You have developed a significant number of applications, debugged millions of lines of code, and tweaked a bunch of scripts to achieve op
 How do you parse and process HTML/XML in PHP?
Feb 07, 2025 am 11:57 AM
How do you parse and process HTML/XML in PHP?
Feb 07, 2025 am 11:57 AM
This tutorial demonstrates how to efficiently process XML documents using PHP. XML (eXtensible Markup Language) is a versatile text-based markup language designed for both human readability and machine parsing. It's commonly used for data storage an
 Explain JSON Web Tokens (JWT) and their use case in PHP APIs.
Apr 05, 2025 am 12:04 AM
Explain JSON Web Tokens (JWT) and their use case in PHP APIs.
Apr 05, 2025 am 12:04 AM
JWT is an open standard based on JSON, used to securely transmit information between parties, mainly for identity authentication and information exchange. 1. JWT consists of three parts: Header, Payload and Signature. 2. The working principle of JWT includes three steps: generating JWT, verifying JWT and parsing Payload. 3. When using JWT for authentication in PHP, JWT can be generated and verified, and user role and permission information can be included in advanced usage. 4. Common errors include signature verification failure, token expiration, and payload oversized. Debugging skills include using debugging tools and logging. 5. Performance optimization and best practices include using appropriate signature algorithms, setting validity periods reasonably,
 PHP Program to Count Vowels in a String
Feb 07, 2025 pm 12:12 PM
PHP Program to Count Vowels in a String
Feb 07, 2025 pm 12:12 PM
A string is a sequence of characters, including letters, numbers, and symbols. This tutorial will learn how to calculate the number of vowels in a given string in PHP using different methods. The vowels in English are a, e, i, o, u, and they can be uppercase or lowercase. What is a vowel? Vowels are alphabetic characters that represent a specific pronunciation. There are five vowels in English, including uppercase and lowercase: a, e, i, o, u Example 1 Input: String = "Tutorialspoint" Output: 6 explain The vowels in the string "Tutorialspoint" are u, o, i, a, o, i. There are 6 yuan in total
 Explain late static binding in PHP (static::).
Apr 03, 2025 am 12:04 AM
Explain late static binding in PHP (static::).
Apr 03, 2025 am 12:04 AM
Static binding (static::) implements late static binding (LSB) in PHP, allowing calling classes to be referenced in static contexts rather than defining classes. 1) The parsing process is performed at runtime, 2) Look up the call class in the inheritance relationship, 3) It may bring performance overhead.
 What are PHP magic methods (__construct, __destruct, __call, __get, __set, etc.) and provide use cases?
Apr 03, 2025 am 12:03 AM
What are PHP magic methods (__construct, __destruct, __call, __get, __set, etc.) and provide use cases?
Apr 03, 2025 am 12:03 AM
What are the magic methods of PHP? PHP's magic methods include: 1.\_\_construct, used to initialize objects; 2.\_\_destruct, used to clean up resources; 3.\_\_call, handle non-existent method calls; 4.\_\_get, implement dynamic attribute access; 5.\_\_set, implement dynamic attribute settings. These methods are automatically called in certain situations, improving code flexibility and efficiency.
