

Advanced CSS skills: multiple methods to achieve image fading

will focus on implementing complex layouts, compatibility with device differences, making cool animations, making complex interactions, improving accessibility and building whimsical effects.
While taking into account the basic overview, we also focus on the exploration of skills and their application in combination with reality. Everyone is welcome to pay attention.
The text starts here.
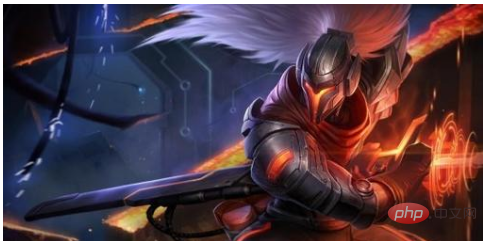
In the past, we wanted to achieve a fade-out of a picture. The most common one is a change in overall transparency, like this:
<div class="img"></div>
div {
    width: 300px;
    height: 300px;
    background: url(Advanced CSS skills: multiple methods to achieve Advanced CSS skills: multiple methods to achieve image fading fading.jpg);
    transition: .4s;
}
.img:hover {
    opacity: 0;
}
However, CSS is so powerful today. The fade effect we can achieve with CSS is no longer so simple. [Recommended learning: css video tutorial]
Think about it, can the following effect be achieved with CSS?
The answer is yes! This article will step by step, starting from scratch, using only one label to achieve the above-mentioned picture fade effect.
Here, there are two core points:
How to cut a picture so finely and into so many pieces?
Based on the above (1), how to control the independent hiding and display of these small blocks?
Don’t panic, let us solve them step by step.
Powerful Mask
First of all, we need to use Mask.
In CSS, the mask attribute allows users to hide part or all of the visible area of an element by masking or cropping a specific area of the Advanced CSS skills: multiple methods to achieve Advanced CSS skills: multiple methods to achieve image fading fading.
Syntax
The most basic way to use mask is to use pictures, similar to this:
div {
    width: 300px;
    height: 300px;
    background: url(Advanced CSS skills: multiple methods to achieve Advanced CSS skills: multiple methods to achieve image fading fading.jpg);
    transition: .4s;
}
.img:hover {
    opacity: 0;
}Of course, the method of using pictures will be discussed later. The method of using Advanced CSS skills: multiple methods to achieve Advanced CSS skills: multiple methods to achieve image fading fadings is actually more cumbersome, because we first have to prepare the corresponding Advanced CSS skills: multiple methods to achieve Advanced CSS skills: multiple methods to achieve image fading fading materials. In addition to Advanced CSS skills: multiple methods to achieve Advanced CSS skills: multiple methods to achieve image fading fadings, mask can also accept a background-like parameter, which is a gradient.
Similar to the following usage:
{
    mask: linear-gradient(#000, transparent)                      /* 使用渐变来做遮罩 */
}How to use it specifically? A very simple example. Above we created a gradient color from black to transparent. We applied it in practice. The code is similar to this:
The following picture is superimposed with a gradient color from transparent to black. Gradient,
{
    background: url(Advanced CSS skills: multiple methods to achieve Advanced CSS skills: multiple methods to achieve image fading fading.png) ;
    mask: linear-gradient(90deg, transparent, #fff);
}
After applying the mask, it will become like this:
This DEMO can be simple first Understand the basic usage of mask.
Here we get the most important conclusion of using mask: The overlapped part of the transparent gradient between the picture and the one generated by the mask will become transparent.
It is worth noting that the gradient above uses linear-gradient(90deg, transparent, #fff), and the #fff solid color part here In fact, you can change it to any color without affecting the effect.
CodePen Demo -- Basic use of MASK
Use mask to implement hover and hide pictures
After understanding the simple usage of mask, let's take a look For such a very simple example, we transform the first DEMO mentioned above.
<div class="img"></div>
div {
    width: 300px;
    height: 300px;
    background: url(Advanced CSS skills: multiple methods to achieve Advanced CSS skills: multiple methods to achieve image fading fading.jpg);
}
.img:hover {
    mask: linear-gradient(rgba(0, 0, 0, 0), rgba(0, 0, 0, 0));
}Yes, using Mask, we can also get an approximate disappearing effect:
If you don’t understand Mask yet, you You need to read this article first: Wonderful CSS MASK
Of course, there is a big flaw in the current effect, that is, the lack of animation. The picture disappears instantly. Therefore, we also need to add animation to the above-mentioned Advanced CSS skills: multiple methods to achieve Advanced CSS skills: multiple methods to achieve image fading fading disappearance effect achieved with the help of mask.
And this requires the use of CSS @property.
Powerful CSS @property
CSS @property should be familiar to everyone.
@property CSS at-rule is part of the CSS Houdini API, which allows developers to explicitly define their CSS custom properties, allowing property type checking, setting default values, and defining the custom property whether it can be inherited.
如果你对 CSS @property 还有所疑惑,建议你先快速读一读这篇文章 -- CSS @property,让不可能变可能
回到我们的正题,如果我们想给上述使用 Mask 的代码,添加上动画,我们期望代码大概是这样:
div {
    width: 300px;
    height: 300px;
    background: url(Advanced CSS skills: multiple methods to achieve Advanced CSS skills: multiple methods to achieve image fading fading.jpg);
    mask: linear-gradient(rgba(0, 0, 0, 1), rgba(0, 0, 0, 1));
}
.img:hover {
    mask: linear-gradient(rgba(0, 0, 0, 0), rgba(0, 0, 0, 0));
}这里,mask 的是从 mask: linear-gradient(rgba(0, 0, 0, 1), rgba(0, 0, 0, 1)) 向 mask: linear-gradient(rgba(0, 0, 0, 0), rgba(0, 0, 0, 0)) 变化的。
但是实际上,这样并不会产生任何的动画效果。
原因在于,我们 Mask 属性本身是不支持过渡动画的!
但是,利用上 CSS @property,整个效果就不一样了。借助,CSS @property,我们改造一下代码:
@property --m-0 {
   syntax: "<number>";
   initial-value: 1;
   inherits: false;
}
div {
    width: 300px;
    height: 300px;
    background: url(Advanced CSS skills: multiple methods to achieve Advanced CSS skills: multiple methods to achieve image fading fading.jpg);
    mask: linear-gradient(90deg, rgba(0, 0, 0, var(--m-0)), rgba(0, 0, 0, var(--m-0)));
    transition: --m-0 0.5s;
}
div:hover {
    --m-0: 0;
}我们利用 CSS @property 定义了一个名为 --m-0 的变量,然后,我们将整个动画过渡效果赋予了这个变量,而不是整个 mask。
利用这个小技巧,我们就可以成功的实现基于 mask 属性的动画效果:

借助多重 mask 分割图片
到了这一步,后面的步骤其实就很明朗了。
由于 mask 拥有和 background 一样的特性。因此,mask 是可以有多重 mask 的。也就是说,我们可以设置多个不同的 mask 效果给同一个元素。
什么意思呢?上面的效果只有一重 mask,我们稍微添加一些 mask 代码,让它变成 2 重 mask:
@property --m-0 {
   syntax: "<number>";
   initial-value: 1;
   inherits: false;
}
@property --m-1 {
   syntax: "<number>";
   initial-value: 1;
   inherits: false;
}
div {
    mask:
        linear-gradient(90deg, rgba(0, 0, 0, var(--m-0)), rgba(0, 0, 0, var(--m-0))),
        linear-gradient(90deg, rgba(0, 0, 0, var(--m-1)), rgba(0, 0, 0, var(--m-1)));
    mask-size: 50% 100%;
    mask-position: left, right;
    mask-repeat: no-repeat;
    transition:
        --m-0 0.3s,
        --m-1 0.25s 0.15s;
}
div:hover {
    --m-0: 0;
    --m-1: 0;
}这样,我们的步骤大概是:
首先将 mask 一分为二,左右两边各一个
然后,设置了两个基于 CSS @property 的变量,
--m-0和--m-0然后,给它们设置了不同的过渡时间和过渡延迟时间
在 hover 的一瞬间,再将这两个变量的值,都置为 0,也就是实现
linear-gradient(90deg, rgba(0, 0, 0, 1), rgba(0, 0, 0, 1))到linear-gradient(90deg, rgba(0, 0, 0, 0), rgba(0, 0, 0, 0))的变化,用于隐藏对应 mask 块由于设置了不同的过渡时间和延迟时间,整体上看上去,整个动画就分成了两部分
看看效果:

继续切割为 4 重 mask
好,既然 2 重 mask 效果没问题,那么我们可以再进一步,将整个效果切割为 4 个 mask。代码还是如法炮制,这里我再贴上核心代码:
@property --m-0 {
   syntax: "<number>";
   initial-value: 1;
   inherits: false;
}
@property --m-1 {
   syntax: "<number>";
   initial-value: 1;
   inherits: false;
}
@property --m-2 {
   syntax: "<number>";
   initial-value: 1;
   inherits: false;
}
@property --m-3 {
   syntax: "<number>";
   initial-value: 1;
   inherits: false;
}
div {
    mask:
        linear-gradient(90deg, rgba(0, 0, 0, var(--m-0)), rgba(0, 0, 0, var(--m-0))),
        linear-gradient(90deg, rgba(0, 0, 0, var(--m-1)), rgba(0, 0, 0, var(--m-1))),
        linear-gradient(90deg, rgba(0, 0, 0, var(--m-2)), rgba(0, 0, 0, var(--m-2))),
        linear-gradient(90deg, rgba(0, 0, 0, var(--m-3)), rgba(0, 0, 0, var(--m-3)));
    mask-size: 50% 50%;
    mask-repeat: no-repeat;
    mask-position: left top, right top, left bottom, bottom right;
    transition:
        --m-0 0.3s,
        --m-1 0.15s 0.1s,
        --m-2 0.25s 0.21s,
        --m-3 0.19s 0.15s;
}
div:hover {
    --m-0: 0;
    --m-1: 0;
    --m-2: 0;
    --m-3: 0;
}这样,我们就可以得到 4 块分割图片的 mask 消失效果:

好,再依次类推,我们就可以得到分割为 9 块的,分割为 16 块的。由于代码太多,就简单看看效果:

CodePen Demo -- 基于 @property 和 mask 的图片渐隐消失术
基于 SCSS 简化代码
那么,如果我们要分割为 100 块呢?或者 400 块呢?还要手写这些代码吗?
当然不需要,由于上面的代码的规律非常的明显,我们可以借助预处理器很好的封装整个效果。从而快速的实现切割成任意规则块数的效果。
完整的代码如下:
$count: 400;
$sqrt: 20;
$per: 100% / $sqrt;
$width: 300px;
$perWid: 15;

@for $i from 1 to ($count + 1) {
    @property --m-#{$i} {
       syntax: "<number>";
       initial-value: 1;
       inherits: false;
    }
}
@function bgSet($n) {
    $bg : radial-gradient(rgba(0, 0, 0, var(--m-1)), rgba(0, 0, 0, var(--m-1)));

    @for $i from 2 through $n {
        $bg: $bg, radial-gradient(rgba(0, 0, 0, var(--m-#{$i})), rgba(0, 0, 0, var(--m-#{$i})));
    }

    @return $bg;
}
@function positionSet($n) {
    $bgPosition: ();

    @for $i from 0 through ($n) {
        @for $j from 0 through ($n - 1) {
            $bgPosition: $bgPosition, #{$i * $perWid}px #{$j * $perWid}px;
        }
    }

    @return $bgPosition;
}
@function transitionSet($n) {
    $transition: --m-1 0.1s 0.1s;

    @for $i from 1 through $n {
        $transition: $transition, --m-#{$i} #{random(500)}ms #{random(500)}ms;
    }

    @return $transition;
}
div {
    width: $width;
    height: $width;
    background: url(Advanced CSS skills: multiple methods to achieve Advanced CSS skills: multiple methods to achieve image fading fading.jpg);
    mask: bgSet($count);
    mask-size: $per $per;
    mask-repeat: no-repeat;
    mask-position: positionSet($sqrt);
    transition: transitionSet($count);
}
div:hover {
    @for $i from 1 through $count {
        --m-#{$i}: 0;
    }
}这里,简单解释一下,以生成 400 块小块为例子:
最上面的 SCSS 变量定义中,
$count是我们最终生成的块数$sqrt是每行以及每列会拥有的块数$per是每一块占整体图片元素的百分比值$width是整个图片的宽高值$perWid是每一块的宽高值
利用了最上面的一段循环函数,批量的生成 CSS @property 变量,从
--m-0到--m-400@function bgSet($n) {}是生成 400 块 mask 片段@function positionSet($n)是生成 400 块 mask 的 mask-position,也就是生成 400 段不同定位,让 400 块 mask 刚好覆盖整个图片@function transitionSet($n) {}是随机设置每个块的动画时间和延迟时间代码最下面,还有一段循环函数,生成 400 个 CSS @property 变量的 hover 值,当 hover 的时候,全部变成 0
这样,我们就实现了 400 分块的渐隐效果。效果如下:
CodePen Demo -- 基于 @property 和 mask 的图片渐隐消失术
调整过渡变量,控制方向
当然,上面我们的对每一个小块的 transition 的过渡时间和过渡延迟时间的设置,都是随机的:
@function transitionSet($n) {
    $transition: --m-1 0.1s 0.1s;

    @for $i from 1 through $n {
        $transition: $transition, --m-#{$i} #{random(500)}ms #{random(500)}ms;
    }

    @return $transition;
}我们完全可以通过一定的控制,让过渡效果不那么随机,譬如有一定的方向感。
下面,我们通过让动画的延迟时间与 $i,也就是 mask 小块的 index 挂钩:
@function transitionSet($n) {
    $transition: --m-1 0.1s 0.1s;

    @for $i from 1 through $n {
        $transition: $transition, --m-#{$i} #{100 + random(500)}ms #{($i / 50) * random(100)}ms;
    }

    @return $transition;
}那么,整个动画的方向就是从左往右逐渐消失:

CodePen Demo -- 基于 @property 和 mask 的图片渐隐消失术 2
当然,有意思的是,这个效果,不仅仅能够运用在图片上,它其实可以作用在任何元素之上!
譬如,我们有的只是一段纯文本,同样适用这个效果:
CodePen Demo -- 基于 @property 和 mask 的文本渐隐消失术
总结
到这里,简单总结一下。本文,我们核心利用了 CSS @propery 和 mask,实现了一些原本看上去需要非常多 div 才能实现或者是需要借助 Canvas 才能实现的效果。同时,我们借助了 SCSS 预处理器,在寻找到规律后,极大的简化了 CSS 代码的书写量。
到今天,强大的 CSS 已经允许我们去做越来越多更有意思的动效,CSS @propery 和 mask 这两个属性在现代 CSS 发挥了非常重要的作用,非常建议大家认真掌握以下这两个属性。
原文链接:https://juejin.cn/post/7167160342101884935
作者:chokcoco
(学习视频分享:web前端)
The above is the detailed content of Advanced CSS skills: multiple methods to achieve image fading. For more information, please follow other related articles on the PHP Chinese website!

Hot AI Tools

Undresser.AI Undress
AI-powered app for creating realistic nude photos

AI Clothes Remover
Online AI tool for removing clothes from photos.

Undress AI Tool
Undress images for free

Clothoff.io
AI clothes remover

Video Face Swap
Swap faces in any video effortlessly with our completely free AI face swap tool!

Hot Article
Hot Tools

Notepad++7.3.1
Easy-to-use and free code editor

SublimeText3 Chinese version
Chinese version, very easy to use

Zend Studio 13.0.1
Powerful PHP integrated development environment

Dreamweaver CS6
Visual web development tools

SublimeText3 Mac version
God-level code editing software (SublimeText3)
Hot Topics
 1387
1387
 52
52

 How to use bootstrap in vue
Apr 07, 2025 pm 11:33 PM
How to use bootstrap in vue
Apr 07, 2025 pm 11:33 PM
Using Bootstrap in Vue.js is divided into five steps: Install Bootstrap. Import Bootstrap in main.js. Use the Bootstrap component directly in the template. Optional: Custom style. Optional: Use plug-ins.
 The Roles of HTML, CSS, and JavaScript: Core Responsibilities
Apr 08, 2025 pm 07:05 PM
The Roles of HTML, CSS, and JavaScript: Core Responsibilities
Apr 08, 2025 pm 07:05 PM
HTML defines the web structure, CSS is responsible for style and layout, and JavaScript gives dynamic interaction. The three perform their duties in web development and jointly build a colorful website.
 How to write split lines on bootstrap
Apr 07, 2025 pm 03:12 PM
How to write split lines on bootstrap
Apr 07, 2025 pm 03:12 PM
There are two ways to create a Bootstrap split line: using the tag, which creates a horizontal split line. Use the CSS border property to create custom style split lines.
 Understanding HTML, CSS, and JavaScript: A Beginner's Guide
Apr 12, 2025 am 12:02 AM
Understanding HTML, CSS, and JavaScript: A Beginner's Guide
Apr 12, 2025 am 12:02 AM
WebdevelopmentreliesonHTML,CSS,andJavaScript:1)HTMLstructurescontent,2)CSSstylesit,and3)JavaScriptaddsinteractivity,formingthebasisofmodernwebexperiences.
 How to resize bootstrap
Apr 07, 2025 pm 03:18 PM
How to resize bootstrap
Apr 07, 2025 pm 03:18 PM
To adjust the size of elements in Bootstrap, you can use the dimension class, which includes: adjusting width: .col-, .w-, .mw-adjust height: .h-, .min-h-, .max-h-
 How to use bootstrap button
Apr 07, 2025 pm 03:09 PM
How to use bootstrap button
Apr 07, 2025 pm 03:09 PM
How to use the Bootstrap button? Introduce Bootstrap CSS to create button elements and add Bootstrap button class to add button text
 How to set up the framework for bootstrap
Apr 07, 2025 pm 03:27 PM
How to set up the framework for bootstrap
Apr 07, 2025 pm 03:27 PM
To set up the Bootstrap framework, you need to follow these steps: 1. Reference the Bootstrap file via CDN; 2. Download and host the file on your own server; 3. Include the Bootstrap file in HTML; 4. Compile Sass/Less as needed; 5. Import a custom file (optional). Once setup is complete, you can use Bootstrap's grid systems, components, and styles to create responsive websites and applications.
 How to insert pictures on bootstrap
Apr 07, 2025 pm 03:30 PM
How to insert pictures on bootstrap
Apr 07, 2025 pm 03:30 PM
There are several ways to insert images in Bootstrap: insert images directly, using the HTML img tag. With the Bootstrap image component, you can provide responsive images and more styles. Set the image size, use the img-fluid class to make the image adaptable. Set the border, using the img-bordered class. Set the rounded corners and use the img-rounded class. Set the shadow, use the shadow class. Resize and position the image, using CSS style. Using the background image, use the background-image CSS property.
