

A brief analysis of the use of slots and configuration agents in Vue

How to use slots and configure agents in Vue correctly and quickly? The following article will introduce to you how to use slots and configure agents in Vue. I hope it will be helpful to you!

1. Slot
1. What is a slot
Allows the parent component to insert the HTML structure into the specified location of the child component. It is also a method of inter-component communication, applicable to parent components -> child components. There are three types of slots, namely Default Slot, Named Slot, Scope Slot. How to use them is listed below. These three slots
1.1 Default slot
What is the default slot? In fact, the default slot is equivalent to you buying a new house, and then all the rooms have been decorated, but you still have one room that has not yet been decorated, because you don’t know whether to install a set of e-sports equipment or a bookcase in it. So first leave a good place in that room. Then you come to the mall and see the bookcase you like. Then you tell the salesperson, I bought this, and then put the bookcase in the vacant room and plug it in. The same is true for slots. Child components are like empty rooms, and parent components are like favorite bookcases (remember <define slots in child components, write data in parent components> That’s it) [Related recommendations: vuejs video tutorial, web front-end development】
Defining a slot in the subcomponent ##
<template>
  <div class="category">
    <h3>{{title}}</h3>
    <!-- 定义一个插槽(等待组件的使用者进行填充) -->
    <slot>我是默认插槽,在没有传结构式我才会显示该片段文字</slot>
  </div>
</template>Parent componentFill data inside
 <Category title="美食">
      <img slot src="./assets/logo.png" alt>
</Category>1.2 Named slot
Simply put, named slot in child component There is one more name attribute than the default slot, and there is an additional line of code slot = "named slot name" in the parent component. Named slots can better control the location of the data to be placedParent componentUse center and footer slots
      <Category title="游戏">
          <ul slot="center">// 使用center具名插槽
            <li v-for="(g,index) in games" :key="index">{{g}}</li>
          </ul>
          <div class="foot" slot="footer">// 使用footer具名插槽
            <a href="javascript:;">植物大战讲师</a>
            <a href="javascript:;">冰火人闯森林</a>
          </div>
</Category>SubcomponentDefine conter and footer named slots inside
 <template>
      <div class="category">
        <h3>{{title}}</h3>
        <!-- 具名插槽 -->
        <slot name = "center">我是具名插槽center</slot>
        <slot name = "footer">我是具名插槽footer</slot>
        <img src="" alt="">
      </div>
</template>1.3 Scope slot
Understanding: The data is in the component itself, but the structure generated based on the data needs to be decided by the user of the component. (The games data is in the Category component, but the structure traversed using the data is determined by the App component)
Parent component
    <Category title="游戏">
      <template slot-scope="{games}">
        <h4>
          <li v-for="(g,index) in games" :key="index">{{g}}</li>
        </h4>
      </template>
</Category>Child component
<template>
  <div class="category">
    <h3>{{title}}</h3>
    <slot :games="games">我是作用域插槽,在没有传结构式我才会显示该片段文字</slot>
  </div>
</template>
<script>
export default {
  name: "Category",
  props: ["title"],
  data() {
    return {
      games: ["红警", "绿警", "蓝警", "紫警"]
    };
  }
};
</script>Second, configure the proxy
Method 1: Add the following configuration in vue.config.js devServer:{
proxy: "http://localhost:5000"
}Note:
Advantages: The configuration is simple and you can directly send a request to port 8080Disadvantages: You cannot configure multiple proxies and it is inflexible (if you have resources but need to request non-front-end resources, you can only Use your own existing resources) Agent process: Send a request? Turn on the proxy? If there are resources on the front end, use them. If there are no resources, request them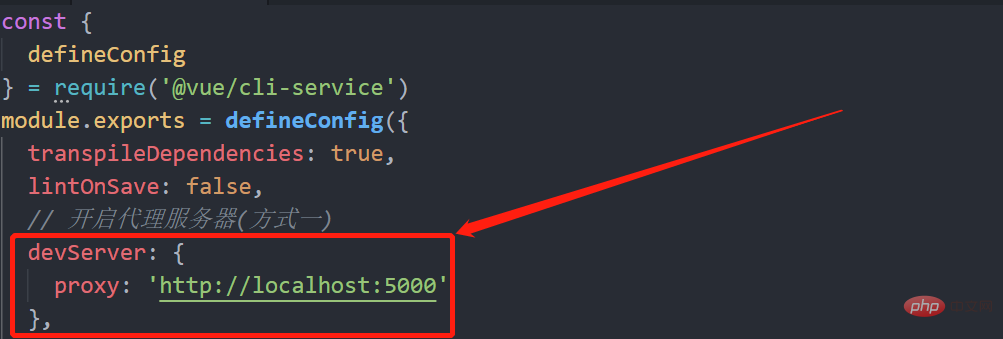 ##Method 2: Add the following configuration in vue.config.js
  devServer: {
    proxy: {
      '/shanyu': {// 匹配所有以'shanyu'开头的请求路径
        target: 'http://localhost:5000',// 代理目标的基础路径
        pathRewrite: {
            '^/shanyu': '' // 将所有的前缀替换为空串再去服务器内擦护照该路径
             // ws和changeOrigin默认都为true
            // ws: true, // 用于支持websocket
               // changeOrigin: true // 用于控制请求头host的值
        },
          //changeOrigin设置为true时,服务器收到的请求头中的host为: localhost: 5000
        //changeOrigin设置为false时,服务器收到的请求头中的host为: localhost :8080
}changeOrigin is generally set to false, because regardless of whether the server has set certain requests that cannot request other ports, changeOrigin can also be set to false. It becomes the same port of the server for the requested resource (in simple terms, when changeOrigin is set to false, which server is requested, the port number of that server is displayed)
(Learning video Share:
vuejs introductory tutorialThe above is the detailed content of A brief analysis of the use of slots and configuration agents in Vue. For more information, please follow other related articles on the PHP Chinese website!

Hot AI Tools

Undresser.AI Undress
AI-powered app for creating realistic nude photos

AI Clothes Remover
Online AI tool for removing clothes from photos.

Undress AI Tool
Undress images for free

Clothoff.io
AI clothes remover

AI Hentai Generator
Generate AI Hentai for free.

Hot Article
Hot Tools

Notepad++7.3.1
Easy-to-use and free code editor

SublimeText3 Chinese version
Chinese version, very easy to use

Zend Studio 13.0.1
Powerful PHP integrated development environment

Dreamweaver CS6
Visual web development tools

SublimeText3 Mac version
God-level code editing software (SublimeText3)
Hot Topics
 1377
1377
 52
52

 How to reference js file with vue.js
Apr 07, 2025 pm 11:27 PM
How to reference js file with vue.js
Apr 07, 2025 pm 11:27 PM
There are three ways to refer to JS files in Vue.js: directly specify the path using the <script> tag;; dynamic import using the mounted() lifecycle hook; and importing through the Vuex state management library.
 How to add functions to buttons for vue
Apr 08, 2025 am 08:51 AM
How to add functions to buttons for vue
Apr 08, 2025 am 08:51 AM
You can add a function to the Vue button by binding the button in the HTML template to a method. Define the method and write function logic in the Vue instance.
 How to use watch in vue
Apr 07, 2025 pm 11:36 PM
How to use watch in vue
Apr 07, 2025 pm 11:36 PM
The watch option in Vue.js allows developers to listen for changes in specific data. When the data changes, watch triggers a callback function to perform update views or other tasks. Its configuration options include immediate, which specifies whether to execute a callback immediately, and deep, which specifies whether to recursively listen to changes to objects or arrays.
 How to use bootstrap in vue
Apr 07, 2025 pm 11:33 PM
How to use bootstrap in vue
Apr 07, 2025 pm 11:33 PM
Using Bootstrap in Vue.js is divided into five steps: Install Bootstrap. Import Bootstrap in main.js. Use the Bootstrap component directly in the template. Optional: Custom style. Optional: Use plug-ins.
 How to return to previous page by vue
Apr 07, 2025 pm 11:30 PM
How to return to previous page by vue
Apr 07, 2025 pm 11:30 PM
Vue.js has four methods to return to the previous page: $router.go(-1)$router.back() uses <router-link to="/" component window.history.back(), and the method selection depends on the scene.
 Vue realizes marquee/text scrolling effect
Apr 07, 2025 pm 10:51 PM
Vue realizes marquee/text scrolling effect
Apr 07, 2025 pm 10:51 PM
Implement marquee/text scrolling effects in Vue, using CSS animations or third-party libraries. This article introduces how to use CSS animation: create scroll text and wrap text with <div>. Define CSS animations and set overflow: hidden, width, and animation. Define keyframes, set transform: translateX() at the beginning and end of the animation. Adjust animation properties such as duration, scroll speed, and direction.
 How to query the version of vue
Apr 07, 2025 pm 11:24 PM
How to query the version of vue
Apr 07, 2025 pm 11:24 PM
You can query the Vue version by using Vue Devtools to view the Vue tab in the browser's console. Use npm to run the "npm list -g vue" command. Find the Vue item in the "dependencies" object of the package.json file. For Vue CLI projects, run the "vue --version" command. Check the version information in the <script> tag in the HTML file that refers to the Vue file.
 How to use vue traversal
Apr 07, 2025 pm 11:48 PM
How to use vue traversal
Apr 07, 2025 pm 11:48 PM
There are three common methods for Vue.js to traverse arrays and objects: the v-for directive is used to traverse each element and render templates; the v-bind directive can be used with v-for to dynamically set attribute values for each element; and the .map method can convert array elements into new arrays.
