The whole process of WordPress theme creation (4): a small test
I introduced you to "The whole process of WordPress theme production (3): HTML static template production". This article continues to bring you "The whole process of WordPress theme production (4): A small test" , let’s take a look at it~
A WordPress theme contains at least the following two files:
style.cssindex.php
#Okay, let’s start our WordPress theme production now. Create a new folder in your WordPress directory wp-content\themes\, name it Aurelius, and add the previous article: WordPress theme production process (3): HTML static Place the style.css and index.html downloaded in Template Production into this directory, and then rename index.html to index.php, so there are the following two files in the wp-content\themes\Aurelius directory:
style.cssindex.php
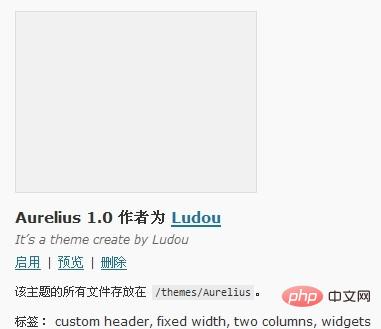
Log in to your WordPress blog management backend - Appearance, is there an additional theme "Aurelius"? As shown in the picture below:

Enable this theme and open your blog homepage. Oh, the page is a mess? What happened? Continue reading below. You may be curious, can the name of this theme be changed to the name I want? Can the theme author be changed to my name? Why does the theme have no small picture preview? Here I will teach you how to change these "theme information". Use a text editor to open style.css in the Aurelius directory. You can follow the instructions below to try to modify the following information at the front of the style.css file, and then Go to the "Appearance" column of the WordPress management backend and refresh it to see what changes are there:
/*
Theme Name: 这里填主题名称
Theme URI: 这里填主题介绍的网址,没有就填你的博客网址吧
Description: 这里填主题的简短介绍
Version: 版本号
Author: 作者名
Author URI: 作者的网址
Tags: 标签,多个用半角逗号隔开
*/
The entire process of making the previous WordPress theme (3): HTML static template production Place the downloaded screenshot.png in the Aurelius directory, and then go to the "Appearance" column of the WordPress management background to see if there are any changes. Is there an additional preview image? After the theme is created, you can take a screenshot of your theme interface, name it screenshot.png, size 300 * 225, and place it in the theme directory as the theme thumbnail.
Okay, that’s all we have to talk about today, so stay tuned. . .
Finally The whole process of WordPress theme production (3): HTML static template productionCopy all the files in the downloaded Aurelius directory to the wp-content\themes\Aurelius directory, and copy All .html suffixes are changed to .php for our content in the next section.
Recommended learning: "WordPress Tutorial"
The above is the detailed content of The whole process of WordPress theme creation (4): a small test. For more information, please follow other related articles on the PHP Chinese website!

Hot AI Tools

Undresser.AI Undress
AI-powered app for creating realistic nude photos

AI Clothes Remover
Online AI tool for removing clothes from photos.

Undress AI Tool
Undress images for free

Clothoff.io
AI clothes remover

AI Hentai Generator
Generate AI Hentai for free.

Hot Article

Hot Tools

Notepad++7.3.1
Easy-to-use and free code editor

SublimeText3 Chinese version
Chinese version, very easy to use

Zend Studio 13.0.1
Powerful PHP integrated development environment

Dreamweaver CS6
Visual web development tools

SublimeText3 Mac version
God-level code editing software (SublimeText3)

Hot Topics
 CakePHP Project Configuration
Sep 10, 2024 pm 05:25 PM
In this chapter, we will understand the Environment Variables, General Configuration, Database Configuration and Email Configuration in CakePHP.
 PHP 8.4 Installation and Upgrade guide for Ubuntu and Debian
Dec 24, 2024 pm 04:42 PM
PHP 8.4 brings several new features, security improvements, and performance improvements with healthy amounts of feature deprecations and removals. This guide explains how to install PHP 8.4 or upgrade to PHP 8.4 on Ubuntu, Debian, or their derivati
 CakePHP Date and Time
Sep 10, 2024 pm 05:27 PM
To work with date and time in cakephp4, we are going to make use of the available FrozenTime class.
 CakePHP File upload
Sep 10, 2024 pm 05:27 PM
To work on file upload we are going to use the form helper. Here, is an example for file upload.
 CakePHP Routing
Sep 10, 2024 pm 05:25 PM
In this chapter, we are going to learn the following topics related to routing ?
 Discuss CakePHP
Sep 10, 2024 pm 05:28 PM
CakePHP is an open-source framework for PHP. It is intended to make developing, deploying and maintaining applications much easier. CakePHP is based on a MVC-like architecture that is both powerful and easy to grasp. Models, Views, and Controllers gu
 CakePHP Creating Validators
Sep 10, 2024 pm 05:26 PM
Validator can be created by adding the following two lines in the controller.
 How To Set Up Visual Studio Code (VS Code) for PHP Development
Dec 20, 2024 am 11:31 AM
Visual Studio Code, also known as VS Code, is a free source code editor — or integrated development environment (IDE) — available for all major operating systems. With a large collection of extensions for many programming languages, VS Code can be c


