 Backend Development
 Python Tutorial
 Teach you step by step how to get started with the web development framework in Python
Teach you step by step how to get started with the web development framework in Python

When it comes to web development frameworks, I usually use Flask and Django. Flask is a lightweight development framework, and it is very convenient to write an API interface. However, the framework FastAPI we are going to introduce today also has a good reputation among Python developers. So before we start, we must first install the modules we need to use through the pip command.
pip install fastapi
And the ASGI server can use uvicorn, then the same.
pip install uvicorn
HelloWorld
Let’s first try to use the Flask framework to write a HelloWorld. The code is as follows:
from flask import Flask, request
import json
app = Flask(__name__)
@app.route('/')
def hello_world():
 return 'hello world'
if __name__ == '__main__':
app.run(host='0.0.0.0', port=8889)The development tool used by the editor is Pycharm. When we run this script, it will The following results pop up.

Then enter the pop-up url in the browser to access the page. The page containing "hello world" will appear as shown below.
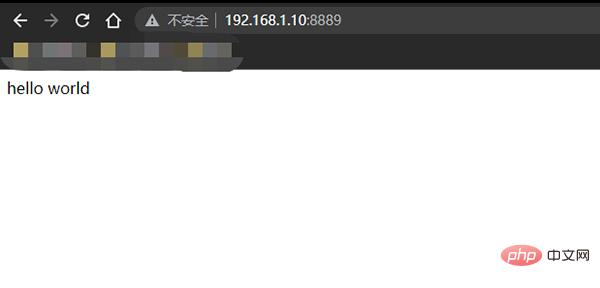
From the logic of the code, app = Flask(__name__) creates a Flask program instance. We enter the url in the browser to send the request to the web server, and then the web The server forwards the url to the Flask program instance, so it needs to know which part of the code needs to be started for each url request, so the mapping relationship between the url and the Python function is saved. Routing is used to handle the relationship between the above two. Program instance app.route decorator to achieve. Execute the last app.run() to start the service. 0.0.0.0 means listening to all addresses, and the specified port number is 8889. So let’s take a look at what the corresponding FastAPI version of “HelloWorld” looks like. The code As follows:
from fastapi import FastAPI
from fastapi.responses import PlainTextResponse, HTMLResponse, FileResponse
import uvicorn
app = FastAPI()
@app.get("/", response_class=PlainTextResponse)
async def hello(): ## async可加可不加,这个随意
 return "Hello World!"
@app.get("/items/{item_id}")
def read_item(item_id: int, q: str = None):
 return {"item_id": item_id, "q": q}
if __name__ == '__main__':
uvicorn.run('fast_api_1:app', host='0.0.0.0', port=8000)We also run this code. The default listening address of FastAPI is 127.0.0.1, and the port number specified is 8000, so we enter http://127.0.0.1:8000/, and the result is as follows Display:
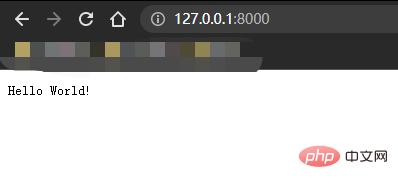
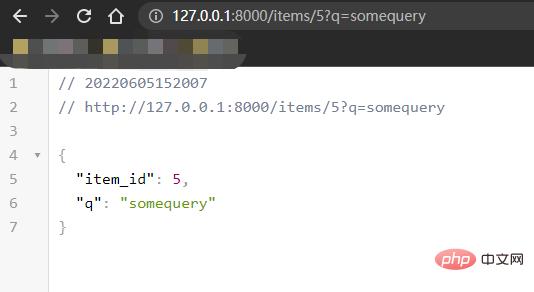
Since a string is returned, we fill in PlainTextResponse at response_class, and we can also enter http://127.0 in the browser. 0.1:8000/items/5?q=somequery, the result is as follows:
Return random number
We are in the above "Hello World "Let's write a few more cases based on this, such as the operation of returning random numbers. The code in the Flask framework is as follows:
@app.route('/random-number')
def random_number():
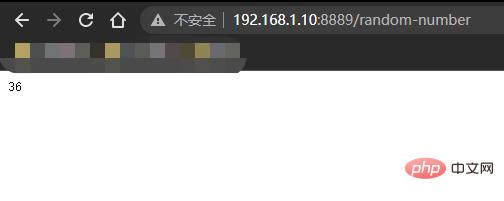
return str(random.randrange(100))Let's test the results in the browser, as shown below:
The code in the FastAPI framework is also very similar.
@app.get('/random-number', response_class=PlainTextResponse)
async def random_number():
return str(random.randrange(100))Judge whether they are all composed of letters
Next let’s take a look. When we send a GET request, we determine whether one of the url request parameters is composed of letters. Among them The code in the Flask framework is as follows:
@app.route('/alpha', methods=['GET'])
def alpha():
 text = request.args.get('text', '')
 result = {'text': text, 'is_alpha' : text.isalpha()}
return jsonify(result)Let’s test the result in the browser, as shown below:
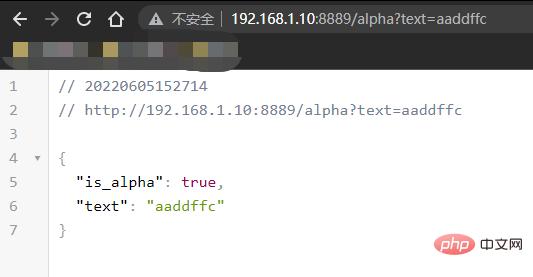
On the other hand, in the FastAPI framework The corresponding code is as follows:
@app.get('/alpha')
async def alpha(text: str):
 result = {'text': text, 'is_alpha' : text.isalpha()}
return resultCreate a new user
The above cases are all GET requests. Let’s take a look at how to handle POST requests. For example, we want to create a new user through POST requests. For a new user, the code in the Flask framework is as follows:
@app.route('/create-user', methods=['POST'])
def create_user():
 id = request.form.get('id', '0001')
 name = request.form.get('name', 'Anonymous')
 data = {'id': id, 'name': name}
 result = {'status_code': '0', 'status_message' : 'Success', 'data': data}
return jsonify(result)You can test the function of the API directly in Postman, as shown below:
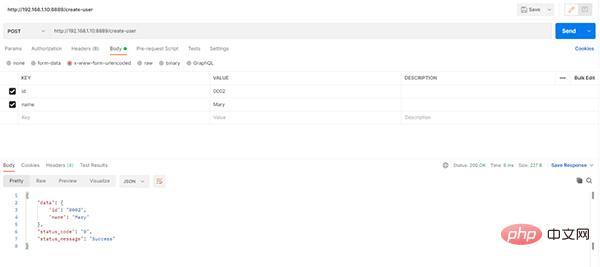
We need to specify in "methods" whether to use POST request, but in the FastAPI framework, there is no need to specify, just use the app.post() decorator:
@app.post('/create-user')
async def create_user(id: str = Form(...), name: str = Form(...)):
 data = {'id': id, 'name': name}
 result = {'status_code': '0', 'status_message' : 'Success', 'data': data}
return resultReturn to static page
If you need to return a static page, the code in the Flask framework looks like this.
@app.route('/get-webpage', methods=['GET'])
def get_webpage():
return render_template('flask_1.html', message="Contact Us")In the FastAPI framework, it is a little more troublesome. The code is as follows:
app.mount("/static", StaticFiles(directory="static"), name="static")
## 用来加载静态页面
templates = Jinja2Templates(directory="templates")
@app.get('/get-webpage', response_class=HTMLResponse)
async def get_webpage(request: Request):
return templates.TemplateResponse("index.html", {"request": request, "message": "Contact Us"})Since a static page is returned, the response_class corresponds to HTMLResponse
Summary
Let’s summarize all the Flask code written above, as follows:
from flask import Flask, request, render_template
import random
from flask import jsonify
import json
app = Flask(__name__)
@app.route('/')
def hello_world():
 return 'hello world'
@app.route('/random-number')
def random_number():
 return str(random.randrange(100))
@app.route('/alpha', methods=['GET'])
def alpha():
 text = request.args.get('text', '')
 result = {'text': text, 'is_alpha' : text.isalpha()}
 return jsonify(result)
@app.route('/create-user', methods=['POST'])
def create_user():
 id = request.form.get('id', '0001')
 name = request.form.get('name', 'Anonymous')
 data = {'id': id, 'name': name}
 result = {'status_code': '0', 'status_message' : 'Success', 'data': data}
 return jsonify(result)
@app.route('/get-webpage', methods=['GET'])
def get_webpage():
 return render_template('flask_1.html', message="Contact Us")
if __name__ == '__main__':
app.run(host='0.0.0.0', port=8889)而将所有的FastAPI框架下的代码全部汇总到一起,则如下所示:
from fastapi import FastAPI, Request, Form
import uvicorn
from fastapi.staticfiles import StaticFiles
from fastapi.responses import PlainTextResponse, HTMLResponse, FileResponse
import random
from fastapi.templating import Jinja2Templates
app = FastAPI()
app.mount("/templates", StaticFiles(directory="templates"), name="templates")
templates = Jinja2Templates(directory="templates")
@app.get("/", response_class=PlainTextResponse)
async def hello():
 return "Hello World!"
@app.get("/items/{item_id}")
def read_item(item_id: int, q: str = None):
 return {"item_id": item_id, "q": q}
@app.get('/random-number', response_class=PlainTextResponse)
async def random_number():
 return str(random.randrange(100))
@app.get('/get-webpage', response_class=HTMLResponse)
async def get_webpage(request: Request):
 return templates.TemplateResponse("index.html", {"request": request, "message": "Contact Us"})
if __name__ == '__main__':
uvicorn.run('fast_api_1:app', host='0.0.0.0', port=8000)The above is the detailed content of Teach you step by step how to get started with the web development framework in Python. For more information, please follow other related articles on the PHP Chinese website!

Hot AI Tools

Undresser.AI Undress
AI-powered app for creating realistic nude photos

AI Clothes Remover
Online AI tool for removing clothes from photos.

Undress AI Tool
Undress images for free

Clothoff.io
AI clothes remover

AI Hentai Generator
Generate AI Hentai for free.

Hot Article

Hot Tools

Notepad++7.3.1
Easy-to-use and free code editor

SublimeText3 Chinese version
Chinese version, very easy to use

Zend Studio 13.0.1
Powerful PHP integrated development environment

Dreamweaver CS6
Visual web development tools

SublimeText3 Mac version
God-level code editing software (SublimeText3)

Hot Topics
 1359
1359
 52
52
 What is the function of C language sum?
Apr 03, 2025 pm 02:21 PM
There is no built-in sum function in C language, so it needs to be written by yourself. Sum can be achieved by traversing the array and accumulating elements: Loop version: Sum is calculated using for loop and array length. Pointer version: Use pointers to point to array elements, and efficient summing is achieved through self-increment pointers. Dynamically allocate array version: Dynamically allocate arrays and manage memory yourself, ensuring that allocated memory is freed to prevent memory leaks.
 Who gets paid more Python or JavaScript?
Apr 04, 2025 am 12:09 AM
There is no absolute salary for Python and JavaScript developers, depending on skills and industry needs. 1. Python may be paid more in data science and machine learning. 2. JavaScript has great demand in front-end and full-stack development, and its salary is also considerable. 3. Influencing factors include experience, geographical location, company size and specific skills.
 Is distinctIdistinguish related?
Apr 03, 2025 pm 10:30 PM
Although distinct and distinct are related to distinction, they are used differently: distinct (adjective) describes the uniqueness of things themselves and is used to emphasize differences between things; distinct (verb) represents the distinction behavior or ability, and is used to describe the discrimination process. In programming, distinct is often used to represent the uniqueness of elements in a collection, such as deduplication operations; distinct is reflected in the design of algorithms or functions, such as distinguishing odd and even numbers. When optimizing, the distinct operation should select the appropriate algorithm and data structure, while the distinct operation should optimize the distinction between logical efficiency and pay attention to writing clear and readable code.
 How to understand !x in C?
Apr 03, 2025 pm 02:33 PM
!x Understanding !x is a logical non-operator in C language. It booleans the value of x, that is, true changes to false, false changes to true. But be aware that truth and falsehood in C are represented by numerical values rather than boolean types, non-zero is regarded as true, and only 0 is regarded as false. Therefore, !x deals with negative numbers the same as positive numbers and is considered true.
 Can C language user identifiers contain spaces?
Apr 03, 2025 pm 01:51 PM
C language identifiers cannot contain spaces because they can cause confusion and difficulty in maintaining. The specific rules are as follows: they must start with letters or underscores. Can contain letters, numbers, or underscores. Cannot contain illegal characters (such as special symbols).
 What does sum mean in C language?
Apr 03, 2025 pm 02:36 PM
There is no built-in sum function in C for sum, but it can be implemented by: using a loop to accumulate elements one by one; using a pointer to access and accumulate elements one by one; for large data volumes, consider parallel calculations.
 How to apply snake nomenclature in C language?
Apr 03, 2025 pm 01:03 PM
In C language, snake nomenclature is a coding style convention, which uses underscores to connect multiple words to form variable names or function names to enhance readability. Although it won't affect compilation and operation, lengthy naming, IDE support issues, and historical baggage need to be considered.
 Does H5 page production require continuous maintenance?
Apr 05, 2025 pm 11:27 PM
The H5 page needs to be maintained continuously, because of factors such as code vulnerabilities, browser compatibility, performance optimization, security updates and user experience improvements. Effective maintenance methods include establishing a complete testing system, using version control tools, regularly monitoring page performance, collecting user feedback and formulating maintenance plans.


