Practical application development using Python

Although the Python language is very versatile, it is still a bit wrong to use it to develop apps. Therefore, apps developed with Python should be used as coding exercises or for self-entertainment. The current modules in this area are not particularly mature and have many bugs. In short, I advise you not to jump into it lightly.
Preparation
Using Python to develop apps requires the use of a module of Python – kivy. kivy is an open source, cross-platform Python development framework for development Use innovative apps. In short, this is a Python desktop program development framework (similar to wxpython and other modules). The powerful thing is that kivy supports linux, mac, windows, android, and ios platforms. This is why this module is needed to develop apps.
Although kivy is cross-platform, if you want to use Python code on different platforms, you also need to package the Python code into an executable program for the corresponding platform. Fortunately, there is a packaging tool under the kivy project Project – buildozer, this is the officially recommended packaging tool because it is relatively simple and has a high degree of automation. Other projects such as Python-for-android can also play a similar role and will not be introduced here.
Building kivy development environment
You need to install the kivy development environment on your PC. Here is a demonstration of the installation process under mac and linux.
install kivy for mac
Install some dependent packages:
brew install pkg-config sdl2 sdl2_image sdl2_ttf sdl2_mixer gstreamer
Install cython and kivy:
pip install cython==0.25
pip install kivy
If an error is reported when installing kivy, use the following method to install kivy:
git clone https://github.com/kivy/kivy
python setup.py install
Post-installation test:
$python
Python 2.7.10 (default, Jul 15 2017, 17:16:57)
[GCC 4.2.1 Compatible Apple LLVM 9.0.0 (clang-900.0.31)] on darwin
Type "help", "copyright", "credits" or "license" for more information.
>>>
>>> import kivy
[INFO ] [Logger] Record log in /Users/didi/.kivy/logs/kivy_18-05-08_4.txt
[INFO ] [Kivy] v1.10.1.dev0, git-5f6c66e, 20180507
[INFO ] [Python] v2.7.10 (default, Jul 15 2017, 17:16:57)
[GCC 4.2.1 Compatible Apple LLVM 9.0.0 (clang-900.0.31)]
Note: If there is no error when importing the kivy module, it means the installation is successful.
install kivy for centos7
First install the dependencies:
yum install
make
mercurial
automake
gcc
gcc-c++
SDL_ttf-devel
SDL_mixer-devel
khrplatform-devel
mesa-libGLES
mesa-libGLES-devel
gstreamer-plugins-good
gstreamer
gstreamer-python
mtdev-devel
python-devel
python-pip
java-devel
Install cython and kivy:
pip install Cython==0.20
pip install kivy
centos installation kivy reference: https://kivy.org/docs/installation/installation-linux.html#using-software-packages
Note: Other ways to install kivy can be found at: https://kivy.org/ #download (need to circumvent the wall)
Develop the first Python app with kivy
After installing kivy, you can develop the app program. Here is a demonstration of the hello-world program. , the more complex usage of kivy is not the focus of this article, and will be introduced later.
Create a main.py file and write:
#! -*- coding:utf-8 -*-
from kivy.app import App
class HelloApp(App):
pass
if __name__ == '__main__':
HelloApp().run()
Create a hello.kv file and write:
Label:
text: 'Hello, World! I am nMask'
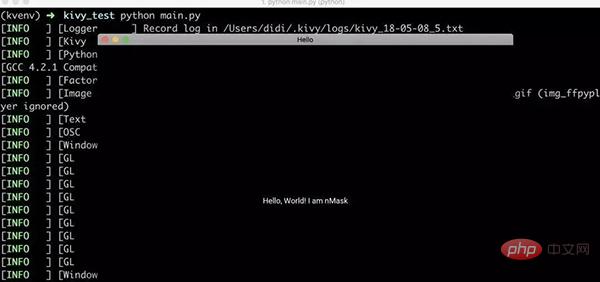
Simple Note: main.py is the entry function and defines a HelloApp class, which inherits kivy.app; the hello.kv file is a kivy program, which is equivalent to defining the interface style, etc. The naming rule of this file is that the class name is in lowercase and app is removed.
Run the first Python app
python main.py
Run result:
pip install buildozer
buildozer init
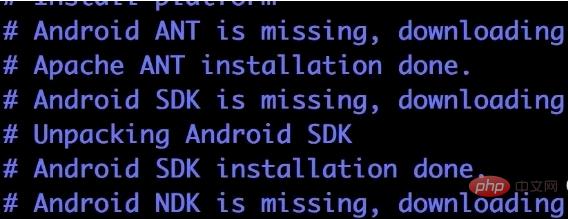
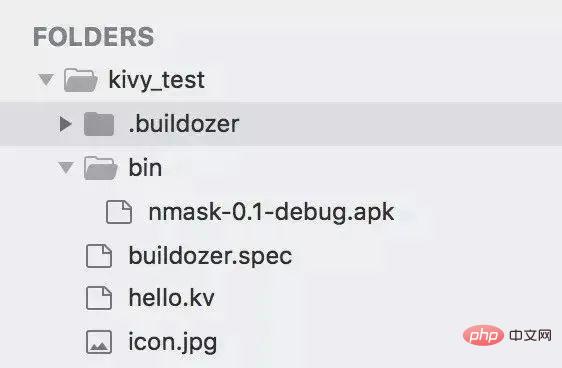
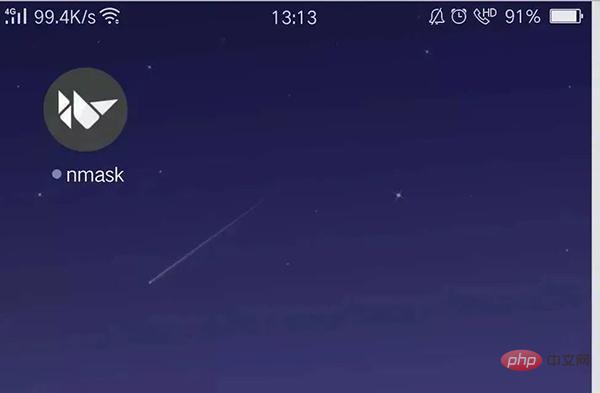
buildozer android debug deploy run

buildozer使用说明
Usage:
buildozer [--profile <name>] [--verbose] [target] <command>...
buildozer --version
Available targets:
androidAndroid target, based on python-for-android project
iosiOS target, based on kivy-ios project
android_oldAndroid target, based on python-for-android project (old toolchain)
Global commands (without target):
distcleanClean the whole Buildozer environment.
help Show the Buildozer help.
init Create a initial buildozer.spec in the current directory
serveServe the bin directory via SimpleHTTPServer
setdefault Set the default command to run when no arguments are given
versionShow the Buildozer version
Target commands:
cleanClean the target environment
update Update the target dependencies
debugBuild the application in debug mode
releaseBuild the application in release mode
deploy Deploy the application on the device
runRun the application on the device
serveServe the bin directory via SimpleHTTPServer
Target "android_old" commands:
adbRun adb from the Android SDK. Args must come after --, or
use --alias to make an alias
logcat Show the log from the device
Target "ios" commands:
list_identitiesList the available identities to use for signing.
xcodeOpen the xcode project.
Target "android" commands:
adbRun adb from the Android SDK. Args must come after --, or
use --alias to make an alias
logcat Show the log from the device
p4aRun p4a commands. Args must come after --, or use --alias
to make an alias
buildozer打包过程中的坑点
如果在打包过程中遇到报错,可以修改buildozer.spec配置文件中的log_level为2,然后重新运行,可以看具体的错误信息。
报错:You might have missed to install 32bits libs
这个错是我在centos7上运行时报的错,大意是系统缺少了某些32位的依赖文件。
解决方案:
yum -y install --skip-broken glibc.i686 arts.i686 audiofile.i686 bzip2-libs.i686 cairo.i686 cyrus-sasl-lib.i686 dbus-libs.i686 directfb.i686 esound-libs.i686 fltk.i686 freeglut.i686 gtk2.i686 hal-libs.i686 imlib.i686 lcms-libs.i686 lesstif.i686 libacl.i686 libao.i686 libattr.i686 libcap.i686 libdrm.i686 libexif.i686 libgnomecanvas.i686 libICE.i686 libieee1284.i686 libsigc++20.i686 libSM.i686 libtool-ltdl.i686 libusb.i686 libwmf.i686 libwmf-lite.i686 libX11.i686 libXau.i686 libXaw.i686 libXcomposite.i686 libXdamage.i686 libXdmcp.i686 libXext.i686 libXfixes.i686 libxkbfile.i686 libxml2.i686 libXmu.i686 libXp.i686 libXpm.i686 libXScrnSaver.i686 libxslt.i686 libXt.i686 libXtst.i686 libXv.i686 libXxf86vm.i686 lzo.i686 mesa-libGL.i686 mesa-libGLU.i686 nas-libs.i686 nss_ldap.i686 cdk.i686 openldap.i686 pam.i686 popt.i686 pulseaudio-libs.i686 sane-backends-libs-gphoto2.i686 sane-backends-libs.i686 SDL.i686 svgalib.i686 unixODBC.i686 zlib.i686 compat-expat1.i686 compat-libstdc++-33.i686 openal-soft.i686 alsa-oss-libs.i686 redhat-lsb.i686 alsa-plugins-pulseaudio.i686 alsa-plugins-oss.i686 alsa-lib.i686 nspluginwrapper.i686 libXv.i686 libXScrnSaver.i686 qt.i686 qt-x11.i686 pulseaudio-libs.i686 pulseaudio-libs-glib2.i686 alsa-plugins-pulseaudio.i686 python-matplotli
参考:https://ask.fedoraproject.org/en/question/9556/how-do-i-install-32bit-libraries-on-a-64-bit-fedora/
报错:Error compiling Cython file
错误大意为cython文件出错,可能是cython模块没有安装,或者版本有问题。解决方案:
pip install cython==0.25
报错:IOError: [Errno 2] No such file or directory….. 这是在打包的最后一步,将apk文件copy到项目bin目录下时报的错,是buildozer的一个bug。
解决方案:
修改/usr/local/lib/python2.7/dist-packages/buildozer/tagets/android.py文件:
在文件开头导入:
from distutils.version import LooseVersion
将786行:XXX found how the apk name is really built from the title这一行以下的代码替换为:
__sdk_dir = self.android_sdk_dir
build_tools_versions = os.listdir(join(__sdk_dir, 'build-tools'))
build_tools_versions = sorted(build_tools_versions, key=LooseVersion)
build_tools_version = build_tools_versions[-1]
gradle_files = ["build.gradle", "gradle", "gradlew"]
is_gradle_build = any((exists(join(dist_dir, x)) for x in gradle_files)) and build_tools_version >= ’25.0'
buildozer虚拟机
kivy官方推出了一个buildozer虚拟机镜像,已经安装好了buildozer以及一些依赖文件,为buildozer打包测试提供平台。由于之前我在mac上利用buildozer打包一直报错,后来换成centos也依然没有成功,因此便下载了此虚拟机,测试效果如下:
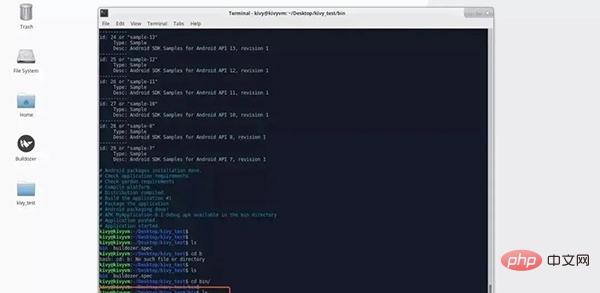
虚拟机下载地址:http://txzone.net/files/torrents/kivy-buildozer-vm-2.0.zip
说明:对于无法解决依赖问题的朋友,可以使用此虚拟机进行程序打包,开发环境还是推荐用自己的本机。
kivy开发实例
因为本文重点在于介绍如何利用kivy+buildozer开发一款python app,因此对于kivy的开发过程,以及app功能进行了最简化。
The above is the detailed content of Practical application development using Python. For more information, please follow other related articles on the PHP Chinese website!

Hot AI Tools

Undresser.AI Undress
AI-powered app for creating realistic nude photos

AI Clothes Remover
Online AI tool for removing clothes from photos.

Undress AI Tool
Undress images for free

Clothoff.io
AI clothes remover

AI Hentai Generator
Generate AI Hentai for free.

Hot Article

Hot Tools

Notepad++7.3.1
Easy-to-use and free code editor

SublimeText3 Chinese version
Chinese version, very easy to use

Zend Studio 13.0.1
Powerful PHP integrated development environment

Dreamweaver CS6
Visual web development tools

SublimeText3 Mac version
God-level code editing software (SublimeText3)

Hot Topics
 Can the Python interpreter be deleted in Linux system?
Apr 02, 2025 am 07:00 AM
Regarding the problem of removing the Python interpreter that comes with Linux systems, many Linux distributions will preinstall the Python interpreter when installed, and it does not use the package manager...
 How to solve the problem of Pylance type detection of custom decorators in Python?
Apr 02, 2025 am 06:42 AM
Pylance type detection problem solution when using custom decorator In Python programming, decorator is a powerful tool that can be used to add rows...
 Python asyncio Telnet connection is disconnected immediately: How to solve server-side blocking problem?
Apr 02, 2025 am 06:30 AM
About Pythonasyncio...
 How to solve permission issues when using python --version command in Linux terminal?
Apr 02, 2025 am 06:36 AM
Using python in Linux terminal...
 Python 3.6 loading pickle file error ModuleNotFoundError: What should I do if I load pickle file '__builtin__'?
Apr 02, 2025 am 06:27 AM
Loading pickle file in Python 3.6 environment error: ModuleNotFoundError:Nomodulenamed...
 Do FastAPI and aiohttp share the same global event loop?
Apr 02, 2025 am 06:12 AM
Compatibility issues between Python asynchronous libraries In Python, asynchronous programming has become the process of high concurrency and I/O...
 What should I do if the '__builtin__' module is not found when loading the Pickle file in Python 3.6?
Apr 02, 2025 am 07:12 AM
Error loading Pickle file in Python 3.6 environment: ModuleNotFoundError:Nomodulenamed...
 How to ensure that the child process also terminates after killing the parent process via signal in Python?
Apr 02, 2025 am 06:39 AM
The problem and solution of the child process continuing to run when using signals to kill the parent process. In Python programming, after killing the parent process through signals, the child process still...


