 Technology peripherals
 AI
AI
 The open source Stable Diffusion plug-in for PS is here: one-click AI brain supplement, ready to install and use
The open source Stable Diffusion plug-in for PS is here: one-click AI brain supplement, ready to install and use
Stable Diffusion is a hot new technology in the AI field this year. Thanks to the open source spirit of Stability AI, it has spawned many AI painting applications. Compared with the traditional painting method, the method of generating images based on text is simple to operate, and the drawing speed is also fast. Each generation will show a different effect.
With the development of technology, consumer-grade GPUs have been able to generate images in tens of seconds, and people have begun to consider using AI drawing capabilities for productivity. Since Stable Diffusion has long been open source, it makes sense for developers to use it to create drawing tools.
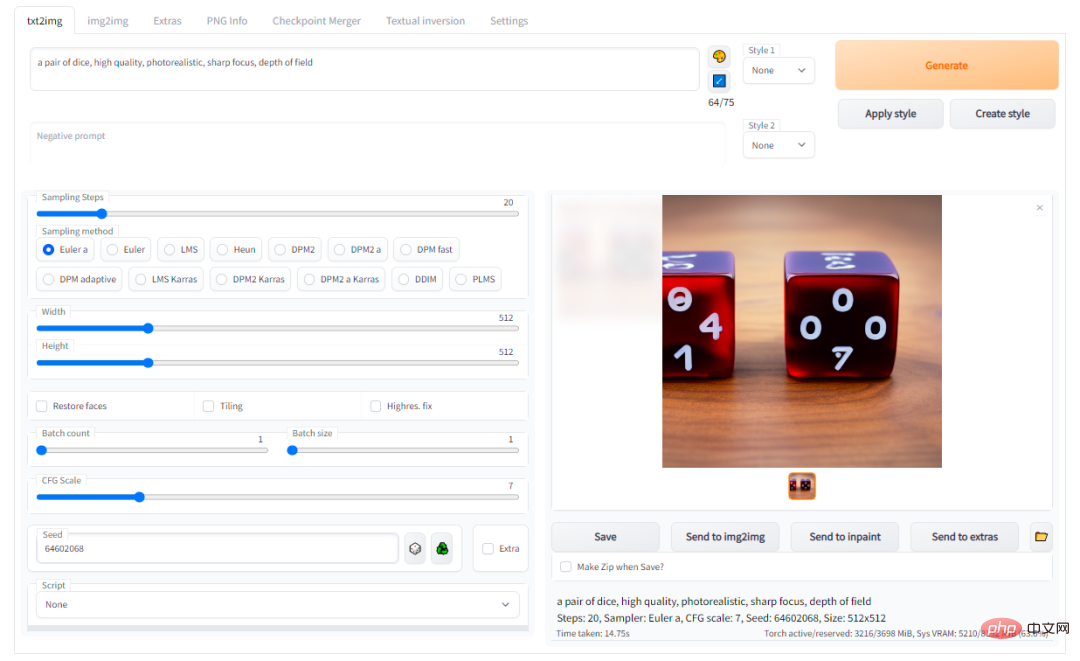
For example, the previous Automatic1111 is a commonly used network UI in the Stable Diffusion user community, but it is still not convenient enough for professional users who often use Photoshop.

Now, with the help of Auto-Photoshop-StableDiffusion-Plugin, users can use the function of Automatic1111 Stable Diffusion directly in the most famous drawing software Photoshop, No need to switch between programs.
This means you can easily use Stable Diffusion AI in the familiar Photoshop environment, right out of the box. After installing this plugin, you can edit Stable Diffusion images using all your favorite tools and conveniently save them in Photoshop.
Project link: https://github.com/AbdullahAlfaraj/Auto-Photoshop-StableDiffusion-Plugin
Function introduction
Quick Test
1. Create a new project in PhotoShop.
2. Once the plugin is loaded, do not select or change anything. Just click the "Generate" button.
3. If you see an image of a cat being loaded onto the canvas, then everything is set up correctly.
txt2Img
1. Use the Rectangular Marquee Tool and select the square (1x1 scale)
a. In the selection tool, you can set the ratio to 512x512 or 512x768;
b. Just make sure that the selected ratio is equal to the size of the resulting image.
2. Write prompt and click "Generate".
3. The result will be resized to fit the selected area. But don't worry, the image will be loaded into PhotoShop as a Smart Object. So you can resize it without losing quality.
img2img
1. Select an image that is on its own layer.
a. If you want the generated image to be perfectly placed on the original image, optional "Ctrl-click" on the layer thumbnail.
2. Change the mode to "img2img" in the plugin UI.
3. Click the "Set Initial Image" button. If the image does not change to the selected layer. Clicking multiple times (the author is working on fixing this issue).
4. Click Generate.
inpaint
1. Change the plug-in mode to "inpaint".
2. Create a square selection on the image to be repaired:
a. Use the Rectangular Marquee Tool;
b. Or “ctrl click” the layer thumbnail.
3. Create a new layer and paint white within the selected area. Note that any white areas will be regenerated via Stable Diffusion.
4. Click the "Init Inpaint Mask" button.
a. Make sure you are still on the white layer before clicking;
b. After clicking, the plug-in will generate a suitable black and white mask. Mask and set it to the mask that Stable Diffusion wants to use.
c. It also creates a canvas snapshot under the selected area and uses this snapshot as the initial image.
5. Click the "Generate" button.
outpaint
1. Change plugin mode to Repair. Remember, "outpaint" is just a special case of repair.
2. Create a "rectangular selection" that intersects the image you want to expand.
3. Click "Init Outpaint Mask", this will:
a. Create a snapshot of the canvas under the selection, and It is used as the "initial image" of Stable Diffusion;
b. Create a black and white mask and use it as the "initial mask";
c. It will update the "Initial Image" and "Initial Mask" in the plug-in UI.
Some experiences
- In order to get the best inpaint and outpaint effects, you must choose " stable-diffusion inpainting model".
- img2img's "initial image" cannot have transparency.
- Always check the Initial Image and Initial Mask in the plugin UI and make sure they match the layers on the canvas. If you want to adjust the mismatch, please do the following:
- Select "group_mask" in the layers panel and click the "set init mask" button.
- Select "group_init_image" in the layer panel and click the "set init image" button.
- After selecting a model, you may need to wait for it to load into Stable Diffusion before you can click Generate.
- Check if the progress bar is stuck at 0% or 1%: you can cancel/interrupt the request at any time if you think it's taking too long and want to regenerate again.
- Do not open multiple PhotoShop documents, this will break the plug-in. Please work on one project at a time.
Questions about img2img, inpaint or outpaint
- ##img2img, inpaint and outpaint Use photoshop's "quick export to png" function.
- Random quick export to png gets corrupted, this is a known photoshop bug.
If you want to test whether the feature is broken and the cause of the problem, you can do the following:
- Select one layer and right click on it and select quick export to png. If you get a window prompt, the quick export works fine. On the other hand if nothing happens then you need to restart photoshop and try the export function again until it works.
- You can use this plugin when the export function is enabled, otherwise img2img, inpaint and outpaint will not work properly.
When running the plug-in for the first time:
1. Download the plug-in:
git clone https://github.com/AbdullahAlfaraj/Auto-Photoshop-StableDiffusion-Plugin.git
2. Run "start_server.bat" under "Auto-Photoshop-StableDiffusion-Plugin"
3. In the location where you installed automatic1111, Edit webui-user.bat and change this line:
set COMMANDLINE_ARGS=
到
set COMMANDLINE_ARGS= --api
这将允许插件与 automatic1111 项目进行通信。保存后关闭「webui-user.bat」文件,正常运行即可。
4、运行 photoshop。选择编辑→首选项→插件,确保选中「启用开发者模式」(Enable Developer Mod)选框。
5、安装官方的「Adobe UXP Developer Tool」,此工具会将插件添加到 photoshop:https://developer.adobe.com/photoshop/uxp/devtool/installation/
6、运行 Adobe UXP Developer Tool 并单击右上角的「添加插件」按钮。导航到「Auto-Photoshop-StableDiffusion-Plugin” 文件夹所在的位置并打开「manifest.json」
7、选择插件并点击 Actions → Load Selected,就完成了。
第二次及后续运行插件的步骤:
1、启动 「webui-user.bat」
2、启动 「start_server.bat」
3、启动 「Photoshop」
4、启动 「Adobe UXP Developer Tool」并加载插件
The above is the detailed content of The open source Stable Diffusion plug-in for PS is here: one-click AI brain supplement, ready to install and use. For more information, please follow other related articles on the PHP Chinese website!

Hot AI Tools

Undresser.AI Undress
AI-powered app for creating realistic nude photos

AI Clothes Remover
Online AI tool for removing clothes from photos.

Undress AI Tool
Undress images for free

Clothoff.io
AI clothes remover

AI Hentai Generator
Generate AI Hentai for free.

Hot Article

Hot Tools

Notepad++7.3.1
Easy-to-use and free code editor

SublimeText3 Chinese version
Chinese version, very easy to use

Zend Studio 13.0.1
Powerful PHP integrated development environment

Dreamweaver CS6
Visual web development tools

SublimeText3 Mac version
God-level code editing software (SublimeText3)

Hot Topics
 How to dynamically create an object through a string and call its methods in Python?
Apr 01, 2025 pm 11:18 PM
In Python, how to dynamically create an object through a string and call its methods? This is a common programming requirement, especially if it needs to be configured or run...
 How to use Go or Rust to call Python scripts to achieve true parallel execution?
Apr 01, 2025 pm 11:39 PM
How to use Go or Rust to call Python scripts to achieve true parallel execution? Recently I've been using Python...
 How to solve the problem of missing dynamic loading content when obtaining web page data?
Apr 01, 2025 pm 11:24 PM
Problems and solutions encountered when using the requests library to crawl web page data. When using the requests library to obtain web page data, you sometimes encounter the...
 How to operate Zookeeper performance tuning on Debian
Apr 02, 2025 am 07:42 AM
This article describes how to optimize ZooKeeper performance on Debian systems. We will provide advice on hardware, operating system, ZooKeeper configuration and monitoring. 1. Optimize storage media upgrade at the system level: Replacing traditional mechanical hard drives with SSD solid-state drives will significantly improve I/O performance and reduce access latency. Disable swap partitioning: By adjusting kernel parameters, reduce dependence on swap partitions and avoid performance losses caused by frequent memory and disk swaps. Improve file descriptor upper limit: Increase the number of file descriptors allowed to be opened at the same time by the system to avoid resource limitations affecting the processing efficiency of ZooKeeper. 2. ZooKeeper configuration optimization zoo.cfg file configuration
 How to do Oracle security settings on Debian
Apr 02, 2025 am 07:48 AM
To strengthen the security of Oracle database on the Debian system, it requires many aspects to start. The following steps provide a framework for secure configuration: 1. Oracle database installation and initial configuration system preparation: Ensure that the Debian system has been updated to the latest version, the network configuration is correct, and all required software packages are installed. It is recommended to refer to official documents or reliable third-party resources for installation. Users and Groups: Create a dedicated Oracle user group (such as oinstall, dba, backupdba) and set appropriate permissions for it. 2. Security restrictions set resource restrictions: Edit /etc/security/limits.d/30-oracle.conf
 In the ChatGPT era, how can the technical Q&A community respond to challenges?
Apr 01, 2025 pm 11:51 PM
The technical Q&A community in the ChatGPT era: SegmentFault’s response strategy StackOverflow...
 Python asyncio Telnet connection is disconnected immediately: How to solve server-side blocking problem?
Apr 02, 2025 am 06:30 AM
About Pythonasyncio...
 What is the reason why pipeline files cannot be written when using Scapy crawler?
Apr 02, 2025 am 06:45 AM
Discussion on the reasons why pipeline files cannot be written when using Scapy crawlers When learning and using Scapy crawlers for persistent data storage, you may encounter pipeline files...


