

How to install Sensu Go Monitoring on Windows 11 or 10 via WSL

Steps to install Sensu Go on Windows 10 or 11
To start using the Sensu Go monitoring tool on Windows 11 or 10, your system should have 10 GB of free space and 4GB of RAM. However, if you are in a production environment, 8GB RAM is recommended.
1. Enable WSL on Windows 11 or 10
Here we are using Ubuntu 22.04 WSL App on Windows, you can also use Debian or Ubuntu 20.04. If you already have a WSL 1 or 2 application enabled and using it, you can go to the next step.
2. Add the Sensu repository in Ubuntu
The next step is to make the repository provide the packages we need to install the Sensu backend on the Ubuntu WSL system since it cannot use the default system repository to install. So run the given command in your command terminal.
sudo apt install curl
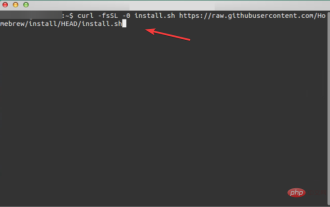
curl -s https://packagecloud.io/install/repositories/sensu/stable/script.deb.sh | sudo bash
3. Install Sensu Go Backend on Windows 10 or 11
We already have the Sesnu repository on our Ubuntu 22.04/20.04 system, now we can use the system’s APT package manager Easy to install backend. Here is the command to follow:
sudo apt install sensu-go-backend
4. Start the Sensu Go background service
We need a supporting configuration file to start the Sensu Go service, without it you will be stuck trying to start the Sensu Go service An error was encountered while serving. So, first, download it using the given command:
sudo curl -L https://docs.sensu.io/sensu-go/latest/files/backend.yml -o /etc/sensu/backend.yml
sudo mkdir /var/run/sensu/
Now, start the service:
sudo service sensu-backend start
To check the service status, use:
sudo service sensu-backend status
5. Configure username and password
Once you are sure that the Sensu Go backend is running without any errors. Set up a username and password to access the web-based graphical user interface of this monitoring tool. To do this, we need to set two environment variables with the required credential values to set the admin user and password. sensu-backend initAfter setting the environment variable, use the command to initialize it.
Method 1:
export SENSU_BACKEND_CLUSTER_ADMIN_USERNAME=h2smedia
export SENSU_BACKEND_CLUSTER_ADMIN_PASSWORD=yourpassword
sensu-backend init
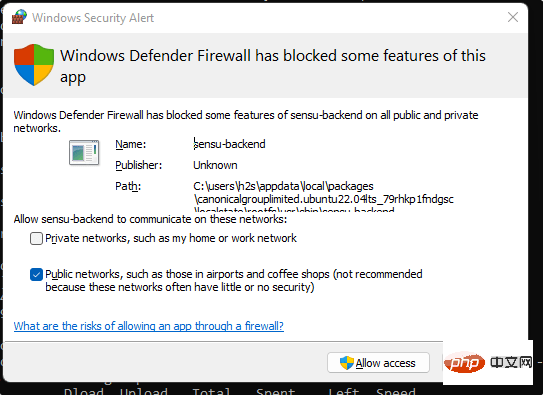
If the system requires allowing Sensu supported firewall, then don’t forget to click the “Allow Access” button.
Method 2:
or , the user can use the given command instead of the above command , set the username and password interactively:
sensu-backend init --interactive
You will be asked to set the username and password as well as the API. However, the API key is optional - press Enter to skip it.
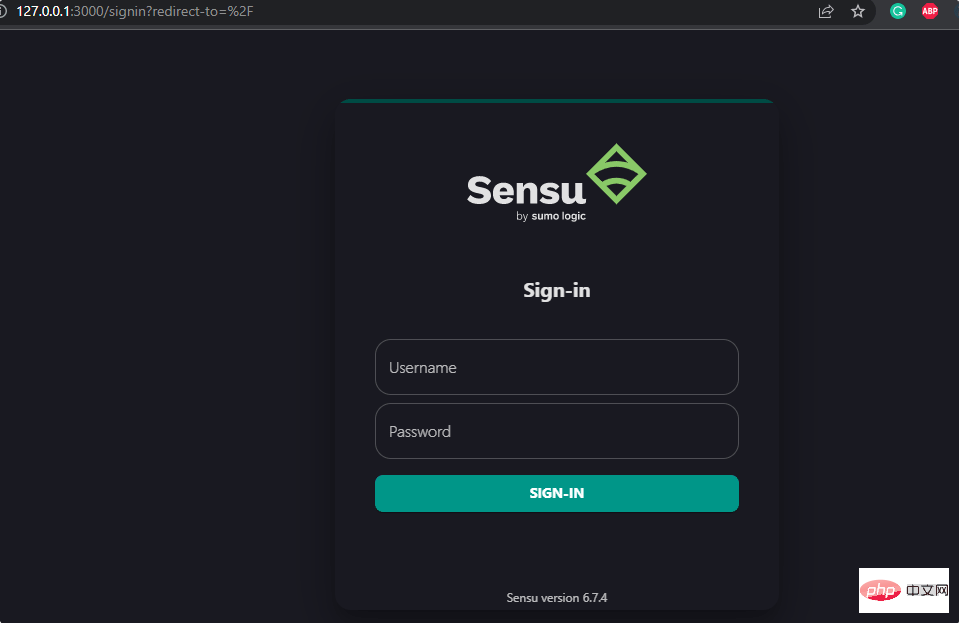
6. Access the web interface
Open the local or remote system browser to access the IP address of the server where you installed the Sensu GO monitoring solution.
Point your browser to the server IP using the port number in the following format:
http://server-ip-address:3000
7. Log in
Use Sensu in step 5 of this tutorial Administrator credentials set. Then click the "Login" button.
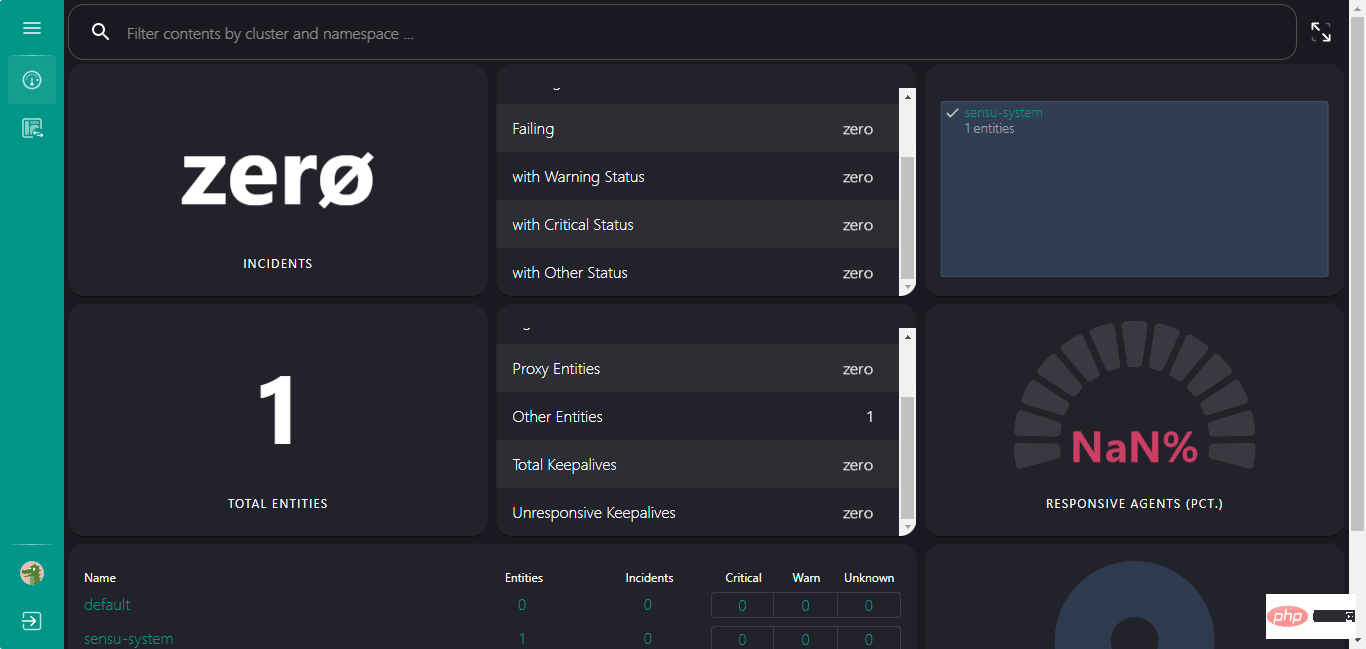
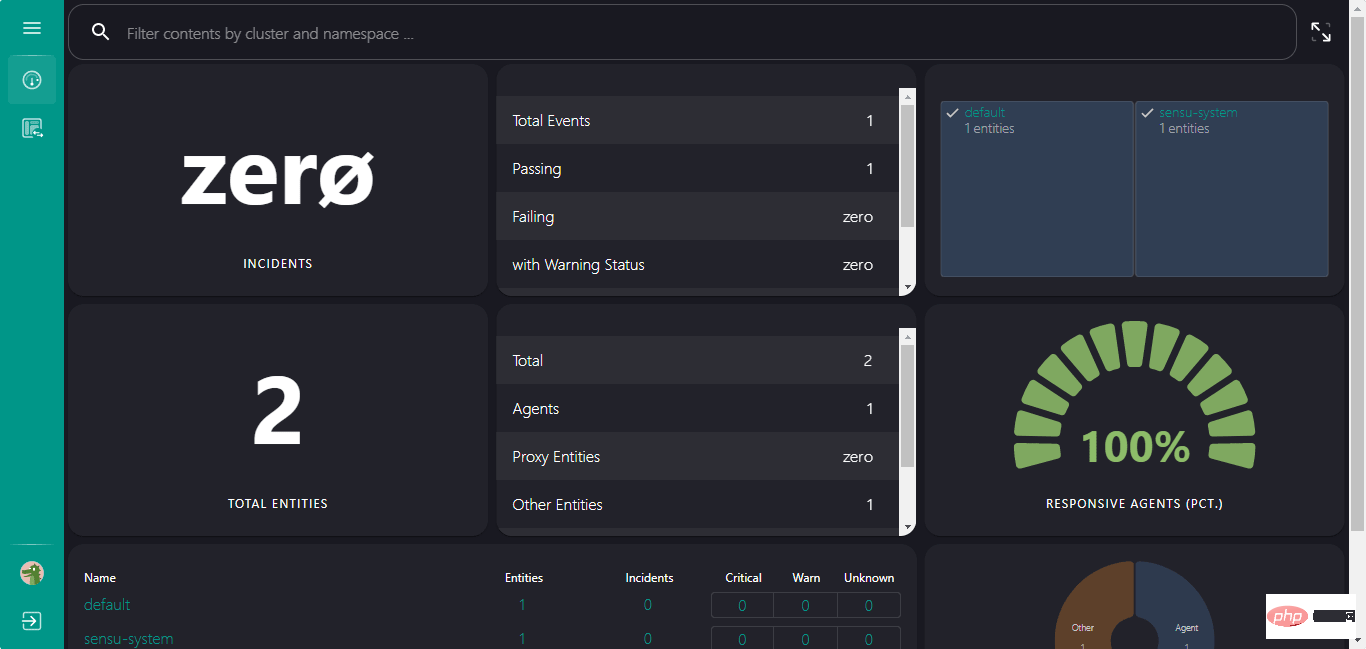
8. Sensu Go Monitoring Dashboard
Finally, the Sensu Go dashboard is there from where you can get the metrics extracted from the system. Overview for monitoring with the Sensu agent. But for this, we have to manually install the agent on every system we want to monitor. Go to next step.
9. Install Sensu Go Agent
Now, assuming you want to monitor a remote system using Sensu GO, first we have to make sure that the specific system has Sensu Agent .
For Ubuntu or Debian
curl -s https://packagecloud.io/install/repositories/sensu/stable/script.deb.sh | sudo bash
sudo apt-get install sensu-go-agent
For RHEL/CentOS/Rocky Linux/AlmaLinux/Oracle Linux
curl -s https://packagecloud.io/install/repositories/sensu/stable/script.rpm.sh | sudo bash
sudo yum install sensu-go-agent
For Windows
Go to the Sensu website and download the agent executable - Here is the link.
10. How to configure Agent for Linux
Assume that you have to use the previous step to install the Sensu Go Agent on Linux (such as Ubuntu/Debian or RedHat). Now you want to configure it so that the backend can recognize the system and add it for monitoring.
Here we use Ubuntu/Debian, but the method is the same for other Linux systems.
Copy proxy configuration file
sudo curl -L https://docs.sensu.io/sensu-go/latest/files/agent.yml -o /etc/sensu/agent.yml
Edit the proxy file and add the Sensu backend server URL.
sudo nano /etc/sensu/agent.yml
Remove # from the name, namespace, backend URL and IP address as shown in the given screenshot. Then replace the address 127.0.0.1 with your Sensu Go’s backend server.
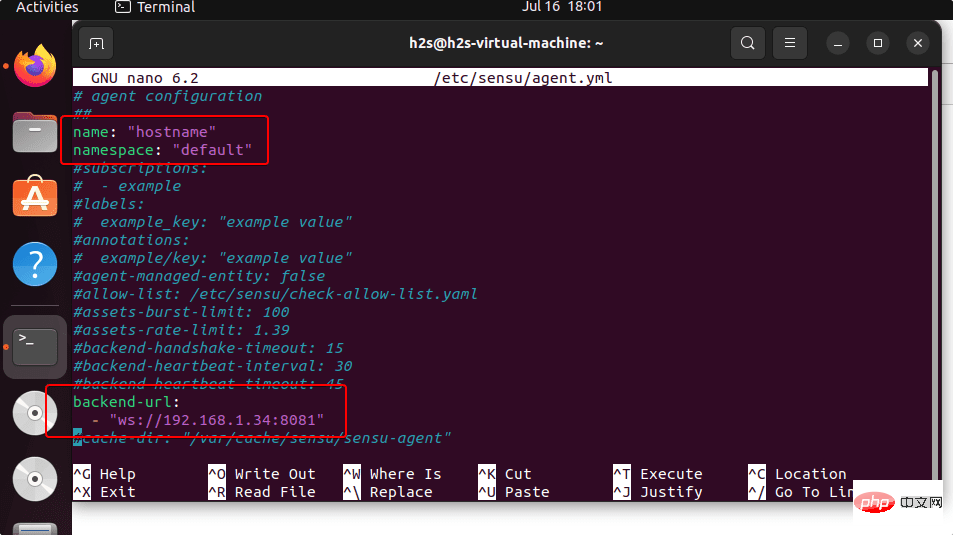
Save the file using Ctrl O, press Enter, and exit - Ctrl X.
Now, restart the agent for the changes to take effect.
sudo systemctl restart sensu-agent
11. Start monitoring on Windows 10 or 11
After installing and configuring the Sensu Go Agent on the system to be monitored, refresh the WSL Linux application running on Windows 11 or 10 Sensu Go web interface to view added devices on the dashboard. You can see we have two entities which are the backend and another proxy.
12.如何安装Sensuctl命令工具
Sensuctl 是 Sensu 监控解决方案提供的一种工具,用于使用命令行管理其资源。它通过调用 Sensu 的底层 API 来创建、读取、更新和删除事件、实体和资源。Sensuctl 适用于 Linux、macOS 和 Windows。
下面是在 Debian 或 Ubuntu 系统上安装它的方法。
curl -s https://packagecloud.io/install/repositories/sensu/stable/script.deb.sh | sudo bash
sudo apt install sensu-go-cli
在官方文档页面上了解有关此命令实用程序及其用法的更多信息。
13.卸载后端和代理(可选)
如果您的 Windows WSL 系统上不再需要 Sensu Go 后端和代理,那么这里是删除它们的命令。
sudo apt autoremove --purge sensu-go-backend
sudo apt autoremove --purge sensu-go-agent
The above is the detailed content of How to install Sensu Go Monitoring on Windows 11 or 10 via WSL. For more information, please follow other related articles on the PHP Chinese website!

Hot AI Tools

Undresser.AI Undress
AI-powered app for creating realistic nude photos

AI Clothes Remover
Online AI tool for removing clothes from photos.

Undress AI Tool
Undress images for free

Clothoff.io
AI clothes remover

AI Hentai Generator
Generate AI Hentai for free.

Hot Article
Hot Tools

Notepad++7.3.1
Easy-to-use and free code editor

SublimeText3 Chinese version
Chinese version, very easy to use

Zend Studio 13.0.1
Powerful PHP integrated development environment

Dreamweaver CS6
Visual web development tools

SublimeText3 Mac version
God-level code editing software (SublimeText3)
Hot Topics
 1385
1385
 52
52

 How to install Oracle Linux on Windows 10 or 11 WSL – Subsystems
Apr 14, 2023 pm 10:07 PM
How to install Oracle Linux on Windows 10 or 11 WSL – Subsystems
Apr 14, 2023 pm 10:07 PM
Steps to Install Oracle Linux 8 or 7.5 on Windows 10 | 11 WSL 1. Enable WSL – Windows Subsystem for Linux The first thing we need to have is WSL, enable it if it is not already enabled. Go to the search box and type – Turn Windows features on or off. When the option appears, click to open the same. In the window that opens, scroll down and select the box provided for Windows Subsystem for Linux. Then click the OK button. Restart the system afterwards to apply the changes. 2. Download OracleLinx8 or
 How to run SUDO commands in Windows 11/10
Mar 09, 2024 am 09:50 AM
How to run SUDO commands in Windows 11/10
Mar 09, 2024 am 09:50 AM
The sudo command allows users to run commands in elevated privilege mode without switching to superuser mode. This article will introduce how to simulate functions similar to sudo commands in Windows systems. What is the Shudao Command? Sudo (short for "superuser do") is a command-line tool that allows users of Unix-based operating systems such as Linux and MacOS to execute commands with elevated privileges typically held by administrators. Running SUDO commands in Windows 11/10 However, with the launch of the latest Windows 11 Insider preview version, Windows users can now experience this feature. This new feature enables users to
 3 Easy Ways to Create a Windows 11 USB Installer on Mac
May 13, 2023 pm 09:43 PM
3 Easy Ways to Create a Windows 11 USB Installer on Mac
May 13, 2023 pm 09:43 PM
Windows 11 introduces a wealth of new features and a comprehensively improved appearance, placing greater emphasis on unity and efficiency. So, today’s topic is how to create a Windows 11 USB installer on Mac. Performing a clean installation of Windows 11, rather than an upgrade, is the method that yields the best results when getting the operating system. Using a drive bootable in Windows 11, you can perform this task. If you have a Windows PC, making a bootable CD for Windows 11 is a very simple process. On the other hand, if you are using a Mac, the process is a little more complicated. This article will describe how to use the base
 Steps to install Adminer on Windows 10 or 11
Apr 23, 2023 pm 04:40 PM
Steps to install Adminer on Windows 10 or 11
Apr 23, 2023 pm 04:40 PM
Steps to install Adminer on Windows 11 or 10 You can follow these steps to install Adminer on both Windows 11 and 10 operating systems to manage different database systems. 1. Enable WSL on Windows If you have already enabled WSL then go to next step otherwise go to Windows start menu and type “Turn Windows features on or off” and turn it on when its icon appears. Scroll down to Windows Subsystem for Linux, select it, and click the OK button. After WSL installation is complete, a dialog box will appear asking you to restart the system. 2
 What is sudo and why is it important?
Feb 21, 2024 pm 07:01 PM
What is sudo and why is it important?
Feb 21, 2024 pm 07:01 PM
sudo (superuser execution) is a key command in Linux and Unix systems that allows ordinary users to run specific commands with root privileges. The function of sudo is mainly reflected in the following aspects: Providing permission control: sudo achieves strict control over system resources and sensitive operations by authorizing users to temporarily obtain superuser permissions. Ordinary users can only obtain temporary privileges through sudo when needed, and do not need to log in as superuser all the time. Improved security: By using sudo, you can avoid using the root account during routine operations. Using the root account for all operations may lead to unexpected system damage, as any mistaken or careless operation will have full permissions. and
 How to enable or disable firewall on Alpine Linux?
Feb 21, 2024 pm 12:45 PM
How to enable or disable firewall on Alpine Linux?
Feb 21, 2024 pm 12:45 PM
On AlpineLinux, you can use the iptables tool to configure and manage firewall rules. Here are the basic steps to enable or disable the firewall on AlpineLinux: Check the firewall status: sudoiptables -L If the output shows rules (for example, there are some INPUT, OUTPUT, or FORWARD rules), the firewall is enabled. If the output is empty, the firewall is currently disabled. Enable firewall: sudoiptables-PINPUTACCEPTsudoiptables-POUTPUTACCEPTsudoiptables-PFORWARDAC
 How to install PHP on Windows 10 using Command Prompt
May 08, 2023 pm 05:13 PM
How to install PHP on Windows 10 using Command Prompt
May 08, 2023 pm 05:13 PM
Install PHP on Windows using Command Prompt or PowerShell Install ChocolateyChoco Package Manager I tried the Windows default package manager Winget but could not install PHP through it. Therefore, the other best option left is to use the popular Chocolatey package manager. But unlike Winget, Choco does not exist in our Windows system by default, so we need to install it manually on our system. Go to your Windows 10 or 11 search box and type CMD, when it appears select "Run as administrator" to copy the given command
 How to use Nginx Proxy Manager to implement reverse proxy under HTTPS protocol
Sep 26, 2023 am 08:40 AM
How to use Nginx Proxy Manager to implement reverse proxy under HTTPS protocol
Sep 26, 2023 am 08:40 AM
How to use NginxProxyManager to implement reverse proxy under HTTPS protocol. In recent years, with the popularity of the Internet and the diversification of application scenarios, the access methods of websites and applications have become more and more complex. In order to improve website access efficiency and security, many websites have begun to use reverse proxies to handle user requests. The reverse proxy for the HTTPS protocol plays an important role in protecting user privacy and ensuring communication security. This article will introduce how to use NginxProxy