Home > Common Problem > How to change account type on Windows 11

How to change account type on Windows 11

王林
Release: 2023-04-13 12:58:05
forward
4340 people have browsed it

How to change account type on Windows 11

Changing the account type on Windows 11 allows you to manage their permissions and makes it easier for users to handle certain things themselves.

Change the account type on Windows 11:
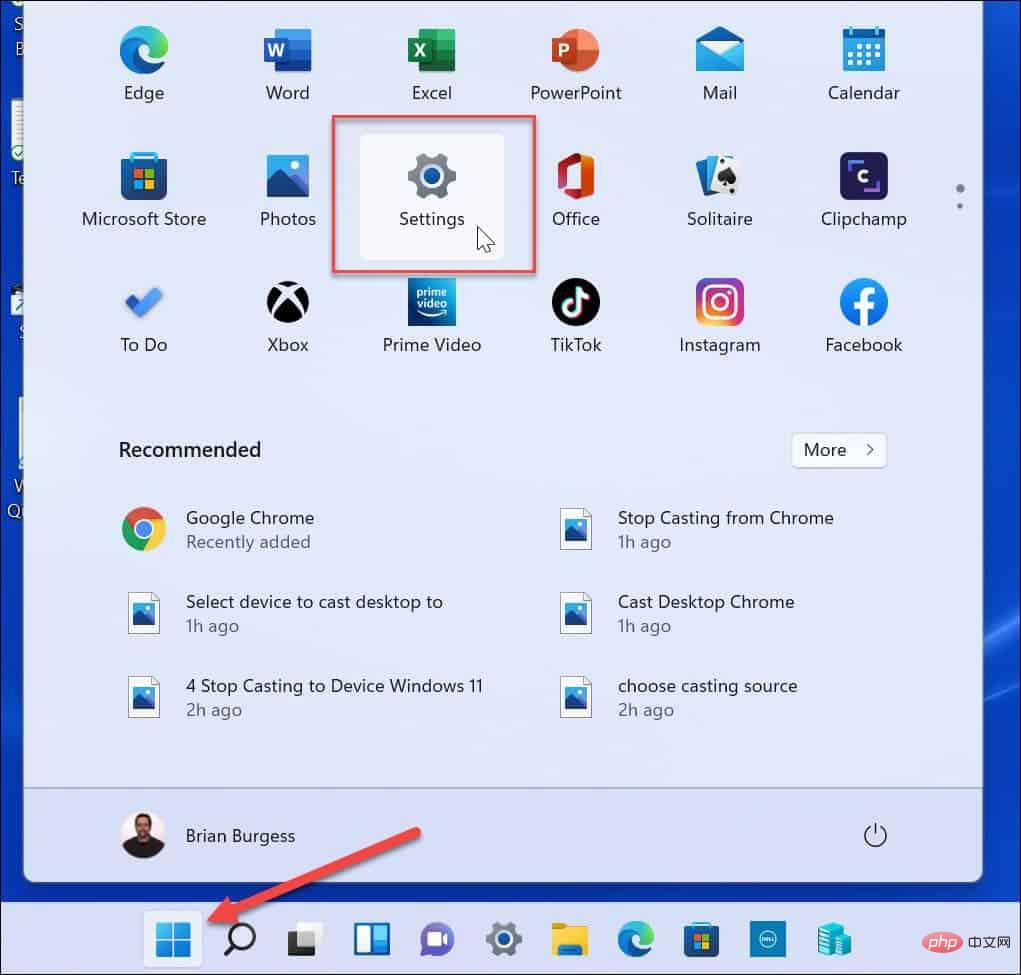
  1. Open the Start Menu and select Settings.
    How to change account type on Windows 11
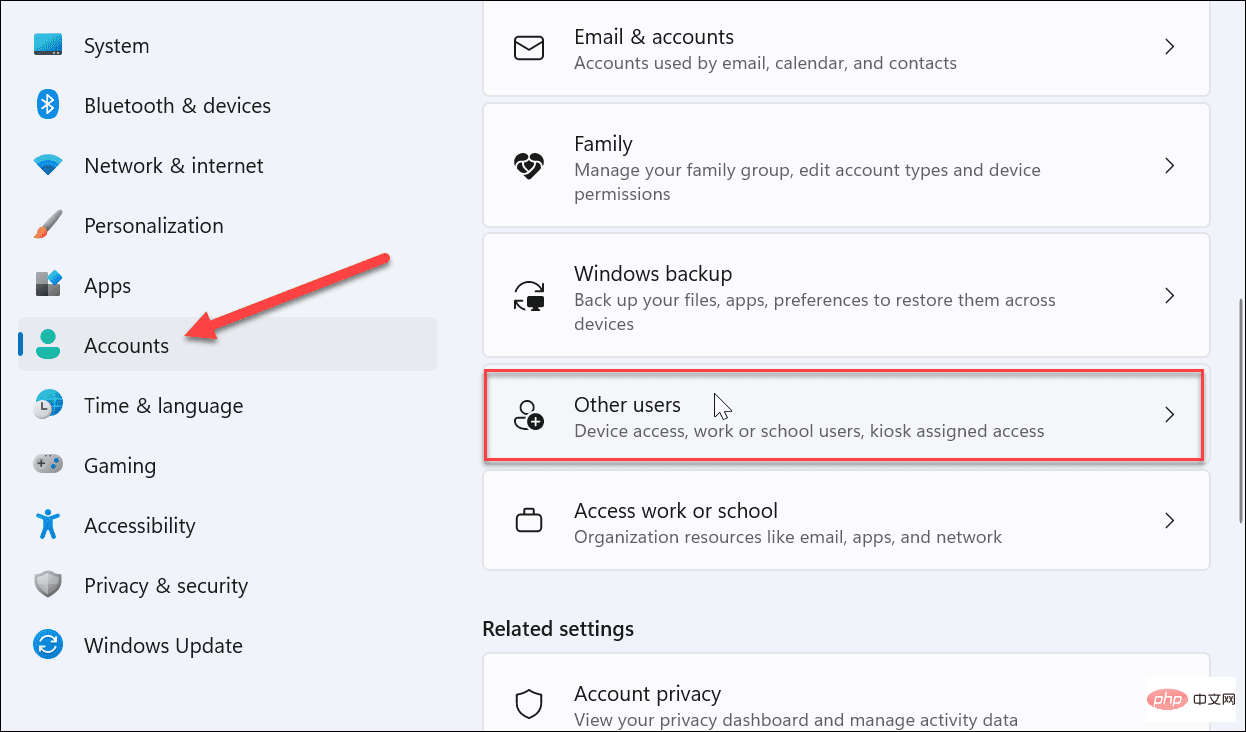
  2. In "Settings", select "Account" > "Other Users". How to change account type on Windows 11
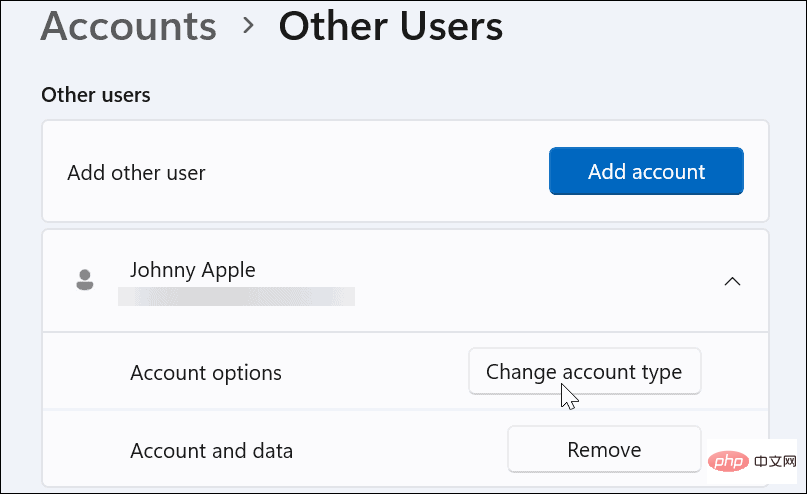
  3. Under the Other Users section, find the account you want to update and select the Change Account Type button. How to change account type on Windows 11
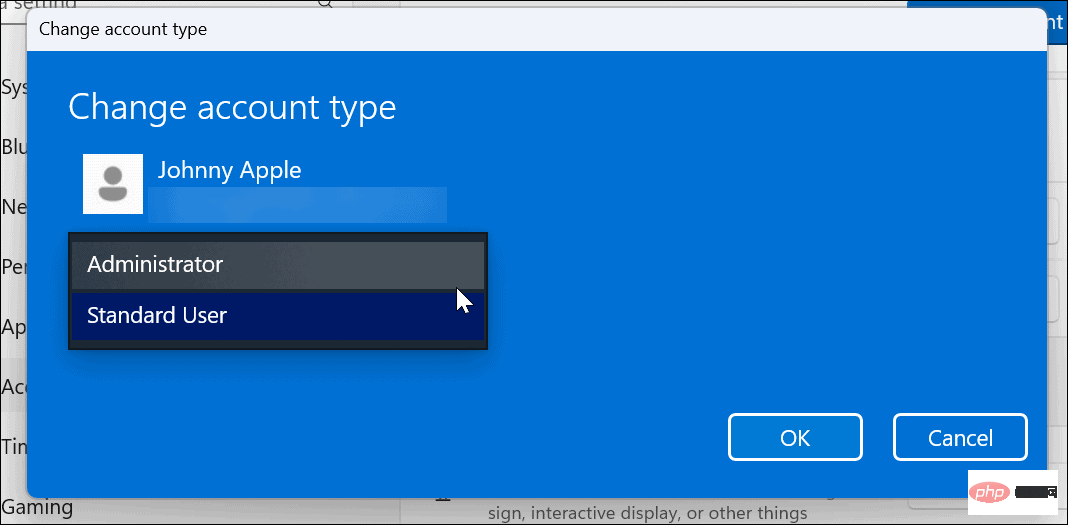
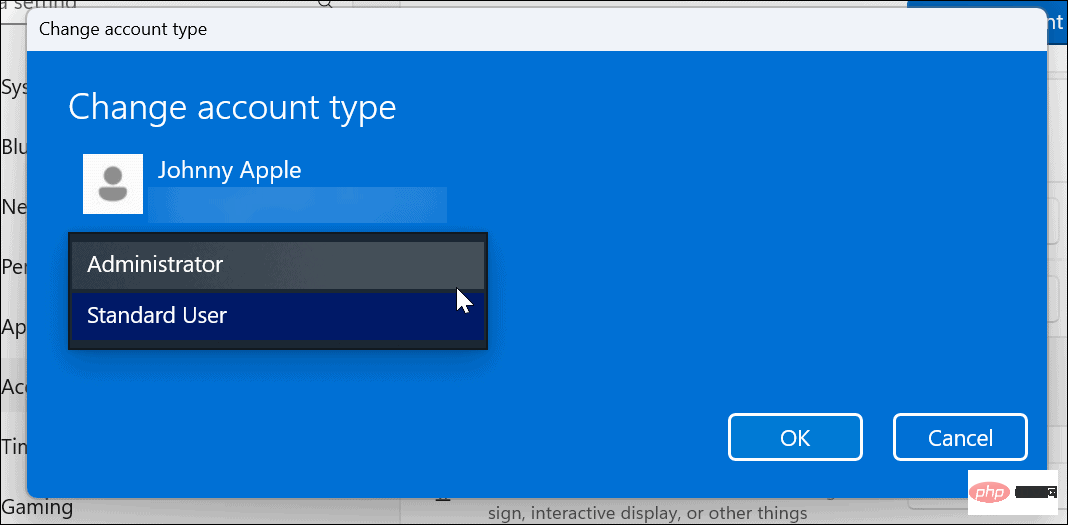
  4. Under the Account type section, select the Standard or Administrator option from the drop-down list and click OK . How to change account type on Windows 11
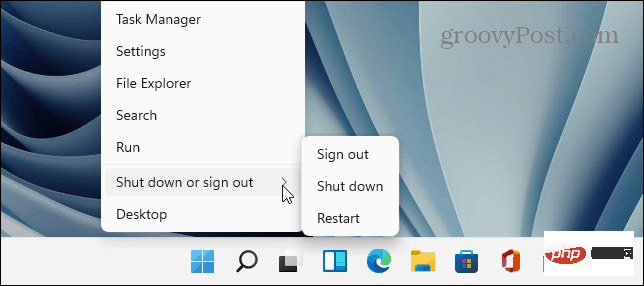
  5. After changing the account type, restart your PC and log in again using the new account type. How to change account type on Windows 11

How to Change Account Type in Control Panel

If you prefer to use Control Panel to change the account type on Windows 11, at least now you can. The process is simple but does involve a few more steps.

Change the Windows 11 user account type through Control Panel:
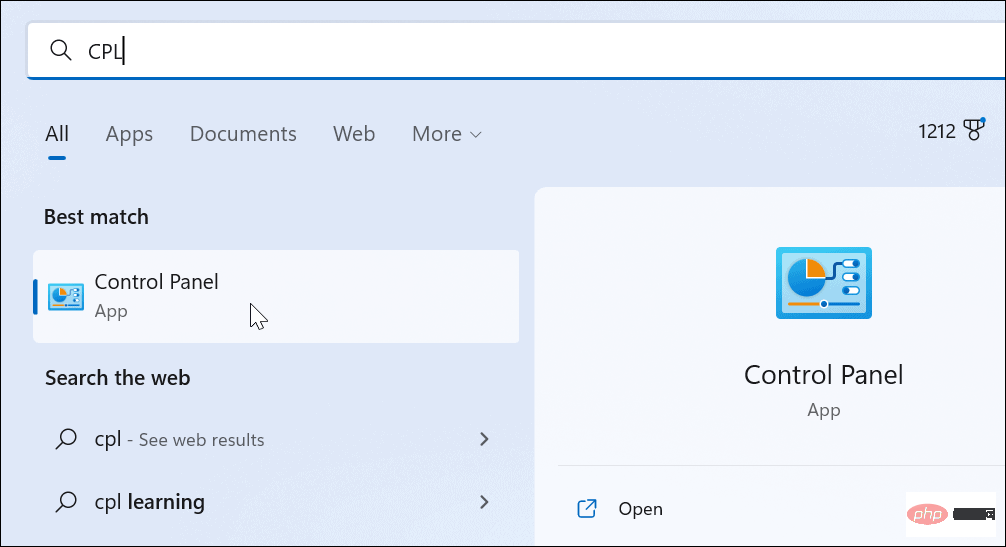
  1. Open the Start Menu.
  2. In Start, search for CPL and select Control Panel from the top. How to change account type on Windows 11
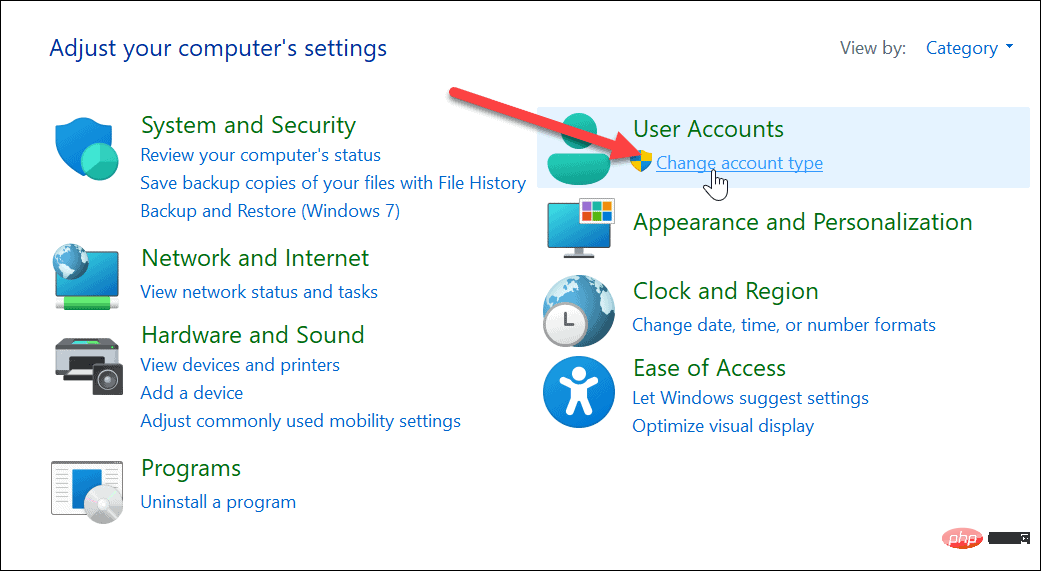
  3. In the main Control Panel screen, click the Change Account Type link under the User Accounts option. How to change account type on Windows 11
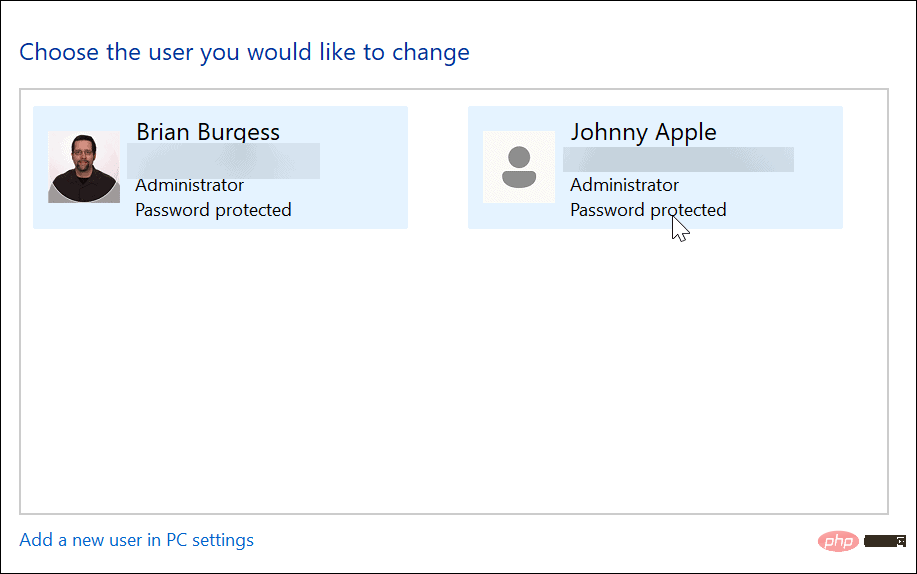
  4. Click on the account you want to change the type of. How to change account type on Windows 11
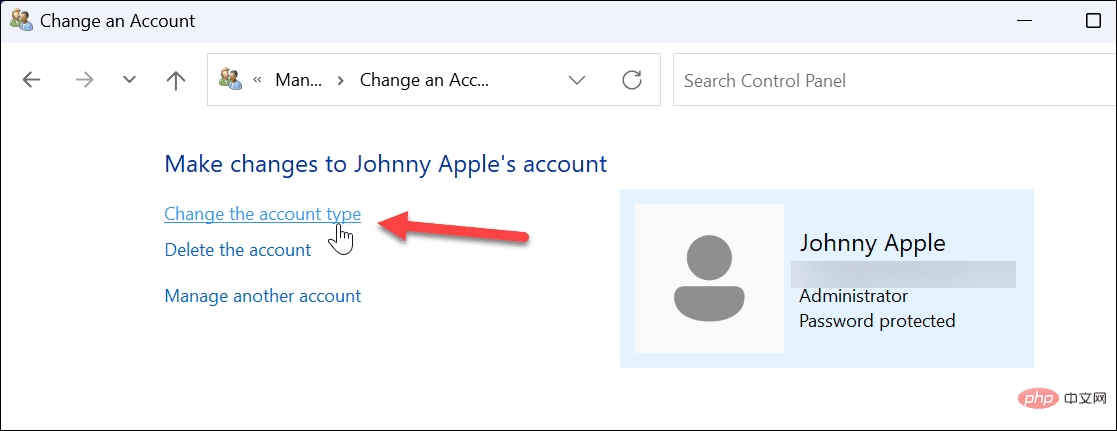
  5. Click the Change Account Type link on the right. How to change account type on Windows 11
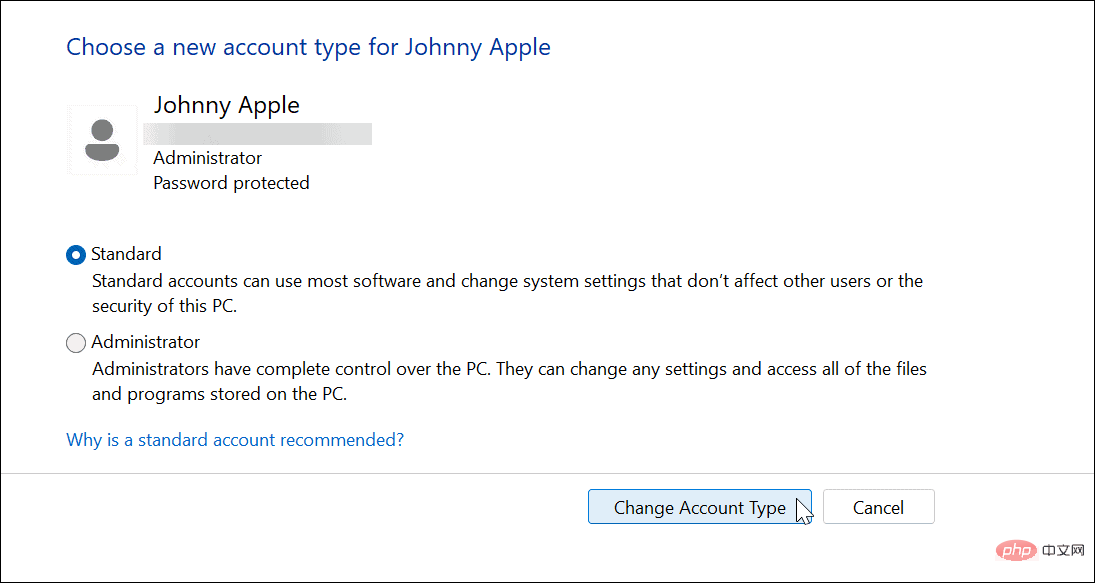
  6. Select the account type you want to use and click the Change Account Type button. How to change account type on Windows 11

The account will be set up according to your selections. For example, we set it from Administrator to a standard user account.

Change account type on Windows 11 (workaround)

You can also use the workaround in Control Panel to change a user's account type. It's simple, but you need to know how to do it.

To use another method of changing the user account type on Windows:
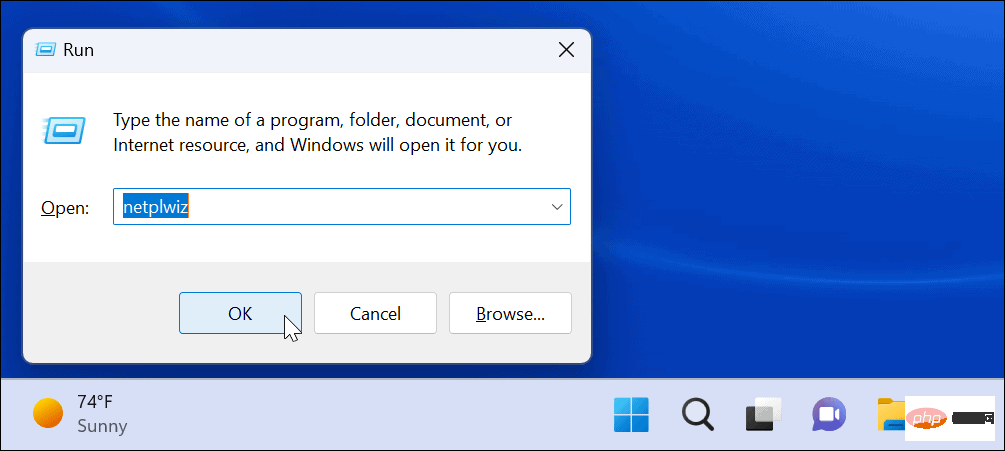
  1. Press the Windows key ROpen "Run” Dialog box.
  2. Enter netplwiz in the field that opens and click OK. How to change account type on Windows 11
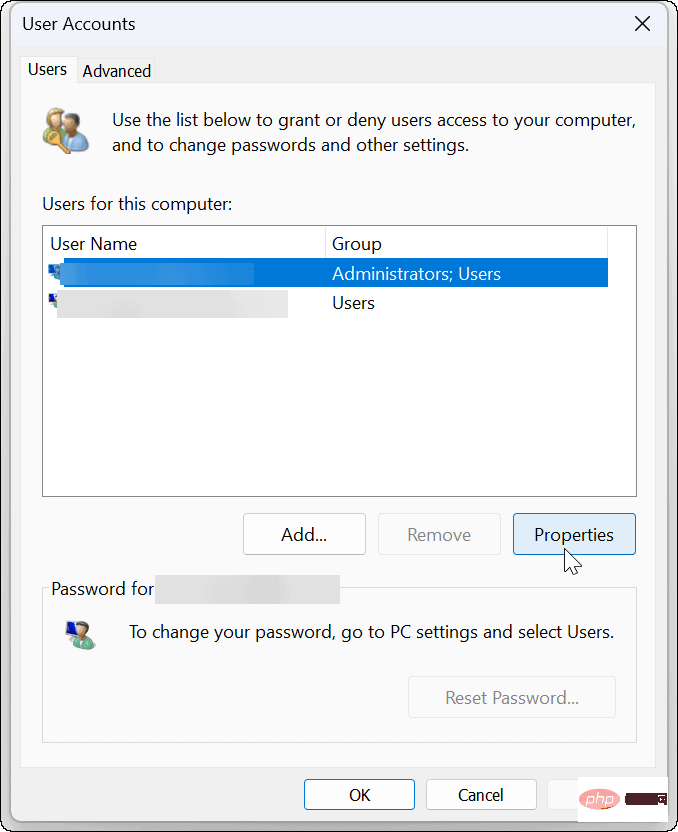
  3. Select the account whose type you want to change and click the "Properties " button. How to change account type on Windows 11
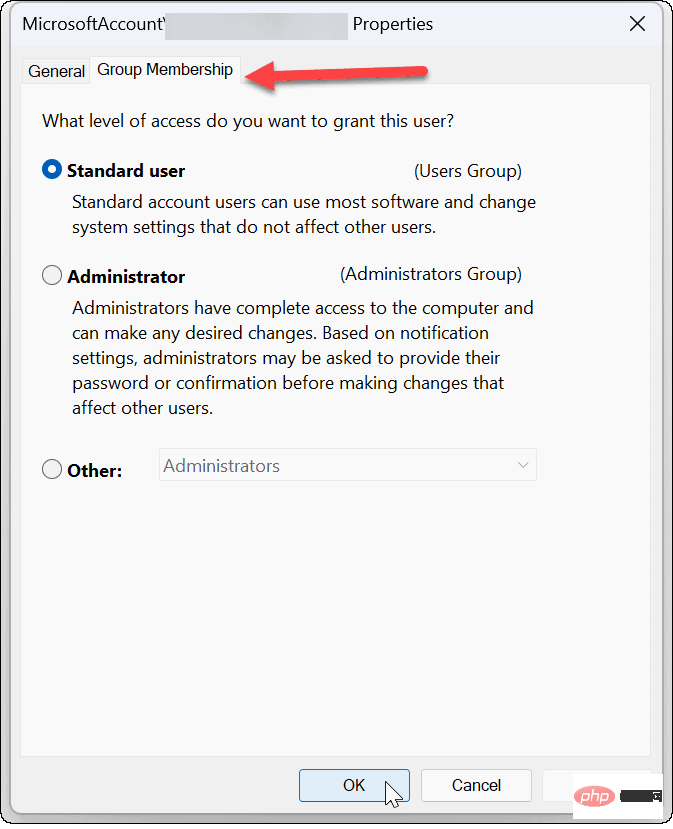
  4. Make sure the "Group Membership" tab is open. How to change account type on Windows 11
  5. Next, select the account you want to grant access to and click OK. How to change account type on Windows 11-1
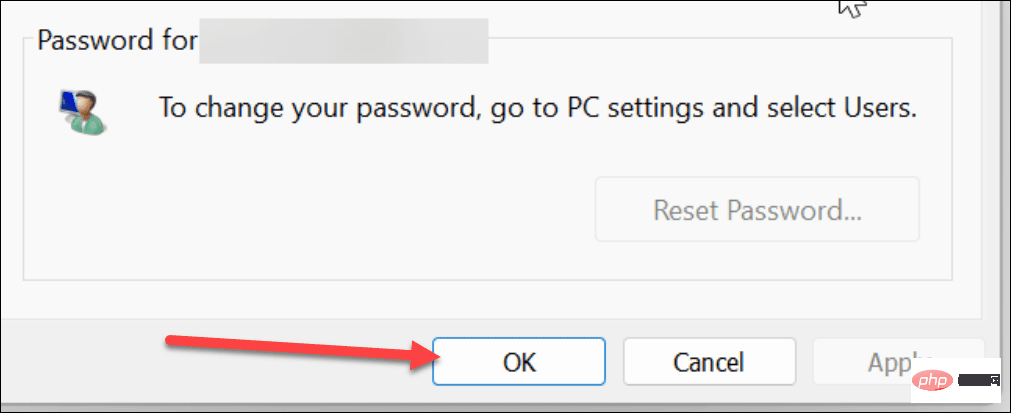
  6. Click the OK button again to close the User Account screen. How to change account type on Windows 11

The above is the detailed content of How to change account type on Windows 11. For more information, please follow other related articles on the PHP Chinese website!

Related labels:
source:yundongfang.com
Statement of this Website
The content of this article is voluntarily contributed by netizens, and the copyright belongs to the original author. This site does not assume corresponding legal responsibility. If you find any content suspected of plagiarism or infringement, please contact admin@php.cn
Popular Tutorials
More>
Latest Downloads
More>
Web Effects
Website Source Code
Website Materials
Front End Template