

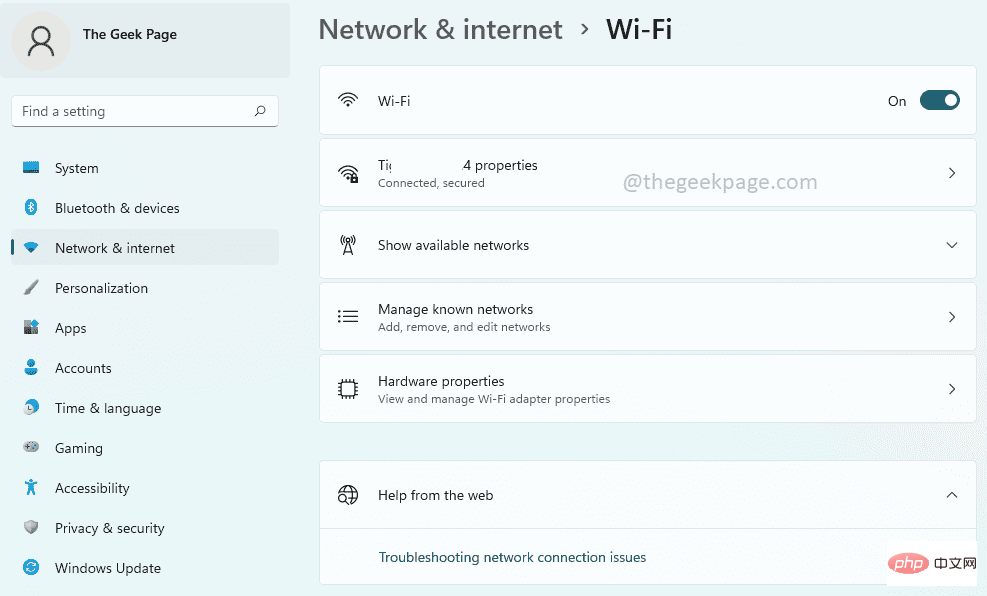
How to open Wi-Fi settings in Windows 11

Windows WiFi Settings window provides many WiFi setting options to its users. WiFi Settings Some of the settings available in the window are as follows.
- Turn WiFi on or off
- View and edit the properties of the current network
- Show available networks
- Manage known networks
- View and Manage Wi-Fi Adapter Properties
- Troubleshooting Network Connection Issues
Therefore, the WiFi Settings window is a primary window as it provides all the major WiFi configuration options. If you are working on a network-related project, or you are a student who is looking into WiFi management settings, or someone who needs to open the WiFi settings window very frequently for other reasons, you may be happy to know that there are many options for you to open WiFi settings window.
In this article, we detail 9 different methods you can use to open the WiFi settings window in Windows 11. From the methods listed in this article, choose your favorite and share it with us! enjoy!
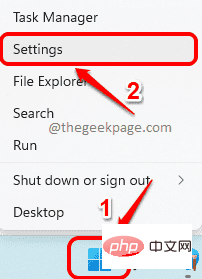
Method 1: App via Settings
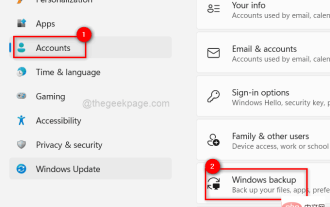
Step 1:Right clickWindows Start menu icon and click the Settings option to launch the Settings application.
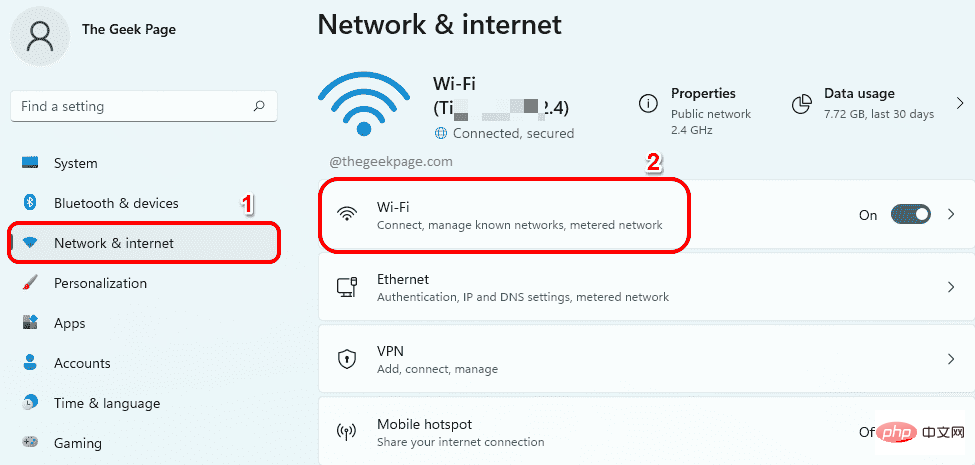
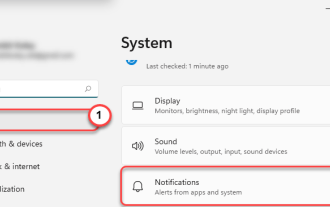
Step 2: In the left pane of the settings window, clickNetwork and Internet tile, then on the right side of the window, click the Wi-Fi tile.
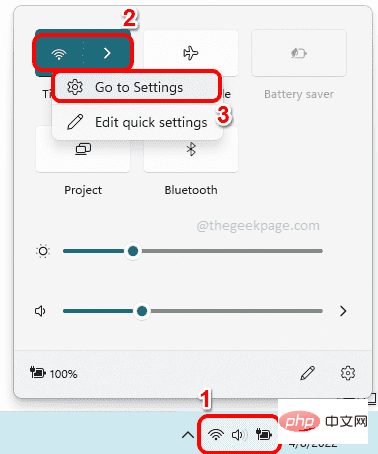
lower right corner of the taskbar, click on the Wi-Fi icon, speaker icon and battery icon The Quick Settings Panel icon.
Next,right-click the Wi-Fi icon in the Quick Settings panel and click Go to Settings options to launch the Wi-Fi setup window immediately.
 Method 3: Search through Windows
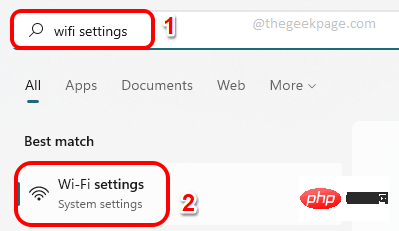
: On the taskbar, click Search icon.

: Now on the Search bar, enter wifi settings and click The Wi-Fi Settings option in the Best Match section. This will immediately launch the Wi-Fi setup window for you.
 Method 4: More Wi-Fi settings through the quick settings panel
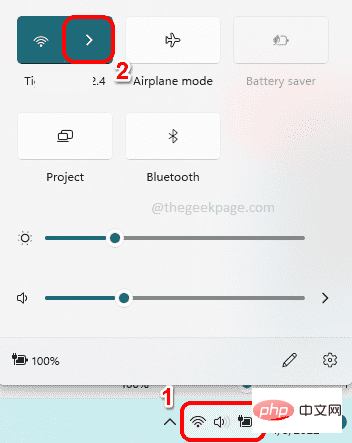
: First, click on the Quick Settings Panel icon in the lower right corner of the taskbar. The quick settings panel icons consist of the speaker icon, Wi-Fi icon, and battery icon. Next, click the
right arrowicon associated with the Wi-Fi icon.
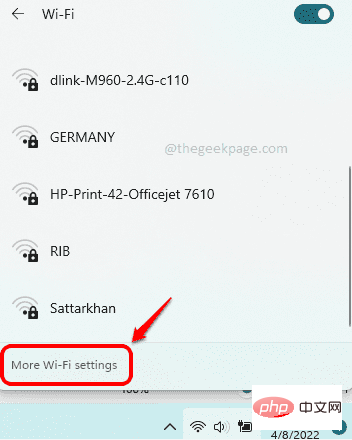
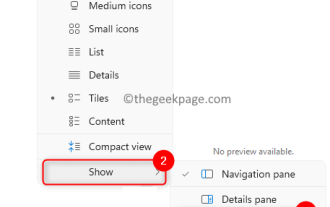
: Now, under the list of available Wi-Fi networks, click Show More Wi-Fi Settingsthe link to.
 Method 5: Through the command prompt
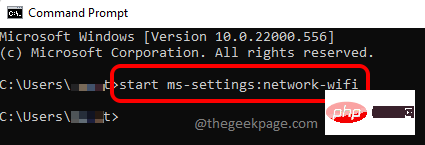
: Press the WIN R key to startRunWindow. When it appears, type cmd and press the Enter key.
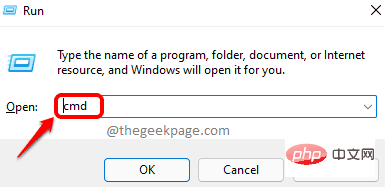
: When Command Prompt opens, copy and paste the following command, Then press the Enter key to immediately launch the Wi-Fi settings window in Windows 11. 启动 ms-settings:network-wifi
 Method 6: Via Windows PowerShell
: Press the Win R keys simultaneously again Bring up the run window.
Typepowershell and press Enter to start Windows PowerShell.
第 2 步:在 PowerShell 窗口中,复制并粘贴以下命令,然后按Enter键立即启动 Wi-Fi 设置窗口。
启动 ms-settings:network-wifi

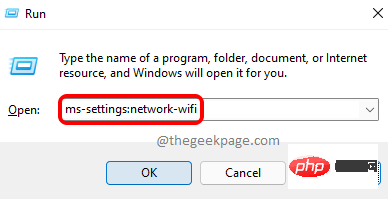
方法七:通过运行窗口
这是一种非常简单的方法。只需同时按Win + R键即可打开“运行”对话框。在运行命令框中,复制并粘贴以下命令,然后单击确定按钮。这将立即将您带到 Wifi 设置窗口。享受!
ms-设置:网络-wifi
方法 8:通过创建桌面快捷方式
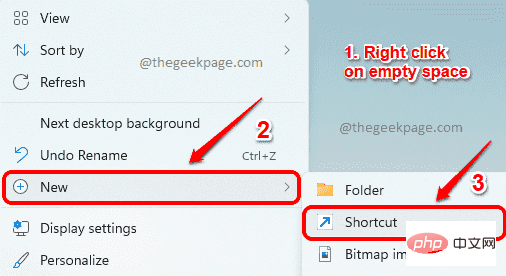
步骤 1:按WIN+D键立即调出桌面。
现在,右键单击桌面上的空白区域。从右键单击上下文菜单中单击“新建”选项,然后单击“快捷方式”选项。
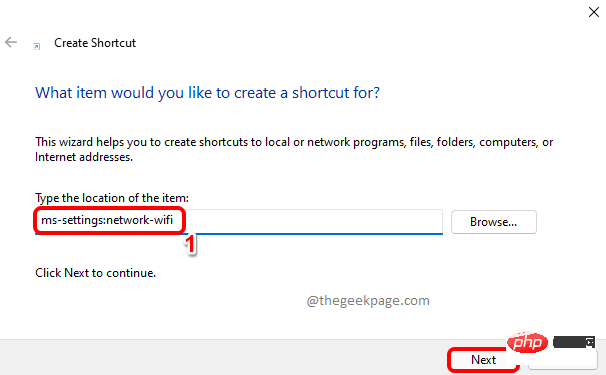
第 2 步:接下来,在“创建快捷方式”窗口中,在“键入项目的位置”字段中,复制并粘贴以下位置。
ms-设置:网络-wifi
完成后,点击底部的下一步按钮。
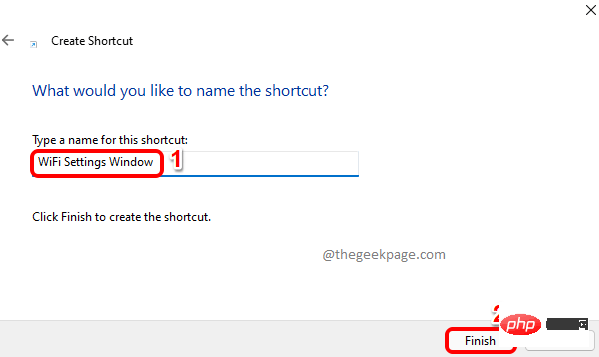
第 3 步:最后,为您的快捷方式命名,然后点击完成按钮。
在下面的示例中,我们将快捷方式命名为WiFi 设置窗口。
第4步:就是这样。如果你现在去桌面,你可以看到你全新的快捷方式,一切准备就绪。每次要启动 Wi-Fi 设置窗口时双击它。

方法 9:通过分配热键组合
第 1 步:为 Wi-Fi 设置窗口创建桌面快捷方式,详见方法 8。
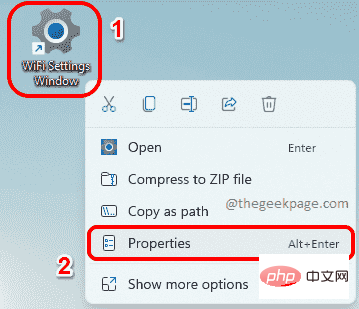
接下来,右键单击桌面快捷方式,然后单击“属性”选项。
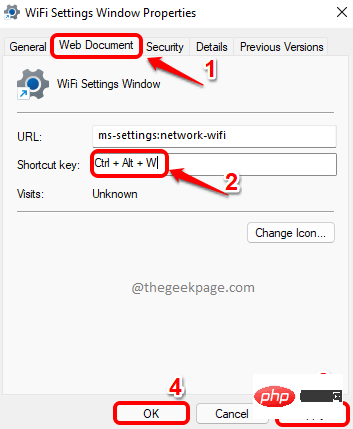
第 2 步:现在在快捷方式属性窗口中,首先单击Web 文档选项卡。
然后单击与快捷键选项关联的文本字段。只需按下要分配给快捷方式的任何键。CTRL + ALT键将自动添加到您分配的键之前。
例如,如果您想将键 W 分配给您的快捷方式,那么 WiFi 设置窗口的热键组合将是 CTRL + ALT + W。
就是这样。每次急于更改 WiFi 设置时,尝试同时按下 CTRL + ALT + W 键以调出 WiFi 设置窗口。
The above is the detailed content of How to open Wi-Fi settings in Windows 11. For more information, please follow other related articles on the PHP Chinese website!

Hot AI Tools

Undresser.AI Undress
AI-powered app for creating realistic nude photos

AI Clothes Remover
Online AI tool for removing clothes from photos.

Undress AI Tool
Undress images for free

Clothoff.io
AI clothes remover

AI Hentai Generator
Generate AI Hentai for free.

Hot Article
Hot Tools

Notepad++7.3.1
Easy-to-use and free code editor

SublimeText3 Chinese version
Chinese version, very easy to use

Zend Studio 13.0.1
Powerful PHP integrated development environment

Dreamweaver CS6
Visual web development tools

SublimeText3 Mac version
God-level code editing software (SublimeText3)
Hot Topics
 1377
1377
 52
52

 7 Ways to Fix Printer Access Denied Error in Windows 11
May 10, 2023 pm 03:43 PM
7 Ways to Fix Printer Access Denied Error in Windows 11
May 10, 2023 pm 03:43 PM
Connecting your Windows computer to external devices such as printers can make things easier for you. However, you may encounter several problems when trying to collect computers from external devices such as printers. Users complain about Windows 11 printer access denied error. Many situations can cause this issue, including hardware issues, driver issues, and more. Therefore, this article will discuss the cause of the problem and how to solve it. Windows 11 printer access denied error prevents you from using the printer to perform any action on your computer. This indicates that there is not a good connection between the computer and the printer. Likewise, printer errors may cause Windows to be unable to connect to the printer Access Denied error 0x0000011b.
 How to fix preview pane not working in Windows 11
Apr 24, 2023 pm 06:46 PM
How to fix preview pane not working in Windows 11
Apr 24, 2023 pm 06:46 PM
One of the features that comes with Windows File Explorer is the preview pane, which displays a preview of the file you selected. This means you can view the contents of the file before opening it. The preview pane of File Explorer provides previews for different types of files such as Office-related documents, PDFs, text files, images, and videos. It usually works fine, but sometimes the file preview isn't available. Recently, many Windows 11 users have raised the issue that File Explorer’s preview pane is not working and they are unable to view file previews. Are you facing the issue of preview pane not working on your Windows computer? Then, continue reading this article. Here we have compiled a list of fixes that can help you fix
 Fix: Snipping Tool notification missing in Windows 11, 10
May 16, 2023 pm 06:34 PM
Fix: Snipping Tool notification missing in Windows 11, 10
May 16, 2023 pm 06:34 PM
Snip&Sketch is an excellent Windows screenshot tool. Microsoft has added tons of new cool features and shortcuts to make this tool almost indispensable for users. However, you may have noticed an issue after taking the screenshot, the preview notification does not appear in the notification panel! There are many reasons that could be the source of the problem. So, no need to waste more time, just follow these solutions to find a quick solution. Fix 1 – Check notification settings You may have blocked Snip & Sketch notification settings. 1. You have to open settings. So, press Windows key + I key at the same time. 2. Now, go to “System” from the left pane. 3. On the right side, click All Options
 Ghost Specter Windows 11 Superlite: Download and Installation Guide
May 05, 2023 am 09:10 AM
Ghost Specter Windows 11 Superlite: Download and Installation Guide
May 05, 2023 am 09:10 AM
Updating the operating system to the latest Windows 11 poses a challenge for many PCs due to insufficient system requirements. Therefore, Microsoft released a modified version, GhostSpectreWindows11Superlite, compatible with every PC. Therefore, we will discuss how to download and install it. Likewise, if your PC meets the Windows 11 system requirements, you can read further about obtaining a Windows 11 custom ISO. What is Ghost Windows 11? GhostSpectreWindows11 is a modified version called LightWindows11. This is because of the installed
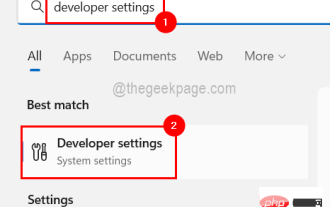 How to enable developer mode in Windows 11
Apr 25, 2023 pm 10:58 PM
How to enable developer mode in Windows 11
Apr 25, 2023 pm 10:58 PM
Microsoft has announced a new feature alongside Windows 10 called Developer Mode, which is also present in Windows 11. This is very important for all developers who code software development on Windows PC and want to deploy it to other devices. To improve the coding environment, users must enable developer mode on Windows systems, which allows users to benefit from enhanced assistance in writing, testing, and deploying code. Users must ensure that developer mode is enabled not only on the Windows machine where coding is done, but also on the device where it is deployed and tested. If you are new to coding and want to make the most of this feature, continue reading this article which will guide you how
 Fix issue where Windows 11 display language cannot be changed
May 07, 2023 am 10:10 AM
Fix issue where Windows 11 display language cannot be changed
May 07, 2023 am 10:10 AM
The display language is the front-end language in which users can read and view system screen content. Windows 11 releases updated versions regularly, but sometimes this causes some unexpected things to change. Many Windows users have noticed a change in Windows 11 systems where they cannot change their display language. They're not sure why this is happening. We suspect this may be due to a recent Windows version being installed on the system or having sync settings enabled to remember preferences for different devices. Don't worry if you encounter such problems when changing the display language. In this article, we have explained below some solutions that will help users to resolve this issue and be able to change the display language. build
 Windows 11 doesn't recognize Bootrec? Apply this simple fix
May 20, 2023 pm 01:50 PM
Windows 11 doesn't recognize Bootrec? Apply this simple fix
May 20, 2023 pm 01:50 PM
The boot sector is a critical part of the drive that takes over shortly after the computer boots. When you have a problem, bootrec is here to help. But what should you do if bootrec is not recognized in Windows 11? The boot sector contains the MBR or Master Boot Record, which helps locate the operating system on the drive and load it. Moreover, its issues may prevent you from booting Windows 11 efficiently or at all. Speaking of issues, many are reporting Bootrec/Fixboot access denied messages and we have detailed this issue in a separate tutorial. In this case, it is recommended that you run the bootrec command to eliminate this issue. If you encounter when running the command
 Which one is better? What are the differences, advantages and disadvantages of NTFS and ReFS in Windows 11?
May 10, 2023 am 08:06 AM
Which one is better? What are the differences, advantages and disadvantages of NTFS and ReFS in Windows 11?
May 10, 2023 am 08:06 AM
NTFS has always been the default file system for Windows PCs, but Microsoft is introducing some juicy stuff with ReFS. This new file system may be coming to Windows 11, and users are eager to know how NTFS will compare to ReFS. In this detailed guide, we will show you the better choice between these two file systems. Does Windows 11 support ReFS? Discussions about Windows 11 supporting ReFS (Resilient File System) are still tentative and ongoing. This file system is not officially available on Windows 11 PCs yet. However, DevsChannel and WindowsServe