

Network sharing not working in Windows 11? Apply these fixes

Network sharing allows users to transfer and receive files with other users on the local network. It's perfect for people with multiple devices in the office or at home. However, many users have reported that network sharing does not work properly after upgrading to Windows 11.
This can be due to a number of reasons, including an issue with the operating system installer version. In addition to this, misconfigured settings, missing critical services, or missing permissions can cause network shares to not work in Windows 11.
Many people who use both Windows 10 and Windows 11 devices on their local network have noticed that while the device running Windows 11 is able to access the Windows 10 PC, the reverse is not true. This is where upgrading all your devices to Windows 11 might work.
So, now let us introduce you to the most effective fixes.
What should I do if network sharing doesn’t work in Windows 11?
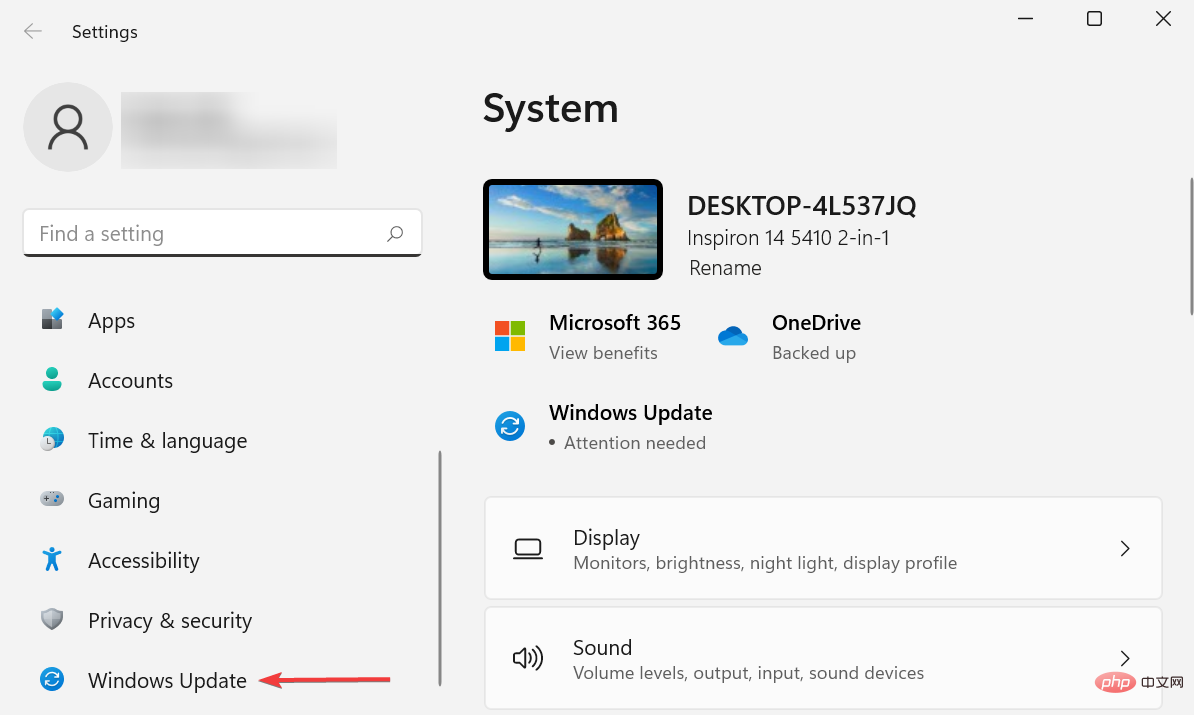
1. Update Windows 11
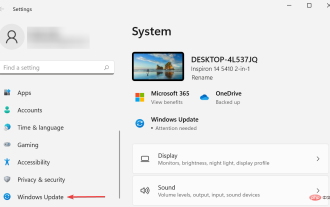
- Press Windows ILaunch the Settings app, then click on the left Select Windows Update from the tabs listed in the navigation pane.

- Click the Check for Updates button on the right to scan for any newer versions available.
- If any are listed after scanning, click Download and Install to get them.
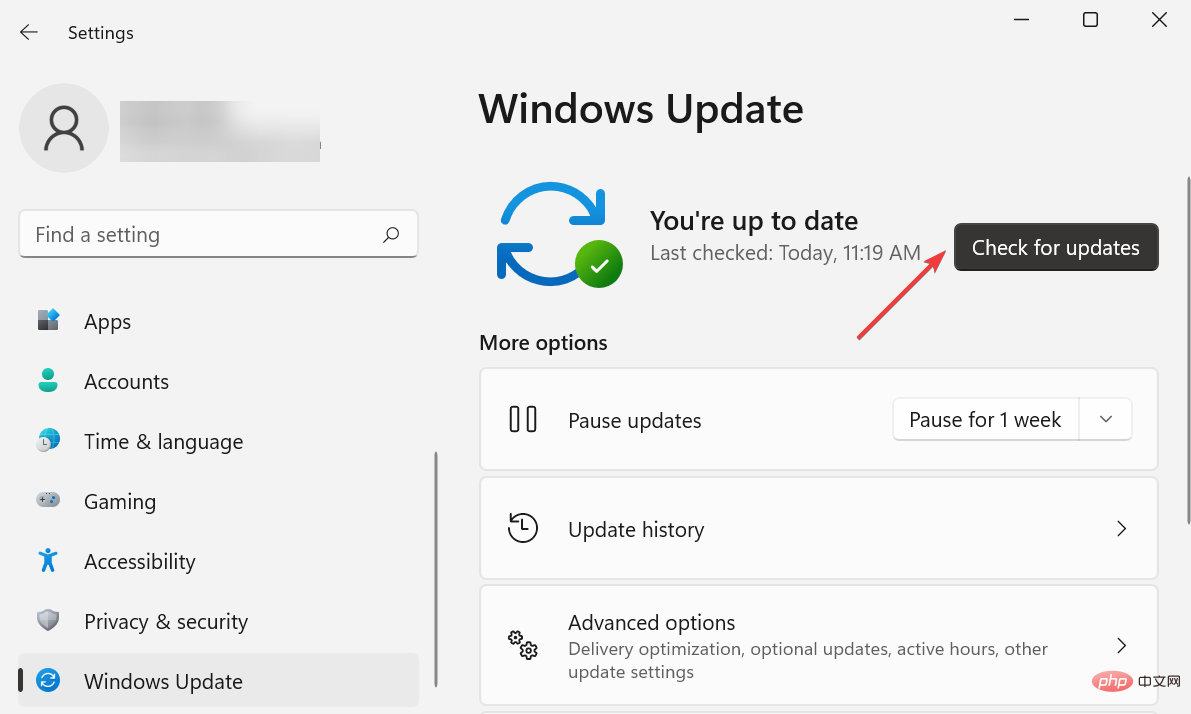
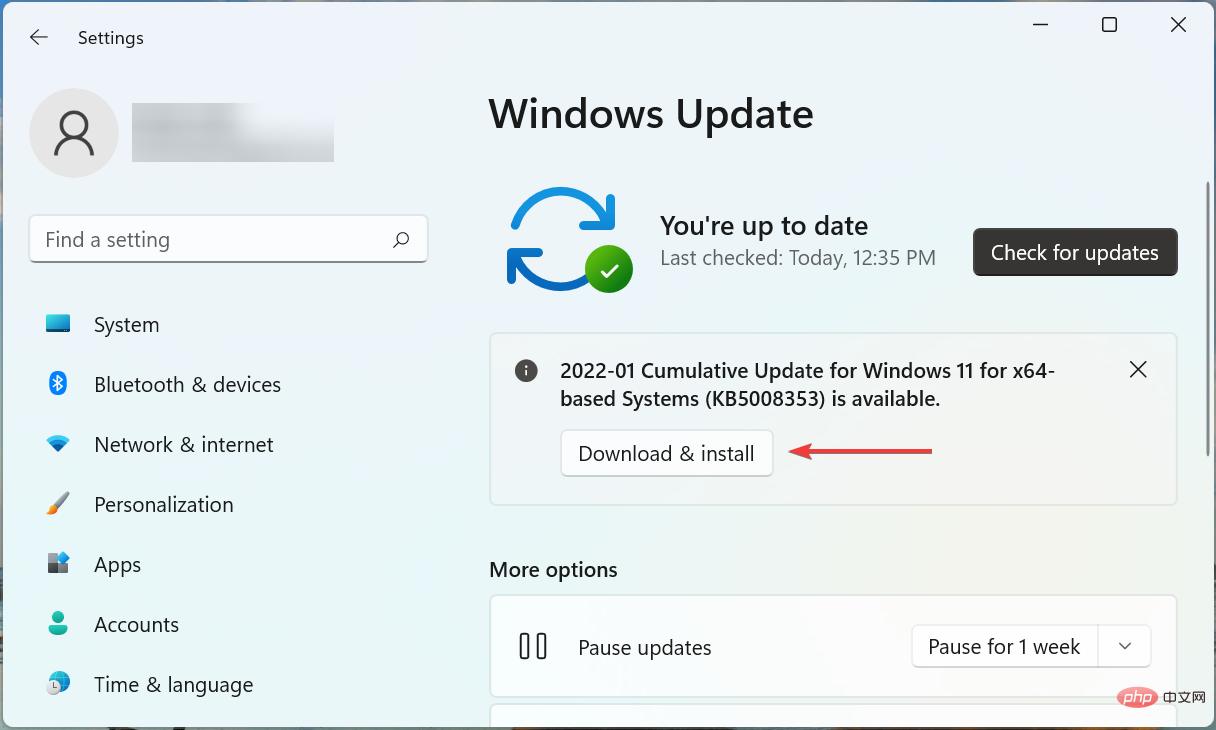
Often, the current version of Windows 11 can be an issue that causes network sharing not to work in Windows 11. If this is the case, updating the operating system should fix the error.
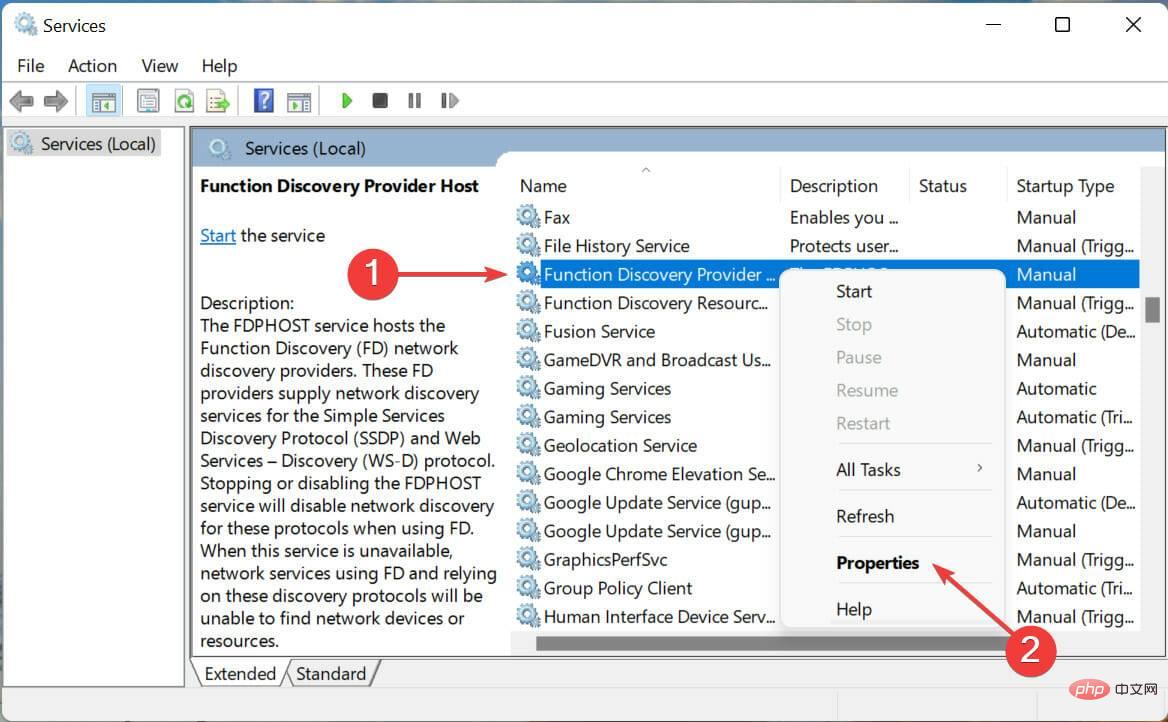
2. Run key services
- Press Windows SStart the "Search"menu at the top Enter "Services" in the text field and click on the relevant search results that appear.
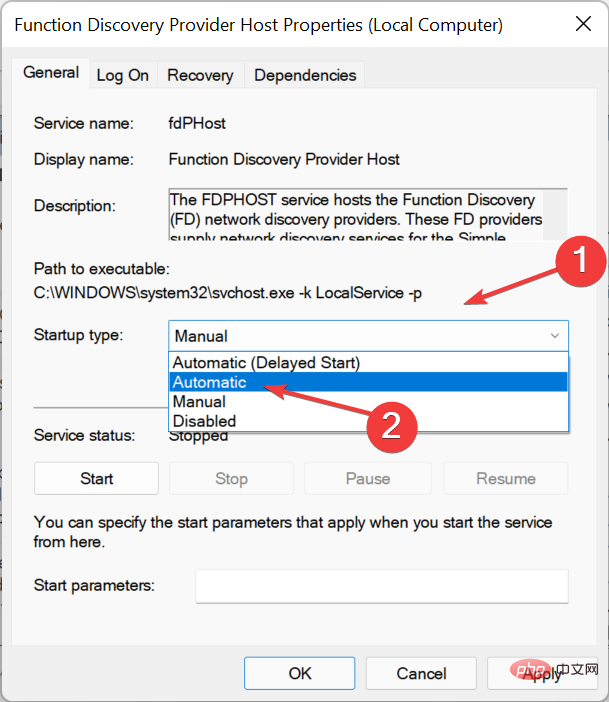
- Locate the Function Discovery Provider Host service, right-click it and select Properties from the context menu.
- Now, click on the Startup type drop-down menu and select Automatic from the list of options.
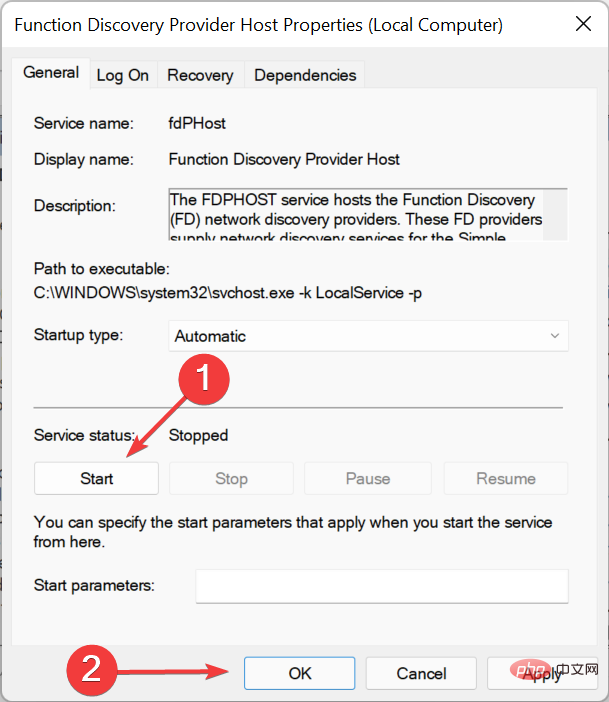
- If the service is not running, click the "Start" button and then click "OK" at the bottom to save the changes.
- Similarly, set Function Discovery Resource Publication to Automatic and run the service.
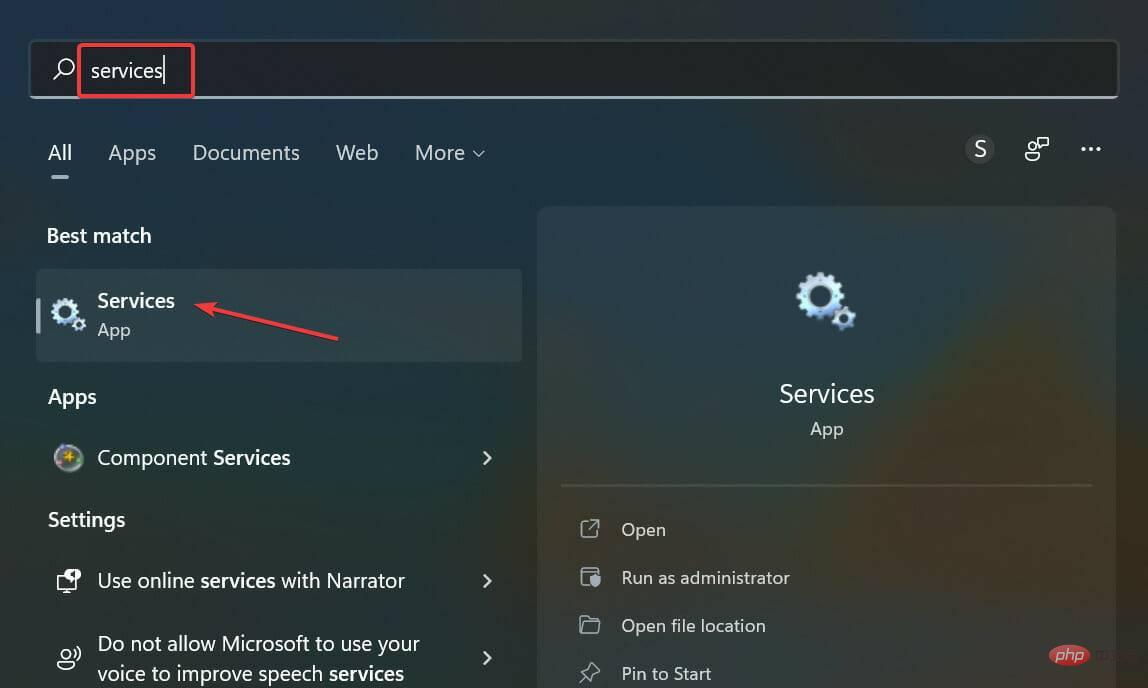
Once completed, check if the network sharing not working issue in Windows 11 has been fixed.
3. Reconfigure sharing settings
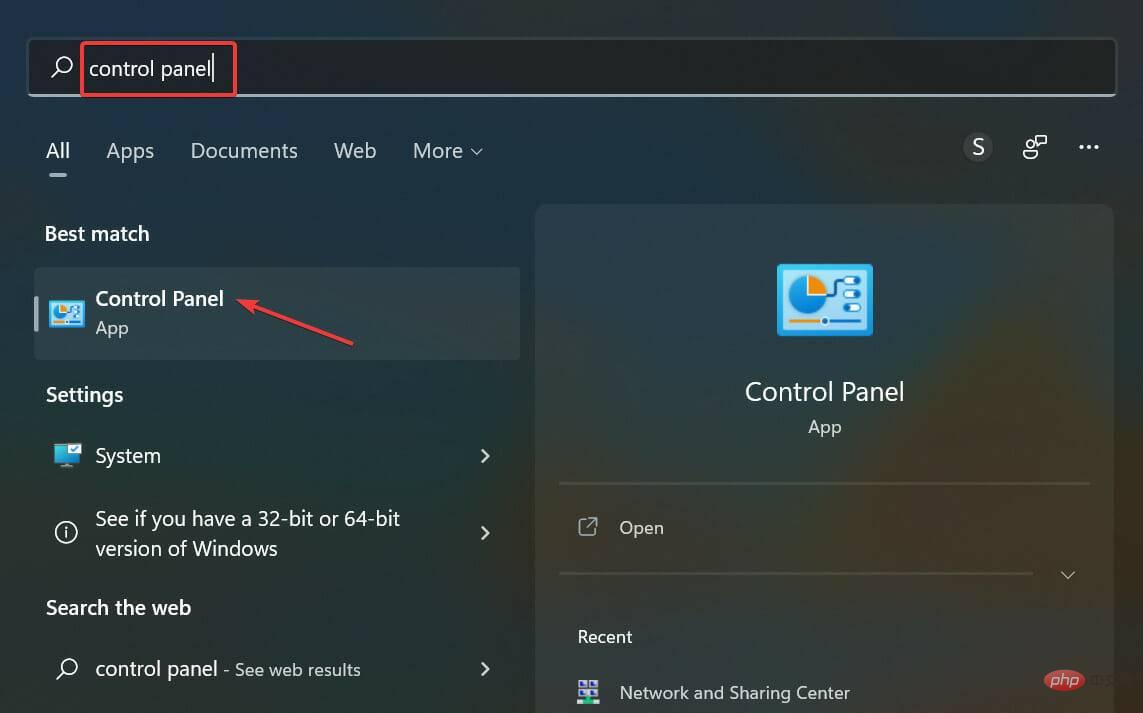
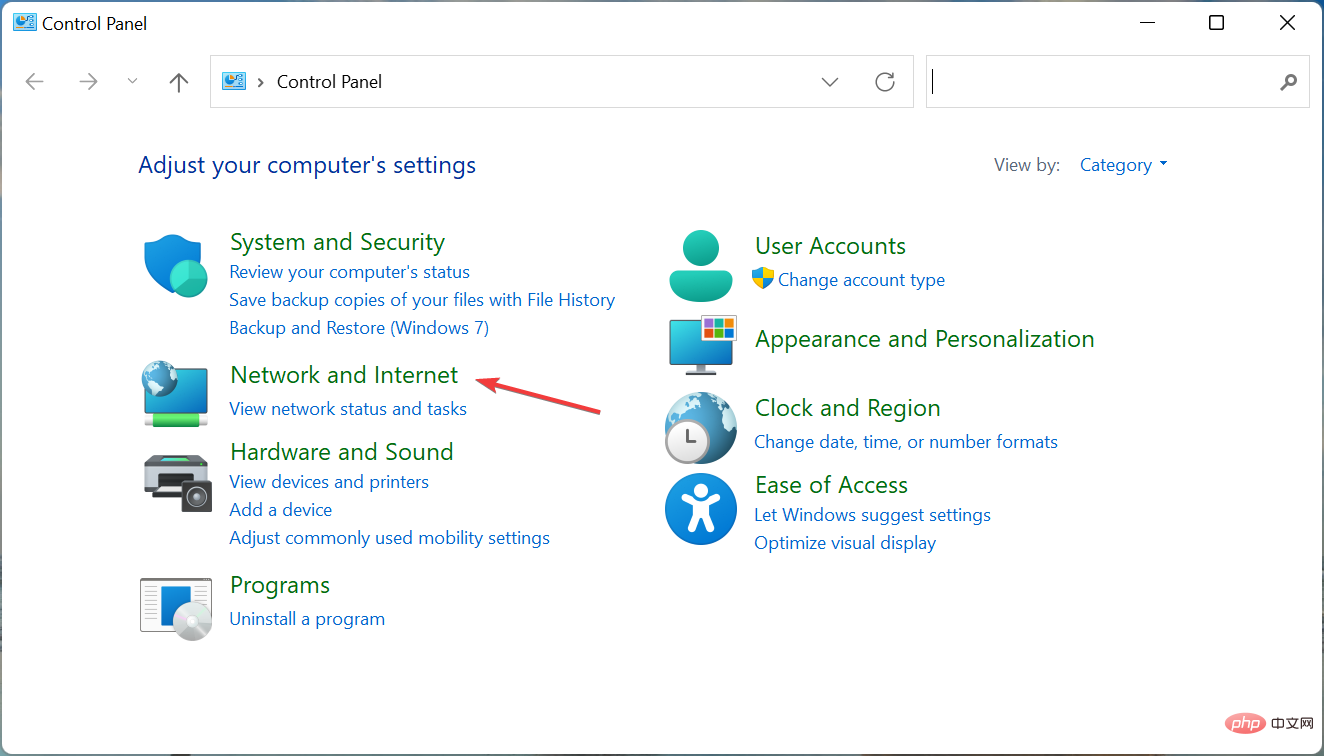
- Press Windows SStart the "Search"menu, in the text Enter "Control Panel" into the field and click on the relevant search results that appear.
- Click on Network and Internet.
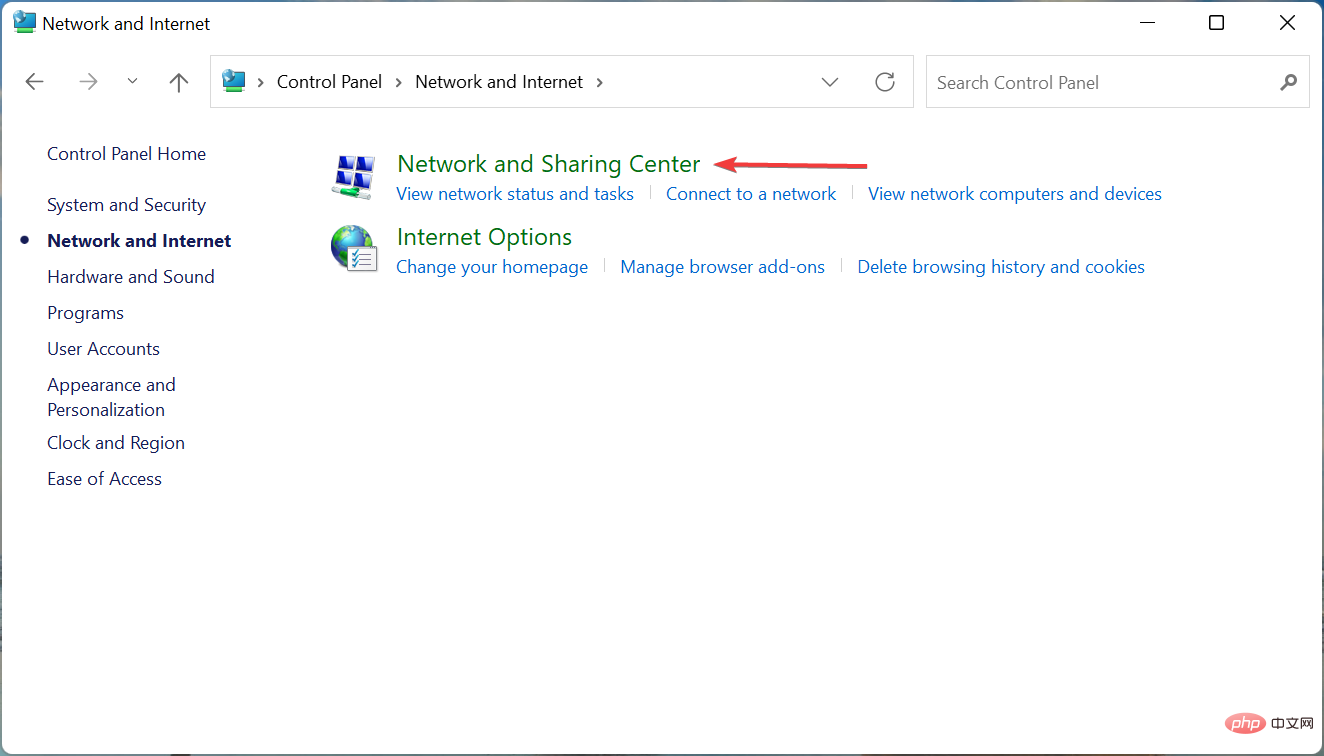
- Next, click Network and Sharing Center.
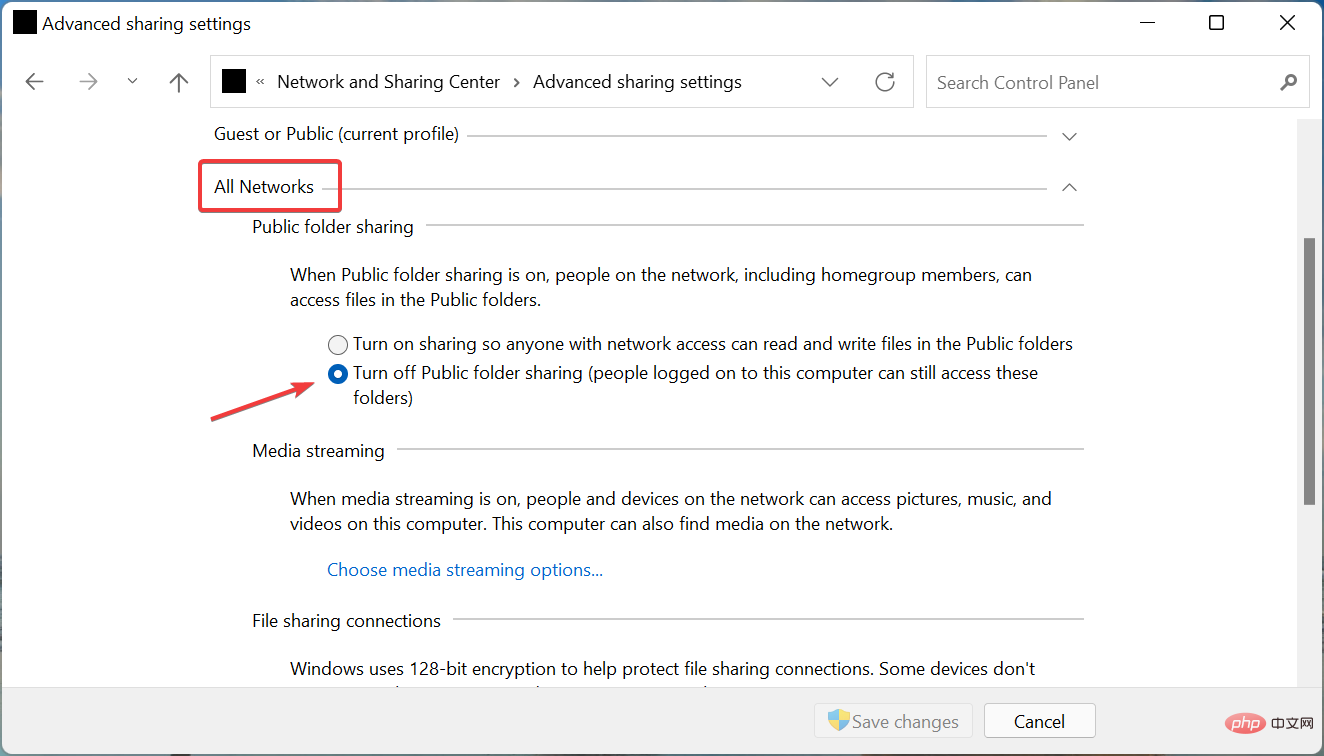
- Click Change advanced sharing settings from the options listed on the left.
- Now, click All Networks and under Public Folder Sharing select Turn off Public Folder Sharing (people logged into this computer can still Access these folders).
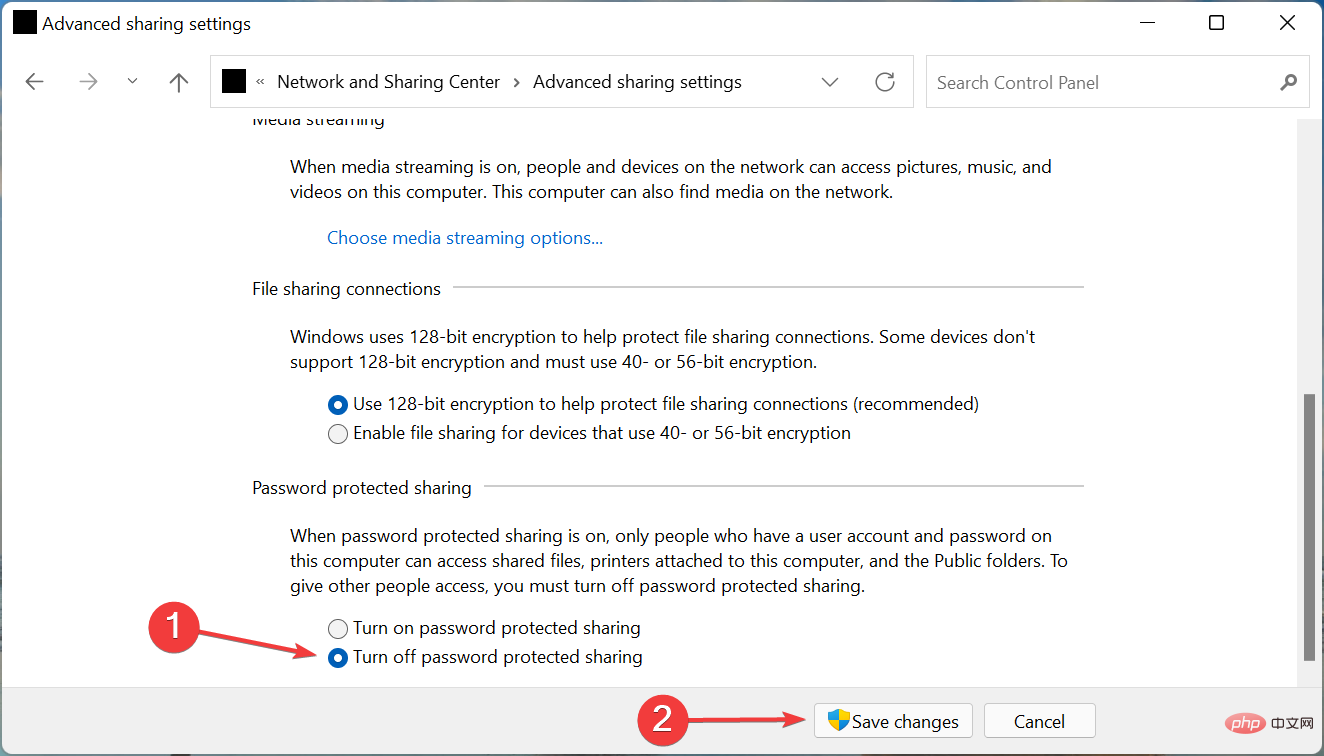
- Now, scroll down and select Turn Password Protection off Sharing under Password Protected Sharing and click at the bottom to save changes.

Once completed, restart your computer for the changes to take effect and verify that the network share now starts running in Windows 11.
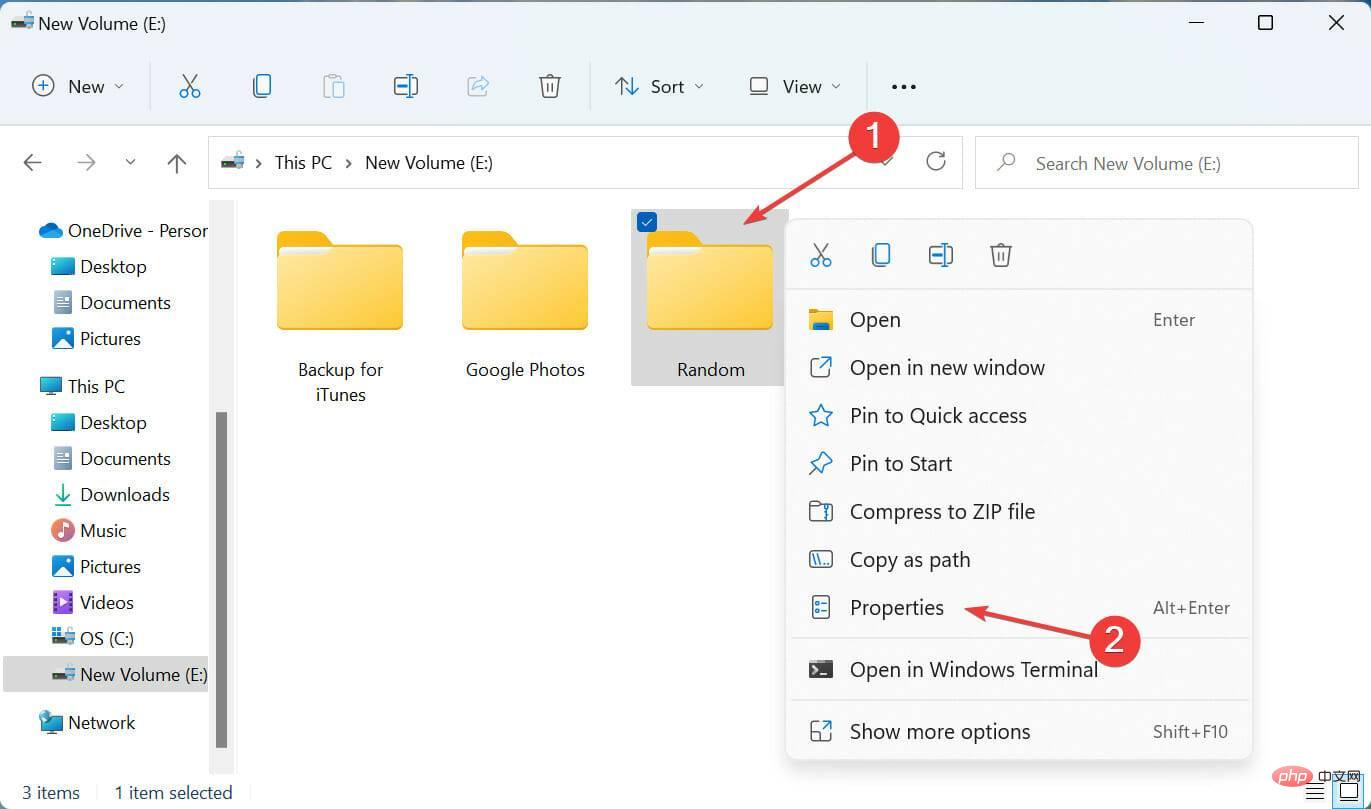
4. Provide the necessary permissions
- Press Windows EStart File Explorer and find the file you encounter when sharing Go to the problem's folder, right-click on it and select Properties from the context menu.
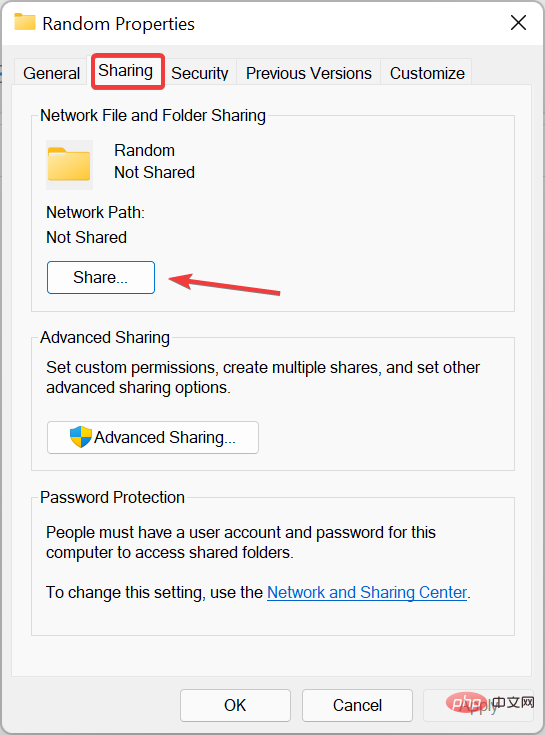
- Navigate to the Share tab and click the Share button.
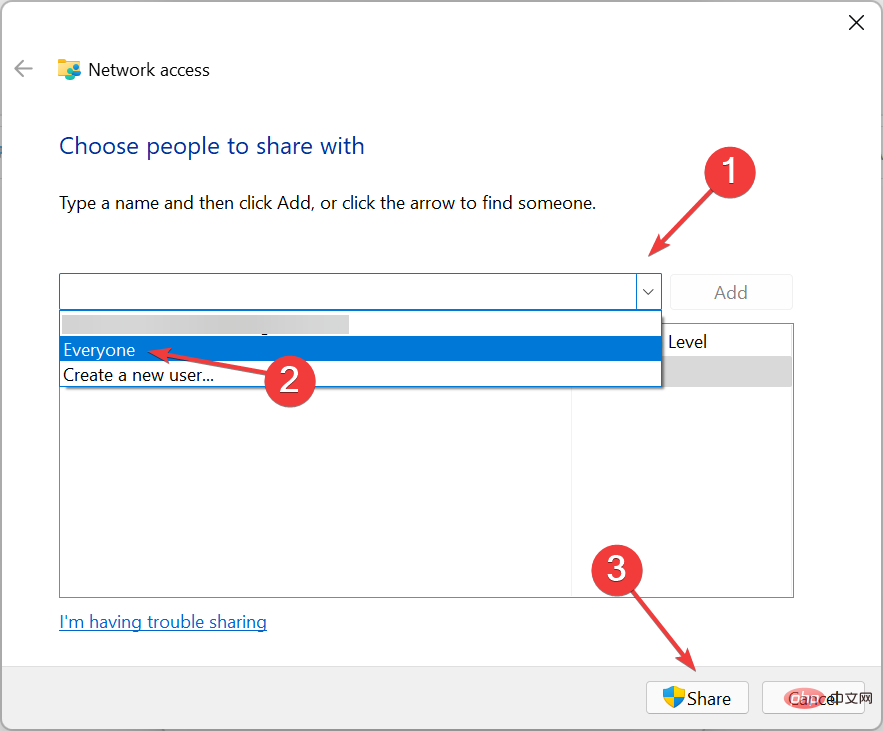
- Click the drop-down menu, select Everyone from the list of options, and click Share at the bottom.
- Click on the next window to finish.
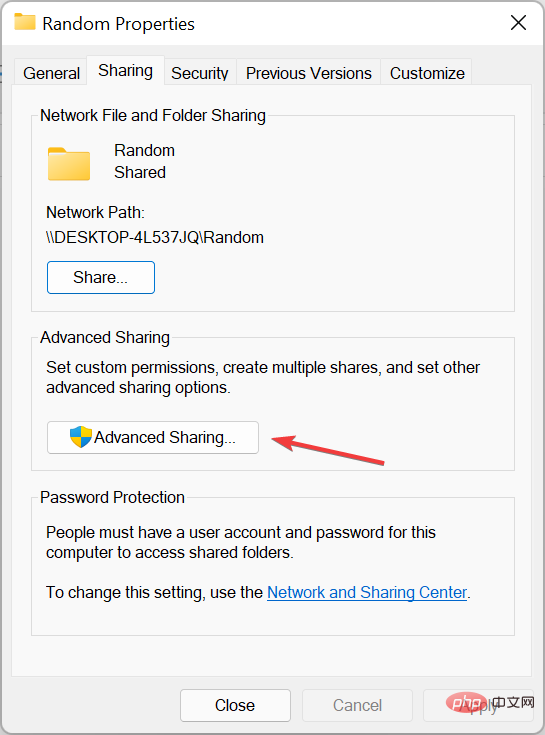
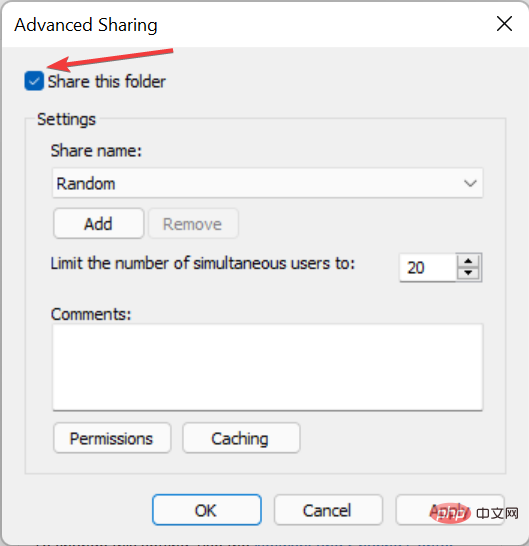
- Now, click on the AdvancedShare button in the Share tab.
- Check the Share this folder checkbox.
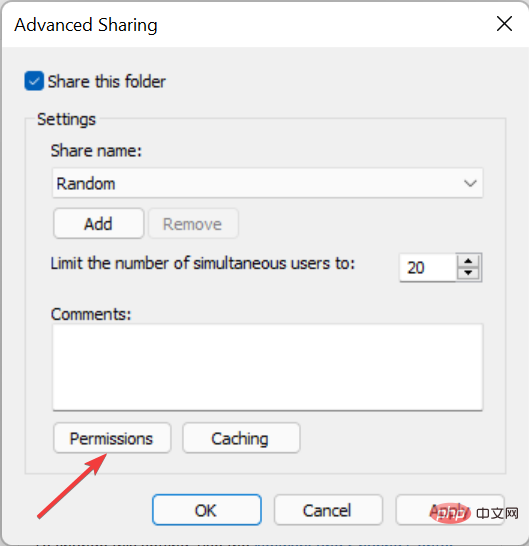
- Click the Permissions button.
- Make sure the "Everyone" option is selected and the relevant permissions are granted. When finished, click OK at the bottom to save changes. Save changes on all subsequent windows, then restart your computer for these to take effect.

The above is the detailed content of Network sharing not working in Windows 11? Apply these fixes. For more information, please follow other related articles on the PHP Chinese website!

Hot AI Tools

Undresser.AI Undress
AI-powered app for creating realistic nude photos

AI Clothes Remover
Online AI tool for removing clothes from photos.

Undress AI Tool
Undress images for free

Clothoff.io
AI clothes remover

AI Hentai Generator
Generate AI Hentai for free.

Hot Article
Hot Tools

Notepad++7.3.1
Easy-to-use and free code editor

SublimeText3 Chinese version
Chinese version, very easy to use

Zend Studio 13.0.1
Powerful PHP integrated development environment

Dreamweaver CS6
Visual web development tools

SublimeText3 Mac version
God-level code editing software (SublimeText3)
Hot Topics
 1378
1378
 52
52

 How to perform network sharing and file transfer on Kirin OS?
Aug 05, 2023 pm 09:17 PM
How to perform network sharing and file transfer on Kirin OS?
Aug 05, 2023 pm 09:17 PM
How to perform network sharing and file transfer on Kirin OS? Kirin operating system is an operating system developed based on the Linux kernel and is highly regarded for its stability and security. Network sharing and file transfer are very convenient on Kirin OS. This article will introduce you to some simple methods and code examples. 1. Use Samba for network sharing Samba is a software suite for sharing files and printers between Linux and Windows systems. The following is how to set up Samba on Kirin OS
 How to share a folder between two Windows 10 computers
Jan 10, 2024 pm 10:06 PM
How to share a folder between two Windows 10 computers
Jan 10, 2024 pm 10:06 PM
We often encounter situations where two computers share the same folder, but most people don't know how to turn on this feature. Today I have brought you a detailed tutorial, let’s take a look at it. Tutorial method one for sharing folders between two win10 computers: Use storage devices such as mobile hard drives and USB flash drives to transfer data. Connect the external hard drive to the first computer, open the corresponding file management tool, find and locate your new device. To operate by copying the required files, connect the external hard drive to the second computer and copy-paste the files. Method 2: Use the network for file sharing and transfer. We first connect two computers to the same network, and enable file sharing and printer sharing services for them respectively. Click on "Control Panel
 Network sharing not working in Windows 11? Apply these fixes
Apr 13, 2023 pm 04:58 PM
Network sharing not working in Windows 11? Apply these fixes
Apr 13, 2023 pm 04:58 PM
Network sharing allows users to transfer and receive files to and from other users on the local network. It's perfect for people with multiple devices in the office or at home. However, many users have reported that network sharing does not work properly after upgrading to Windows 11. This can be due to a number of reasons, including issues with the operating system installer version. In addition to this, misconfigured settings, missing critical services, or missing permissions can cause network shares to not work in Windows 11. Many people who use both Windows 10 and Windows 11 devices on their local network have noticed that while the device running Windows 11 is able to access the Windows 10 PC, the reverse is not possible
 Solve the unresponsive problem of win10usb network sharing computer
Jan 09, 2024 pm 01:34 PM
Solve the unresponsive problem of win10usb network sharing computer
Jan 09, 2024 pm 01:34 PM
When we use the win10 operating system, have we ever encountered a situation where the win10usb network shared computer is unresponsive? If you encounter this situation, do you know how to solve it? Let the editor tell you how to solve the problem of unresponsive win10usb network sharing computer! win10usb network sharing computer is not responding 1. Find this computer on the desktop, right-click and select "Manage". 2. Then click Device Manager and open "Universal Serial Bus Controller". 3. Then find the USB-related controller and uninstall the devices one by one, then "restart the computer", and the system will automatically reinstall the USB controller.
 Accidentally deleted network adapter driver fix
May 02, 2023 pm 05:37 PM
Accidentally deleted network adapter driver fix
May 02, 2023 pm 05:37 PM
When using a network adapter, you may accidentally remove the only valid network adapter driver from your computer. Then what should be done? If you don't have an external WiFi adapter, you can't even use the internet to download the latest network adapter! Therefore, you must use another method to solve this problem. Fix 1 – Use USB tethering to download drivers You can use your Android/iOS internet connection to download and install driver updates. Step 1 – Connect using USB tethering All these steps you have to make on your phone. Step 1 – Connect your smartphone to your computer using a USB cable. Step 2 - Unlock your phone and open settings. Just drop down
 Computer name not recognized for network sharing
Dec 26, 2023 am 09:59 AM
Computer name not recognized for network sharing
Dec 26, 2023 am 09:59 AM
The win10 system is an excellent system chosen by most users! Powerful work ability is the most eye-catching label of win10 system! Basically, most work involving computers generally uses the win10 system. Recently, many friends have reported that the computer name cannot be found in network sharing when using computers. Today, the editor will bring you the network Let’s take a look at the solution for sharing that the other party’s computer cannot be found. Solution to the problem that the computer name cannot be found in network sharing: Operation steps: 1. Right-click the network connection icon in the lower right corner of the computer desktop. 2. Click ‘Change advanced sharing settings’ in the upper left corner. Enter the sharing settings page. 3. Many people often do not turn on network discovery and cannot find shared computers.
 How to create and manage network shared folders on a Windows computer
Jun 17, 2023 pm 12:18 PM
How to create and manage network shared folders on a Windows computer
Jun 17, 2023 pm 12:18 PM
Network shared folders are a very convenient feature that allows multiple computers to share files and folders on the same network. If users want to create and manage network shared folders on Windows computers, there are a few simple steps. Step 1: Set up network sharing To set up network sharing, you first need to make sure that your computer is connected to the network and that the network connection is enabled. To check the network connection status, press Win+R keys, type "ncpa.cpl" and press Enter. Next, select the network you want to use
 Specific methods to turn off network sharing in win10
Mar 27, 2024 am 10:50 AM
Specific methods to turn off network sharing in win10
Mar 27, 2024 am 10:50 AM
1. Open the Control Panel and click [Select Home Group and Sharing Options]; as shown in the figure: 2. Click [Change advanced sharing settings]; as shown in the figure: 3. Select [Turn off network discovery] and [Turn off Files and Printers] Share] and finally click [Save Changes]. as the picture shows: