 Backend Development
 Python Tutorial
 When Python was used as a photo editing tool, I found that it was really easy to use! !
When Python was used as a photo editing tool, I found that it was really easy to use! !
Today I will share with you the specific application of Python in image processing. Since it is image processing, we must mention the opencv module. This module supports many algorithms related to computer vision and machine learning. And the application fields are expanding day by day, and there are roughly the following fields.
- Object recognition: Judgment of objects through vision and internal storage
- Image segmentation
- Face recognition
- Car safety driving
- Human-computer interaction
- Wait
Of course, this time the editor does not intend to cover such advanced content. Today, I will start with the most basic opencv module and the basics of images. Let’s start with the operation.
Module installation
We all install modules through the pip command.
pip install opencv-python
pip install opencv-contrib-python
Various operations on pictures
Having learned linear algebra, it is not unfamiliar to the matrix matrix. An image is essentially a matrix. A grayscale image is an ordinary matrix, while a color image is a multidimensional matrix. Our operations on images can be naturally converted into operations on matrices.
Read the image
First we read the image, calling the cv2.imread() method, its syntax format is as follows:
cv2.imread(filename, flag=1)
The flag parameter It is used to set the format of reading images. The default is 1, which means reading in RGB three-channel format. If set to 0, it means reading in grayscale single-channel format.
import cv2
import numpy as np
img=cv2.imread('1.jpg', 0)Display images
After reading the image, we hope to display it. The function method used here is cv2.imshow(), and its syntax format is as follows
cv2.imshow(name, img)
The parameter explanations are as follows:
- name: represents the name of the display window
- img: the matrix form of the image
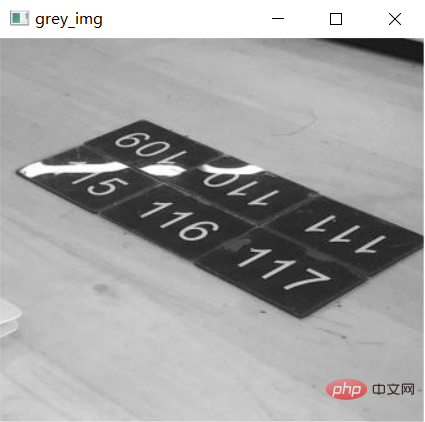
us Try to display the picture read above. The code is as follows
cv2.imshow("grey_img", img)
## 如果使用了cv2.imshow()函数,下面一定要跟着一个摧毁窗口的函数
cv2.destroyAllWindows()After we run the above code, we can find that the picture pops up in a moment, but before we can see what the picture looks like clearly It is closed directly. The reason is that the cv2.imshow() function method does not have a delay effect. We add a delay function. The code is as follows
import cv2
import numpy as np


img = cv2.imread('1.jpg')
cv2.imshow("grey_img", img)
cv2.waitKey(0)
cv2.destroyAllWindows()output

Picture Saving
Finally we save the picture. The function used here is cv2.imwrite(), its syntax format is as follows
cv2.imwrite(imgname, img)
The parameter explanations are as follows:
- imgname: The name of the picture to be saved
- img: The matrix form of the picture
The sample code is as follows:
import cv2
import numpy as np


img = cv2.imread('1.jpg')
cv2.imshow("grey_img", img)
cv2.waitKey(0)
cv2.imwrite('1.png', img)
cv2.destroyAllWindows()of the picture Various attributes
Sometimes we want to know the pixel size of the picture, and the essence of the picture is a matrix. For example, a picture of 1024 pixels * 960 pixels means that the number of rows in the matrix is 960 The number of rows and columns is 1024. The shape() function method called in the opencv module, the code is as follows:
import cv2


img = cv2.imread('1.jpg')
print(img.shape[0]) # 行数
print(img.shape[1]) # 列数
print(img.shape[2]) # 通道数output
308
340
3
You can see that the pixels of the image are 340*380 , the number of channels is 3, and for grayscale images, let’s take a look at the properties of the image. The code is as follows:
img = cv2.imread('1_grey.png', 0)
print(img.shape)output
(308, 340)
You can see that for grayscale images, We don’t see the number of channels, only the number of rows and columns.
Basic operations on images
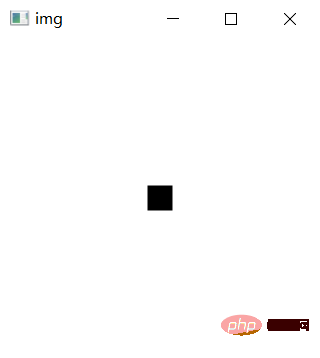
Finally, let’s perform some basic operations on the image, which is nothing more than changing some pixel values. We import a blank image and add a black point to it by modifying the pixel value. The code is as follows
import cv2
import numpy as np


img = cv2.imread('2.jpg')
(x, y, z) = img.shape


for i in range(-10, 10):
for j in range(-10, 10):
# When Python was used as a photo editing tool, I found that it was really easy to use! !的正中心的位置来改变像素值,
img[int(x/2) + i, int(y/2) + j] = (0, 0, 0)


cv2.imshow("img", img)
cv2.waitKey(0)
cv2.destroyAllWindows()output

The above is the detailed content of When Python was used as a photo editing tool, I found that it was really easy to use! !. For more information, please follow other related articles on the PHP Chinese website!

Hot AI Tools

Undresser.AI Undress
AI-powered app for creating realistic nude photos

AI Clothes Remover
Online AI tool for removing clothes from photos.

Undress AI Tool
Undress images for free

Clothoff.io
AI clothes remover

Video Face Swap
Swap faces in any video effortlessly with our completely free AI face swap tool!

Hot Article

Hot Tools

Notepad++7.3.1
Easy-to-use and free code editor

SublimeText3 Chinese version
Chinese version, very easy to use

Zend Studio 13.0.1
Powerful PHP integrated development environment

Dreamweaver CS6
Visual web development tools

SublimeText3 Mac version
God-level code editing software (SublimeText3)

Hot Topics
 1390
1390
 52
52
 Choosing Between PHP and Python: A Guide
Apr 18, 2025 am 12:24 AM
PHP is suitable for web development and rapid prototyping, and Python is suitable for data science and machine learning. 1.PHP is used for dynamic web development, with simple syntax and suitable for rapid development. 2. Python has concise syntax, is suitable for multiple fields, and has a strong library ecosystem.
 PHP and Python: Different Paradigms Explained
Apr 18, 2025 am 12:26 AM
PHP is mainly procedural programming, but also supports object-oriented programming (OOP); Python supports a variety of paradigms, including OOP, functional and procedural programming. PHP is suitable for web development, and Python is suitable for a variety of applications such as data analysis and machine learning.
 Can vs code run in Windows 8
Apr 15, 2025 pm 07:24 PM
VS Code can run on Windows 8, but the experience may not be great. First make sure the system has been updated to the latest patch, then download the VS Code installation package that matches the system architecture and install it as prompted. After installation, be aware that some extensions may be incompatible with Windows 8 and need to look for alternative extensions or use newer Windows systems in a virtual machine. Install the necessary extensions to check whether they work properly. Although VS Code is feasible on Windows 8, it is recommended to upgrade to a newer Windows system for a better development experience and security.
 Is the vscode extension malicious?
Apr 15, 2025 pm 07:57 PM
VS Code extensions pose malicious risks, such as hiding malicious code, exploiting vulnerabilities, and masturbating as legitimate extensions. Methods to identify malicious extensions include: checking publishers, reading comments, checking code, and installing with caution. Security measures also include: security awareness, good habits, regular updates and antivirus software.
 How to run programs in terminal vscode
Apr 15, 2025 pm 06:42 PM
In VS Code, you can run the program in the terminal through the following steps: Prepare the code and open the integrated terminal to ensure that the code directory is consistent with the terminal working directory. Select the run command according to the programming language (such as Python's python your_file_name.py) to check whether it runs successfully and resolve errors. Use the debugger to improve debugging efficiency.
 Can visual studio code be used in python
Apr 15, 2025 pm 08:18 PM
VS Code can be used to write Python and provides many features that make it an ideal tool for developing Python applications. It allows users to: install Python extensions to get functions such as code completion, syntax highlighting, and debugging. Use the debugger to track code step by step, find and fix errors. Integrate Git for version control. Use code formatting tools to maintain code consistency. Use the Linting tool to spot potential problems ahead of time.
 Can vscode be used for mac
Apr 15, 2025 pm 07:36 PM
VS Code is available on Mac. It has powerful extensions, Git integration, terminal and debugger, and also offers a wealth of setup options. However, for particularly large projects or highly professional development, VS Code may have performance or functional limitations.
 Can vscode run ipynb
Apr 15, 2025 pm 07:30 PM
The key to running Jupyter Notebook in VS Code is to ensure that the Python environment is properly configured, understand that the code execution order is consistent with the cell order, and be aware of large files or external libraries that may affect performance. The code completion and debugging functions provided by VS Code can greatly improve coding efficiency and reduce errors.


