

How to use DISM to repair a Windows image

There are several ways to repair a Windows image, depending on whether the image is offline or online. Offline Windows images can be repaired in a VHD or WIM file, and when an online Windows image does not run as expected, it will first attempt to repair itself. This repair source uses the same repair source as the on-demand feature and is determined by Group Policy settings. When using DISM to attempt to repair an offline or online Windows image, you can specify an additional repair source location by using the /Source parameter and the /RestoreHealth parameter. If you need to scan and repair online images, you can also use the sfc /scannow command for a quick check. On the other hand, you can also choose to use DISM /Cleanup-Image for a more thorough inspection.
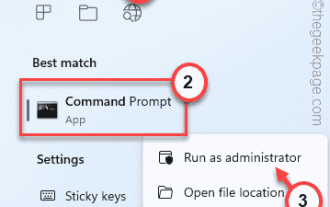
The first step is to make sure the image is still repairable. Here's what you need to do:
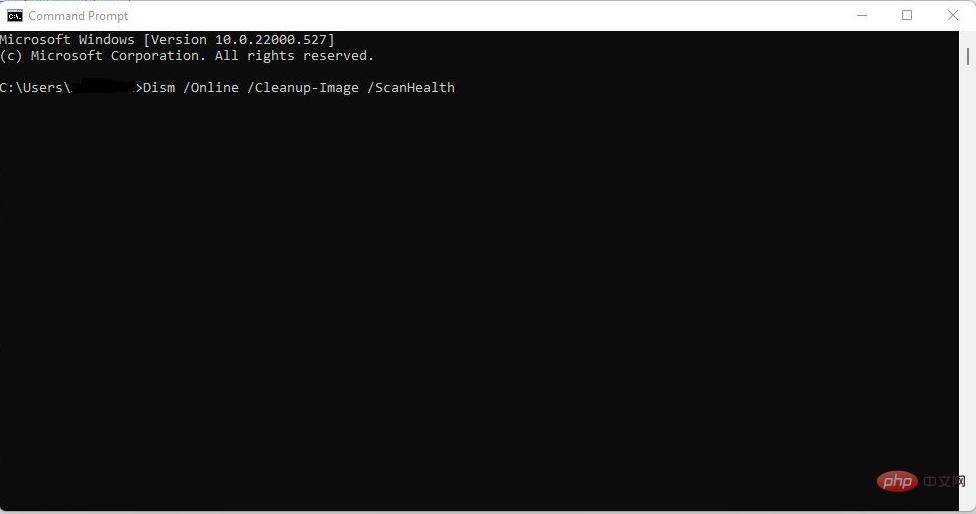
You must first do a quick scan to see if the image is corrupted. Open a command prompt on your PC and enter Dism /Online /Cleanup-Image /ScanHealth. The scan should only take a few minutes.
You can use the command Dism /Online /Cleanup-Image /CheckHealth to see if your PC detects any corruption on the image. When using this sfc parameter, the DISM tool will notify you whether the Windows image is healthy, repairable, or not repairable. If it's the latter, you'll need to get rid of the image and start from scratch. However, if it is repairable, you can continue to use the /RestoreHealth parameter to start the repair.
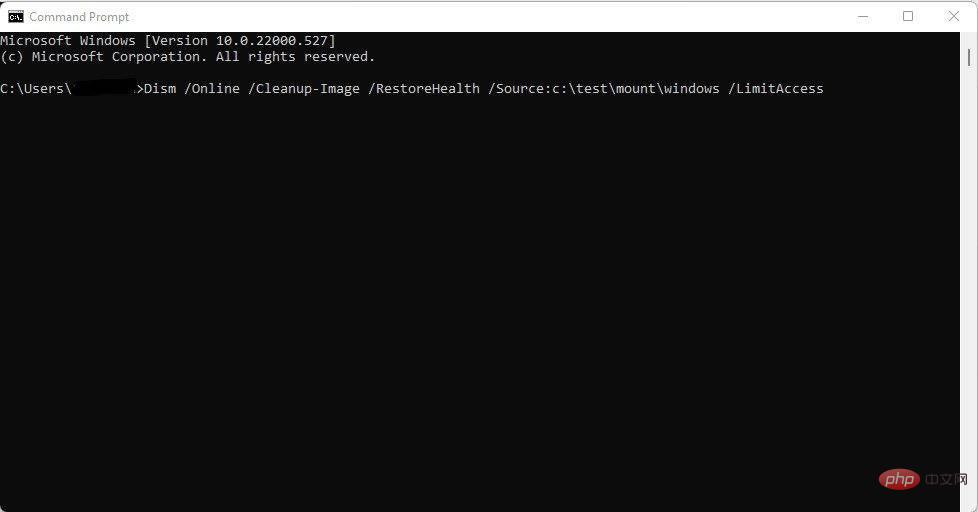
Repairing a Windows image follows the same process as above. Open your PC's Start menu, go to Command Prompt, and enter the correct command. If you are trying to repair an offline image with the help of a mounted image as a repair source, the correct command to use is Dism /Image:C:\offline /Cleanup-Image /RestoreHealth /Source:c:\test\install\windows. However, if you want to use the source to repair an online image, enter the following command: Dism /Online /Cleanup-Image /RestoreHealth /Source:c:\test\mount\windows /LimitAccess.
Please note that if you do not specify /Source , the default location for the repair files is the same as Features on Demand. You can read more about it here. On the other hand, specifying two or more sources will ensure the same result, but only the files in the first location will be copied. It is important to use /LimitAccess if you want to ensure that the DISM tool does not use Windows Update as a source to repair images.
Now, in some cases, the image is corrupted when the DISM tool tries to modify it. In this case, you can use the command Dism /Cleanup-Mountpoints to fix it.
The above is the detailed content of How to use DISM to repair a Windows image. For more information, please follow other related articles on the PHP Chinese website!

Hot AI Tools

Undresser.AI Undress
AI-powered app for creating realistic nude photos

AI Clothes Remover
Online AI tool for removing clothes from photos.

Undress AI Tool
Undress images for free

Clothoff.io
AI clothes remover

AI Hentai Generator
Generate AI Hentai for free.

Hot Article
Hot Tools

Notepad++7.3.1
Easy-to-use and free code editor

SublimeText3 Chinese version
Chinese version, very easy to use

Zend Studio 13.0.1
Powerful PHP integrated development environment

Dreamweaver CS6
Visual web development tools

SublimeText3 Mac version
God-level code editing software (SublimeText3)
Hot Topics
 1378
1378
 52
52

 How to fix DISM 87 error in Windows 11?
May 09, 2023 am 09:31 AM
How to fix DISM 87 error in Windows 11?
May 09, 2023 am 09:31 AM
Windows 11 users are facing issues dealing with many error codes caused by different issues. DISM error 87 is a command line error. DISM means DeploymentImageServicingManagement, and its main job is to help organize virtual disks. It manages split Windows Image Format (WIM) files, all-flash utility files, virtual hard disks (VHD) and more. You can access the tool on Command Prompt or Windows PowerShell. We use this tool to repair Windows image issues. This article will introduce how to fix the problem in Windows 11
 Fix: Can't move a folder because there is one at the same location in Windows 11 Vladimir Popescu
May 11, 2023 pm 01:01 PM
Fix: Can't move a folder because there is one at the same location in Windows 11 Vladimir Popescu
May 11, 2023 pm 01:01 PM
Transferring files and folders from one location to another is one of the very common tasks performed by all users. But recently, some Windows 11 users have reported seeing the error message Unable to move folders because there is a folder in the same location that cannot be redirected while trying to transfer anything on their PC. This specific error will warn you if you try to move a folder into Onedrive, SkyDrive, etc. This is a common error faced by Windows 10 users as well. However, when trying to change the location of the folder again, the operation fails. This is a matter of concern and should be addressed immediately. So, in this article, we have put together a list of some solutions that will surely help you.
 How to Fix Ntoskrnl.exe Blue Screen of Death Issue in Windows 11
Apr 22, 2023 pm 01:22 PM
How to Fix Ntoskrnl.exe Blue Screen of Death Issue in Windows 11
Apr 22, 2023 pm 01:22 PM
This error indicates a problem with the Windows operating system kernel executable (ntoskrnl.exe). Without this file, Windows cannot run. If you receive this error, the following steps will help you fix ntoskrnl.exe Blue Screen of Death on Windows 11. Check your RAM for possible errors The first thing you should do is check your system's RAM integrity for possible errors. You can use the Windows Memory Diagnostic Tool or other third-party utility to do this. To run a diagnostic test of RAM: Click Start or press the Windows key to launch the Start menu. Type m
 Fix: An error occurred and not all updates were successfully uninstalled
May 23, 2023 pm 09:07 PM
Fix: An error occurred and not all updates were successfully uninstalled
May 23, 2023 pm 09:07 PM
Windows updates often make Windows devices better and more useful to billions of users. But sometimes some updates may not work properly, so you can easily choose to uninstall some recently installed updates. The process is very simple and Windows will roll back the current update. After uninstalling updates, you may see this prompt on your screen "An error occurred and not all updates were successfully uninstalled." If you get this, the uninstall process did not complete successfully, so you have to resolve the issue manually. Fix 1 – Uninstall updates using CMD There is a very easy way to uninstall the required updates. 1. Just click on the Windows icon in the middle of the taskbar. 2. Next start writing "cmd" in the search box at the top
 How to use DISM to repair a Windows image
Apr 14, 2023 am 09:43 AM
How to use DISM to repair a Windows image
Apr 14, 2023 am 09:43 AM
There are several ways to repair a Windows image, depending on whether the image is offline or online. Offline Windows images can be repaired in a VHD or WIM file, and when an online Windows image does not run as expected, it will first attempt to repair itself. This repair source uses the same repair source as the on-demand feature and is determined by Group Policy settings. When using DISM to attempt to repair an offline or online Windows image, you can specify an additional repair source location by using the /Source parameter and the /RestoreHealth parameter. If you need to scan and repair online images, you can also use the sfc /scannow command for a quick check. On the other hand, you also
 Fix: Windows 11 shutdown box keeps popping up randomly
May 28, 2023 am 10:26 AM
Fix: Windows 11 shutdown box keeps popping up randomly
May 28, 2023 am 10:26 AM
Shutdown Box can be quickly launched with keyboard shortcuts to exit, switch users, shut down, restart, or put the computer to sleep. However, some users reported that it keeps popping up randomly in Windows 11. Not only does it affect your Windows experience, but it is also detrimental to progress while working on the system. And, worst of all, there isn't enough reliable information on the web to solve the problem. Therefore, we decided to dedicate this tutorial to list the causes and guide you through the most effective fixes to prevent the Windows 11 shutdown box from popping up randomly. What causes the Windows 11 shutdown box to pop up randomly? There are a lot of issues that cause the Windows 11 shutdown box to randomly appear even if you don't press
 How to fix clock watchdog timeout on Windows
Apr 13, 2023 pm 06:01 PM
How to fix clock watchdog timeout on Windows
Apr 13, 2023 pm 06:01 PM
It’s never fun to encounter a blue screen error on your Windows PC. So, here’s how to fix clock watchdog timeout on Windows. When you get a Blue Screen of Death (BSOD) error while booting your PC, you might think that your system is done. But there's no need to panic. The Clock_Watchdog_Timeout BSOD error is related to a problem with the communication between your system and the CPU. This is a system-level process called "system interrupt" and is normal behavior. However, if your system spends too long in the interruption phase, a blue screen error will occur. You can fix the problem with a simple reboot, or you may need to do it from the command line
 Get Windows Ready: How to Fix
Apr 15, 2023 pm 04:37 PM
Get Windows Ready: How to Fix
Apr 15, 2023 pm 04:37 PM
It may take a while to download and install Windows updates, but after a while, it's time to investigate. Unfortunately, the "GettingWindowsReady" stuck error often occurs when update glitches occur - seemingly out of nowhere. If you don't know how to fix this issue, you can try the following troubleshooting tips. Disconnect your internet connection and you will often encounter errors while the finalization process of the update is taking place. For example, Windows is communicating with Microsoft servers to complete updates. Unfortunately, the GettingWindowsReady message prevents Windows from taking you to the desktop. Disconnect your internet cable if you are plugged in