How to install or uninstall fonts on Windows 11
What types of fonts does Windows 11 support?
To install a new font, it needs to be compatible with Windows. Windows 11 supports the following font types:
- TrueType (.TFF)
- PostScript Type 1 (.PFB .PFM)
- Open (.OTF)
- TrueType Collection (.TTC)
After you download your favorite fonts, you can install them by following the instructions below.
How to install fonts on Windows 11
When you are ready, you can follow these steps to install new fonts on Windows 11:
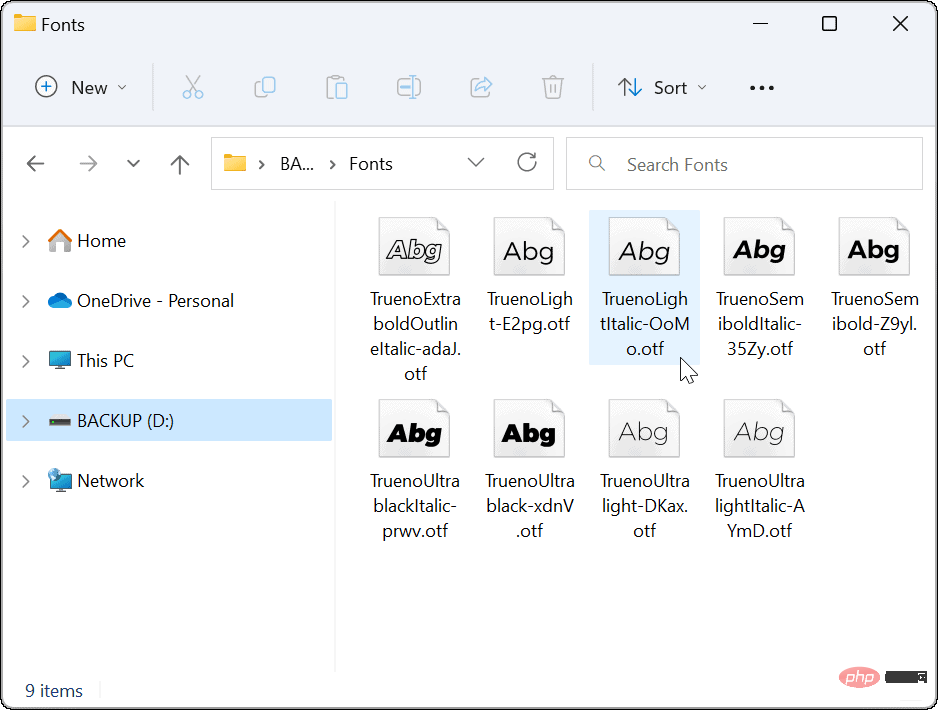
- Most fonts start with They come in zip files, so the first thing to do is to unzip them to an easily accessible location.
- When you are ready to install the font, open File Explorer to the location of the desired font and double-click it.

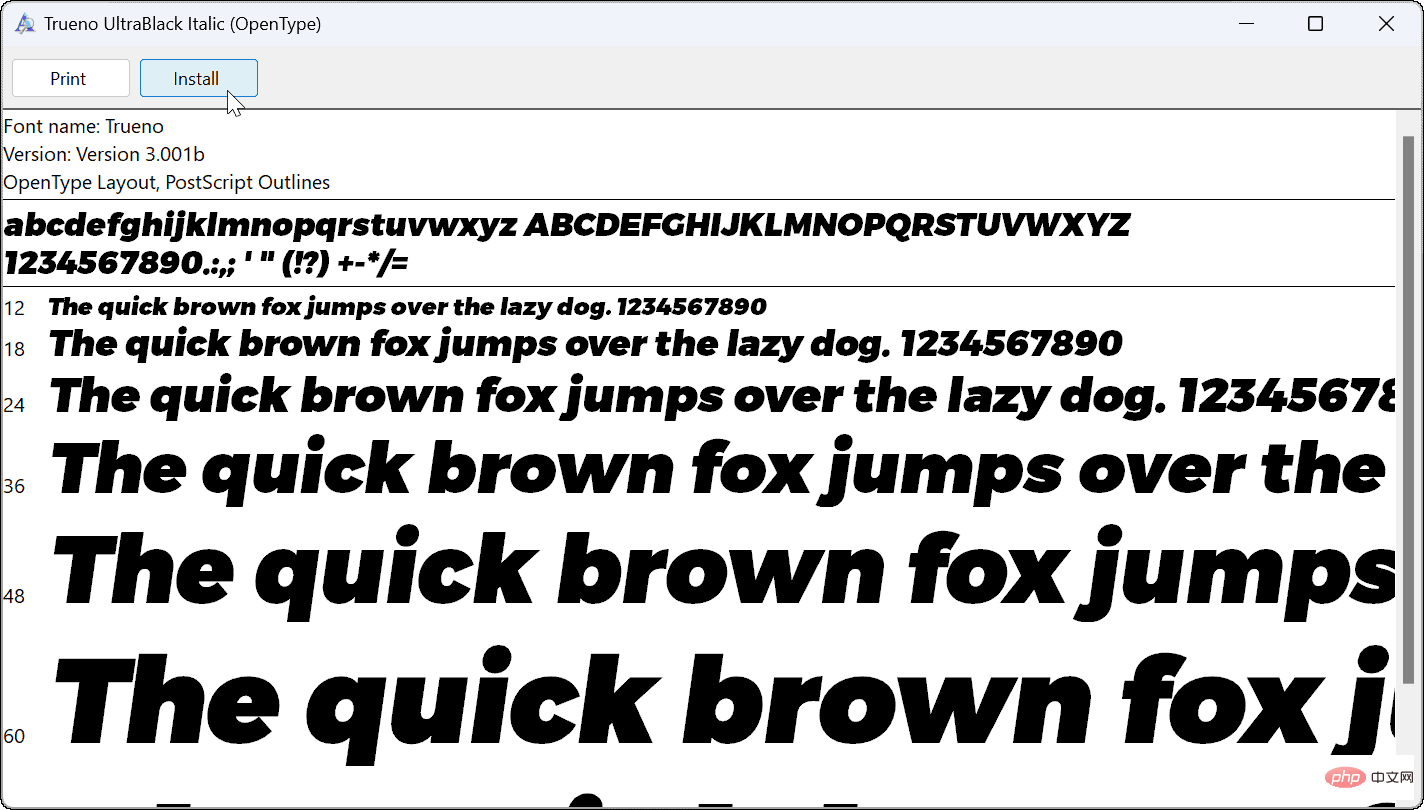
- After double-clicking on the font, a window will open showing an example of how it will look. If you're ready to use it, click the Install button at the top.

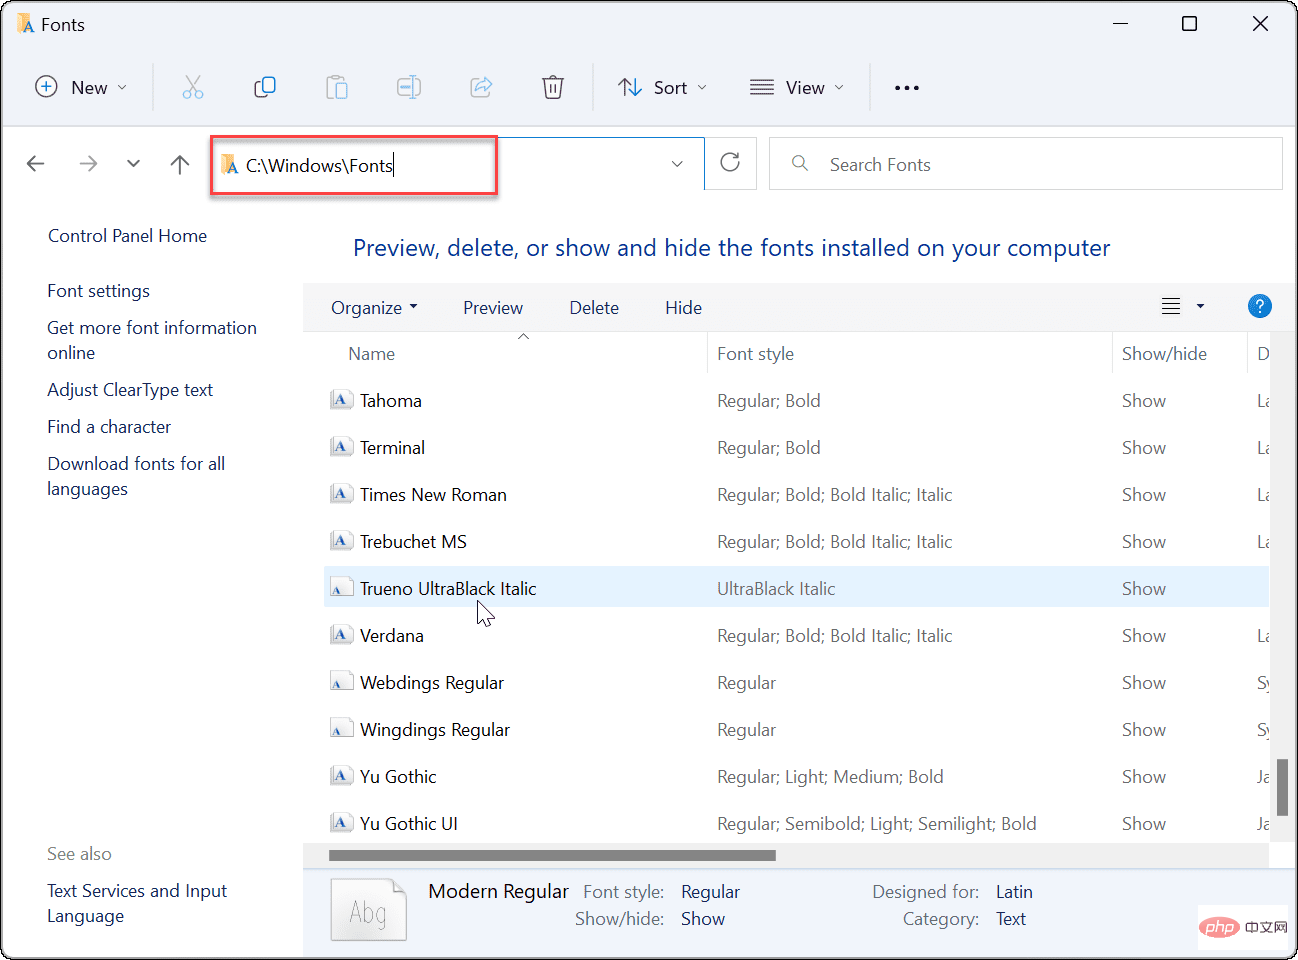
- The font will be installed on your system and available where the font normally resides. Additionally, it should be moved to the default location for fonts C:\Windows\Fonts.

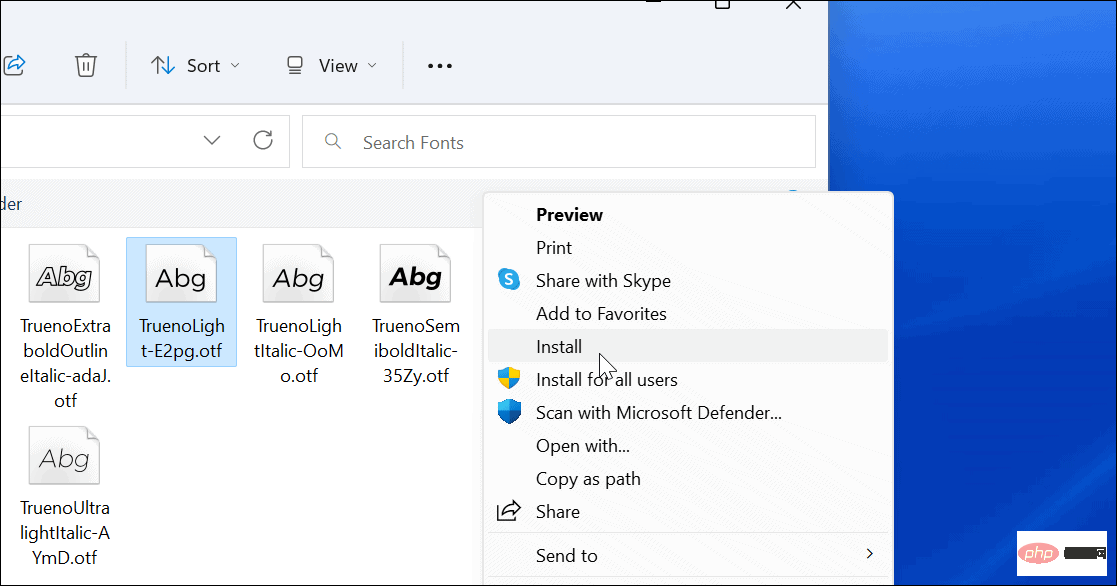
- It’s also worth noting that there is another way to install fonts. For example, you can right-click the font file, select Show more options from the menu, and then click Install on the classic context menu.

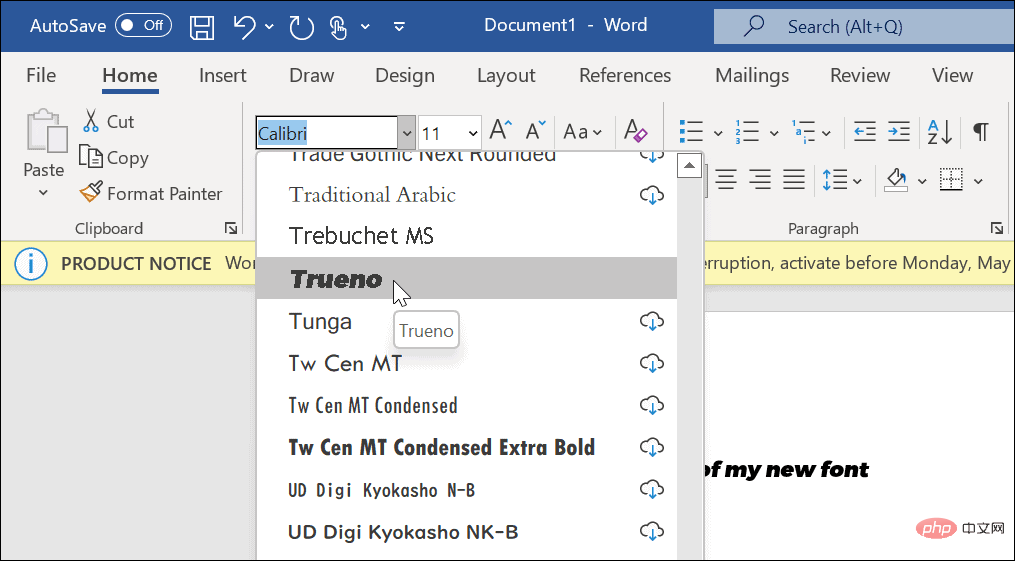
- After you install a new font, you can use it in any application that allows you to choose a different font, such as Microsoft Word.

How to quickly install new fonts on Windows 11
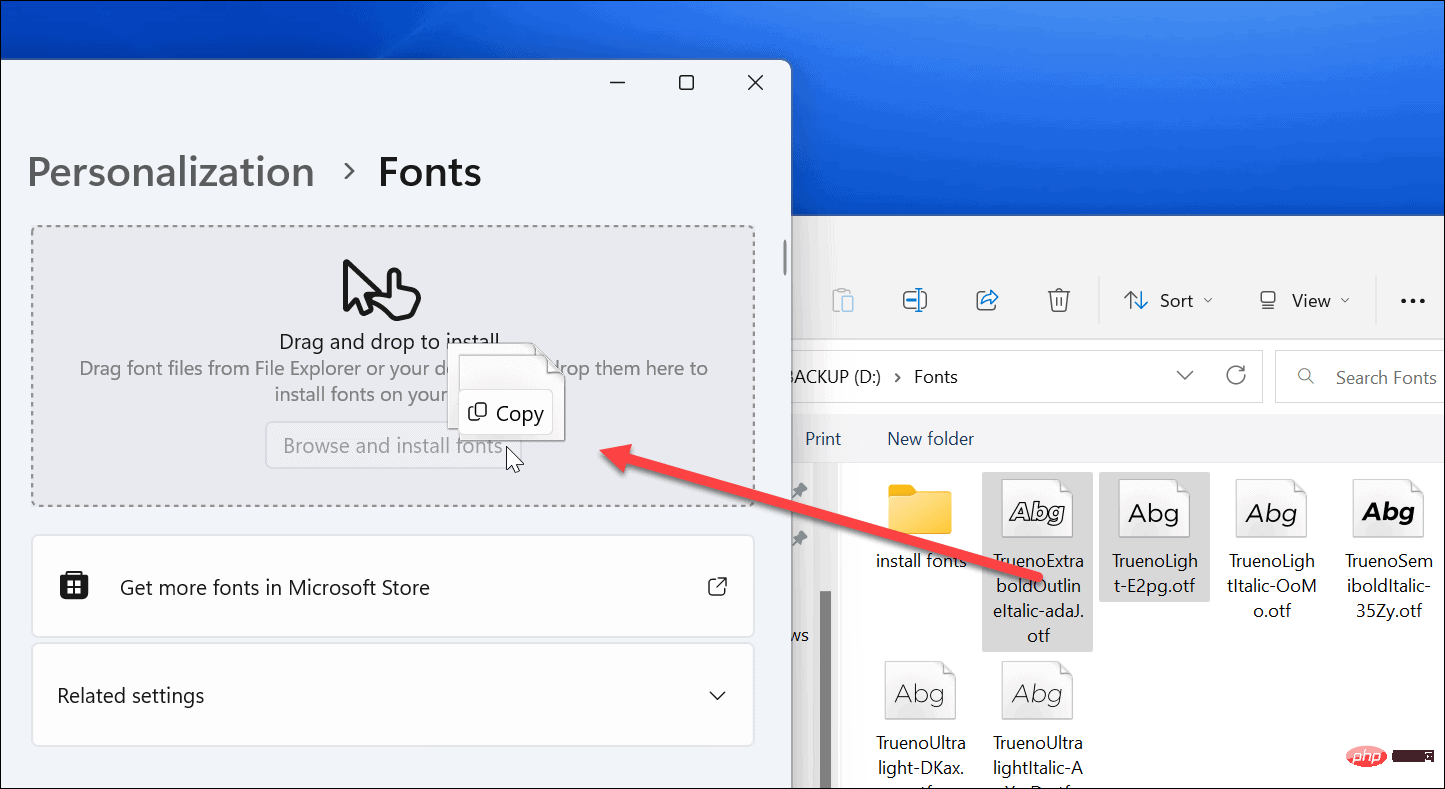
Microsoft is making it easier for users to install fonts – just drag them to Settings can be selected.
You can install fonts by dragging and dropping using the following steps:
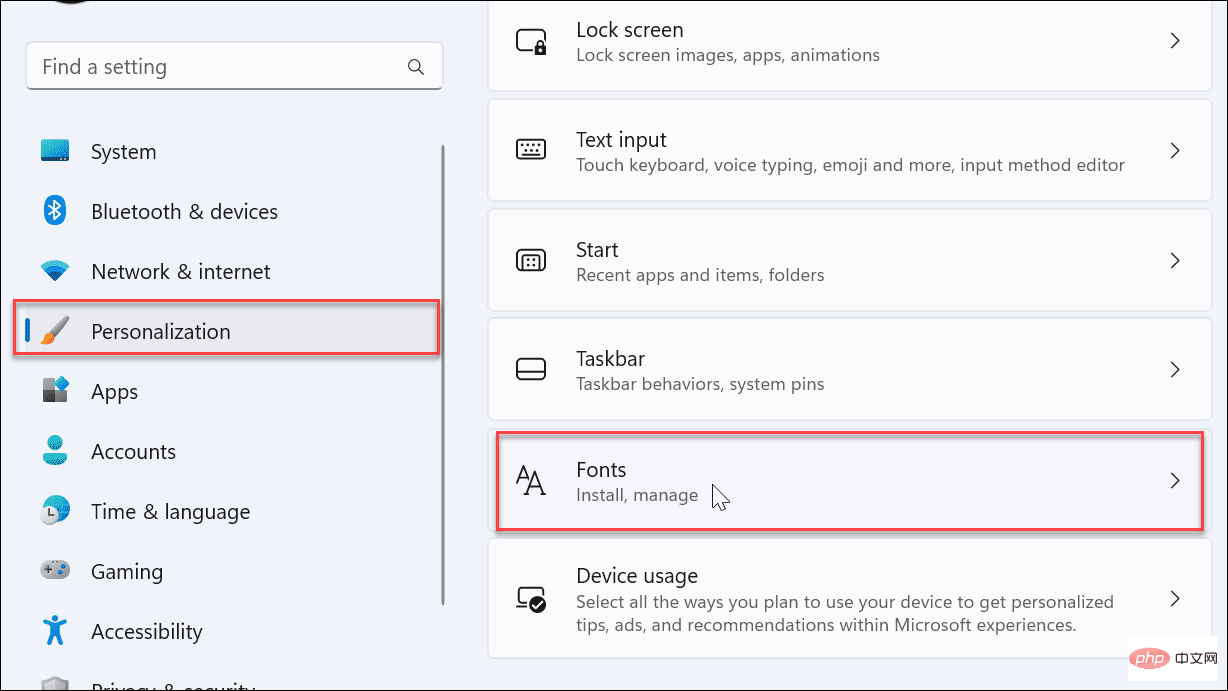
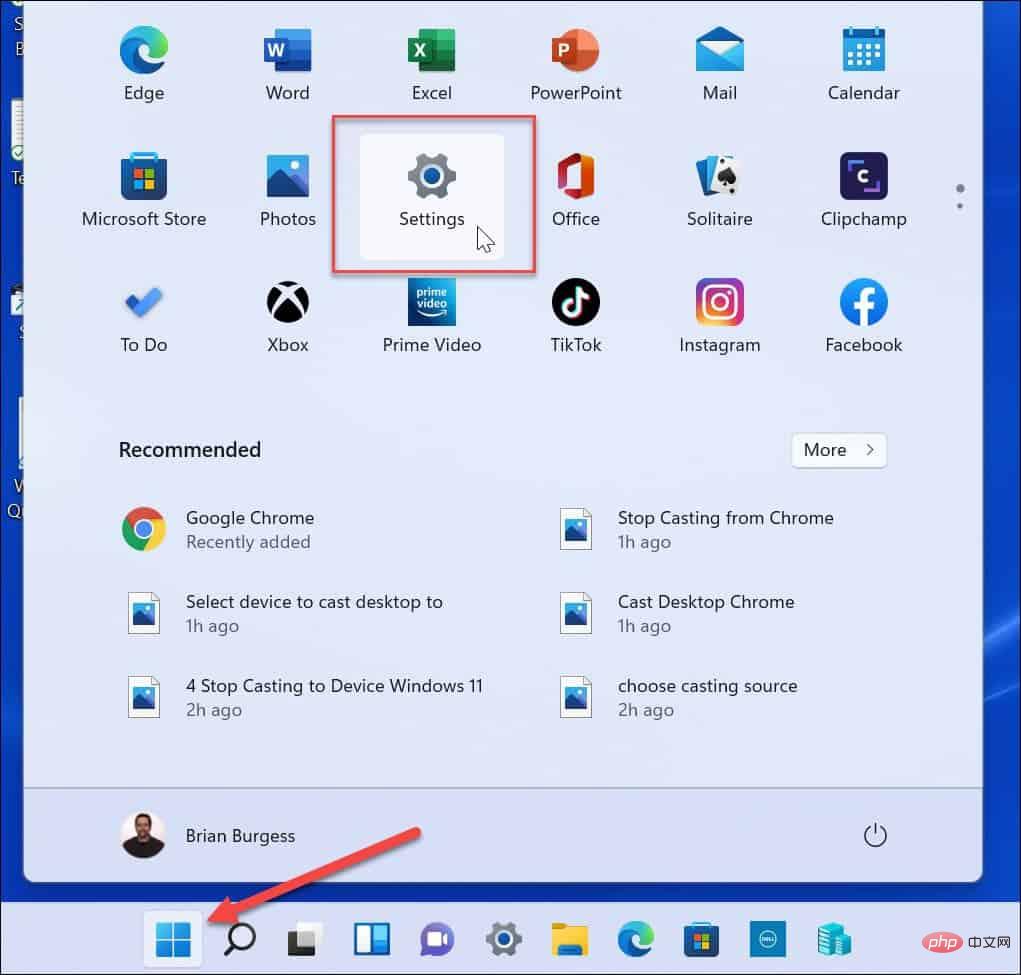
- Open Start > Settings and select Personalization > Fonts.

- When you open the Fonts section, you will find a box to install the font files. Just drag the font you downloaded from File Explorer into the box.

Everything here belongs to it. Your fonts will be moved to C:\Windows\Fonts and will be available through applications such as Microsoft Word or PowerPoint.
How to uninstall fonts from Windows 11
Don’t like the fonts you installed? You can delete it quickly.
To uninstall fonts on Windows 11, use the following steps:
- Press the Windows keyOpen the Start menuand select "set up".

- When Settings open, navigate to Personalization from the list on the left, scroll down on the right, and click Font.

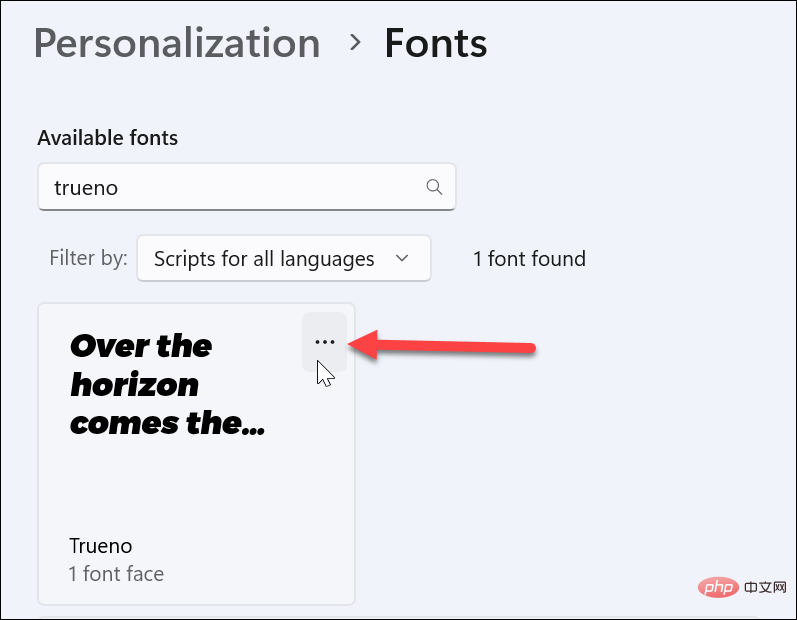
- If you know the name of the font, type it in the Available Fonts field and click the three dots menu.

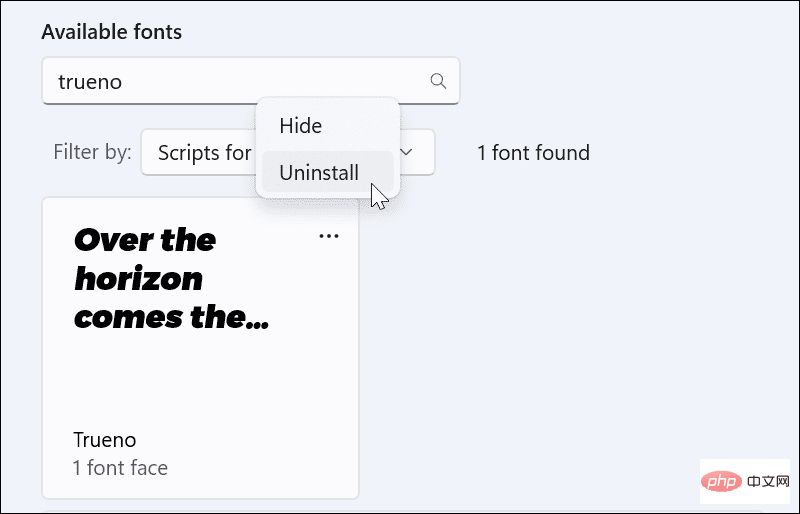
- Click Uninstall from the menu that appears.

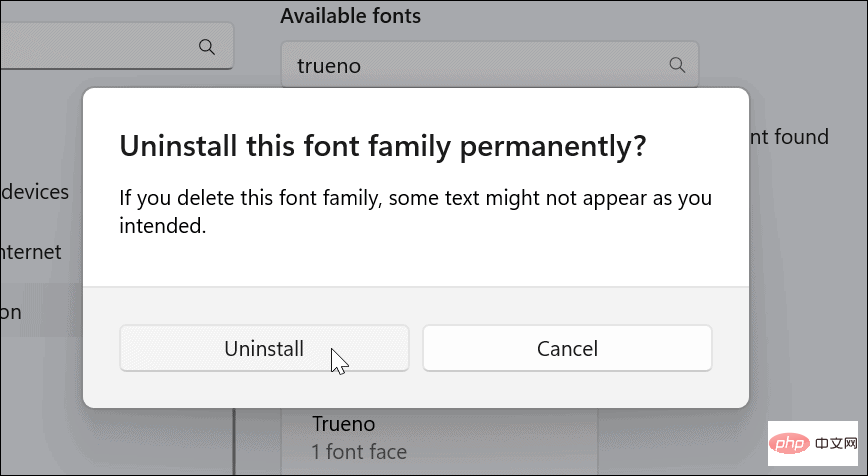
- Click the Uninstall button when the verification message appears.

Your fonts will be uninstalled and no longer appear in the C:\Windows\Fonts directory. Other apps you use can't access it either.
How to install fonts from Microsoft
If you don't like installing fonts from the Internet, you can get them from the Microsoft Store.
Use these steps to install fonts from the Microsoft Store:
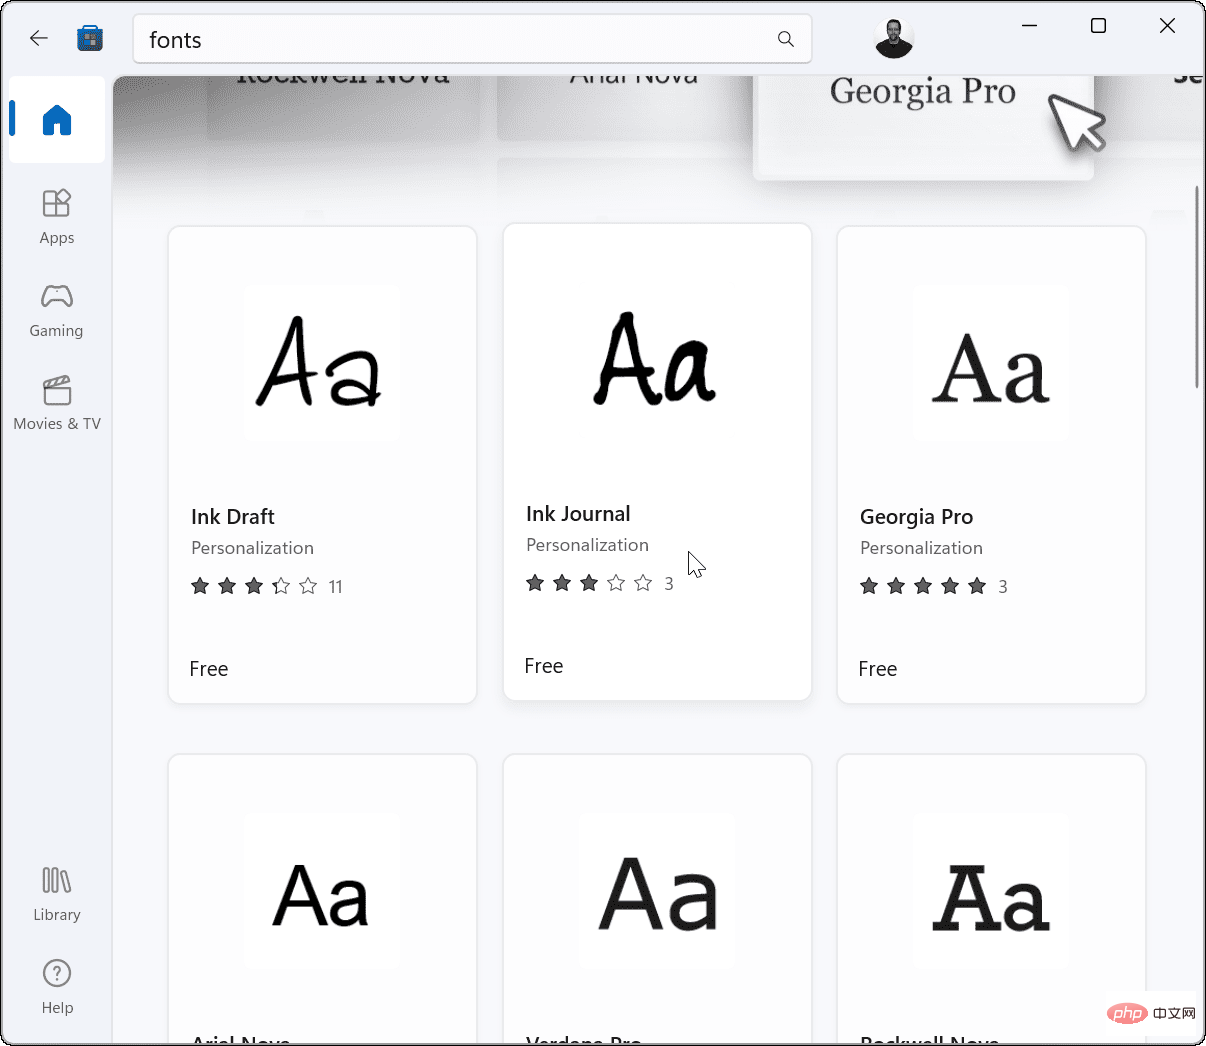
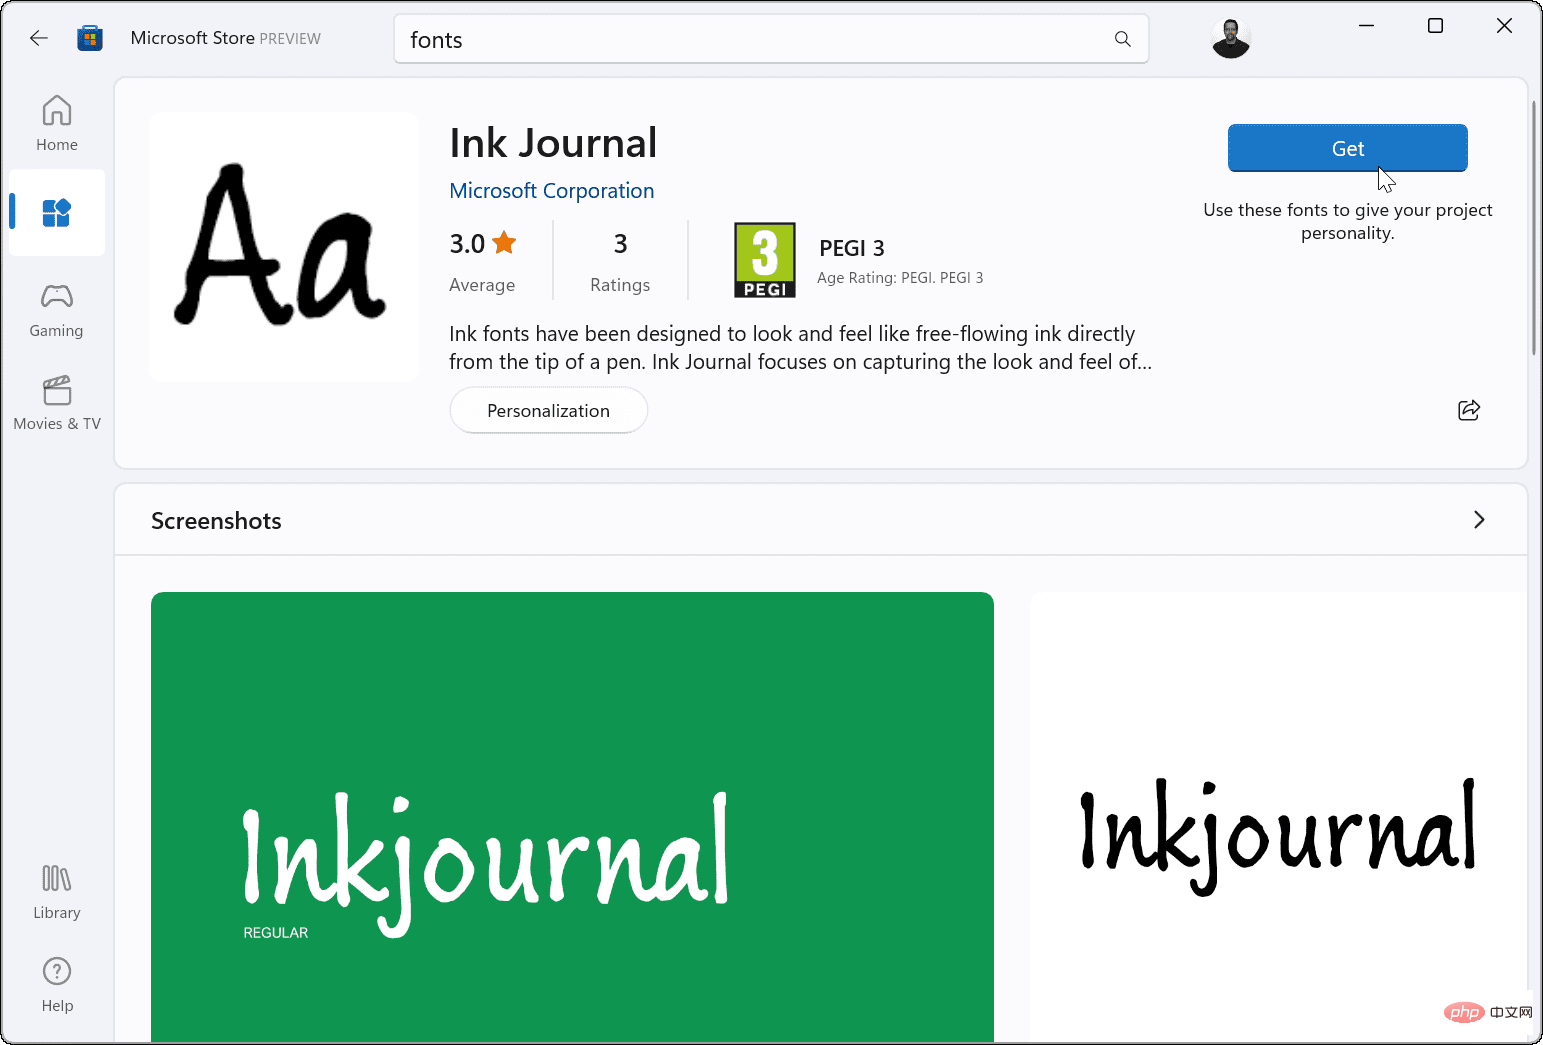
- Launch the Microsoft Store app from the taskbar and search for fonts when it opens.
- Browse the available fonts and click on the one you like.

- You will get some instructions and screenshots showing the fonts in use. Click the Get button.

That's it. Your fonts will be installed and available in the C:\Windows\Fonts directory.
Customizing Fonts in Windows
Using the steps above, you should be able to install new fonts on your Windows 11 PC.
The process is simple, but you may spend a lot of time working on them in your document. Finding the perfect font can take time, so keep that in mind. Don't download more fonts than you have time to use.
Not on Windows 11 yet? no problem. You can install fonts on Windows 10 or install fonts from the Microsoft Store on Windows 10.
The above is the detailed content of How to install or uninstall fonts on Windows 11. For more information, please follow other related articles on the PHP Chinese website!

Hot AI Tools

Undresser.AI Undress
AI-powered app for creating realistic nude photos

AI Clothes Remover
Online AI tool for removing clothes from photos.

Undress AI Tool
Undress images for free

Clothoff.io
AI clothes remover

Video Face Swap
Swap faces in any video effortlessly with our completely free AI face swap tool!

Hot Article

Hot Tools

Notepad++7.3.1
Easy-to-use and free code editor

SublimeText3 Chinese version
Chinese version, very easy to use

Zend Studio 13.0.1
Powerful PHP integrated development environment

Dreamweaver CS6
Visual web development tools

SublimeText3 Mac version
God-level code editing software (SublimeText3)


