

How to set a timer on your iPhone camera

How long can you set a timer on your iPhone camera?
When you access the timer options in the iPhone's Camera app, you'll be given the option to choose between two modes: 3 seconds (3s) and 10 seconds (10s). The first option lets you take a quick selfie from the front or rear camera while you're holding your iPhone. The second option is useful in scenes where you can mount your iPhone on a tripod from a distance to click group photos or selfies.
How to Set a Timer on an iPhone Camera
While setting a timer on an iPhone camera is a fairly simple process, the exact steps vary depending on the iPhone model you are using.
Case 1: On iPhone XS/XR and newer models
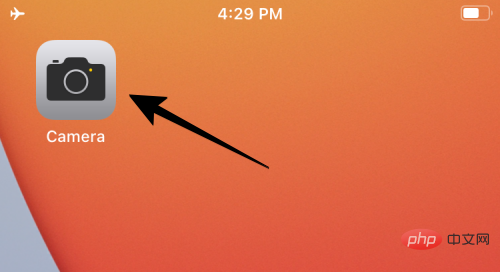
If you have an iPhone XS/XR or newer model, you can find " Timer" option. To set a timer on these iPhones, open the Camera app on iOS.
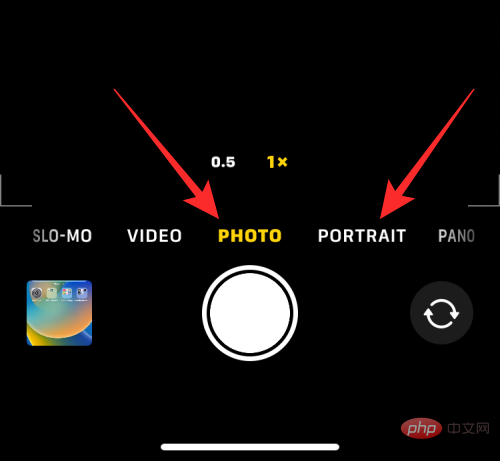
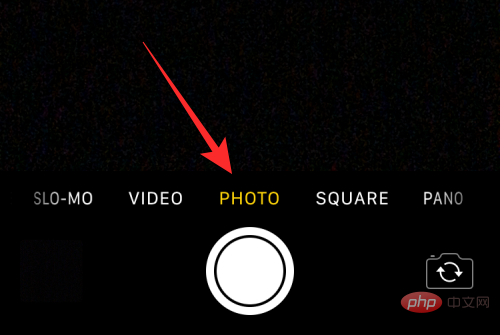
#When the camera is on, make sure you are in Photo or Portrait mode by tapping on those modes at the bottom. By default, the Camera app opens in Photo Mode, but it may be different if you keep the Camera app's settings.
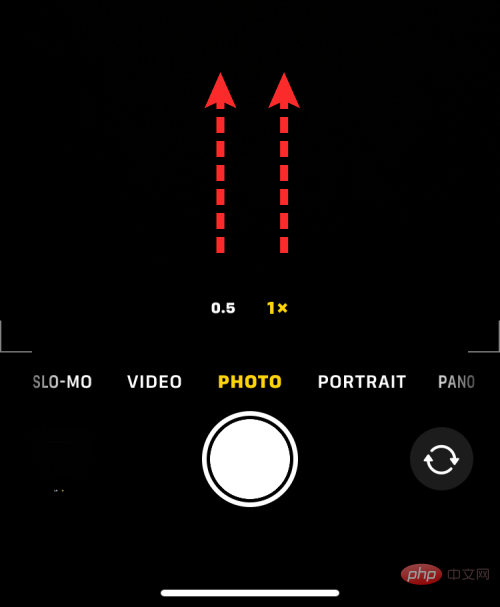
When you are in photo or portrait mode, tap the up arrow at the top of the screen to open additional options.

These options can also be accessed by sliding the viewfinder upward within any of these modes.
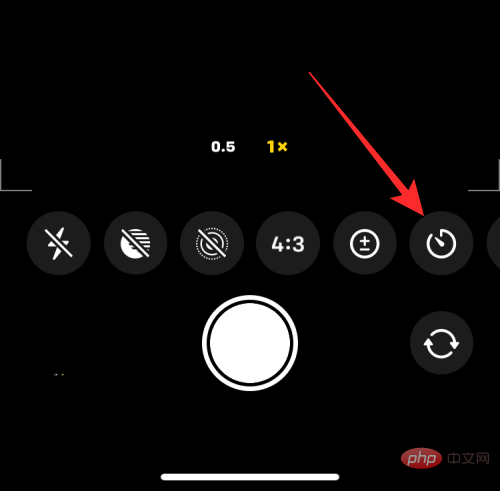
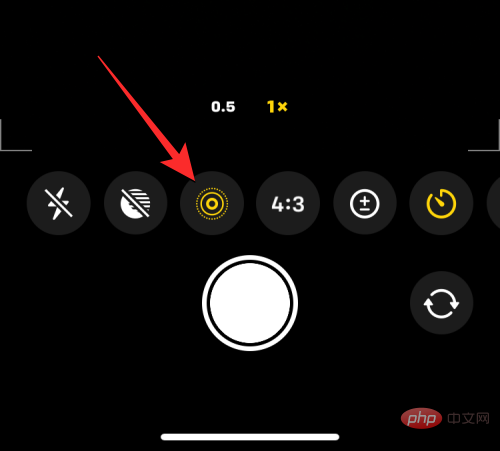
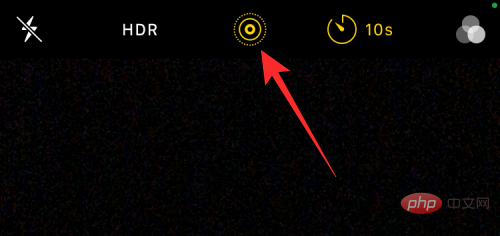
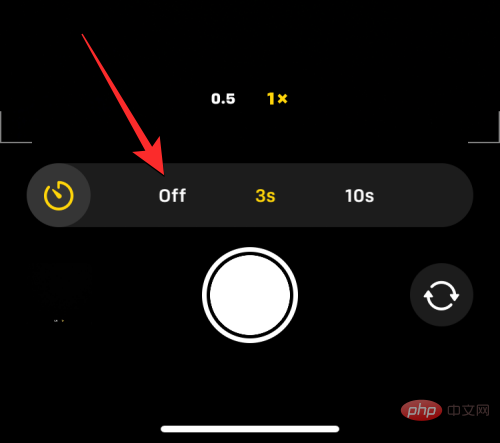
In the options that appear at the bottom, click on the Timer icon (the icon marked with a bell symbol).
#When you click on the Time icon, you will see new options appear at the bottom. From here, select 3 seconds or 10 seconds to set the timer, depending on how fast you want to shoot.

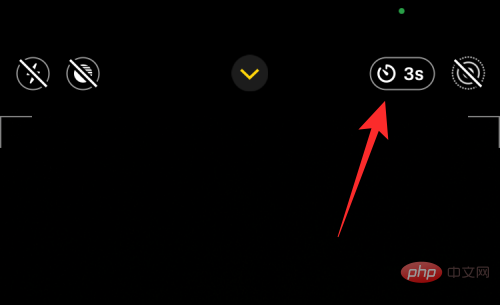
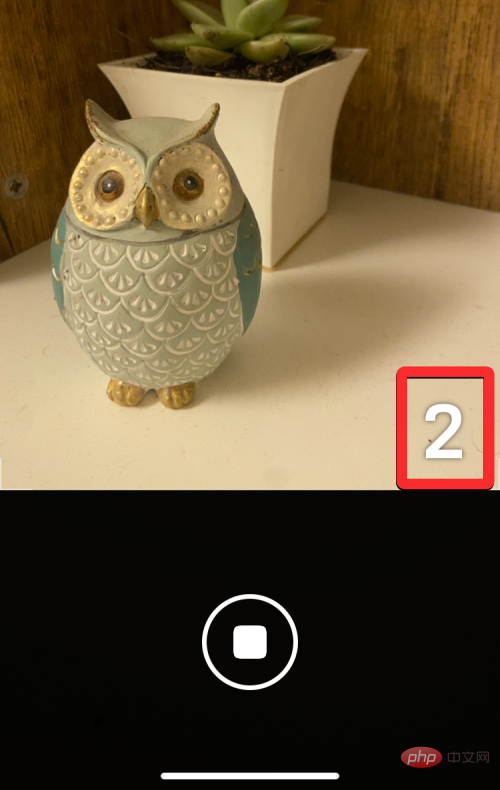
The selected timer option will be displayed in the upper right corner to help you ensure you choose correctly.
#After setting the timer, you can point yourself towards the camera. If this is a group selfie, you may want to place your iPhone against a wall or mount it on a tripod.
NOTE: You can disable Live Photos mode on your iPhone by tapping the Live Photos icon (the icon marked with concentric circles) if It is highlighted in yellow) to take multiple photos in time-lapse mode. This icon will be in the top right corner or at the bottom of the hidden menu where you can access the Timer option.
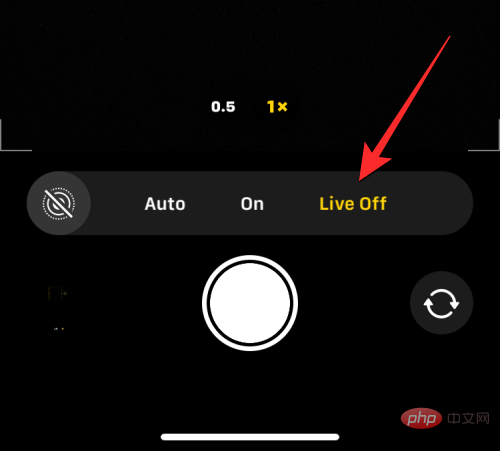
If Live Photo appears as enabled in the hidden camera menu, select Live Off after tapping the Live Photo icon.
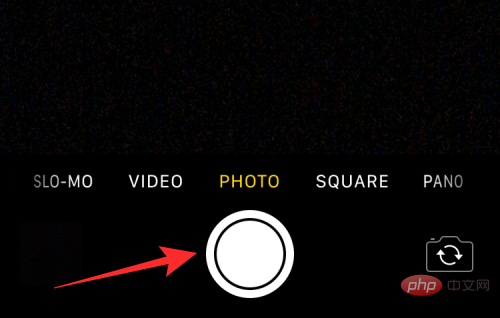
When you are ready to shoot, click the shutter button at the bottom.
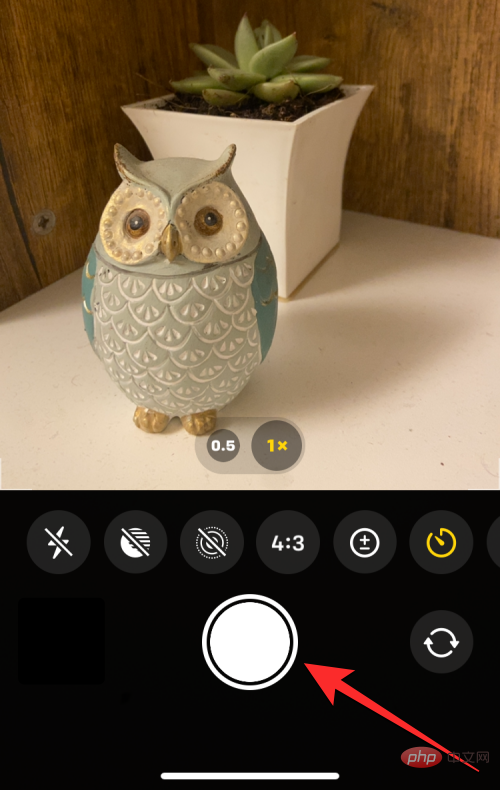
#You will now see a countdown appear in the lower right corner of the screen. If you take a photo from the main (rear) camera, your iPhone's flash will also flash to tell you the count so you can be ready to pose at the right time.
#When the countdown ends, your iPhone will snap one or more pictures, depending on whether you enabled Live Photos for the picture.
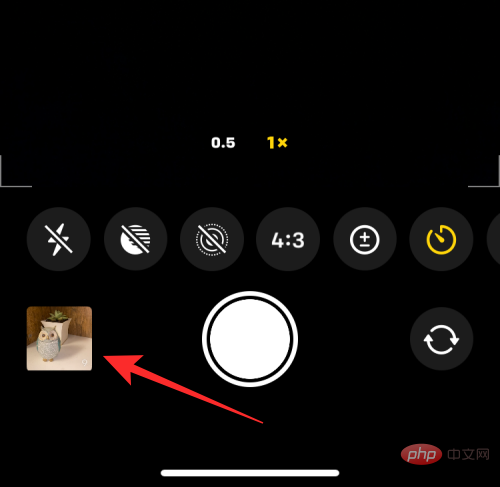
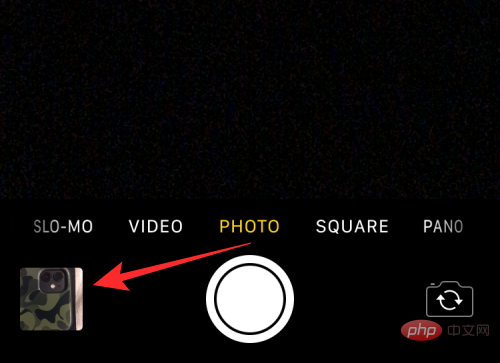
When capturing a time-lapse shot, you will see its thumbnail appear in the lower left corner. To see the photo you took, you can click on this Thumbnail to see how the photo was taken.
#You can repeat these steps to take more time-lapse photos on iPhone.
Case 2: On iPhone X and older models
The above method works on modern iPhones. If you have an iPhone X, iPhone 8, or earlier, you can easily access the timer option on the iOS Camera. To take a time-lapse photo on iPhone X or earlier, open the Camera app on iOS.
When the camera opens, tap the Photos tab at the bottom to capture a time-lapse shot. Timer options are not accessible in other camera modes.
In Photo or Portrait mode, tap the timer icon (the one marked with a bell) at the top of the screen.

#When you do this, you'll see additional options at the top to set the timer. Here, select 3 seconds or 10 seconds depending on how long you want to wait for iPhone to take the photo.

#The timer you set will appear in the upper right corner letting you know the time you selected.

#After setting the timer, you can point yourself towards the camera. If this is a group selfie, you may want to place your iPhone against a wall or mount it on a tripod.
NOTE: You can disable it by clicking on the Live Photos icon (the icon marked with concentric circles) at the top Live Photo mode on iPhone (if it's highlighted in yellow to take multiple photos in time-lapse mode).
When you are ready to shoot, click the shutter button at the bottom.
You will now see a countdown appear in the center of the screen. If you take a photo from the main (rear) camera, your iPhone's flash will also flash to tell you the count so you can be ready to pose at the right time.

When the countdown ends, your iPhone will snap one or more pictures, depending on whether you enabled Live Photos for the picture.
When capturing a time-lapse shot, you will see its thumbnail appear in the lower left corner. To see the photo you took, you can click on this Thumbnail to see how the photo was taken.
You can repeat these steps to take more time-lapse photos on iPhone.
How many photos can be saved during timed shooting?
Ideally, when you take a photo on your iPhone, the camera app takes a series of photos in burst mode the moment you press the shutter button. When using time-lapse shooting, the number of photos taken by the iPhone camera will depend on whether Live Photos is enabled.
Live Photo is a feature in the Camera app that lets your iPhone capture the moment before and after you press the shutter button, so you can choose the best moment from a series of photos or videos you've captured. While Live Photo captures video with audio during regular shooting, time-lapse shooting in Live Photo mode works differently.
- When you turn on Live Photos during a time-lapse shot, your iPhone will only take a single photo.
- When you turn off Live Photos during a timed shooting session, your iPhone will take 10 photos in burst mode.
Thumbnail in the lower left corner of the Camera app or by opening your iPhone on the Photos app to access them.

To stop the counter midway through a time-lapse shot, tap the Stop button at the bottom. This button will appear instead of the Shutter button in the Camera app.
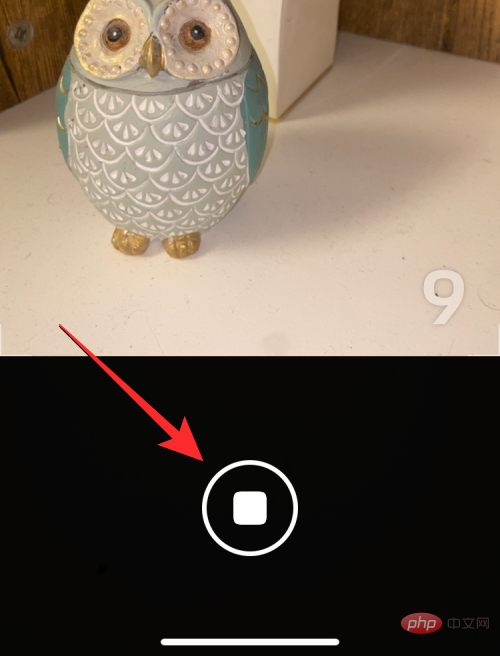
#When you stop time-lapse shooting midway, the screen will return to the state before you pressed the shutter button. You can resize the frame, change the scene, and tap the shutter button again to restart the countdown.
How to turn off the timer for your iOS camera
When you set a timer for taking photos in the Camera app, the Camera app retains this setting for the next time Use when you want to capture something on your iPhone. This means that if you previously enabled a timer, the selected timer will be reactivated by default whenever you open the camera app again to click another photo. To avoid waiting for a timed countdown, you need to manually disable the timer on your iPhone so that subsequent clicks are regular photos captured when you click the shutter button.
On iPhone XS/XR and newer models
To turn off the timer on these iPhones, open the Camera app and tap the # that says the previously set time ##Timer options (indicated by a clock symbol with either 3 seconds or 10 seconds).
Close.
(indicated by a clock symbol with either 3 seconds or 10 seconds).
From the options that appear at the top, select Off
.
#The previously configured timer will now be disabled and any photo you click now will be captured when you click the shutter button.
What modes and timers can you use on the camera app?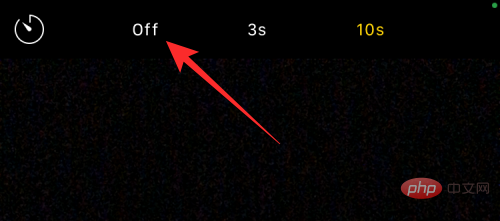 You can take time-lapse photos on iPhone only if you take a still photo of the moment in the iOS Camera app.
or
portrait modewithin the app. You can select these modes by tapping the corresponding mode tab at the bottom or by swiping left or right on the camera viewfinder.
When you take a panorama photo, you cannot use the timer option, which requires you to manually move your iPhone left and right to take longer photos. This also applies to capturing video, as the timer option is not available when you are in video, time-lapse or slow motion mode in the camera app. Since you can cut out unnecessary parts from the video after it is captured, there is no point in adding a timer to capture the video as you can always edit them to remove the beginning part. The timer option works when taking a photo from any camera on your iPhone, regardless of its location. This means you can capture time-lapse shots from the front (selfie) camera, main (wide-angle) lens, ultra-wide-angle lens, and telephoto lens.
Why and when should you use a timer on your camera?
Time-lapse photography comes in handy when you plan to capture a moment, not when the moment is right in front of you. The best time to use the timer option is during
Group Selfie. Since you don't need to shoot at the right time, setting a timer will allow others in the frame to be ready to shoot when the countdown reaches zero. You can even use your iPhone's main camera (the camera on the back) to take higher-quality photos than your average selfie.
Using time-lapse group selfies allows you, the photographer, to be prepared and in the frame of the group selfie. You can also prevent camera shake or blurring that can occur when manually clicking these pictures, since you no longer need to press the volume down or shutter button. Since Time Lapse without Live Photo captures a burst, you can choose the best moment from up to 10 pictures.
You can also use the timer option to take more beautiful selfies from the front and rear cameras. Since you no longer need to manually press the shutter button to click photos, you can point the camera at you or place it on a stable surface to click selfies and pose at the right time.
Other scenarios that may benefit from time-lapse photography are when you want to take long exposure photos or macro photos. In both cases, your iPhone needs to be very stable and focused on the subject at hand. Using the timer option in this situation can help eliminate the blur that can occur when taking pictures using the volume down or shutter button.
I can’t find the timer option on my iOS camera. Why?
When you take a photo in Photo or Portrait mode on your iPhone camera, the timer option appears. The feature is available on iPhone 5 or later running iOS 8 or later. If you can't find this option, that's because:
- The timer option is hidden in the camera app. On iPhone XR/XS or newer, you'll need to tap the up arrow or swipe up on the viewfinder to make the timer option visible.
- Time-lapse shooting cannot be used when taking panoramic photos in Pano mode.
- You cannot use the timer option when shooting video on any of the following modes (video, time-lapse, or slow motion).
- You can't take time-lapse photos on iPhone 4 or older.
- Your iPhone has not or cannot be updated to iOS 8 or later.
To take a time photo on a supported iPhone, make sure you're in Photo or Portrait mode, swipe up on the viewfinder to access the timer options, and set it to your preferred duration.
The above is the detailed content of How to set a timer on your iPhone camera. For more information, please follow other related articles on the PHP Chinese website!

Hot AI Tools

Undresser.AI Undress
AI-powered app for creating realistic nude photos

AI Clothes Remover
Online AI tool for removing clothes from photos.

Undress AI Tool
Undress images for free

Clothoff.io
AI clothes remover

Video Face Swap
Swap faces in any video effortlessly with our completely free AI face swap tool!
Hot Article
Hot Tools

Notepad++7.3.1
Easy-to-use and free code editor

SublimeText3 Chinese version
Chinese version, very easy to use

Zend Studio 13.0.1
Powerful PHP integrated development environment

Dreamweaver CS6
Visual web development tools

SublimeText3 Mac version
God-level code editing software (SublimeText3)
Hot Topics
 1389
1389
 52
52

 iPhone 16 Pro and iPhone 16 Pro Max official with new cameras, A18 Pro SoC and larger screens
Sep 10, 2024 am 06:50 AM
iPhone 16 Pro and iPhone 16 Pro Max official with new cameras, A18 Pro SoC and larger screens
Sep 10, 2024 am 06:50 AM
Apple has finally lifted the covers off its new high-end iPhone models. The iPhone 16 Pro and iPhone 16 Pro Max now come with larger screens compared to their last-gen counterparts (6.3-in on the Pro, 6.9-in on Pro Max). They get an enhanced Apple A1
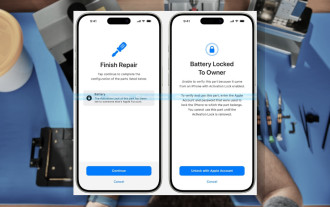 iPhone parts Activation Lock spotted in iOS 18 RC — may be Apple\'s latest blow to right to repair sold under the guise of user protection
Sep 14, 2024 am 06:29 AM
iPhone parts Activation Lock spotted in iOS 18 RC — may be Apple\'s latest blow to right to repair sold under the guise of user protection
Sep 14, 2024 am 06:29 AM
Earlier this year, Apple announced that it would be expanding its Activation Lock feature to iPhone components. This effectively links individual iPhone components, like the battery, display, FaceID assembly, and camera hardware to an iCloud account,
 iPhone parts Activation Lock may be Apple\'s latest blow to right to repair sold under the guise of user protection
Sep 13, 2024 pm 06:17 PM
iPhone parts Activation Lock may be Apple\'s latest blow to right to repair sold under the guise of user protection
Sep 13, 2024 pm 06:17 PM
Earlier this year, Apple announced that it would be expanding its Activation Lock feature to iPhone components. This effectively links individual iPhone components, like the battery, display, FaceID assembly, and camera hardware to an iCloud account,
 Gate.io trading platform official app download and installation address
Feb 13, 2025 pm 07:33 PM
Gate.io trading platform official app download and installation address
Feb 13, 2025 pm 07:33 PM
This article details the steps to register and download the latest app on the official website of Gate.io. First, the registration process is introduced, including filling in the registration information, verifying the email/mobile phone number, and completing the registration. Secondly, it explains how to download the Gate.io App on iOS devices and Android devices. Finally, security tips are emphasized, such as verifying the authenticity of the official website, enabling two-step verification, and being alert to phishing risks to ensure the safety of user accounts and assets.
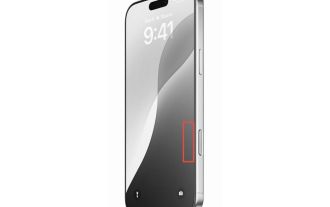 Multiple iPhone 16 Pro users report touchscreen freezing issues, possibly linked to palm rejection sensitivity
Sep 23, 2024 pm 06:18 PM
Multiple iPhone 16 Pro users report touchscreen freezing issues, possibly linked to palm rejection sensitivity
Sep 23, 2024 pm 06:18 PM
If you've already gotten your hands on a device from the Apple's iPhone 16 lineup — more specifically, the 16 Pro/Pro Max — chances are you've recently faced some kind of issue with the touchscreen. The silver lining is that you're not alone—reports
 Anbi app official download v2.96.2 latest version installation Anbi official Android version
Mar 04, 2025 pm 01:06 PM
Anbi app official download v2.96.2 latest version installation Anbi official Android version
Mar 04, 2025 pm 01:06 PM
Binance App official installation steps: Android needs to visit the official website to find the download link, choose the Android version to download and install; iOS search for "Binance" on the App Store. All should pay attention to the agreement through official channels.
 Beats adds phone cases to its lineup: unveils a MagSafe case for the iPhone 16 series
Sep 11, 2024 pm 03:33 PM
Beats adds phone cases to its lineup: unveils a MagSafe case for the iPhone 16 series
Sep 11, 2024 pm 03:33 PM
Beats is known for launching audio products such as Bluetooth speakers and headphones, but in what can best be described as a surprise, the Apple-owned company has branched into making phone cases, starting with the iPhone 16 series. The Beats iPhone
 How to solve the problem of 'Undefined array key 'sign'' error when calling Alipay EasySDK using PHP?
Mar 31, 2025 pm 11:51 PM
How to solve the problem of 'Undefined array key 'sign'' error when calling Alipay EasySDK using PHP?
Mar 31, 2025 pm 11:51 PM
Problem Description When calling Alipay EasySDK using PHP, after filling in the parameters according to the official code, an error message was reported during operation: "Undefined...