

Here are the fixes for Open Shell Windows 11 not working issue

Open shell not running on Windows 11 is not a new problem and has been plaguing users since the advent of this new operating system.
The cause of the Open-Shell Windows 11 not working issue is not specific. It can be caused by unexpected errors in programs, the presence of viruses or malware, or corrupted system files.
For those who don’t know, Open-Shell is the replacement for Classic Shell, which was discontinued in 2017. You can check out our tutorial on how to install Classic Shell on Windows 11.
How to replace the Start menu in Windows 11?
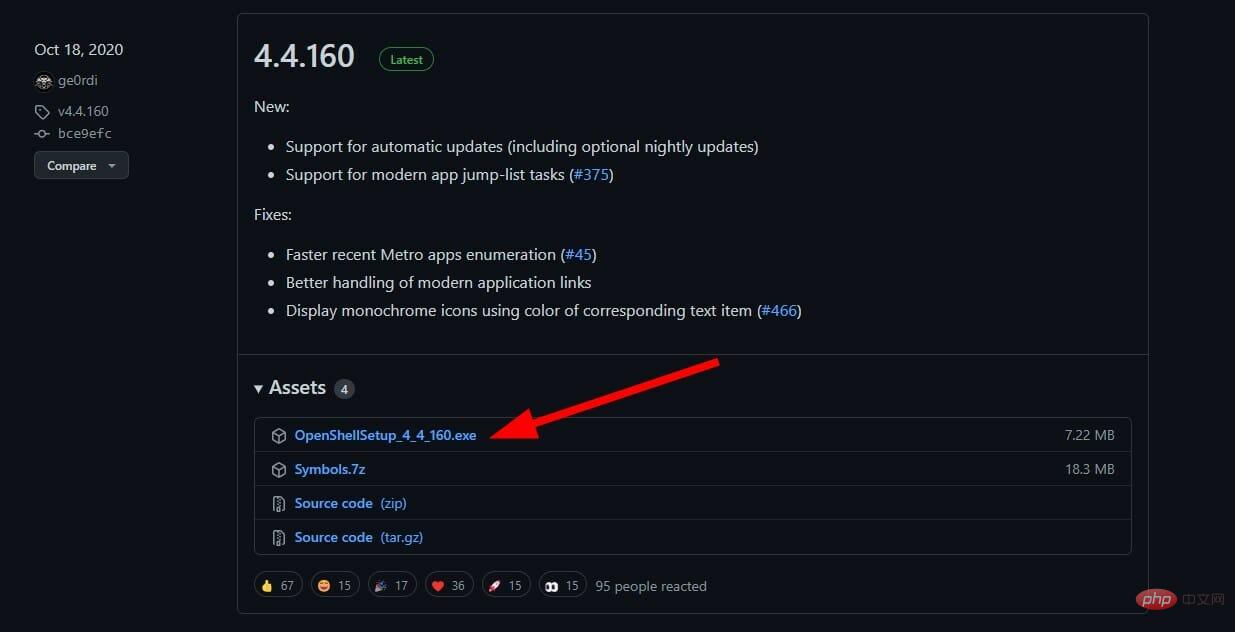
- DownloadOpen the shell.

- Install the application and open it.
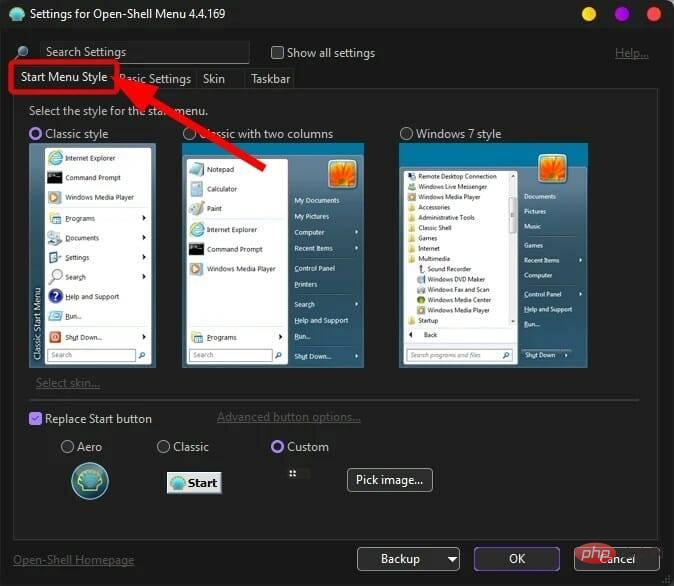
- On "Start Menu Style" you can change the appearance of the Start menu and replace the Start menu icon.
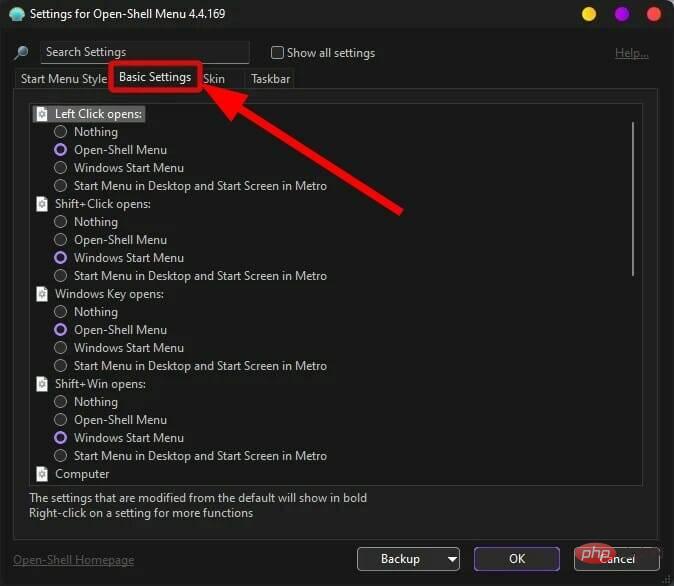
- Under the Basic Settings tab you can change the Start menu behavior.
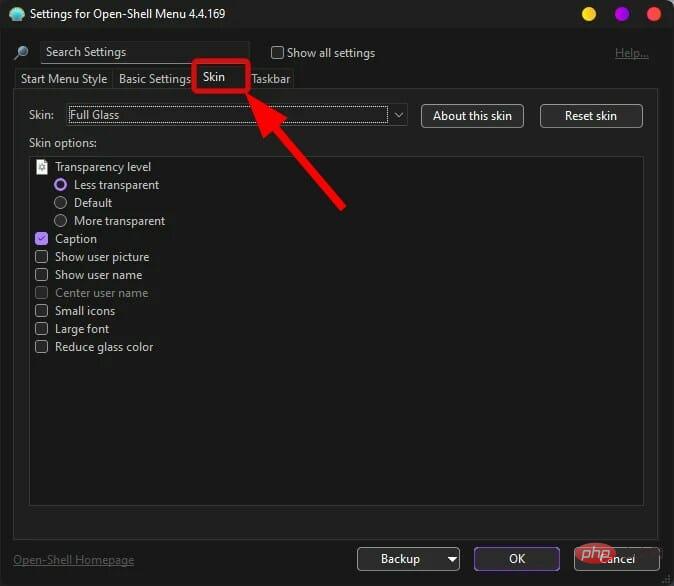
- Under the "Skin" tab, you can adjust the appearance of the Start menu.
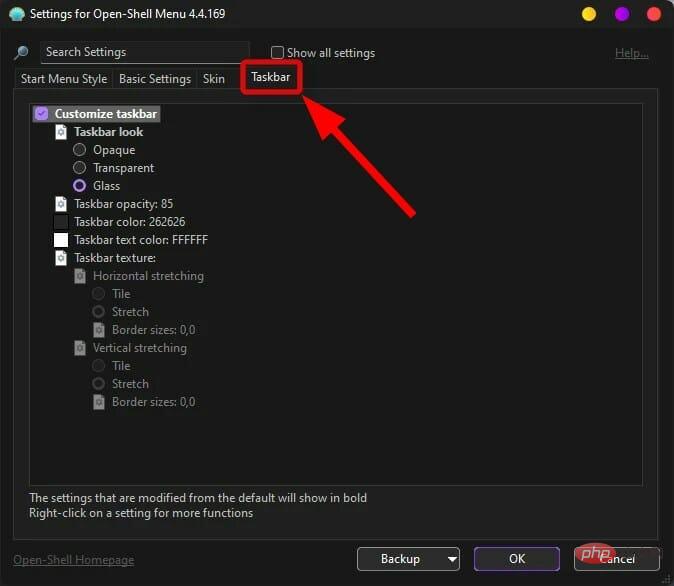
- Switch to the Taskbar tab and you can change the taskbar's appearance, opacity, color, text color and overlay.
How to fix Open Shell not running on Windows 11?
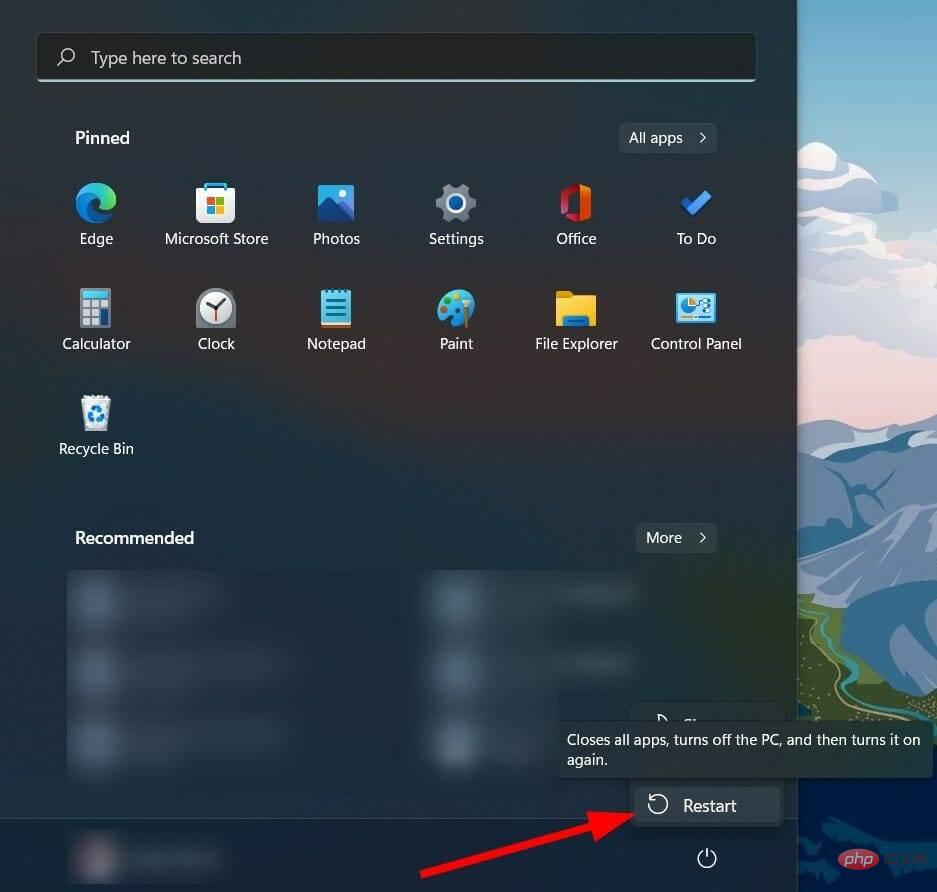
1. Restart your computer
- Open the Start menu.
- Click Power.
- Select Restart.
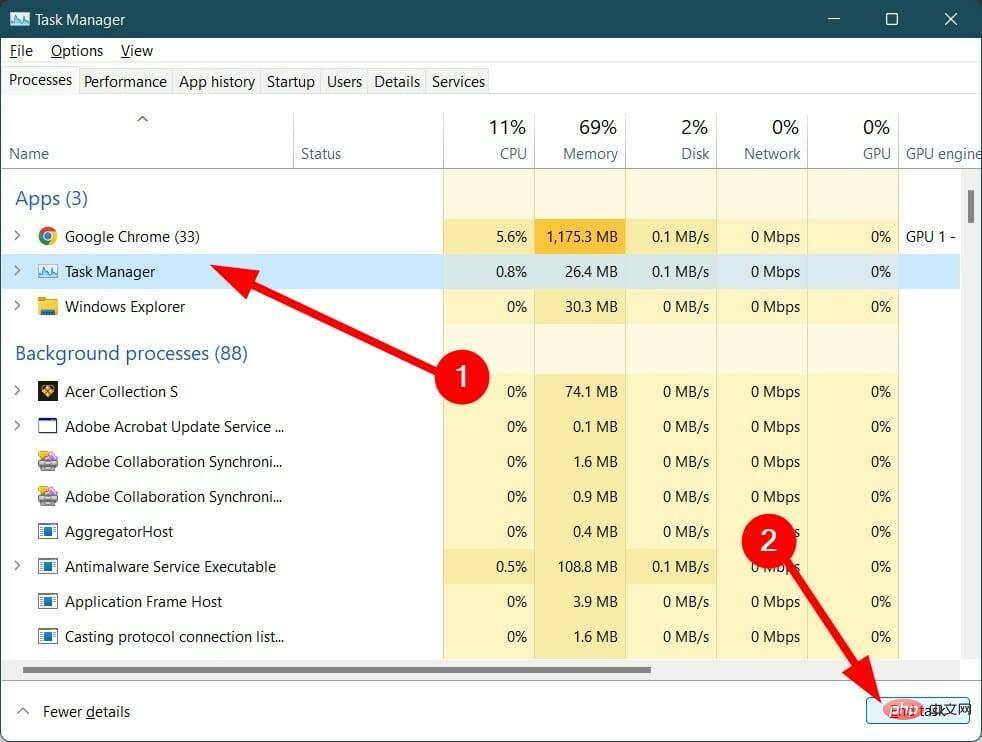
2. Restart the file explorer
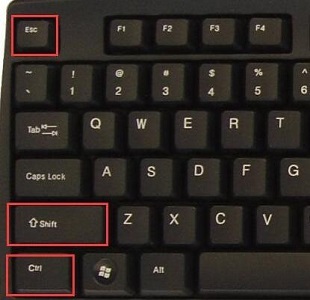
- Press Ctrl Alt Del button to open Task Manager.
- Select all instances of File Explorer from the Processes tab and press the End Task button.
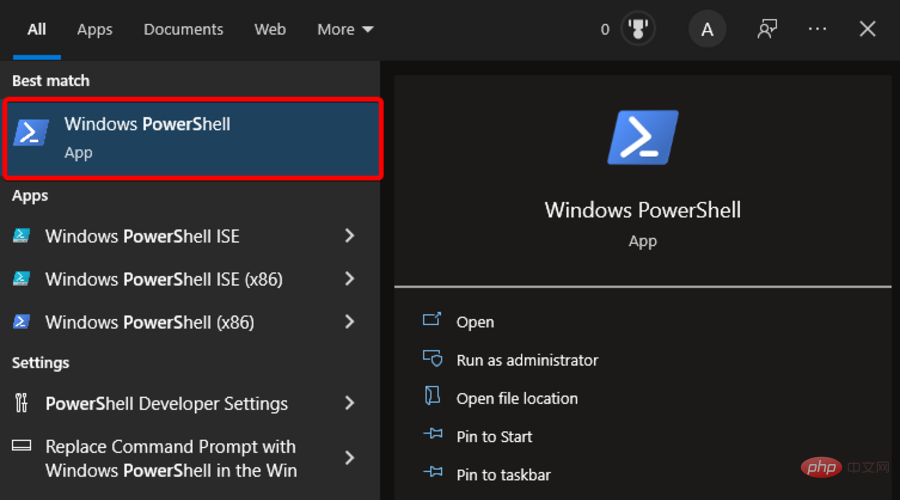
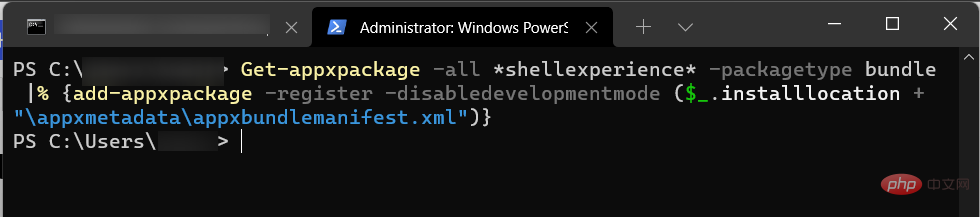
3.Re-register for Shell experience
- Press Start menu.
- Search Windows Powershell and open it.
- Execute the following commands.
Get-appxpackage -all shellexperience -packagetype bundle |% {add-appxpackage -register -disabledevelopmentmode ($_.installlocation “\appxmetadata\appxbundlemanifest.xml”)}
- Press Enter and let the command process.
- Close Powershell and check if this resolves the issue.
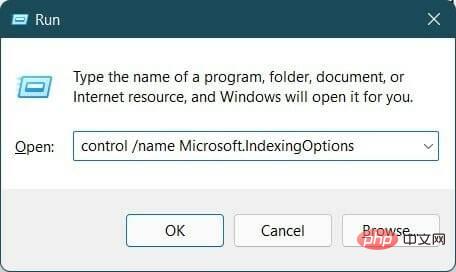
4. Rebuild the Windows search index
- Press the Win R key to open the Run command.
- Type the following command and press Enter.
control /name Microsoft.IndexingOptions
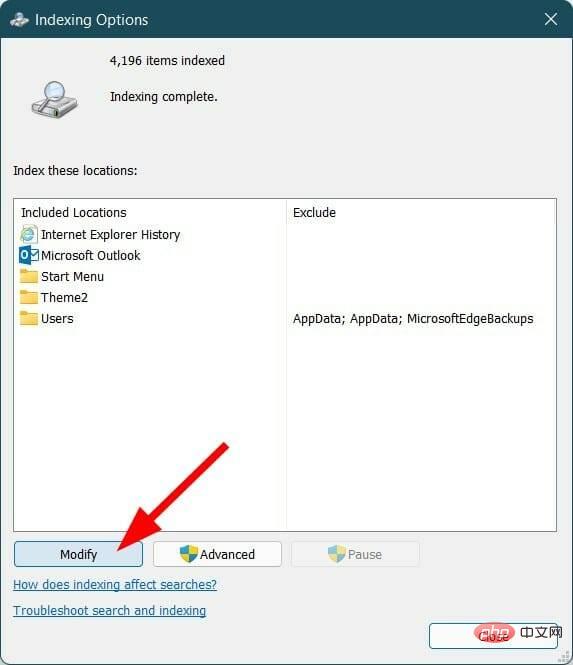
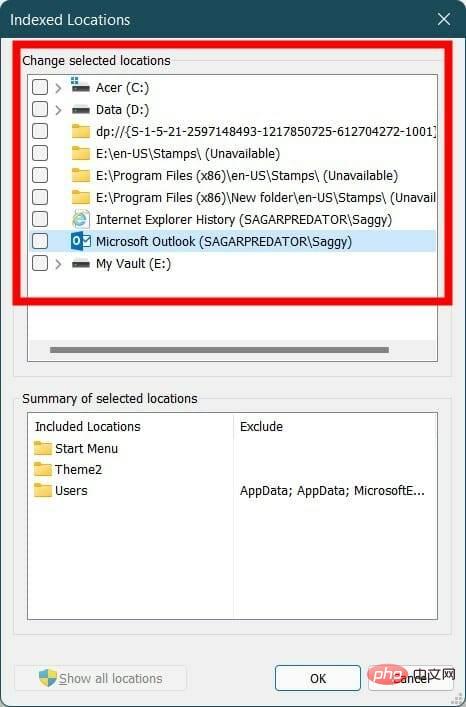
- In the Indexing Options window, click Modify.
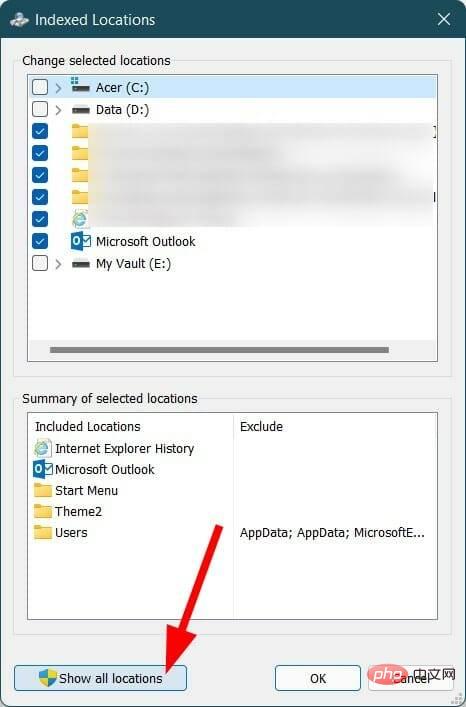
- Click to show all locations.
-
Uncheck all locations and click OK.
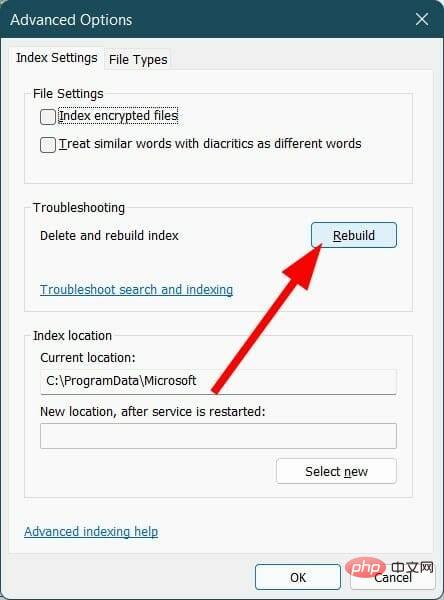
- Now go back to the "Index Options" window and click "Advanced".
- SelectRebuild in the new Advanced Options window.
- Click "OK" to start the process.
- When finished, Close the "Index Options" window.
- Restart your PC and check if this resolves the issue.

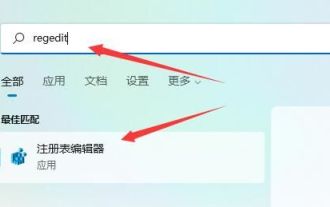
5. Adjust the start menu registry settings
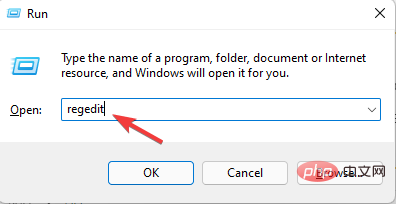
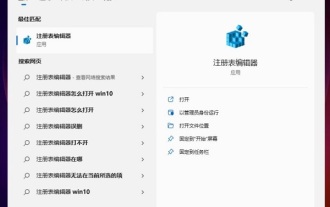
- Press Win R to open and run the command .
- Type regedit and press Enter.
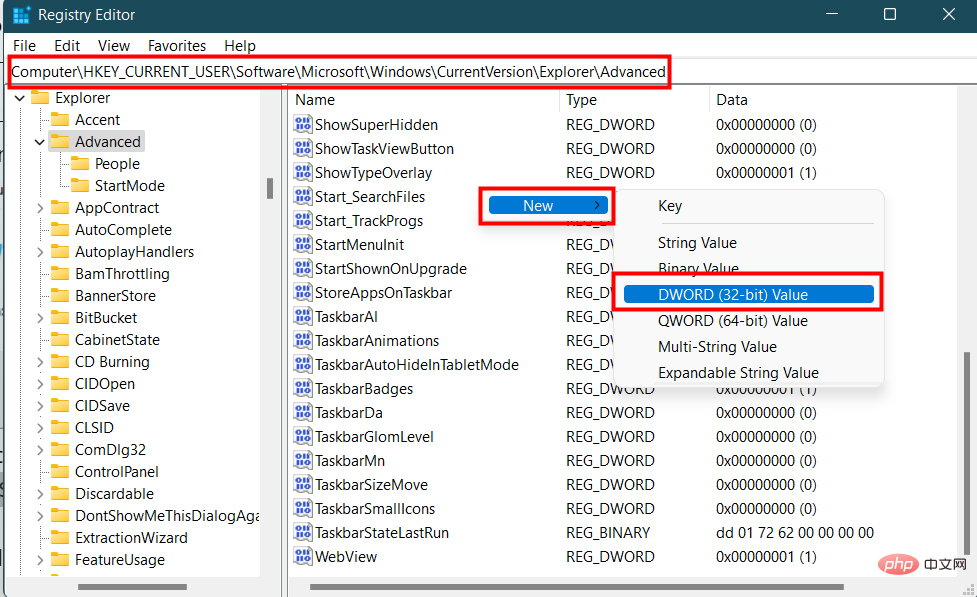
- Go to the path mentioned below.
Computer\HKEY_CURRENT_USER\Software\Microsoft\Windows\CurrentVersion\Explorer\Advanced - Right-click an empty area and select New > DWORD (32-bit value).
- Name it EnableXamlStartMenu.
- Double-click the newly created value and set Value Data to 0.
- RestartWindows Explorer and check if this resolves the issue.
- In the same location as above, find Start_ShowClassicMode (if it's not available, you're good).
- Right click on it and select Delete.
6. Check for the latest Windows updates
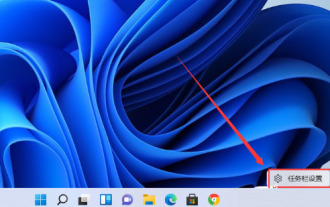
- Press Win I key to open Settings.
- Select Windows Update from the left pane.
- Click the Check for Updates button.

What else should I know about Open Shell?
➡ Open Shell works perfectly with Windows 11. However, if you face any issues, you can follow the steps above to resolve the issue you are facing while using Open Shell.
➡ If you think Open Shell is causing multiple issues on your Windows 11 PC, then we recommend you uninstall it. It can be done simply from the control panel.
➡ Open Shell will not completely remove the Windows 11 taskbar. However, you can take advantage of various customization features to change the look and behavior of your Windows 11 taskbar.
The above is the detailed content of Here are the fixes for Open Shell Windows 11 not working issue. For more information, please follow other related articles on the PHP Chinese website!

Hot AI Tools

Undresser.AI Undress
AI-powered app for creating realistic nude photos

AI Clothes Remover
Online AI tool for removing clothes from photos.

Undress AI Tool
Undress images for free

Clothoff.io
AI clothes remover

Video Face Swap
Swap faces in any video effortlessly with our completely free AI face swap tool!

Hot Article
Hot Tools

Notepad++7.3.1
Easy-to-use and free code editor

SublimeText3 Chinese version
Chinese version, very easy to use

Zend Studio 13.0.1
Powerful PHP integrated development environment

Dreamweaver CS6
Visual web development tools

SublimeText3 Mac version
God-level code editing software (SublimeText3)
Hot Topics


 How to disable taskbar thumbnail preview in Win11? Turn off the taskbar icon display thumbnail technique by moving the mouse
Feb 29, 2024 pm 03:20 PM
How to disable taskbar thumbnail preview in Win11? Turn off the taskbar icon display thumbnail technique by moving the mouse
Feb 29, 2024 pm 03:20 PM
This article will introduce how to turn off the thumbnail function displayed when the mouse moves the taskbar icon in Win11 system. This feature is turned on by default and displays a thumbnail of the application's current window when the user hovers the mouse pointer over an application icon on the taskbar. However, some users may find this feature less useful or disruptive to their experience and want to turn it off. Taskbar thumbnails can be fun, but they can also be distracting or annoying. Considering how often you hover over this area, you may have inadvertently closed important windows a few times. Another drawback is that it uses more system resources, so if you've been looking for a way to be more resource efficient, we'll show you how to disable it. but
 How to reduce the height of the taskbar in win11? Tutorial on resizing the taskbar in Windows 11
Feb 29, 2024 pm 12:37 PM
How to reduce the height of the taskbar in win11? Tutorial on resizing the taskbar in Windows 11
Feb 29, 2024 pm 12:37 PM
When we use win11, we will find that the height of the taskbar is a bit high, which feels a bit unsightly to some users. So how to reduce the height of the win11 taskbar? Users can directly click the Registry Editor under the Start menu, and then find the Advanced folder to operate. Let this site carefully introduce to users how to adjust the taskbar size in Windows 11. How to resize the taskbar in Windows 11 First, we need to open the Registry Editor. You can open the registry editor by clicking the Start menu and entering "regedit" in the search box, or by pressing the Win+R key combination to open the Run function and entering "regedit".
 What should I do if the Win7 taskbar does not display the icon? How to solve the problem of the computer taskbar icon disappearing
Jun 09, 2024 pm 01:49 PM
What should I do if the Win7 taskbar does not display the icon? How to solve the problem of the computer taskbar icon disappearing
Jun 09, 2024 pm 01:49 PM
Recently, many users using Win7 system have found that the icons in the taskbar suddenly disappeared, which makes the operation very inconvenient and they do not know how to solve the problem. This article will introduce to you how to solve the problem of disappearing taskbar icons in Win7 system. Bar! Cause Analysis When encountering such a situation, there are generally two situations: one is that the taskbar on the computer does not really disappear, but is just hidden, and the other is that the taskbar does disappear. Method 1: 1. There is a situation that you need to confirm first, that is, when the mouse is placed at the bottom of the screen, the taskbar will be displayed. You can directly click the mouse on the taskbar and select "Properties". 2. In the dialog box that opens, click & on the "Hide taskbar" option.
 How to make the Win11 taskbar black? Introduction to how to set the black taskbar in Win11
Apr 22, 2024 pm 06:40 PM
How to make the Win11 taskbar black? Introduction to how to set the black taskbar in Win11
Apr 22, 2024 pm 06:40 PM
Some friends also want the taskbar to turn black after changing the dark wallpaper on their computers, but they don’t know how to do it. Let’s take a look at the specific methods below! 1. Right-click an empty area in the taskbar and select "Taskbar Settings." 2. In the taskbar settings window, find the "Appearance" tab and click it. 3. Under the "Appearance" tab, find the "Taskbar Background" option and click the drop-down menu. 4. Select "Black". 5. Close the "Taskbar Settings" window. Taskbar beautification Xiaozhi Eye Protector is a very easy-to-use win11 transparent taskbar tool. It supports taskbar transparency, taskbar beautification, and multiple styles to beautify the taskbar interface, making your computer interface more beautiful. Xiaozhi Eye Protector Eye Baby (click to download now) Xiaozhi Eye Protection
 How to solve the problem that the win11 taskbar does not respond when clicked/cannot be used
May 09, 2024 pm 06:43 PM
How to solve the problem that the win11 taskbar does not respond when clicked/cannot be used
May 09, 2024 pm 06:43 PM
After upgrading to Windows 11 system, many users encountered the problem that the taskbar cannot be clicked, which has a great impact on life and work. So how to solve it specifically? Let’s take a look below! Method 1 1. First, we press the Ctrl+Shift+Esc shortcut keys on the keyboard to open the Task Manager. 2. Then click File in the upper left corner and select Run New Task. 3. After opening it, enter control and press Enter to enter the control panel. 4. Find the time and area and choose to change the date and time. 5. Change the time to September 4 or later, turn off automatic time synchronization after the setting is completed, and then restart the computer. 6. After restarting, re-enter the time settings and come to the internet time selection.
 How to expand the stacked display of the Win11 taskbar? Tutorial on stacking and expanding the Win11 taskbar
Jan 29, 2024 am 11:33 AM
How to expand the stacked display of the Win11 taskbar? Tutorial on stacking and expanding the Win11 taskbar
Jan 29, 2024 am 11:33 AM
When we use win11 system, we will find that our taskbar windows are merged. Many users don't like this operation very much. So how to expand the win11 taskbar stacking? Users can directly click on the taskbar settings under the right button, and then directly find the taskbar corner overflow option in the right menu to operate. Let this site carefully introduce to users how to expand the win11 taskbar stack. How to expand taskbar stacking in Windows 11 Method 1. 1. Right-click on a blank space on the taskbar and select Taskbar Settings. 3. After clicking the taskbar corner overflow, turn on the switch for the application icon to be displayed. Method two: 1. We need to use a software to achieve this, search, download and install star by ourselves
 How to quickly delete the line at the end of a file in Linux
Mar 01, 2024 pm 09:36 PM
How to quickly delete the line at the end of a file in Linux
Mar 01, 2024 pm 09:36 PM
When processing files under Linux systems, it is sometimes necessary to delete lines at the end of the file. This operation is very common in practical applications and can be achieved through some simple commands. This article will introduce the steps to quickly delete the line at the end of the file in Linux system, and provide specific code examples. Step 1: Check the last line of the file. Before performing the deletion operation, you first need to confirm which line is the last line of the file. You can use the tail command to view the last line of the file. The specific command is as follows: tail-n1filena
 How to solve the problem that the taskbar cannot be resized in Windows 11 system
Apr 17, 2024 pm 06:40 PM
How to solve the problem that the taskbar cannot be resized in Windows 11 system
Apr 17, 2024 pm 06:40 PM
Recently, some Windows 11 users have found that the size of the taskbar cannot be freely scaled according to personal preferences, especially when they want to increase or decrease the size of the taskbar. In order to solve the troubles faced by these users, this article will focus on the problem that the taskbar size cannot be adjusted in Windows 11 system and provide relevant solutions. Operation method 1. Click Start in the taskbar in the lower left corner, enter "Registry Editor" in the search box above and open it. 2. After entering the new interface, click "HKEY_CURRENT_USERSoftwareMicrosoftWindowsCurrentVersionExpl" in the left column