

5 Ways (and Fixes) to Adjust Your Screen for Monitoring on Windows 11

Thanks to recent improvements around the world, PC parts are now available at MSRP, prompting many users to finally build the PC of their dreams. Building a PC can have its challenges, and one of the tasks is fitting your screen to your monitor's display. If you can't fit a screen to your monitor on Windows 11, here's everything you need to know. let's start.
How to adjust your screen in 5 ways for monitoring on Windows 11
To fit your screen to your monitor, you can adjust the resolution, scaling, or display output based on your current settings set up. We recommend that you try resizing the resolution to maintain visual quality and dpi. However, if this doesn't work for you, you can try one of the other options mentioned in the tutorial below. Follow any of the sections below, depending on your preference.
Method 1: Using the Settings app
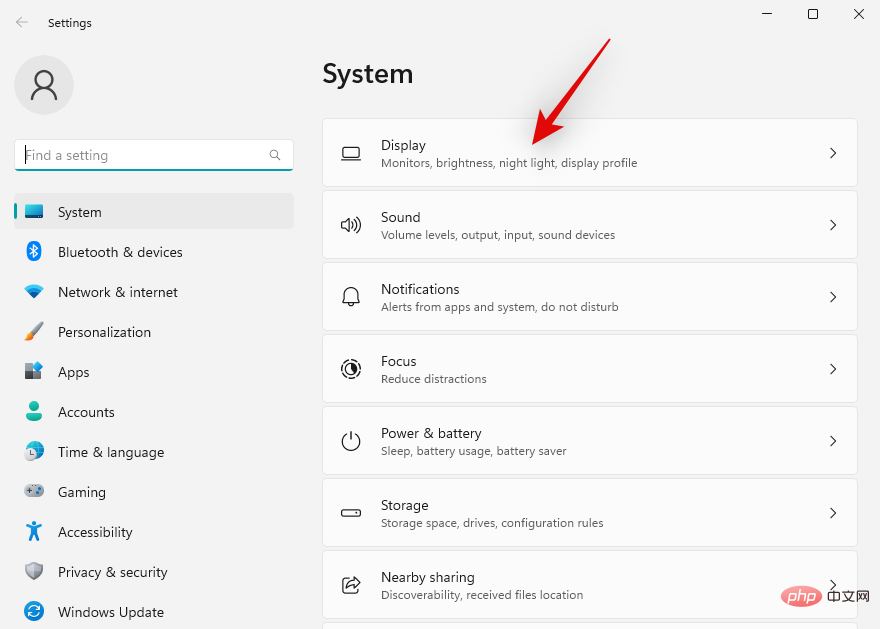
Press the Windows ikeyboard to open the Settings app. Now click to display .
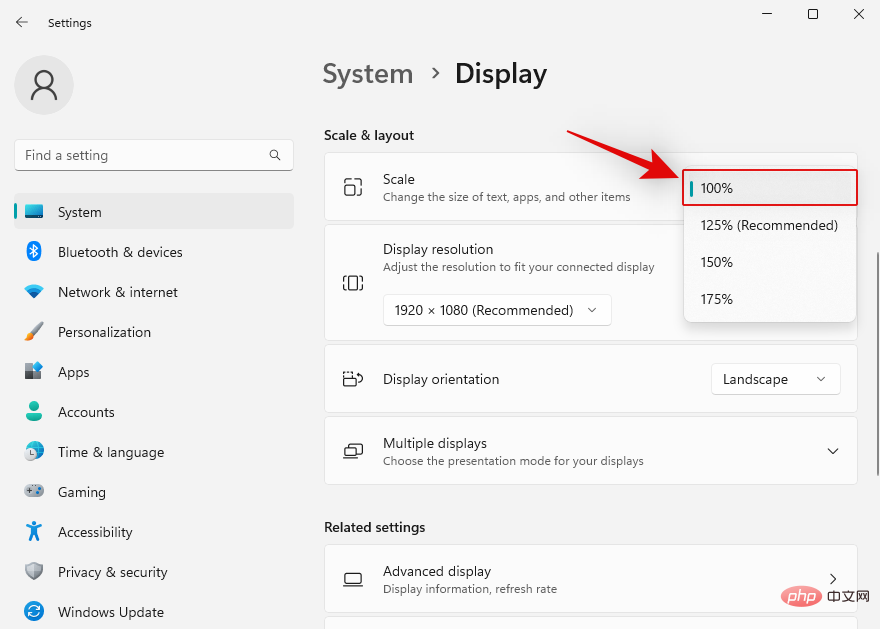
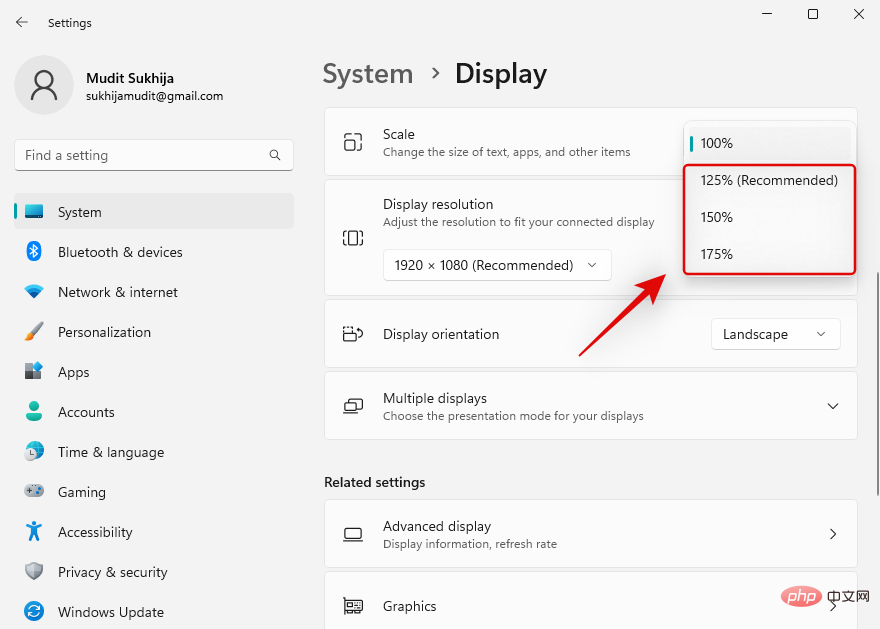
Click the drop-down menu for Scale.
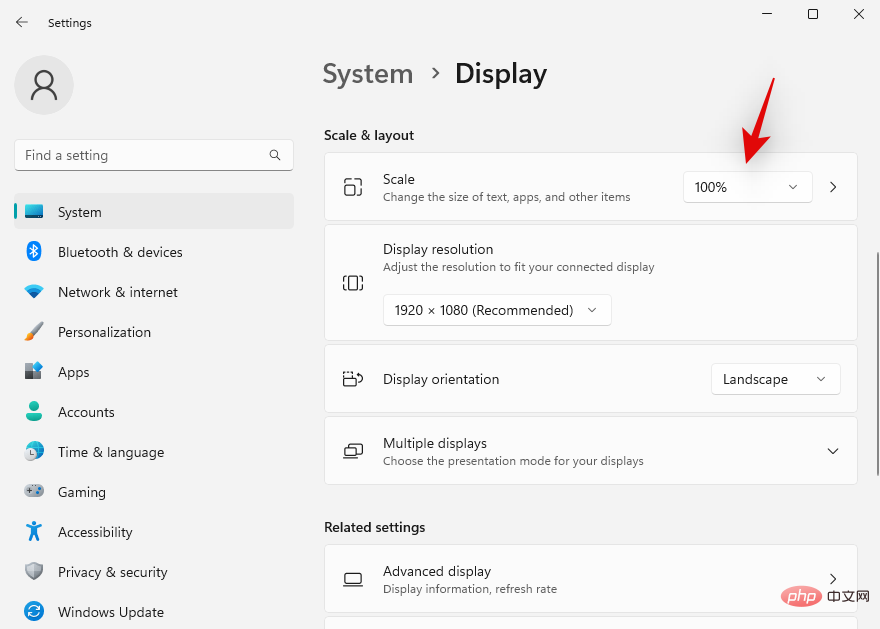
Despite the recommended options, choose 100%.
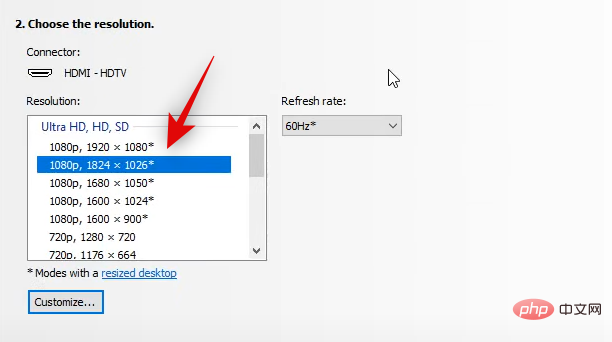
Now click on the drop-down menu that says Resolution.

Select your monitor's default resolution from the on-screen list.
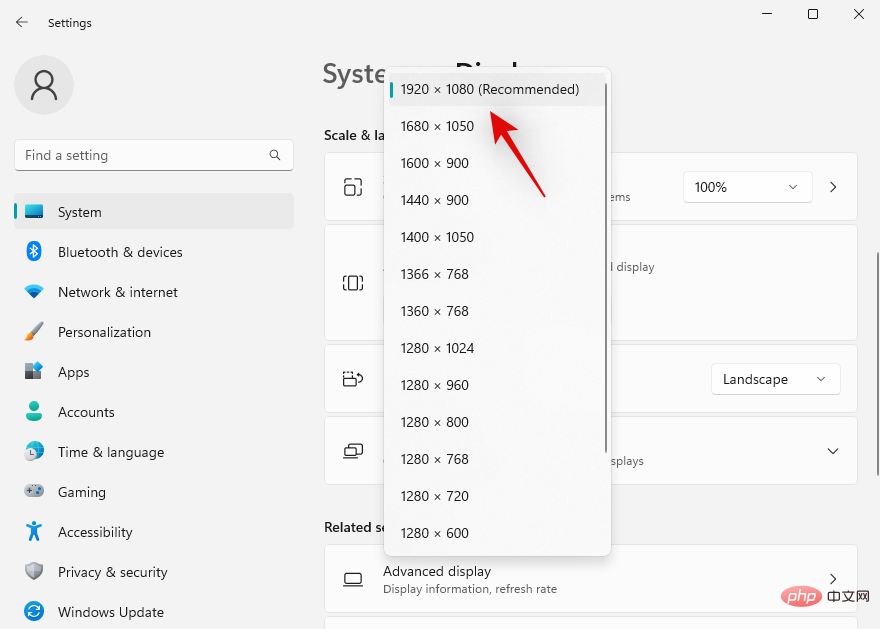
Note: You can find the resolution of your monitor in the product manual or on the product page. You can also find the same information on the OEM support website.
If you are unable to select a resolution at this time or are having trouble, scroll to the bottom and click Advanced Display.
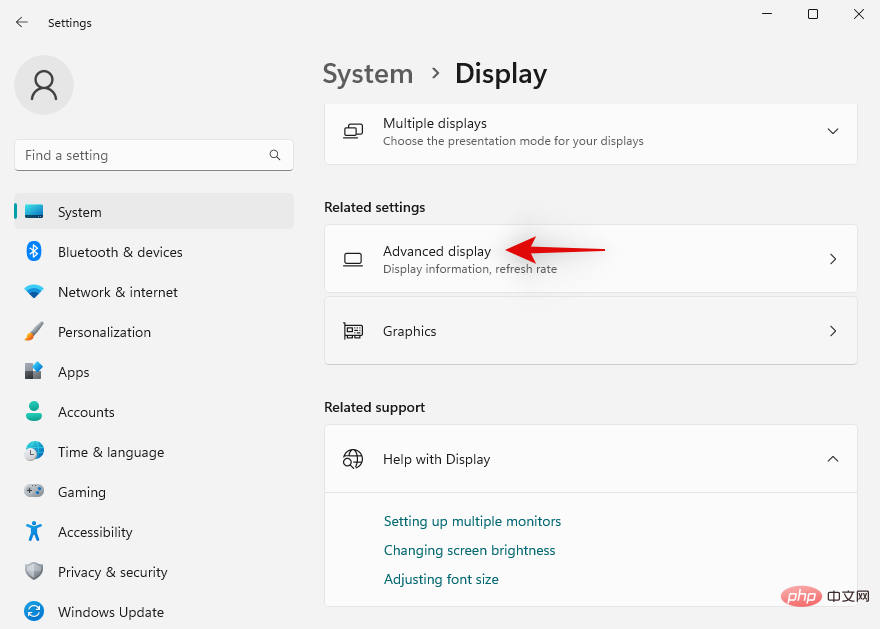
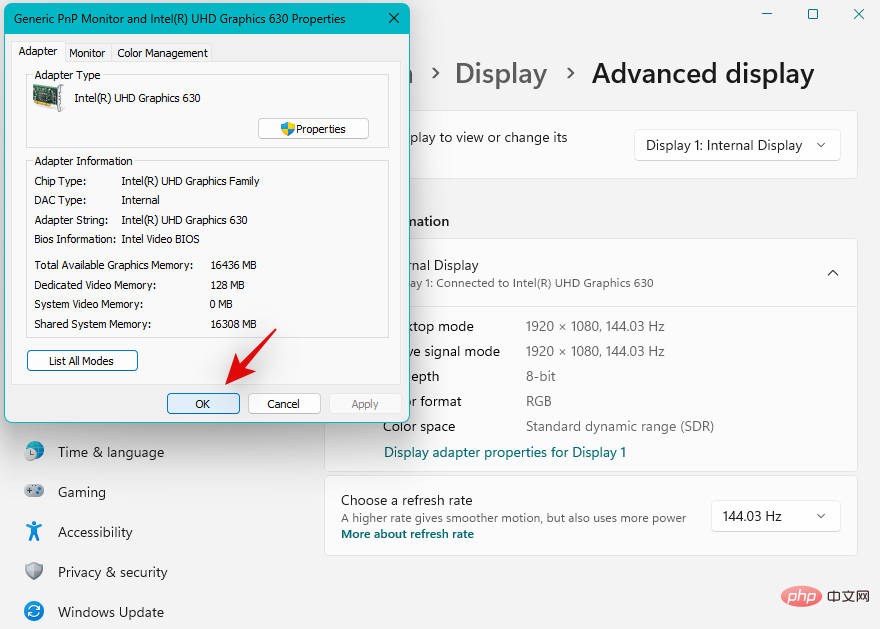
Click Monitor Adapter Properties for Monitor N, where N is the number assigned to the current monitor (if you have multiple monitor settings).
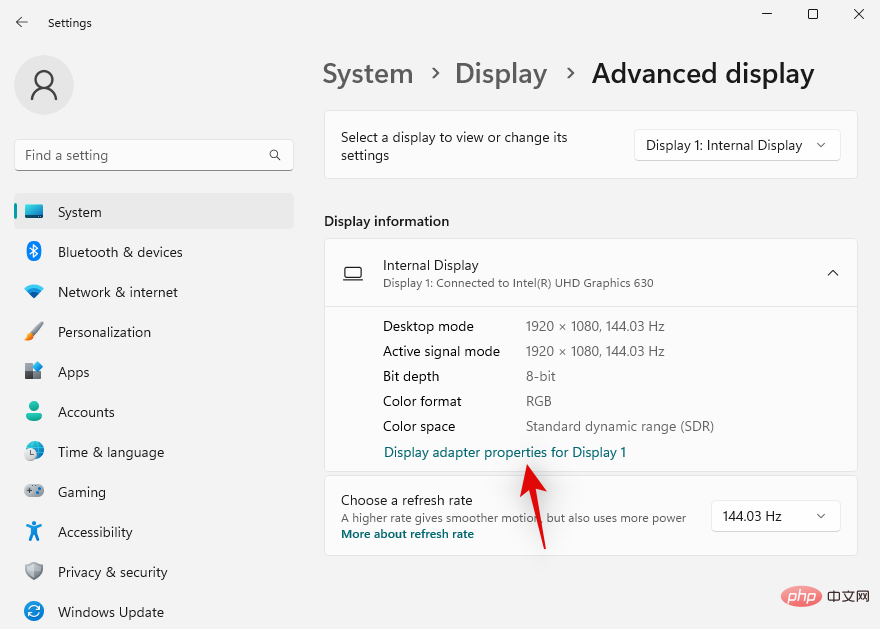
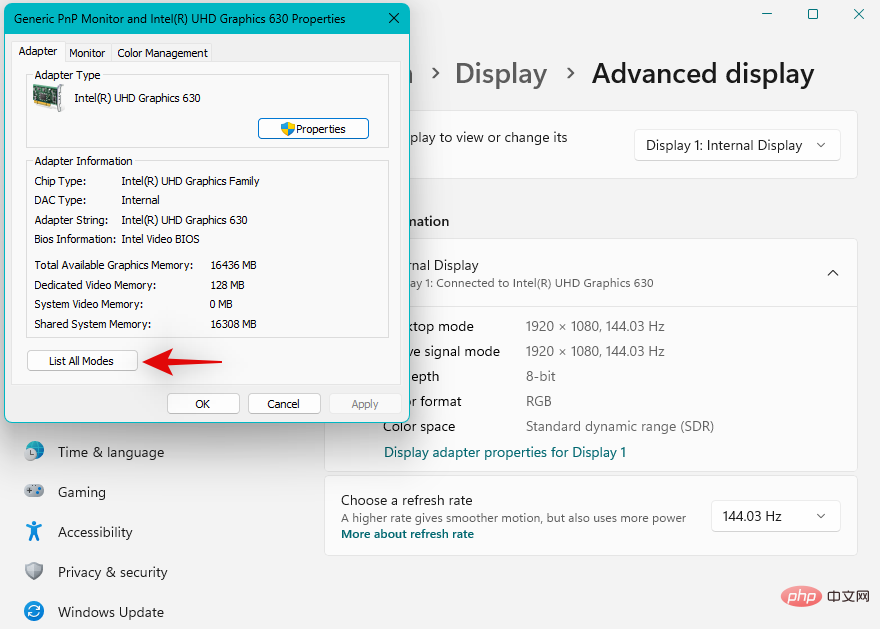
Click to list all modes.
Now choose a resolution, color, and refresh rate combination that is compatible and relevant to your monitor.
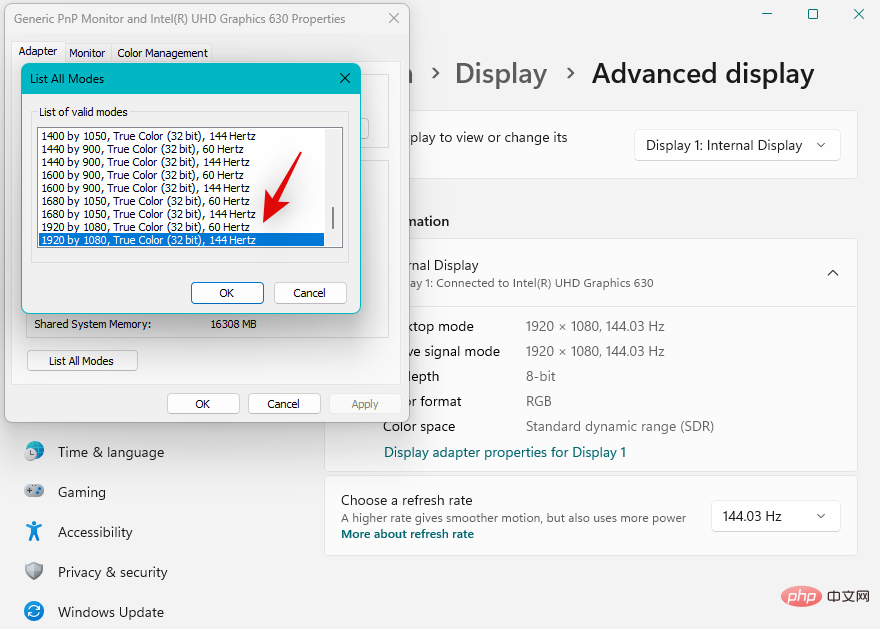
Click OK.
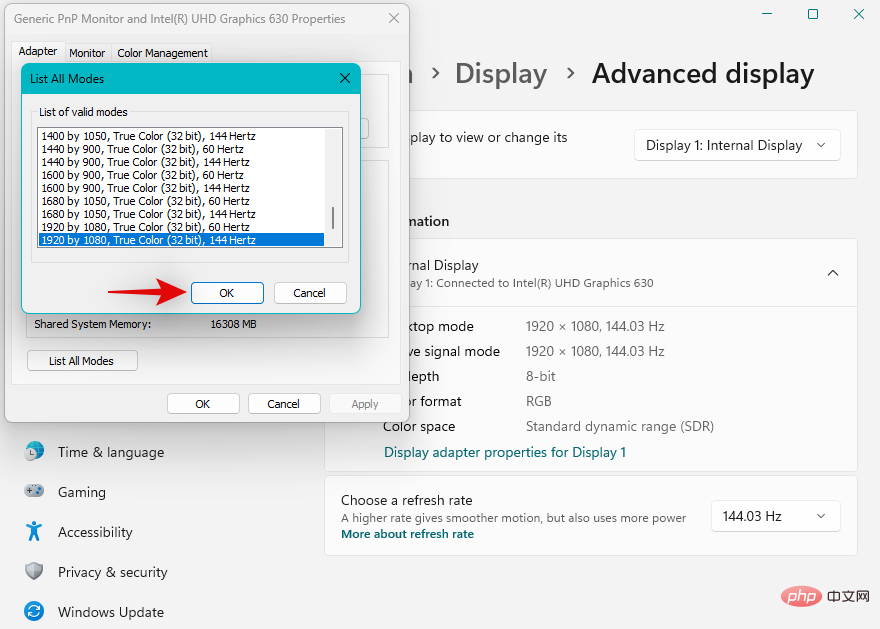
Click OK again.
That's it! You should now have the screen adapted to your monitor based on the default resolution.
Method 2: Adjust the display ratio
If your screen still doesn't fit your monitor, we recommend that you try adjusting the scaling in Windows settings. Zoom allows you to increase or decrease the size of screen elements regardless of your screen resolution. This helps improve visibility and, in some cases, helps fit the screen to your monitor. Please follow the steps below to help you through the process.
Press Windows i to launch Settings application and click Display.
Now click the drop-down menu for Scale and select a higher scale than 100%.
After making a selection, the elements on the screen should automatically resize. Keep trying other options until you find the one that works best for your display and monitor. You should now have the screen installed on your monitor.
Method 3: Use the Nvidia Control Panel
If you have an Nvidia GPU, then you can use the Nvidia Control Panel to adjust your resolution, scale, and other display properties. This should help you easily fit the screen to your display size. Please follow the steps below to help you through the process.
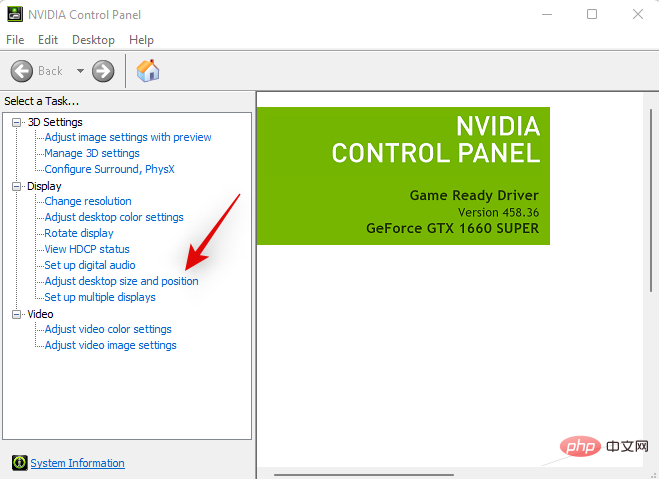
Shift Right-clickan empty area on the desktop and selectNVIDIA Control Panel.

After Control Panel launches, click and select Adjust desktop size and position under Display on the left .
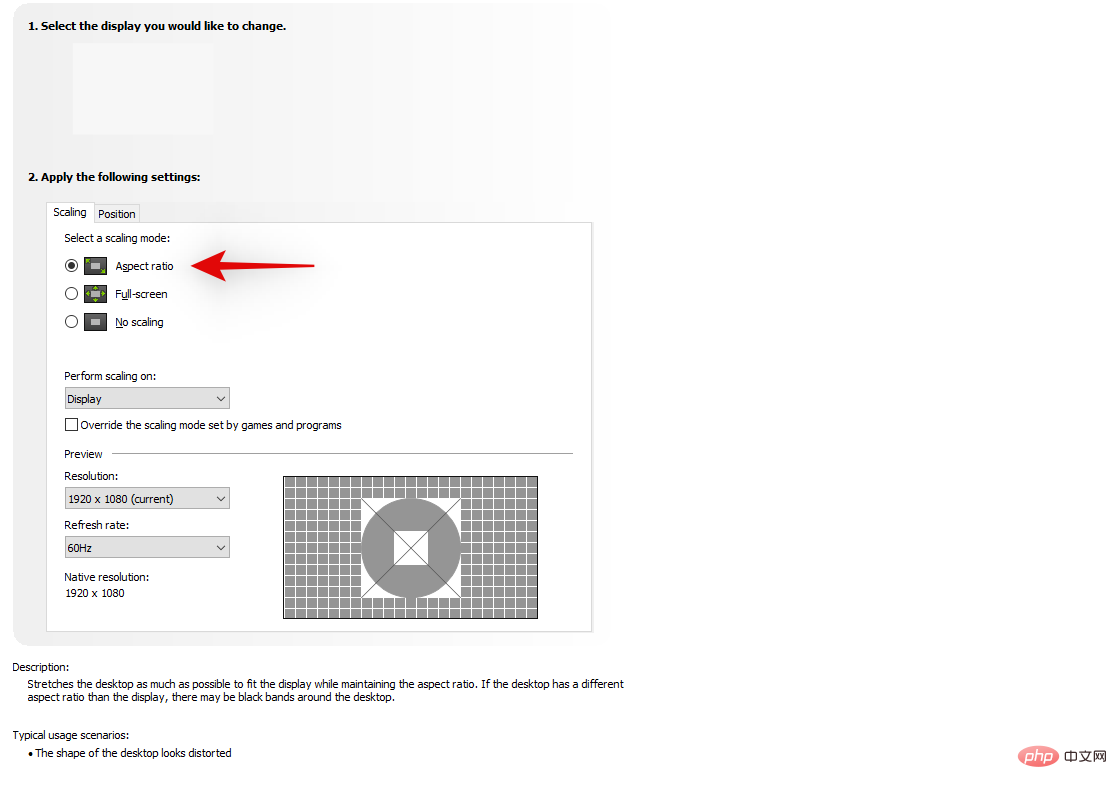
Click and select Aspect Ratio under Scaling.
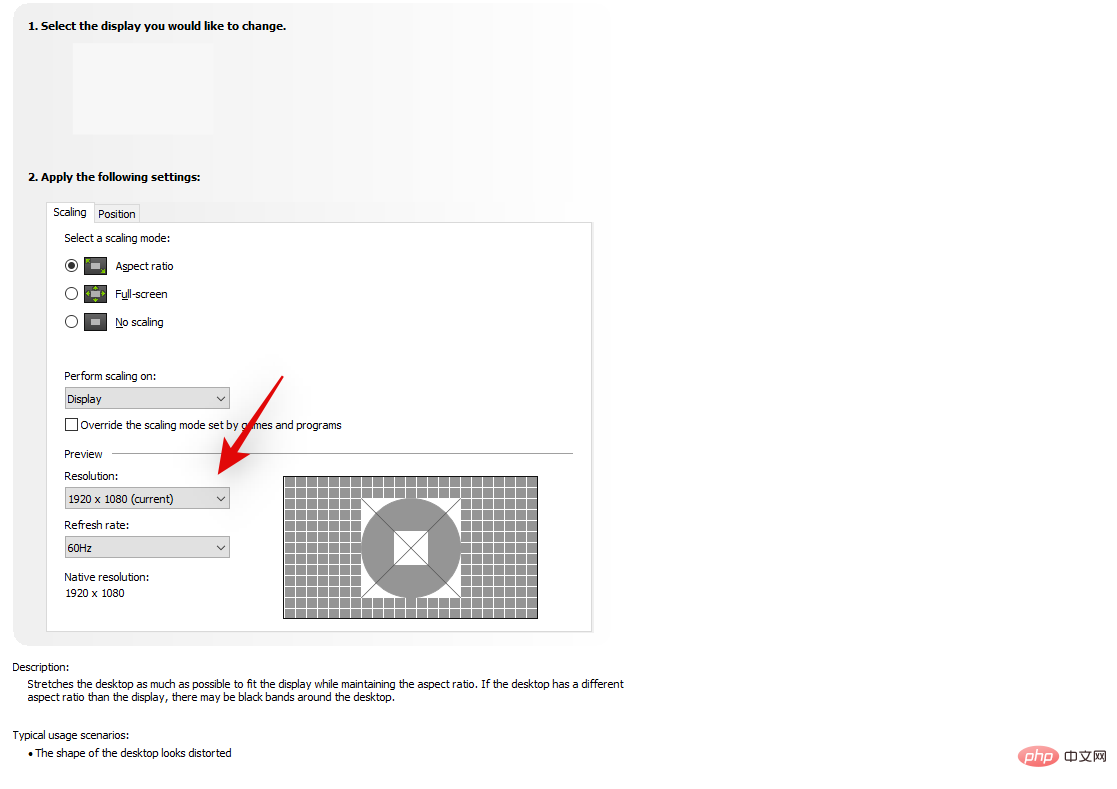
Click the resolution drop-down menu: and select the resolution your monitor supports.
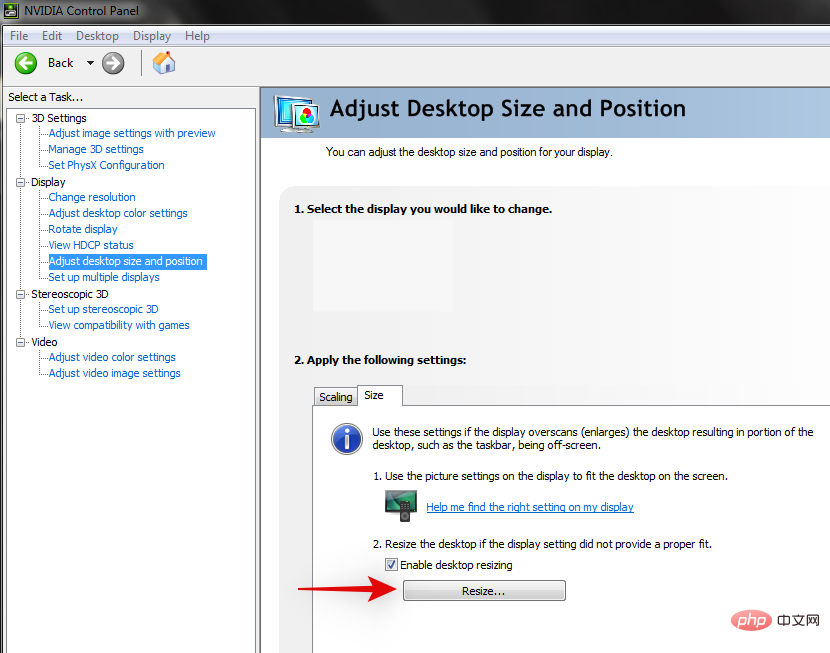
Now click and switch to the " Size " tab by clicking on the same at the top.

Select the Enable desktop resizing checkbox.

Click on the same Resize....
#Now use the Width and Height sliders on the screen to adjust the screen position. You can use it to fine-tune and adjust the screen to fit perfectly into the corners of your monitor.
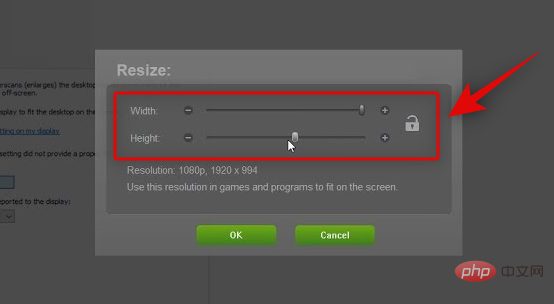
Click OK when finished.

A new custom resolution will now be created and applied based on your monitor. Let's verify this. Click the on the left to change the resolution.

Your new resolution should now be listed and selected under Resolutions on your right.
That's it! Now you'll use the Nvidia Control Panel to install the screen onto your monitor.
Method 4: Using AMD Radeon Software
AMD Radeon Software allows you to fine-tune the screen size and adjust its position using HDMI scaling. This helps you easily adapt the screen to your monitor's display. Use the following steps to help you through the process.
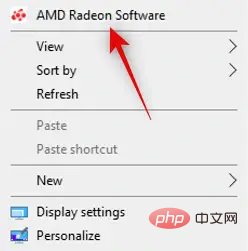
Shift Right-clickan empty area on the desktop and selectAMD Radeon Software.
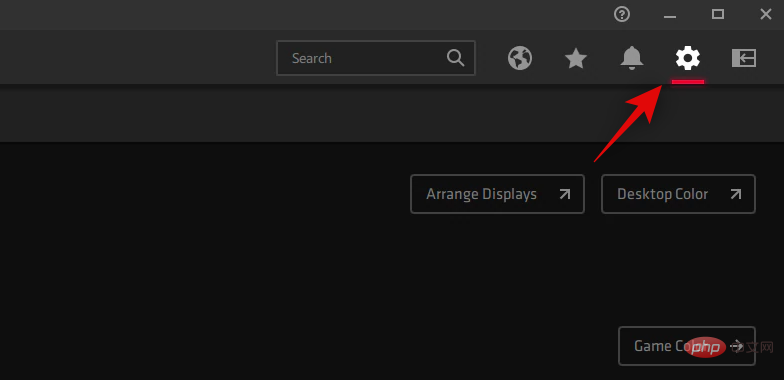
Now click on the gear (  ) icon in the upper right corner.
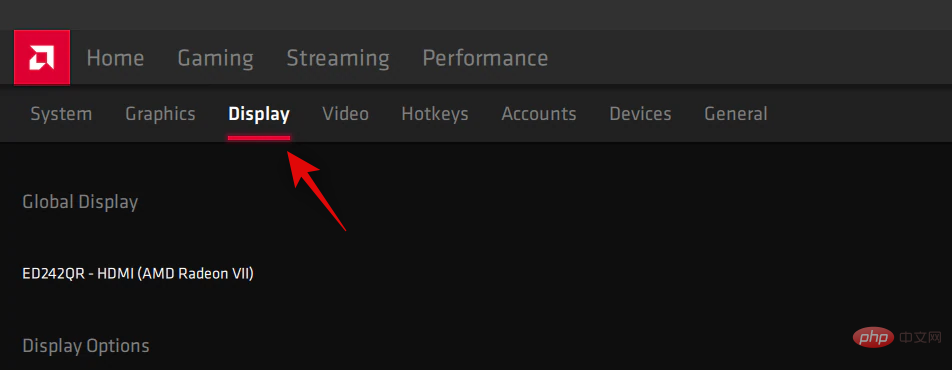
Click and switch to the Show tab.
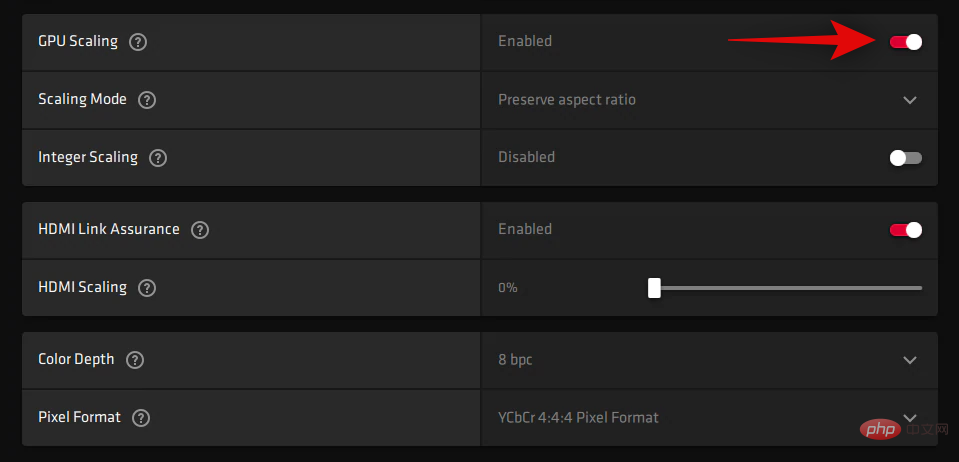
Click and enable the GPU Scaling toggle if it is not already enabled.
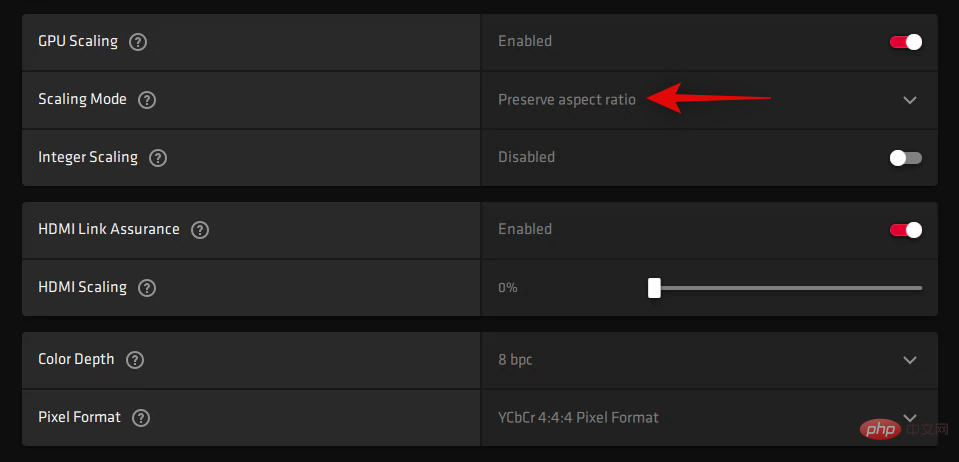
Click the drop-down menu for Zoom Mode and select Preserve Aspect Ratio.
Now scroll down and use the HDMI Scaling slider to adjust your display. You can now resize the display to fit your monitor.

You will now resize the display to fit your monitor.
However, if this does not work for you, then we recommend that you try using a custom resolution on your system. Use the following steps to help you through the process.
Open AMD Radeon Software as above and click the gear ( ) icon.
Click and select Display.
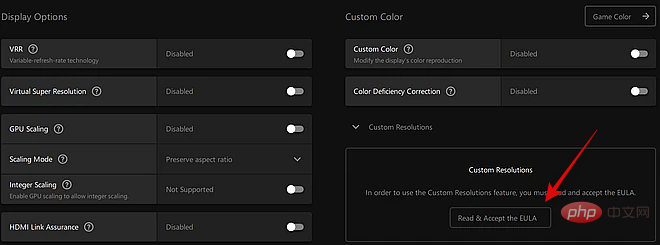
Now click under Custom Resolution to read and accept the EULA.
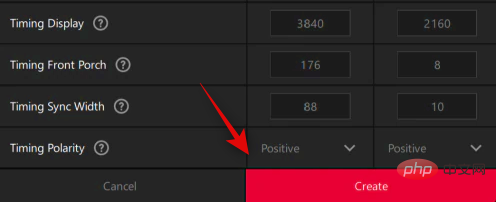
Click I accept. Now click New under Custom Resolution. We recommend that you leave most settings at their default values to avoid display issues. We need to focus on the Resolution (Px) value at the top.
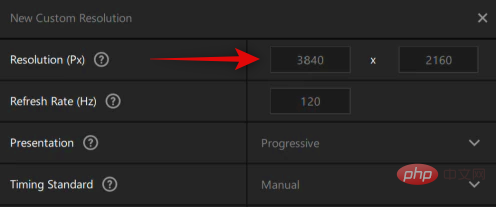
#Enter the desired custom resolution for your monitor. You can find more information about your monitor's default resolution in the product manual, on the product page, or on the OEM's product support page.
NOTE: However, you can select the desired refresh rate based on your monitor when setting a custom resolution.
After entering the desired resolution, click Create.
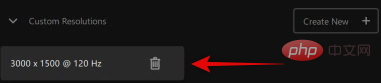
Your screen will now go blank for a moment. This is normal as AMD Radeon Software is now testing your custom resolution for compatibility. If all goes well, your custom resolution will be applied and added as an option under Custom Resolutions.
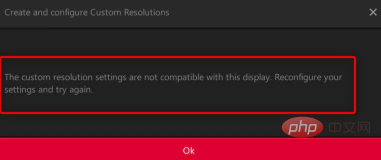
However, you will receive the same notification if the custom resolution is not compatible with your monitor. Click OK and try different custom resolutions until you find the one that works best for your current monitor.
#Now you will use AMD Radeon software to adapt the screen to your monitor.
Method 5: Use the Intel Graphics Command Center
If you are using an iGPU or laptop, you can use the Intel Graphics Command Center to adjust the screen to your monitor. Please follow the steps below to help you through the process.
- Intel Graphics Command Center | Download Link
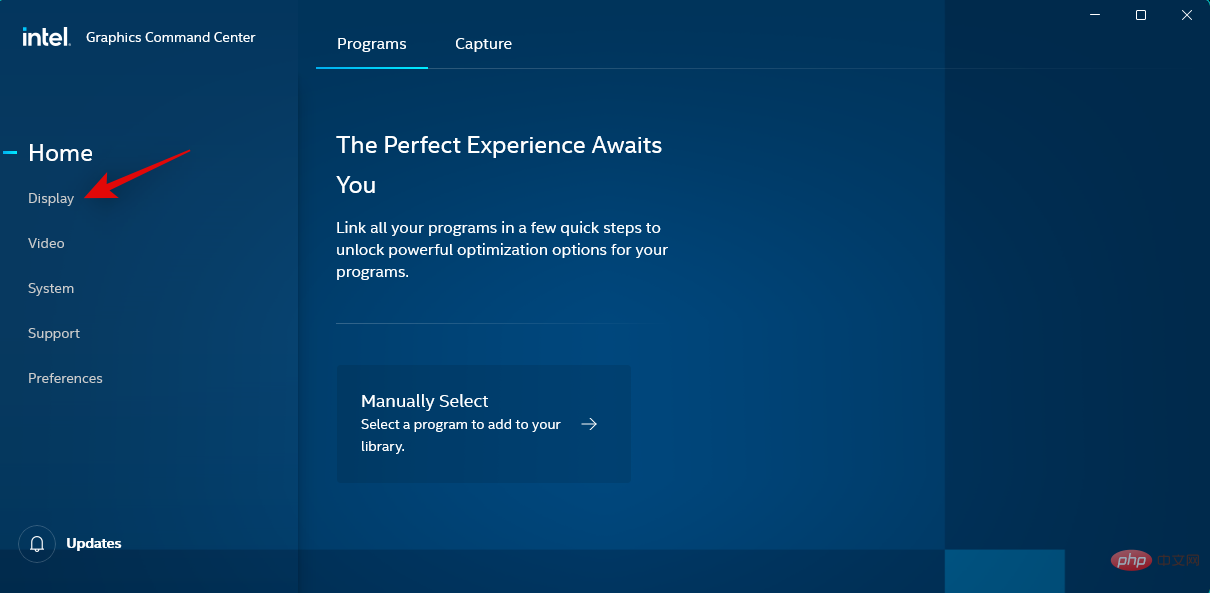
Use the link above to download and install Intel Graphics Command Center on your PC. Once done, launch the same and click on Display.
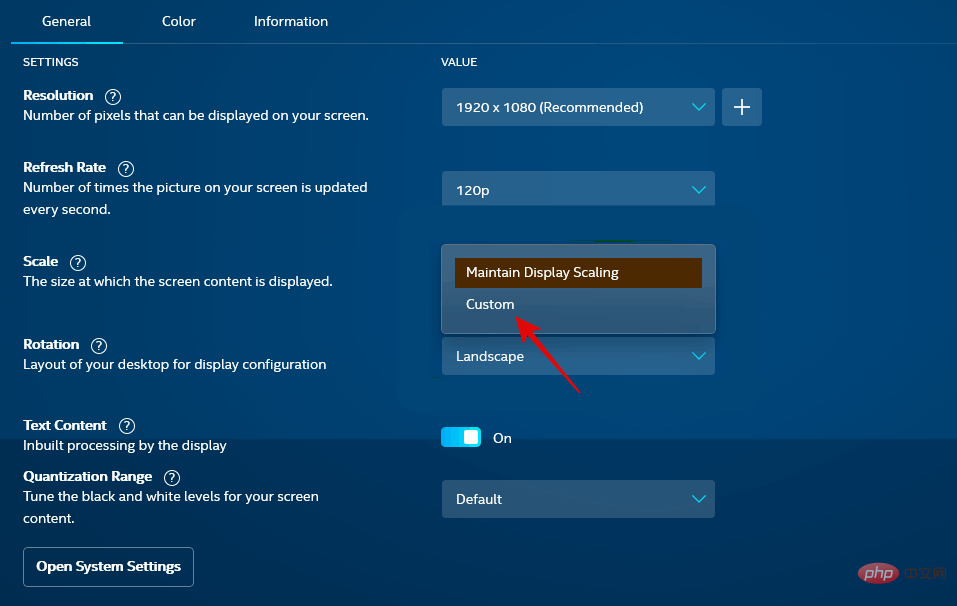
Now make sure General is selected at the top and scroll down and click on the dropdown menu for Scale.
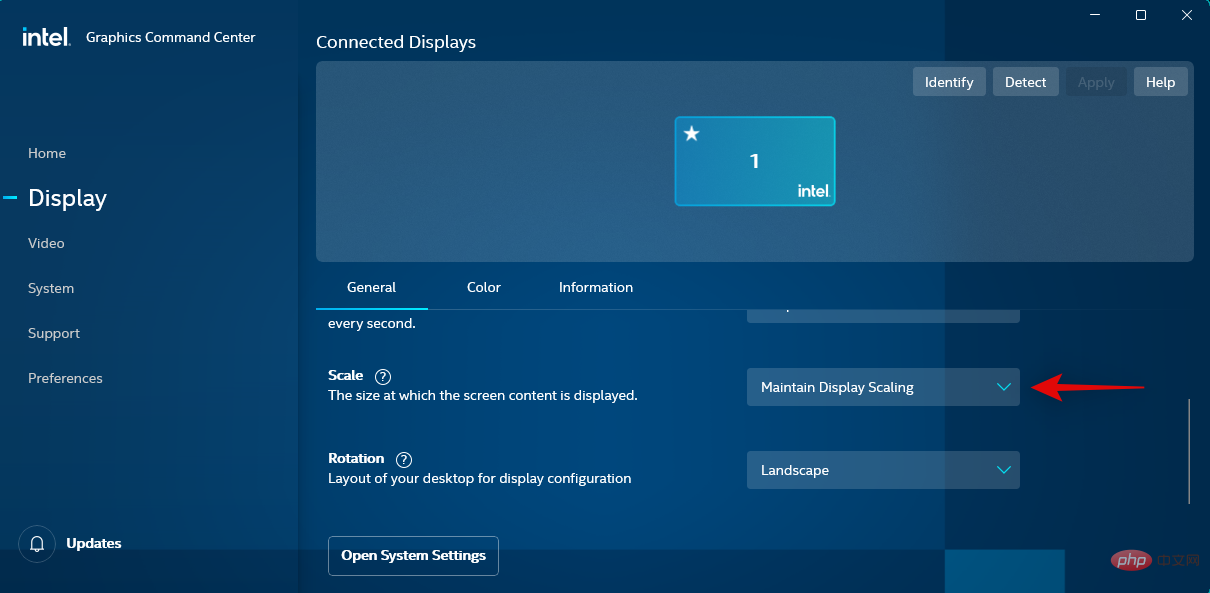
Select Customize.
Note: If you are using a laptop, you can only access this option if you are connected to an external monitor.
Now use the on-screen slider to adjust the screen to your monitor.
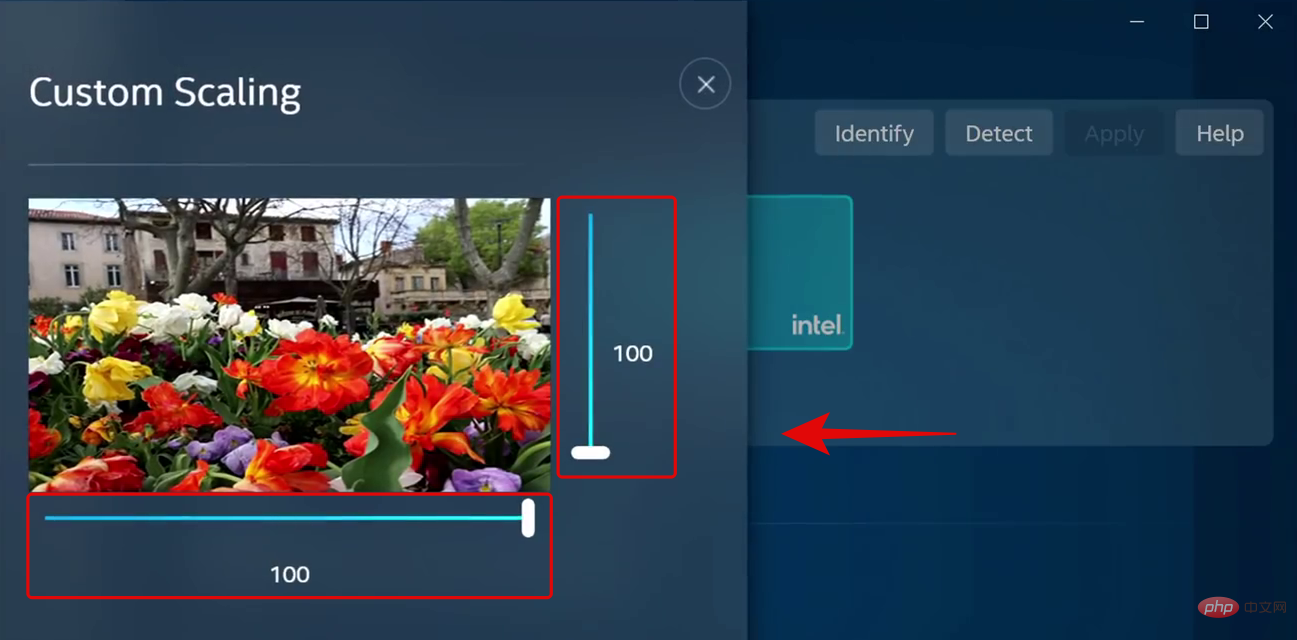
# Once completed save your settings and you can now use the Intel Graphics Command Center to mount the screen to your monitor.
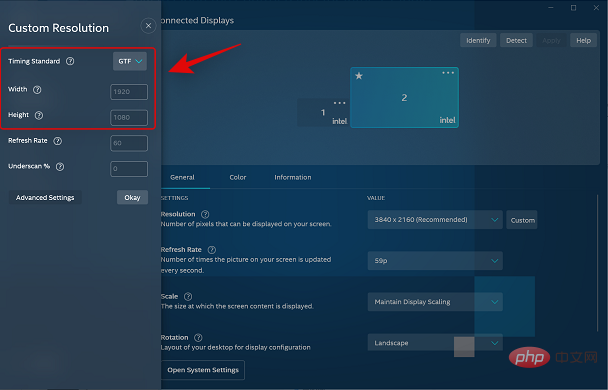
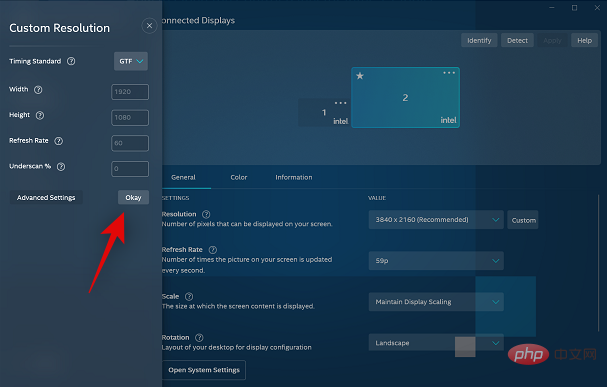
However, if this doesn't work for you, then we recommend that you try using a custom resolution instead. Revert changes to the scaling settings and click next to Resolution. Adjust and enter your custom resolution in the left sidebar. If you are having issues with Underscan then you can try a custom value next to Underscan %.
When finished, click OK.
#You should now have your screen adapted to your monitor using a custom resolution. You may want to try a few values before you find the one that works best for your current monitor.
Method 6: Use Your Monitor Settings
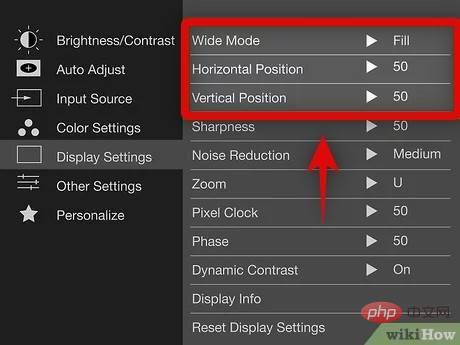
#Most monitors these days come with built-in independent settings for your monitor to help you adjust The screen and the special features provided by the monitor.
We recommend you try it to adjust your monitor to fit your monitor's screen. While you won't be able to scale the display signal your monitor receives, you should be able to adjust its position on the screen.
We recommend that you apply a custom resolution that matches your monitor and then use the settings provided by your monitor to reposition the display on your monitor screen. You can find more information on your monitor's OEM support page.
Can't fit your screen? Try these fixes!
If your screen still doesn't adjust to your monitor, there may be an issue with your graphics driver or hardware component. We recommend that you use the following sections to help check and fix problems on your PC. let's start.
Fix 1: Update Graphics Driver
Most scaling and resolution issues stem from outdated or faulty graphics drivers. Updating your drivers can help fix the same issue on your PC.
However, we recommend that you force-remove the driver first to ensure that Windows does not use your old driver. Please follow the steps below to help you through the process.
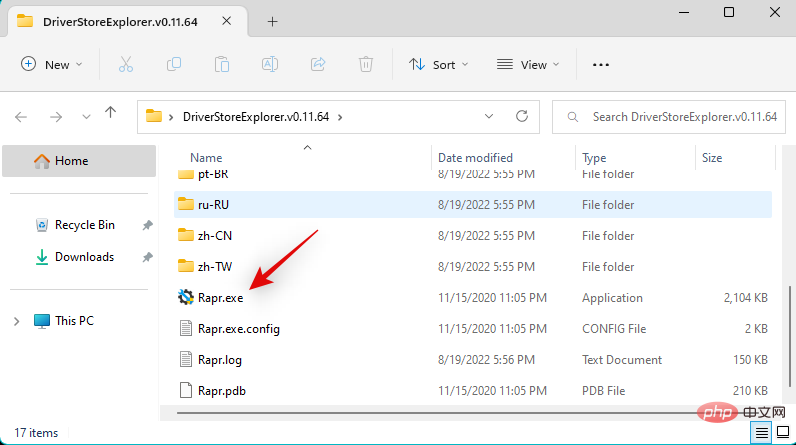
- DriverStoreExplorer | Download Link
Use the link above to download and unzip DriverStoreExplorer on your PC. Once completed, use the .exe file to launch the same program.
Click the Driver class at the top and use it to identify your graphics driver.
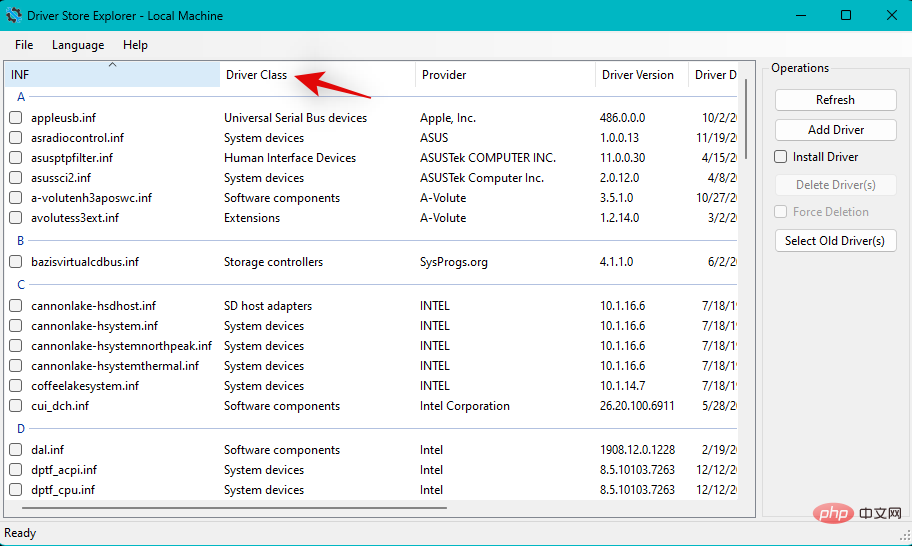
#Once found, select all graphics drivers by checking their boxes.
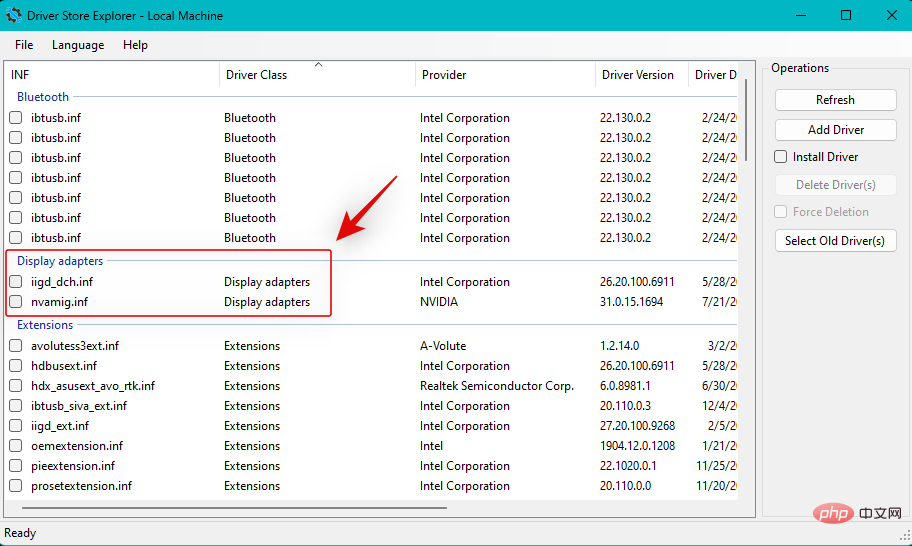
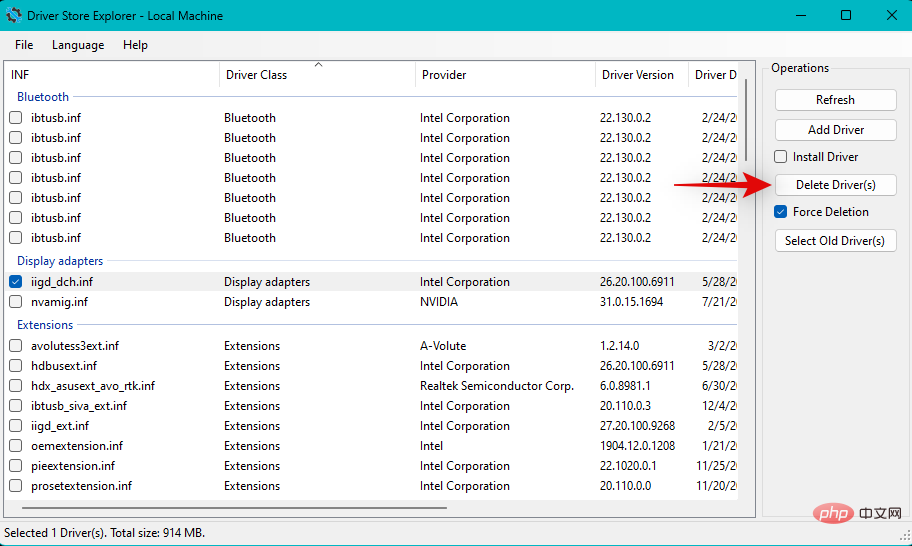
Check the Forced deletion box.

Now click Remove Driver.
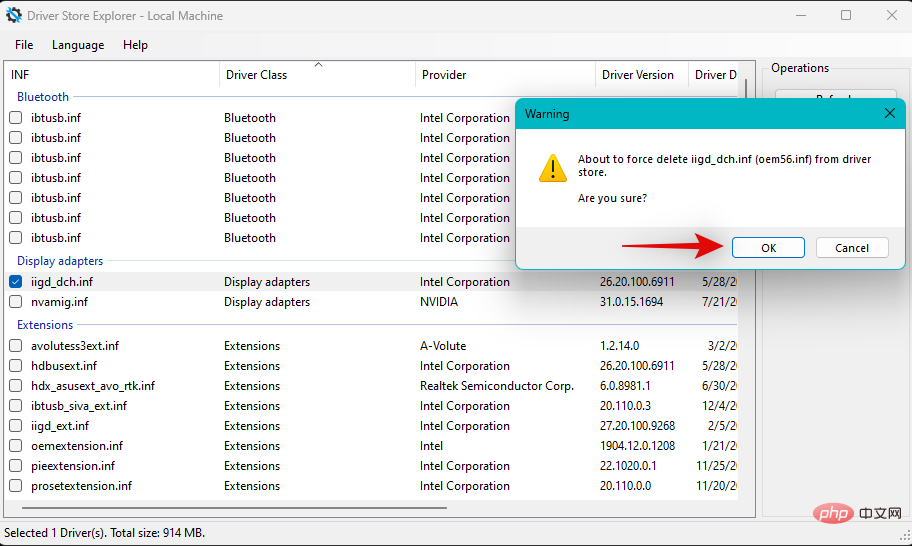
Click Yes to confirm your choice.
The graphics driver will now be forcefully removed from your PC. During this process, your display will become blank and blurry. This is normal because Windows will use the generic display driver during this time. Once the process is complete, close DriverStoreExplorer and use any of the links below to download the latest driver for your GPU.
- IntelGPU Driver
- Nvidia GPU Driver
- AMD GPU Driver Program
After downloading, install the display driver and restart your PC. You should now be able to match your screen to your monitor's display using the methods above.
Fix 2: Replace the Cable
We now recommend that you try using a different cable to connect to your monitor. Modern display port and cable standards are difficult to judge compatibility in advance unless you're familiar with the specifications.
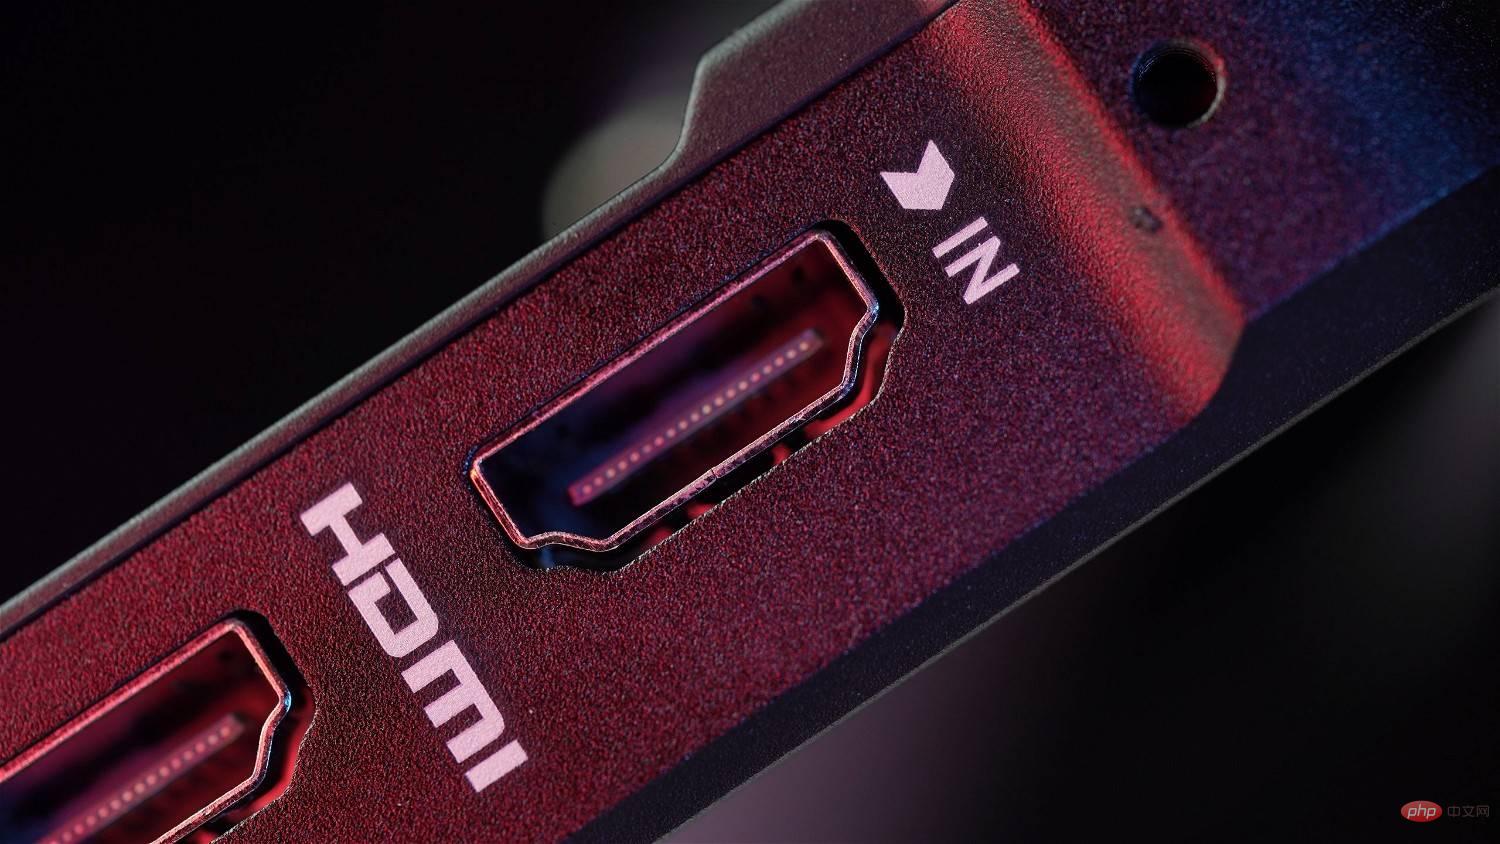
There are many common HDMI and Display Port cable standards on the market. Incompatibility with your display cable can cause scaling and resolution issues, which in turn prevents you from making adjustments on your PC. We recommend that you try a different cable to rule out incompatible cables as the cause of the problem.
Fix 3: Try a different port
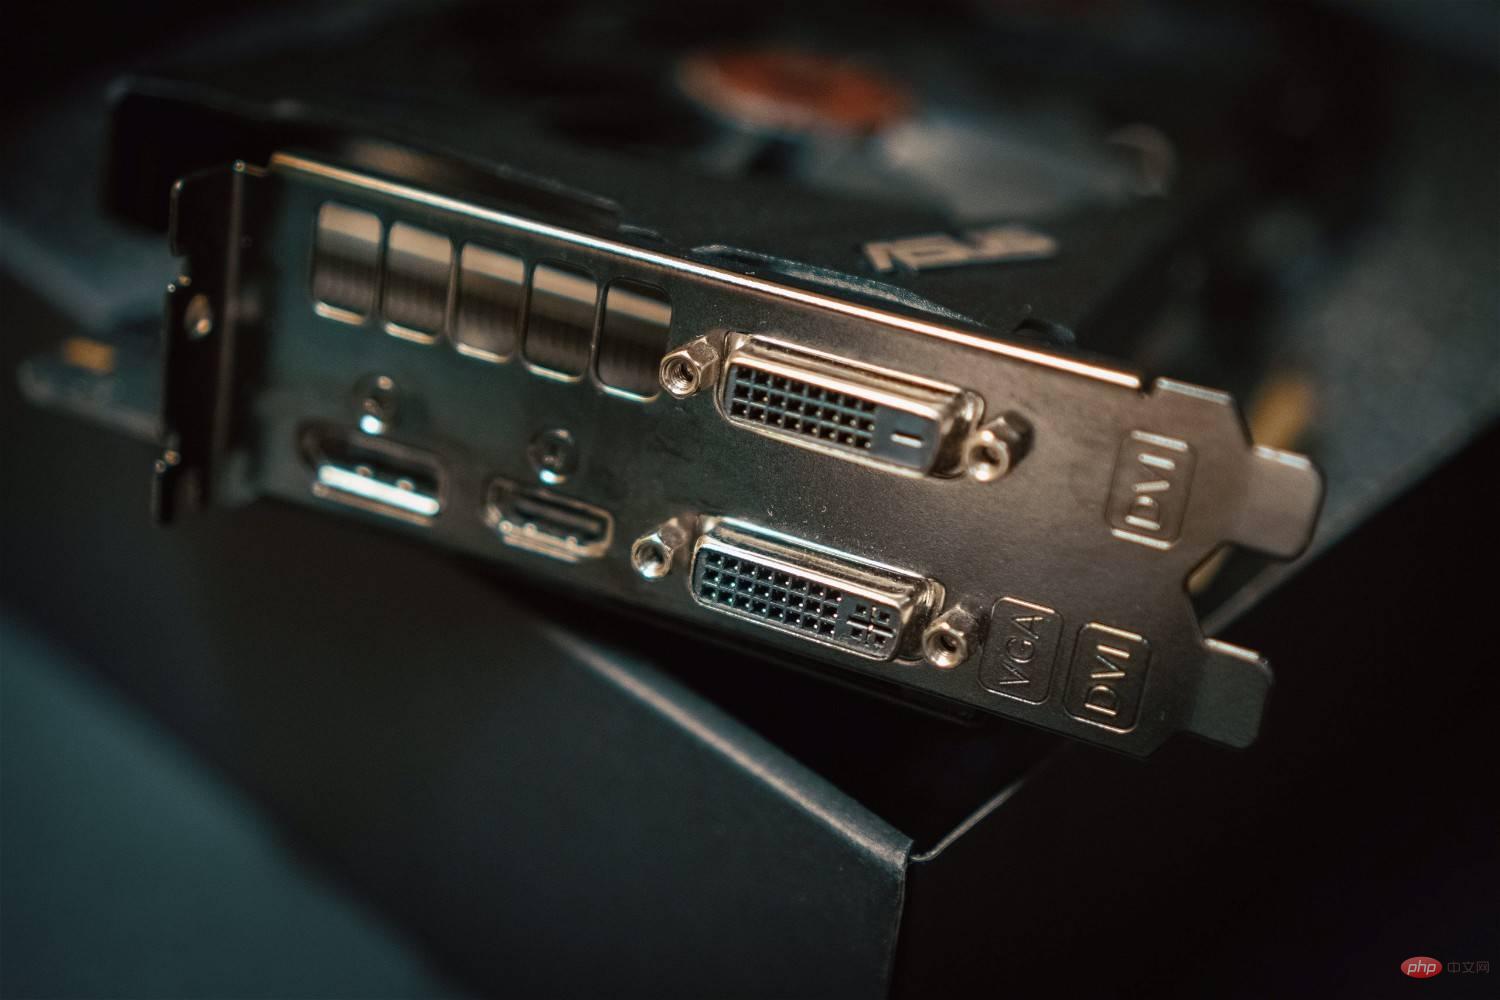
We now recommend that you try using a different display port. Depending on its features and functionality, you may face incompatibility issues with your monitor. Switching ports can help you identify and repair identical ports on your PC.
You can try using a different HDMI port or switch to the Display or VGA port, depending on availability. If you are no longer facing monitor scaling issues, then you are looking at a faulty display port on your PC. We recommend that you contact a certified technician to weigh all of your options in this situation.
Fix 4: Try a different monitor
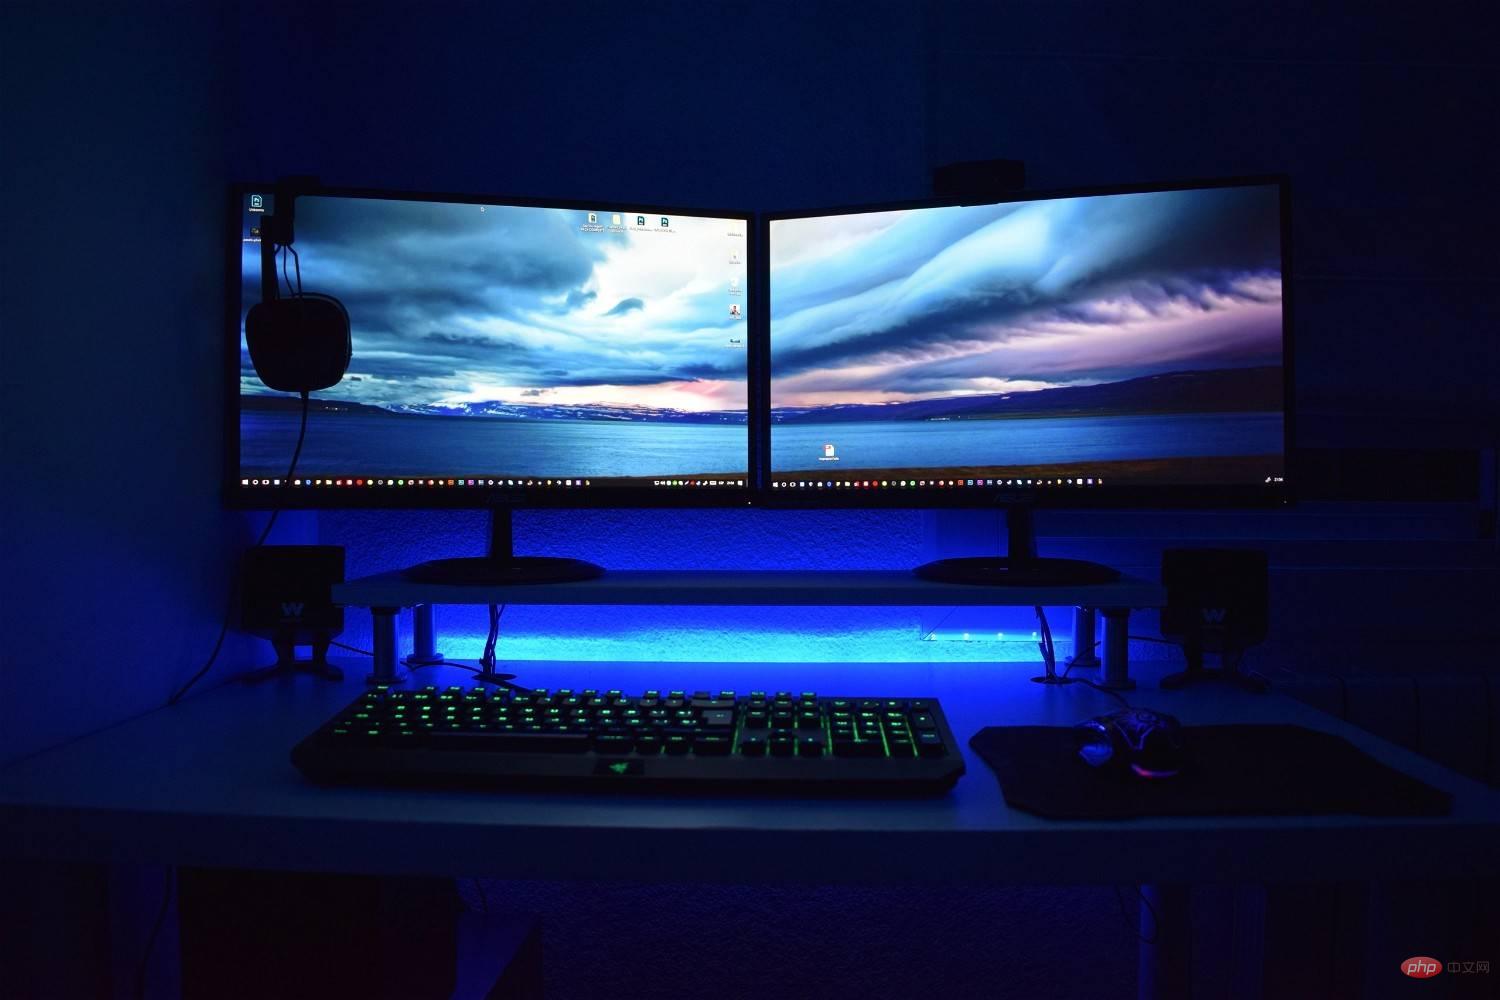
#If you are still having issues at this point, then we recommend that you try a different monitor to troubleshoot your Hardware problem with PC or monitor. If you are unable to use a second monitor, you can try connecting it to your TV using an HDMI cable.
Most TVs require you to adjust the resolution and scaling to fit the screen correctly. If you can connect to your TV/second monitor and adjust these settings as expected, then you may be facing a hardware issue with your monitor. In this case, you can get your monitor repaired by a certified technician to resolve your issue.
However, if you are unable to adjust the settings and mount your screen on a secondary monitor as well, then we recommend that you contact your PC support team to further diagnose and determine your issue.
The above is the detailed content of 5 Ways (and Fixes) to Adjust Your Screen for Monitoring on Windows 11. For more information, please follow other related articles on the PHP Chinese website!

Hot AI Tools

Undresser.AI Undress
AI-powered app for creating realistic nude photos

AI Clothes Remover
Online AI tool for removing clothes from photos.

Undress AI Tool
Undress images for free

Clothoff.io
AI clothes remover

AI Hentai Generator
Generate AI Hentai for free.
Hot Article
Hot Tools

Notepad++7.3.1
Easy-to-use and free code editor

SublimeText3 Chinese version
Chinese version, very easy to use

Zend Studio 13.0.1
Powerful PHP integrated development environment

Dreamweaver CS6
Visual web development tools

SublimeText3 Mac version
God-level code editing software (SublimeText3)
Hot Topics
 1377
1377
 52
52

 Discover ways to solve ghosting problems on HP monitors (How to eliminate ghosting on HP monitors)
Aug 08, 2024 am 01:11 AM
Discover ways to solve ghosting problems on HP monitors (How to eliminate ghosting on HP monitors)
Aug 08, 2024 am 01:11 AM
As a common computer peripheral, HP monitors will inevitably have some problems. One of them is the ghosting problem. When we use HP monitors, blur, ghosting or lag appears on the screen, which will not only affect our visual experience, but also reduce our work efficiency. How should we solve this problem? Understand the phenomenon of ghosting - Ghosting is when a copy of an object or text appears on the monitor screen, causing the image to be blurred or overlapping. -Ghosting issues can be caused by a variety of factors, such as monitor aging, signal transmission issues, etc. Check the connecting cables - Check that the cables connecting the computer and monitor are intact. - Make sure the connection cable is appropriately tight and not loose or broken. Adjust resolution and refresh rate - in operating system settings
 Desktop resolution affects 'Black Myth: Wukong' frame rate dropped by half? RTX 4060 frame rate test errata
Aug 16, 2024 am 09:35 AM
Desktop resolution affects 'Black Myth: Wukong' frame rate dropped by half? RTX 4060 frame rate test errata
Aug 16, 2024 am 09:35 AM
A few days ago, Game Science released the benchmark software for "Black Myth: Wukong". During the test, we found that when an external monitor is connected (the independent display is directly connected to the video output interface), if the desktop resolution of the monitor is larger than the in-game resolution , the game frame rate will drop very significantly, and in some cases the frame rate will even drop by half. So we restarted the test and found out the reason. This article is about my last test: "2 resolutions x 13 image qualities = 26 test results, RTX4060 in "Black Myth: Wukong" What is the frame rate in ? 》Correction and errata, I would like to apologize to everyone here first. In theory, the RTX4060 will be much higher in "Black Myth: Wukong" than my previous test results.
 KTC '25GR950' 24.5-inch monitor is now available: 1080P 180Hz Fast IPS, 579 yuan
Aug 19, 2024 pm 10:45 PM
KTC '25GR950' 24.5-inch monitor is now available: 1080P 180Hz Fast IPS, 579 yuan
Aug 19, 2024 pm 10:45 PM
According to news from this website on August 19, KTC launched a 24.5-inch monitor with model number "25GR950" on JD.com today. This monitor features "1080P180Hz" and the initial price is 579 yuan. As of the time of publication of this website, the machine has not yet been displayed. Specific sales time. According to reports, this monitor uses a 1920x1080 resolution 180Hz panel, a response speed of 1ms, a static contrast ratio of 1000:1, a brightness of 350 nits, supports 8-Bit color, and covers 99% sRGB and 95% DCI-P3 color gamut. This monitor stand supports tilting, and the monitor body supports VESA100x100mm wall mounting. It provides 1 DP1.4 interface, 2 HDMI2.0 interfaces, and 1 3.
 AOC launches 'U24P10R' 23.8-inch monitor: 4K 60Hz + 90W PD USB-C, 1699 yuan
Aug 16, 2024 am 07:34 AM
AOC launches 'U24P10R' 23.8-inch monitor: 4K 60Hz + 90W PD USB-C, 1699 yuan
Aug 16, 2024 am 07:34 AM
According to news from this site on August 15, AOC launched a 23.8-inch monitor model "U24P10R" on JD.com today. This monitor features "4K60Hz + 90WPD USB-C" and is currently on sale, with an initial price of 1,699 yuan. According to reports, this monitor is equipped with a 3840x2160 resolution 60Hz IPS panel, a brightness of 400 nits, a response speed of 4ms, a static contrast ratio of 1300:1, supports 10-Bit color, and covers 100% sRGB and 95% DCI-P3 color gamut. In addition, this monitor stand supports tilt/lift/rotate/tilt, the monitor body supports 100x100mm VESA wall mounting, and provides 2 HDMI2.0 interfaces and 1 DP1
 AOC 'Q24B35' 23.8-inch monitor is now available: 2K 120Hz, 749 yuan
Aug 17, 2024 pm 07:44 PM
AOC 'Q24B35' 23.8-inch monitor is now available: 2K 120Hz, 749 yuan
Aug 17, 2024 pm 07:44 PM
According to news from this site on August 17, AOC launched a 23.8-inch monitor with the model number "Q24B35" in its JD flagship store today. This monitor features "2K120Hz", but it is currently out of stock. The product page shows that the price of the monitor is 749 yuan. According to reports, this monitor uses a 2560x1440 resolution 120Hz IPS panel, a brightness of 250 nits, a static contrast ratio of 1300:1, a response speed of 4ms, and supports 8-Bit color. In addition, the monitor stand supports tilt/lift/rotate/tilt, the main body supports VESA100x100mm wall mounting, and provides 1 HDMI2.0 interface and 1 DP1.4 interface. This site organizes the currently known monitor parameter information as follows:
 OPPO Find X8 Ultra core configuration exposed! Snapdragon 8 Gen4+ Extra Large Battery
Aug 22, 2024 pm 06:54 PM
OPPO Find X8 Ultra core configuration exposed! Snapdragon 8 Gen4+ Extra Large Battery
Aug 22, 2024 pm 06:54 PM
On August 22, a digital blogger revealed some core configuration information of OPPO Find X8 Ultra. According to the exposed content, this high-end model will be equipped with Qualcomm’s latest Snapdragon 8Gen4 mobile platform, equipped with a 6000mAh ultra-large capacity battery, and supports 100W wired fast charging and 50W wireless fast charging functions. Appearance design There is currently no specific design information about OPPO Find X8 Ultra. But the real picture of the standard version of OPPO Find X8 has been exposed on the Internet. Appearance of FindX8 Judging from the exposed photos, the rear camera module of OPPO FindX8 adopts a square design with a certain degree of curvature at the four corners, giving a more rounded feeling. In addition, the machine adopts a direct
 180Hz WQHD Rapid VA panel, MSI launches MAG 275CQPF curved monitor
Aug 07, 2024 pm 08:18 PM
180Hz WQHD Rapid VA panel, MSI launches MAG 275CQPF curved monitor
Aug 07, 2024 pm 08:18 PM
According to news from this site on August 7, based on reports from foreign media GdM and DisplaySpecifications, MSI launched the MAG275CQPF curved screen monitor on the 5th of this month. MAG275CQPF is equipped with a 27-inch 1500R curvature RapidVA panel with a resolution of 2560×1440 (aspect ratio 16:9), a refresh rate of 180Hz, a GtG response time as low as 0.5ms, and supports Adaptive-Sync adaptive synchronization and HDR. The display has a typical brightness of 300 nits, a static contrast ratio of 5000:1, and a dynamic contrast ratio of 100000000:1. It supports 8 dithers and 10 color depths, and the color gamut covers 136% sRGB, 94
 Xiaomi's 100-yuan phone Redmi 14C design specifications revealed, will be released on August 31
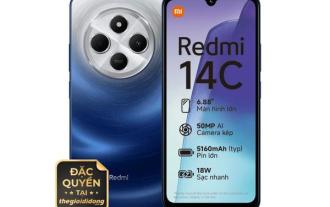
Aug 23, 2024 pm 09:31 PM
Xiaomi's 100-yuan phone Redmi 14C design specifications revealed, will be released on August 31
Aug 23, 2024 pm 09:31 PM
Xiaomi's Redmi brand is gearing up to add another budget phone to its portfolio - the Redmi 14C. The device is confirmed to be released in Vietnam on August 31st. However, ahead of the launch, the phone's specifications have been revealed via a Vietnamese retailer. Redmi14CR Redmi often brings new designs in new series, and Redmi14C is no exception. The phone has a large circular camera module on the back, which is completely different from the design of its predecessor. The blue color version even uses a gradient design to make it look more high-end. However, Redmi14C is actually an economical mobile phone. The camera module consists of four rings; one houses the main 50-megapixel sensor, and another may house the camera for depth information.