

How to dual-boot Windows 11 and macOS [Complete Guide]

![How to dual-boot Windows 11 and macOS [Complete Guide]](https://img.php.cn/upload/article/000/000/164/168146628588258.jpg)
Windows 11 brings some major changes, many of which are widely accepted by users around the world. While you can dual-boot Windows 11 and Windows 10, what about other operating systems?
Windows 11 can be used with different operating systems, and you can dual-boot Windows 11 and Linux if needed.
Many people often ask, can I dual-boot Windows and macOS? The answer is yes. When it comes to macOS, the situation is no different. You can dual-boot macOS and Windows to use Windows software or play games on your Mac. Some people may try out macOS on their PC using dual boot.
Dual booting Windows 11 and macOS isn’t easy, but it can be done, and in today’s guide, we’ll show you the process.
How to dual-boot Windows 11 and macOS?
Please note that dual boot can be accomplished in two ways from the beginning. You can install macOS on Windows 11 or Windows 11 on Mac as explained below,
Note that dual booting will not harm your PC in any way, but if not done correctly, you may lose files or Encountering startup issues after the process.
We are not responsible for any potential damage that may occur, so you perform this procedure at your own risk.
Install Windows 11 on Mac using BootCamp
1. Download the Windows 10 ISO and create a Windows partition
- Download Windows 10 ISO.
![How to dual-boot Windows 11 and macOS [Complete Guide]](/static/imghw/default1.png)
- After the download is complete, go to "Utilities" and select "Startup Conversion Assistant".
- Optional: Please back up your data before continuing.
- Click to continue.
- Click the Select button and find the Windows 10 ISO file you downloaded.
- Select the desired size for the Windows partition. It should be around 50GB at least, but make it larger if possible.
- Now click the "Install" button.
- Enter your administrative password and your Mac will restart.
![How to dual-boot Windows 11 and macOS [Complete Guide]](https://img.php.cn/upload/article/000/000/164/168146628584287.png)
![How to dual-boot Windows 11 and macOS [Complete Guide]](https://img.php.cn/upload/article/000/000/164/168146628559622.png)
![How to dual-boot Windows 11 and macOS [Complete Guide]](https://img.php.cn/upload/article/000/000/164/168146628548238.png)
Note that we are using the Windows 10 ISO because the Windows 11 ISO is not officially available for download yet.
2. Install Windows 10
- Your Mac will now boot from the Windows 10 ISO.
- Select the desired language and Windows version to install.
- Follow the instructions until you reach the "Which type of installation do you want" screen. Select Customize: Install Window Only (Advanced).
- Select the BOOTCAMP partition and format it as needed.
- Wait for the installation to complete.
![How to dual-boot Windows 11 and macOS [Complete Guide]](https://img.php.cn/upload/article/000/000/164/168146628684847.png)
![How to dual-boot Windows 11 and macOS [Complete Guide]](https://img.php.cn/upload/article/000/000/164/168146628613699.png)
![How to dual-boot Windows 11 and macOS [Complete Guide]](https://img.php.cn/upload/article/000/000/164/168146628750662.png)
During the installation process, it is recommended to disconnect all unnecessary external devices.
3. Install the necessary Windows drivers
- You will now boot into Windows 10 and the Boot Camp Assistant will appear.
- Click Next to continue. Now click Install to download the necessary Windows drivers.
- After downloading the driver, click Finish.
![How to dual-boot Windows 11 and macOS [Complete Guide]](https://img.php.cn/upload/article/000/000/164/168146628715671.jpg)
4. Join the Windows Insider Program (Windows Insider Program)
- Your Mac should boot back to Windows. If you did not hold down the Option key (Alt) during the boot process, select the desired operating system.
- Navigate to "Settings ".
- Go to the Update and Security section.
- In the left pane, select Windows Insider Program. In the right pane, click the Get Started button.
- Select Link an account and enter your Microsoft account credentials.
- Select "Development Channel" and click "Confirm".
- Click the Restart Now button.
- After booting into Windows 10 again, open the Settings app and go to the Update & Security section.
- Click the Check for Updates button.
- Windows will now download the Windows 11 upgrade.
- After downloading the upgrade, restart your Mac and follow the on-screen instructions to upgrade to Windows 11.
![How to dual-boot Windows 11 and macOS [Complete Guide]](https://img.php.cn/upload/article/000/000/164/168146628794219.png)
![How to dual-boot Windows 11 and macOS [Complete Guide]](https://img.php.cn/upload/article/000/000/164/168146628751583.png)
![How to dual-boot Windows 11 and macOS [Complete Guide]](https://img.php.cn/upload/article/000/000/164/168146628771912.png)
![How to dual-boot Windows 11 and macOS [Complete Guide]](https://img.php.cn/upload/article/000/000/164/168146628799826.png)
![How to dual-boot Windows 11 and macOS [Complete Guide]](https://img.php.cn/upload/article/000/000/164/168146628889359.png)
Once the process is completed, you will dual-boot Windows 11 and macOS on your Mac computer without any issues. You must now realize how easy it is to dual-boot Windows and macOS on your PC.
Installing macOS on PC after Windows 11
1. Check GPT
- OpenPowerShellorCommand Prompt. Type the following command and press: Enter
<strong>diskpart</strong> - When the disk is partially open, execute the following command:
<strong>list disk </strong> - Check if your hard drive uses GPT. If there are no asterisks in the GPT column, your Drive doesn't use GPT.
![How to dual-boot Windows 11 and macOS [Complete Guide]](https://img.php.cn/upload/article/000/000/164/168146628845207.png)
Before proceeding, you need to convert MBR to GPT, we have a special guide on how to convert MBR to GPT without losing your files. Once the drive is formatted with GPT, you can move on to the next step.
2. Create a partition for macOS and format the flash drive
- Connect at least a 4GB flash drive to your computer.
- Now press the key and select Disk Management from the list. WindowsX
- Find your flash drive in the list, right-click on it and select Format.
- Make sure to use the exFAT or FAT32 file system.
- Now select the partition you want to shrink, right click on it and select Shrink Volume from the menu.
-
Enter the amount of space you want to shrink (in MB) Set to 50000 or more and click shrink.
- Unallocated space will now be displayed. Right-click on it and select "New Simple Volume".
- Set "Simple Volume Size in MB " to the maximum value.
- Now, set the file system to exFAT and the volume label to macOS.
- Follow the on-screen instructions to complete the process.
![How to dual-boot Windows 11 and macOS [Complete Guide]](https://img.php.cn/upload/article/000/000/164/168146628872862.png)
![How to dual-boot Windows 11 and macOS [Complete Guide]](https://img.php.cn/upload/article/000/000/164/168146628855409.png)
![How to dual-boot Windows 11 and macOS [Complete Guide]](https://img.php.cn/upload/article/000/000/164/168146628868715.png)
Once completed, you should have a macOS partition ready on your PC.
3. Change the EFI partition
- Press and select PowerShell (Admin). WindowsX
- Execute the following command:
<strong>diskpart</strong> - Now run the following command:
<strong>list disk</strong> - Run the following command, replacing X with the number of your hard drive:
<strong>sel disk X</strong> - Now execute this command while replacing X with the number that represents the partition you want to shrink:
<strong>sel vol Command: </strong>
Shrink desired=300Create partition efi size=200 Format quick fs=fat32 label=“system” - Assign letter z
exit<strong><br><br><br>After exiting diskpart, run the following command: <br></strong>bcdboot c:\windows /s z: /f ALL -
<strong>4. Create macOS ISO</strong>- Install Python.
- Download OpenCore. Please be sure to use the latest version. Debug or release builds can be used. The release version is faster and therefore may be a better choice for you.
- Extract the file to the desired location. This location is important, so be sure to remember it. On our PC we extracted it to:
<strong>C:\Users\WindowsReport\Desktop\OpenCore</strong>##Go to the unzipped directory . Now navigate to -
Utilities\How to dual-boot Windows 11 and macOS [Complete Guide]\<strong></strong>Copy the folder path to the How to dual-boot Windows 11 and macOS [Complete Guide] directory. Keep in mind that this path will look different on your PC. On our computer it is: C:\Users\WindowsReport\Desktop\OpenCore\Utilities\How to dual-boot Windows 11 and macOS [Complete Guide]\<strong></strong>Open PowerShell as administrator. - Run the following command:
-
cd C:\Users\WindowsReport\Desktop\OpenCore\Utilities\How to dual-boot Windows 11 and macOS [Complete Guide]\<strong></strong>Now run the following command: -
python How to dual-boot Windows 11 and macOS [Complete Guide].py -b Mac-E43C1C25D4880AD6 -m 00000000000000000 download<strong><br></strong># #You will now begin downloading macOS BigSur. This process may take a while, so be patient and don't interrupt it. - When the process is complete, two Basic System
- or Recovery Image files should appear. Select the BaseSystem.chunklist and BaseSystem.dmg or RecoveryImage.chunklist
- and BaseSystem.dmg files and copy them. Connect your USB flash drive and create a folder named com.apple.recovery.boot
- in the root directory <strong></strong>Move to com .apple.recovery.boot
- directory. Paste the two Base System or Recovery Image files from step 11. Go to
- C:\Users\WindowsReport\Desktop\OpenCore
<strong></strong>Copy the X64 - directory. If you are using a 32-bit system copy IA32. Go to the USB flash drive root directory and paste the X64 directory there.
- The next section will vary greatly based on your hardware configuration, so you will have to follow the instructions yourself based on your hardware.
Fortunately, there is a lot of useful information available on the OpenCore GitHub page. To continue, follow the instructions for your type of hardware.
Note this is a very technical process and if you don't do it correctly your bootable drive will not work, so be sure to follow the OpenCore GitHub instructions exactly.
5. Configure your BIOS<strong></strong>
Access resume.- Go to Advanced
- and set 4G Decoding Above to Enable. Navigate to the serial port configuration and set the serial port
- to off . Return to the "Advanced
- " section and navigate to "USB Configuration". Set XHCI Switch to Enabled. Go to the Boot section and go to Boot Configuration
- . Set "Quick Startup" to "Disabled". Now go back to "Startup" and go to "Secure Boot
- ". Set OS type to Windows UEFI. Now go to "Key Management
- " and select "Clear Secure Boot Key". <strong></strong>save Changes.
<strong></strong> Some PC problems are difficult to solve, especially when they involve corrupted repositories or missing Windows files. If you are having trouble fixing errors, your system may be partially corrupted.
We recommend installing Restoro, a tool that will scan your machine and determine what the fault is.Click here to download and start repairing.
Keep in mind that some of these options may not be available, or they may be in a different location for your version of BIOS.
6. Install macOS
- Restart your computer and hold down the boot menu key. By default, it should be or , but it may be different on your PC. F12F10
- Select your flash drive as the boot device.
- Select Disk Utility.
- Select "All Devices".
- Find the partition you created for your Mac and format it as APFS.
- Make sure the format is set to "Mac OS Extended (Journaled) " and the "Schema " is set to "GUID Partition picture".
- Install macOS to this drive.
- Follow the on-screen instructions to complete setup.
7. Boot into your Mac and configure your EFI
- On macOS, open Terminal.
- Enter the Disk Utility list
- Find the EFI named system Partition.
- Mount it by running the diskutil mount disk0sx command. Replace X with the EFI partition number.
- Now insert your macOS boot media.
- Copy the BOOT and OC folders to the EFI folder.
- Open config.plist and set the value non for the following:
<strong>Misc/Security/BootProtect</strong> - Restart the computer .
- Windows should now start automatically.
- Open PowerShell as administrator.
- Run the following command:
<strong>bcdedit /set {bootmgr} path \EFI\OC\OpenCore.efi</strong>
After making these changes , you can choose between macOS and Windows at launch. Also, keep in mind that the same method will help dual-boot Windows 11 and macOS Monterey.
What are the PC hardware requirements for macOS?
To use macOS on a computer with OpenCore, you need to ensure that your computer meets the hardware requirements:
- Processor: Supports SSE4.2 Intel or AMD CPU
- Firmware: EFI64
- Kernel: 64-bit kext
macOS is designed to work only dependent on specific hardware and may not work properly on custom PCs. For more information on hardware requirements, check out the OpenCore guide.
Will Secure Boot interfere with macOS?
Secure Boot and TPM are two new hardware requirements for Windows 11 that have caused some controversy.
It seems that users are receiving a TPM 2.0 error that prevents them from upgrading to Windows 11, but even if you manage to upgrade to Windows 11, you may still encounter some issues when dual booting.
Secure Boot will scan for software trying to start your computer and prevent unverified software from running. This is especially important if you want to protect against rootkits and similar malware.
However, this feature will interfere with macOS and other operating systems, but you can disable it as Windows 11 does not require it to work properly.
To install Windows 11, your computer needs to be able to support Secure Boot, but Secure Boot does not have to be enabled for this to work.
How to use Boot Camp to switch between Windows and Mac?
Switching between Windows and Mac is easy when using Boot Camp. If you have booted into Windows, do the following:
- Click the Boot Camp icon in the system tray. Now select the
- Restart in macOS option from the menu.
- Restart your Mac.
- Now hold down the Option (or ) key as your Mac restarts. Alt
- You will see a list of boot volumes.
- Select the desired volume to boot to the appropriate operating system.
As you can see, switching between operating systems using Boot Camp is very simple and can be done in seconds.
Is it better to dual-boot on a Mac or PC?
macOS has dual-boot support built into the Boot Camp software, making dual-booting easy and hassle-free.
Dual-booting macOS and Windows on a PC is not that simple, and macOS is not intended to run on PC hardware, so dual-booting may be more difficult to set up, and you may encounter various boot issues.
If you want to dual-boot macOS and Windows, we recommend doing it on a Mac as it's more user-friendly.
To dual-boot Windows 11 and macOS, if you are on a Mac, you need to rely on Boot Camp, and with Boot Camp, the process is very simple and you can have dual-boot mode running in minutes.
On the other hand, dual-booting Windows 11 and macOS on a PC requires a lot of configuration and tinkering; if you're not an expert, it's best avoided.
- Install Python.
![How to dual-boot Windows 11 and macOS [Complete Guide]](https://img.php.cn/upload/article/000/000/164/168146628973532.png) Create partition efi size=200
Create partition efi size=200![How to dual-boot Windows 11 and macOS [Complete Guide]](https://img.php.cn/upload/article/000/000/164/168146628997937.png)
![How to dual-boot Windows 11 and macOS [Complete Guide]](https://img.php.cn/upload/article/000/000/164/168146628978103.png)
![How to dual-boot Windows 11 and macOS [Complete Guide]](https://img.php.cn/upload/article/000/000/164/168146628956728.png)
![How to dual-boot Windows 11 and macOS [Complete Guide]](https://img.php.cn/upload/article/000/000/164/168146628991948.png)
![powershell-How to dual-boot Windows 11 and macOS [Complete Guide]](https://img.php.cn/upload/article/000/000/164/168146628917764.png)
![How to dual-boot Windows 11 and macOS [Complete Guide]](https://img.php.cn/upload/article/000/000/164/168146629070037.png) # #You will now begin downloading macOS BigSur. This process may take a while, so be patient and don't interrupt it.
# #You will now begin downloading macOS BigSur. This process may take a while, so be patient and don't interrupt it. ![How to dual-boot Windows 11 and macOS [Complete Guide]](https://img.php.cn/upload/article/000/000/164/168146629012332.jpg) Navigate to the serial port
Navigate to the serial port ![How to dual-boot Windows 11 and macOS [Complete Guide]](https://img.php.cn/upload/article/000/000/164/168146629012590.jpg) Return to the
Return to the ![How to dual-boot Windows 11 and macOS [Complete Guide]](https://img.php.cn/upload/article/000/000/164/168146629019906.jpg) Go to the Boot section and go to
Go to the Boot section and go to ![How to dual-boot Windows 11 and macOS [Complete Guide]](https://img.php.cn/upload/article/000/000/164/168146629050845.png) Now go to "Key
Now go to "Key ![How to dual-boot Windows 11 and macOS [Complete Guide]](https://img.php.cn/upload/article/000/000/164/168146629090592.jpg)
![How to dual-boot Windows 11 and macOS [Complete Guide]](https://img.php.cn/upload/article/000/000/164/168146629085942.png)
![How to dual-boot Windows 11 and macOS [Complete Guide]](https://img.php.cn/upload/article/000/000/164/168146629161984.jpg)
![How to dual-boot Windows 11 and macOS [Complete Guide]](https://img.php.cn/upload/article/000/000/164/168146629120815.jpg)
![How to dual-boot Windows 11 and macOS [Complete Guide]](https://img.php.cn/upload/article/000/000/164/168146629139217.jpg)
![How to dual-boot Windows 11 and macOS [Complete Guide]](https://img.php.cn/upload/article/000/000/164/168146629145428.jpg)
![How to dual-boot Windows 11 and macOS [Complete Guide]](https://img.php.cn/upload/article/000/000/164/168146629154532.jpg)
The above is the detailed content of How to dual-boot Windows 11 and macOS [Complete Guide]. For more information, please follow other related articles on the PHP Chinese website!

Hot AI Tools

Undresser.AI Undress
AI-powered app for creating realistic nude photos

AI Clothes Remover
Online AI tool for removing clothes from photos.

Undress AI Tool
Undress images for free

Clothoff.io
AI clothes remover

AI Hentai Generator
Generate AI Hentai for free.

Hot Article
Hot Tools

Notepad++7.3.1
Easy-to-use and free code editor

SublimeText3 Chinese version
Chinese version, very easy to use

Zend Studio 13.0.1
Powerful PHP integrated development environment

Dreamweaver CS6
Visual web development tools

SublimeText3 Mac version
God-level code editing software (SublimeText3)
Hot Topics
 1378
1378
 52
52

 No response when entering password on mac keyboard?
Feb 20, 2024 pm 01:33 PM
No response when entering password on mac keyboard?
Feb 20, 2024 pm 01:33 PM
Introduction: In this article, this website will introduce to you the relevant content about the Mac keyboard not responding when entering passwords. I hope it will be helpful to you, let’s take a look. How to solve the problem that the password cannot be entered on the Apple Mac system? You can also try to connect this keyboard to other computers to see if it works normally. If the same problem occurs on another computer, it's most likely a fault with the keyboard itself. You may consider replacing the keyboard or repairing it. The first time you log in to Alipay with your Mac computer, you will find the login interface and cannot enter your password. The password input field displays: "Please click here to install the control", so Alipay login requires the installation of security controls. Security controls can encrypt and protect the information you enter (amount, password, etc.) to improve account security. Tie
 3 tips to easily customize your Mac computer name, host name and Bonjour name
Mar 06, 2024 pm 12:20 PM
3 tips to easily customize your Mac computer name, host name and Bonjour name
Mar 06, 2024 pm 12:20 PM
Many Mac users tend to keep the default name of their device and may never consider changing it. Many people choose to stick with the name from the initial setup, such as "Johnny's MacBook Air" or simply "iMac." Learning how to change the name of your Mac is a very useful skill, especially when you have multiple devices, as it can help you quickly distinguish and manage them. Next, we will teach you step by step how to change the computer name, host name and Bonjour name (local host name) in macOS system. Why should you change your Mac name? Changing the name of your Mac can not only show your personality, but also help improve the user experience: Personalize your Mac: The default name may not be to your taste, change it to a name you like.
 Forgot your mac installer password?
Feb 20, 2024 pm 01:00 PM
Forgot your mac installer password?
Feb 20, 2024 pm 01:00 PM
Introduction: In this article, this website will introduce to you the relevant content about forgetting the password of the Mac installation program. I hope it will be helpful to you, let’s take a look. What to do if you forget your password for Apple computer installation software. First, find iCloud in the phone settings and click to open it. Next, enter your account number and password. There is a line of small words below the login button that prompts you if you have forgotten your ID or password. Click this option. Normally, after you enter an incorrect password multiple times on the login interface, your MacBook Pro will prompt you to use your bound Apple ID to reset your password. You only need to follow the steps prompted by the system to complete the password reset. 3. First shut down your Mac, then restart it. While pressing the power button, immediately press and hold com on the keyboard.
 pkg file to install on mac?
Feb 20, 2024 pm 03:21 PM
pkg file to install on mac?
Feb 20, 2024 pm 03:21 PM
Preface: Today, this site will share with you the relevant content about installing pkg files on Mac. If it can solve the problem you are facing now, don’t forget to follow this site and start now! The previous version of macos pkg cannot be installed to upgrade the operating system: If your laptop is using an older operating system version, it is recommended to upgrade to the latest operating system version. Because older versions may not support installation of the latest macOS system. Select "Erase" in Disk Utility, then select the Macos extension in the format, do not check the encryption option, and do not select the apfs format, and finally click the "Erase" button to solve the problem of being unable to complete the macOS installation. Drag the application's icon to the file starting with App
 How to turn pages when typing on Apple Mac?
Feb 20, 2024 pm 12:54 PM
How to turn pages when typing on Apple Mac?
Feb 20, 2024 pm 12:54 PM
Introduction: Today, this site will share with you relevant content about how to turn pages when typing on Apple Mac. If it can solve the problem you are facing now, don’t forget to follow this site and start now! Tips for using the touchpad on Apple MacBook laptops. The steps for setting up two-finger sliding on Apple computers are as follows: Find the "Settings" icon on the computer desktop and click it. Select "Touchpad" in the settings interface, and then click "Scroll to Zoom". Check "Scroll direction: Natural" in the scroll zoom options to complete the setting. Setting up a two-finger swipe method on your Apple computer is easy. First, turn on your computer and click on the Settings icon at the top of the screen. In the settings interface, select the "Touchpad" option. Then click "Scroll Zoom" and make sure "Scroll Direction" is checked
 How to set up WeChat Mac to automatically convert voice messages into text - How to set up voice to text conversion
Mar 19, 2024 am 08:28 AM
How to set up WeChat Mac to automatically convert voice messages into text - How to set up voice to text conversion
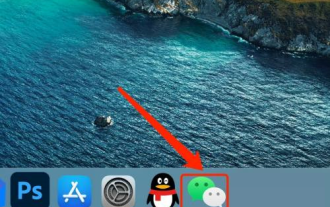
Mar 19, 2024 am 08:28 AM
Recently, some friends have consulted the editor about how to set up WeChat Mac to automatically convert voice messages into text. The following is a method for setting up WeChat Mac to automatically convert voice messages into text. Friends in need can come and learn more. Step 1: First, open the Mac version of WeChat. As shown in the picture: Step 2: Next, click "Settings". As shown in the picture: Step 3: Then, click "General". As shown in the picture: Step 4: Then check the option "Automatically convert voice messages in chat to text". As shown in the picture: Step 5: Finally, close the window. As shown in the picture:
 Can Mac cut files to hard drive?
Feb 20, 2024 pm 01:00 PM
Can Mac cut files to hard drive?
Feb 20, 2024 pm 01:00 PM
Introduction: This article is here to introduce you to the relevant content of cutting files to the hard disk on Mac. I hope it will be helpful to you, let’s take a look. How to Export Photos to a Mobile Hard Drive on a Mac Computer You can use the Finder or Photos application to export photos to a mobile hard drive. When using Finder to export photos, first make sure the mobile hard drive is connected to the Mac and is successfully recognized by the Mac. The steps to transfer photos from Mac to hard drive are simple: first, connect the mobile hard drive to the computer, and then open the [Launcher] icon. Then, find and click the [Photos] icon in the pop-up window. In the opened [Photos] window, hold down the [Shift] key
 Mac black apple boot method?
Feb 20, 2024 pm 01:00 PM
Mac black apple boot method?
Feb 20, 2024 pm 01:00 PM
Preface: This article is here to introduce you to the relevant content about the mac black apple boot method. I hope it will be helpful to you, let’s take a look. Black Apple OC boot quick configuration tutorial 1. After entering the loverconfigurator software interface, click on the "Boot Parameters" setting. The default boot volume name is set to the disk name that was erased when installing the Black Apple system. But Benjuannai? 0, then click Save in the lower right corner, restart the computer, and replace the lover boot interface with the Apple logo boot interface. Secure Boot effectively prevents unsigned bootloaders from booting from any internal disk or USB drive. However, Clover or OC boot does not support the secure boot function. To start