

How to Create and Print Avery Address Labels in Microsoft Word

If you need to create Avery How to Create and Print Avery Address Labels in Microsoft Word How to Create and Print Avery Address Labels in Microsoft Word using Microsoft Word, then this article will help you do it. You don't need to download or own any additional software. Using Microsoft Word, How to Create and Print Avery Address Labels in Microsoft Word can be easily created and printed. Let’s look at the details of printing Avery How to Create and Print Avery Address Labels in Microsoft Word How to Create and Print Avery Address Labels in Microsoft Word.
How to Create and Print Avery Address Labels
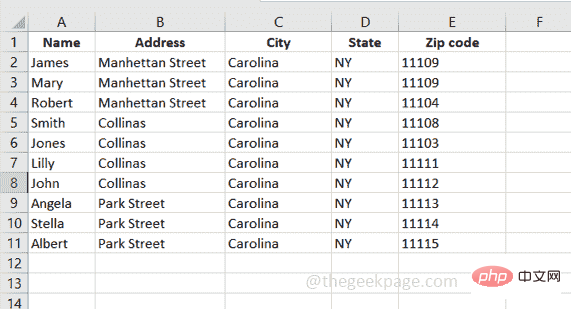
Step 1: First, I have a Microsoft Excel with Name, Address, City, State, and Zip Code as column headers and in Some sample data is saved. We will further use this data as How to Create and Print Avery Address Labels in Microsoft Word information in How to Create and Print Avery Address Labels in Microsoft Word.
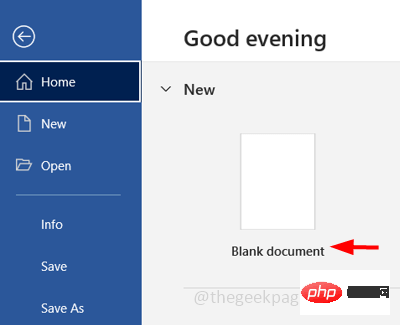
Step 2: Open Microsoft Word and click the File menu and then click Blank Document to create a new Microsoft Word document.
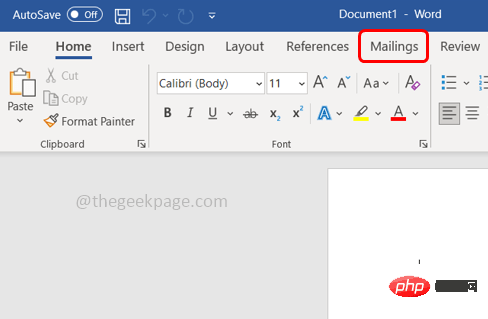
Step 3: Click the Mail tab at the top of the Word document.
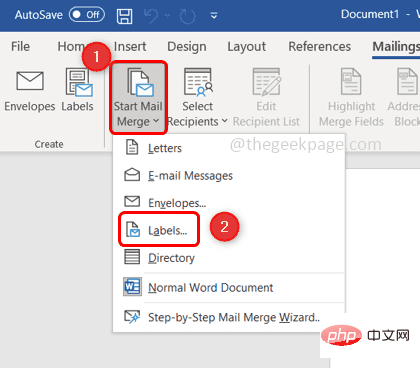
Step 4: Click Start Mail Merge and select Labels## from the drop-down list
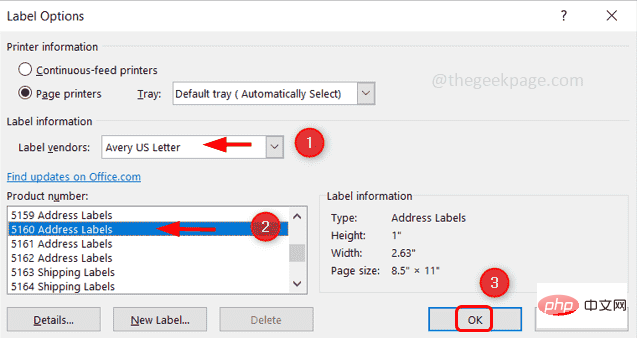
Avery US Letter from the Label Supplier
drop-down list. Step 6: Under the Product Number box, click to select the appropriate product number. The product number is a four or five digit number that is usually printedon the front of Avery product packaging. Here I want to select the 5160 How to Create and Print Avery Address Labels in Microsoft Word tag
Step 7: ClickConfirm
 ##Step 8: Now, import the data saved in Microsoft Excel into Microsoft Word where the above design is set up.
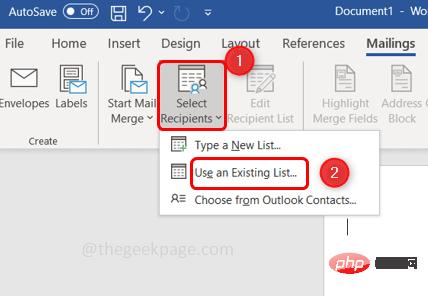
Step 10: To do this, click
Select recipients in the Mail tab on the same Microsoft Word documentStep 11 : Select
Use existing list from the drop-down list that appears
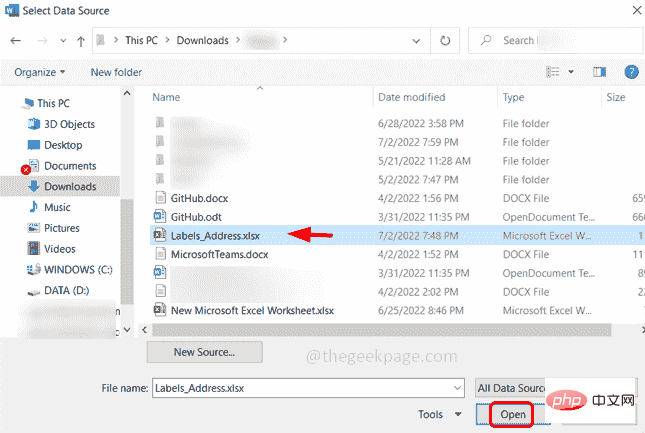
 Step 12: Now browse to the location where you saved Microsoft Excel and
Excel and click to open.
 Step 13: A select table window appears,
Excel worksheetthat has saved the required data, and make sure Check the box next to "The first row of data contains column headers" because we have already set the column headers in Excel (name , How to Create and Print Avery Address Labels in Microsoft Word, city, state and zip code) Step 14: Click OK
.
Step 15: Now you need to merge the fields, so click 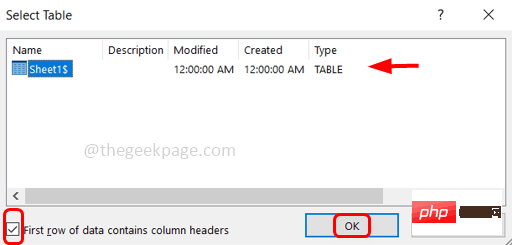 Insert Merge Fields# in the #Mail
##Step 16: Insert merge fields for inserting name, How to Create and Print Avery Address Labels in Microsoft Word, city, etc., so the first row is the name, the second row is the How to Create and Print Avery Address Labels in Microsoft Word, and the third row is the city, state, and zip code. Step 17: Select "Name"
from the "Insert Merge Field
" drop-down list and pressEnter. #Step 18: You can see the name appear in the Word document. Click
again to insert the merge field andselect the 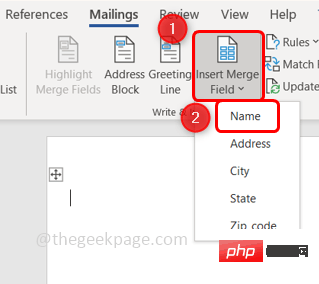 How to Create and Print Avery Address Labels in Microsoft Word from the drop-down list.
##Step 19: Click to insert the merge field,
select the city from the drop-down list, 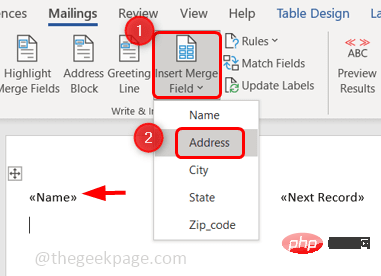 click the keyboard The
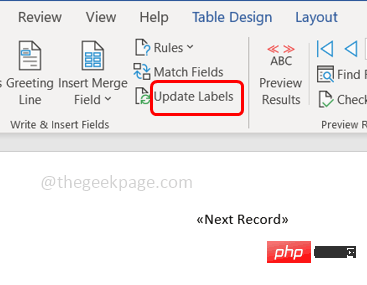
key on the key gives a space and then selects the status from the Insert Merge Field drop-down list, gives a space and then selects from Insert Merge Field Postal CodeStep 20: Now the first tab in Microsoft Word has all the column headers present in Excel. Step 21: Again, we want to update all How to Create and Print Avery Address Labels in Microsoft Word, so click "
Update Labels" in the Mail tab.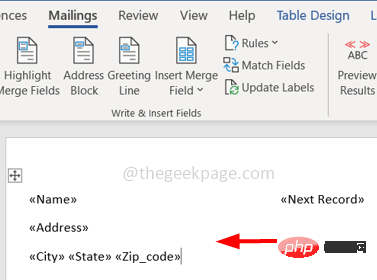
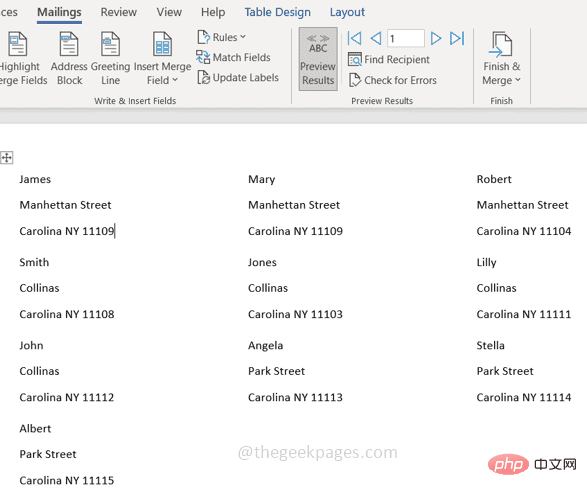
#Step 22: By doing this, all tags are updated.
 Step 23: Click
Step 24: Now all tags have the required data ready.
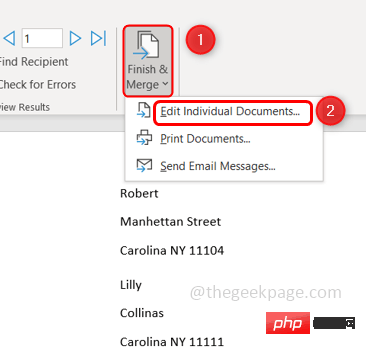
Step 25: Click Finish & Merge and select Edit Individual Documents from the list.
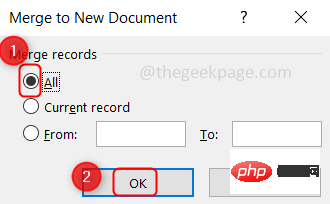
Step 26: Click the radio option button next to All in the window that appears To merge all records.
Step 27: Prepare the label paper or mailing label for printing. Press the Ctrl P keys simultaneously to get the print window
Step 28: Select the correct printer and click Print.
The above is the detailed content of How to Create and Print Avery Address Labels in Microsoft Word. For more information, please follow other related articles on the PHP Chinese website!

Hot AI Tools

Undresser.AI Undress
AI-powered app for creating realistic nude photos

AI Clothes Remover
Online AI tool for removing clothes from photos.

Undress AI Tool
Undress images for free

Clothoff.io
AI clothes remover

AI Hentai Generator
Generate AI Hentai for free.

Hot Article
Hot Tools

Notepad++7.3.1
Easy-to-use and free code editor

SublimeText3 Chinese version
Chinese version, very easy to use

Zend Studio 13.0.1
Powerful PHP integrated development environment

Dreamweaver CS6
Visual web development tools

SublimeText3 Mac version
God-level code editing software (SublimeText3)
Hot Topics


 Fix: ERR_ADDRESS_UNREACHABLE error in Google Chrome
May 15, 2023 pm 06:22 PM
Fix: ERR_ADDRESS_UNREACHABLE error in Google Chrome
May 15, 2023 pm 06:22 PM
Several Windows users have complained that when they try to access some websites on Google Chrome browser on their systems, they are unable to access the web pages. It also displays a message on the browser saying "The site cannot be reached" with error code ERR_ADDRESS_UNREACHABLE. There could be many potential reasons behind this issue, it could be due to website server issues, proxy server settings, unstable internet connection, etc. If you encounter similar problems, don't panic. After deeply analyzing the problem in this article, we got a bunch of solutions. Before proceeding, try the following workarounds: Try checking if the user is trying to access the site from other devices and there are no issues, then this
 Can't use MSI Afterburner in Windows 11? Try the following fixes.
May 09, 2023 am 09:16 AM
Can't use MSI Afterburner in Windows 11? Try the following fixes.
May 09, 2023 am 09:16 AM
MSIAfterburner is an overclocking tool suitable for most graphics cards. Apart from that, you can also use it to monitor the performance of your system. But some users reported that MSIAfterburner is not working in Windows 11. This may be due to several reasons, which we discuss in the following sections. However, when this happens, it prevents you from changing the performance or monitoring it while playing the game. As expected, this poses a significant challenge to gamers. That’s why we’ve dedicated this tutorial to help you understand the issue and walk you through the most effective fixes for MSIAfterburned not working in Windows 11 issue.
 Fix: VAN 1067 error when running Valorant on Windows 11
May 22, 2023 pm 02:41 PM
Fix: VAN 1067 error when running Valorant on Windows 11
May 22, 2023 pm 02:41 PM
The operating system looks much better than its predecessor and has gamer-oriented features like AutoHDR and DirectStorage, but Valorant players have had some trouble launching the game. This is not the first issue faced by gamers earlier, Valorant not opening on Windows 11 is another issue plaguing them but we have covered the ways to fix it. Now it seems that Valorant players who switched to Windows 11 are facing issues due to Secure Boot and TPM2.0 services, which causes the game menu to only show an exit option while running. Many users are getting the VAN1067 error, but it shouldn't be a cause for alarm
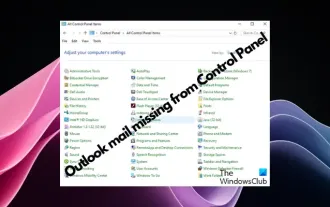 Outlook emails lost from control panel in Windows 11
Feb 29, 2024 pm 03:16 PM
Outlook emails lost from control panel in Windows 11
Feb 29, 2024 pm 03:16 PM
Is the Outlook mail icon missing from Windows 11's Control Panel? This unexpected situation has caused confusion and concern among some individuals who rely on OutlookMail for their communication needs. Why don't my Outlook emails show up in Control Panel? There may be several possible reasons why there are no Outlook mail icons in Control Panel: Outlook is not installed correctly. Installing Office applications from the Microsoft Store does not add the Mail applet to Control Panel. The location of the mlcfg32.cpl file in Control Panel is missing. The path to the mlcfg32.cpl file in the registry is incorrect. The operating system is not currently configured to run this application
 DirectX function GetDeviceRemovedReason fails with error
May 17, 2023 pm 03:38 PM
DirectX function GetDeviceRemovedReason fails with error
May 17, 2023 pm 03:38 PM
Almost every high-end game we play relies on DirectX to run efficiently. However, some users reported encountering the DirectX function GetDeviceRemovedReasonfailedwith followed by the error reason. The above reasons are not self-evident to the average user and require some level of research to determine the root cause and the most effective solution. To make things easier, we've dedicated this tutorial to this problem. In the following sections, we will help you identify the potential causes and walk you through the troubleshooting steps to eliminate the DirectX function GetDeviceRemovedReasonfailedwitherror. what causes
 How to change font color on iPhone
May 13, 2023 pm 01:01 PM
How to change font color on iPhone
May 13, 2023 pm 01:01 PM
Color helps how we process things visually, so using a variety of colors in documents, emails, lock screens, and other elements looks better. As with font styles, choosing different font colors can be a good way to avoid text on your phone looking monotonous. How to Change Font Color in Pages App You can change the text color of a document on your iPhone, or you can do it by opening the Pages app on iOS. Within Pages, click the document you want to open. If the document is open in screen view, click the Edit button in the upper right corner. The selected document will now enter editing mode. To change the font color of text in this document, click the desired text to highlight it. Highlight
 PHP sends emails asynchronously: avoid long waits for emails to be sent.
Sep 19, 2023 am 09:10 AM
PHP sends emails asynchronously: avoid long waits for emails to be sent.
Sep 19, 2023 am 09:10 AM
PHP sends emails asynchronously: avoid long waits for emails to be sent. Introduction: In web development, sending emails is one of the common functions. However, since sending emails requires communication with the server, it often causes users to wait for a long time while waiting for the email to be sent. In order to solve this problem, we can use PHP to send emails asynchronously to optimize the user experience. This article will introduce how to implement PHP to send emails asynchronously through specific code examples and avoid long waits. 1. Understanding sending emails asynchronously
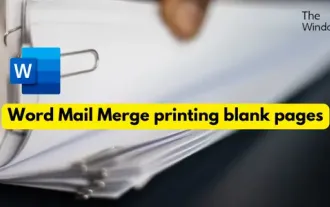 Word mail merge prints blank page
Feb 19, 2024 pm 04:51 PM
Word mail merge prints blank page
Feb 19, 2024 pm 04:51 PM
If you find that blank pages appear when printing a mail merge document using Word, this article will help you. Mail merge is a convenient feature that allows you to easily create personalized documents and send them to multiple recipients. In Microsoft Word, the mail merge feature is highly regarded because it helps users save time manually copying the same content for each recipient. In order to print the mail merge document, you can go to the Mailings tab. But some Word users have reported that when trying to print a mail merge document, the printer prints a blank page or doesn't print at all. This may be due to incorrect formatting or printer settings. Try checking the document and printer settings and make sure to preview the document before printing to ensure the content is correct. if