
 Common Problem
How to Install and Use VirtualBox on Windows 11: 2022 Detailed Step-by-Step Tutorial
Common Problem
How to Install and Use VirtualBox on Windows 11: 2022 Detailed Step-by-Step Tutorial
How to Install and Use VirtualBox on Windows 11: 2022 Detailed Step-by-Step Tutorial

Windows 11 has gone through its fair share of ups and downs since its release. The operating system is now more stable and has many changes that seem to work for most users. Windows as a platform has always been versatile, capable of creating virtual machines, drives, hardware devices, and more.
This is helpful for internal testing, coding in different environments, or just some good old tinkering. If you have been looking to emulate or virtualize your platform on Windows 11, then VirtualBox is a great choice for you. Let’s learn more about it!
What is VirtualBox?
VirtualBox is a long-established virtualization software that has been favored by most users since its release. Currently published and managed by Oracle, VirtualBox allows you to virtualize an x86 environment on your PC.
Not only does the tool support Windows, but it also offers dedicated clients for other platforms, including Linux and macOS. If you've been looking to test tools, platforms, or code in a virtual environment, VirtualBox is a great choice for you. You can create multiple virtual machines and launch them at will, with the ability to install custom operating systems on them.
You even have access to all essential drivers and the ability to use native keyboards in host and virtualized environments.
How to install and use VirtualBox on Windows 11: Everything you need to know
Here’s how to use VirtualBox on a Windows 11 PC. Your setup needs to meet some hardware requirements so that VirtualBox can run as expected. Additionally, there are a few things you should keep in mind before continuing with this tutorial.
The same is listed below. Once you have your setup ready as expected, you can use the following tutorial to install and set up VirtualBox on your PC.
Requirements:
The following are the minimum system requirements for running VirtualBox on a Windows 11 PC.
- CPU: x86 compatible hardware (supports most modern Intel and AMD CPUs)
- RAM: Minimum requirements for host operating system (Windows 11: 4GB) Minimum requirements for the operating system you wish to virtualize
-
DiskSpace: Minimum space requirements for the operating system you wish to virtualize VirtualBox installation Maximum 50 MB
- Windows 7: 32-bit 16GB or 64-bit 20GB
- Windows 8 and 8.1: 32-bit 16GB or 64-bit 20GB
- Windows 10: 32-bit 16GB or 64-bit 20GB
- Windows 11: 64GB or higher
-
Operations supported by the virtual machine Systems: Popular supported operating systems are listed below
- Windows 10
- Windows 7
- Windows 8 & 8.1
- Windows
- Windows
- Windows 2000
- Windows Server 2003, 2008 and 2012 (including R2)
- Windows
- Ubuntu Desktop
- Debian 6.0 through 8.0, 5.0, 4.0 and 3.1
- Fedora Core 1, 4, 5, 6
- Solaris 11
- Solaris 10 (5.08 and above Version)
# If your operating system is not listed above, you can find the full list of supported operating systems at this link.
Preparation:
Before you start using VirtualBox, you need to prepare some methods. You may need to enable some settings on your system and download some files to help you. Use the following sections to help you through the process.
1. Operating System (OS)
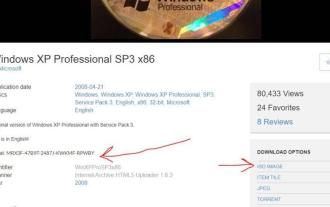
First, you will need the operating system you wish to install on the virtual machine. We recommend that you download the same beforehand to help you with the process. We've listed download links for popular operating systems below to help you get started.
- Windows 7 | Download link
Note: This is a web archive link that may be updated after a while stop working.
- Windows 8.1 | Download link
- Windows 10 | Download link
- Ubuntu Desktop|Download Link
Download and save your operating system ISO. We will need this to boot and install the operating system during the initial VirtualBox setup.
2. Free Space
You can easily run out of available space when using VirtualBox. If you plan to virtualize in the long term, it is recommended that you create enough free space on your disk drives. Although VirtualBox creates and manages its own virtual disk space based on the size of the operating system and the files it contains, to be on the safe side you should create a separate partition if possible.
Keep in mind that the page file also interferes with the virtual folders that VirtualBox uses as virtual disk drives. If you are low on space, it might be a good idea to close the paging file for the current disk.
3. Drivers (optional)
VirtualBox comes bundled with most universal drivers and has the ability to install extension packs that provide additional options and functionality. While ideal for most systems, some proprietary hardware or components may require manual installation of their drivers.
This includes custom monitors, USB hubs, unsupported iGPUs, etc. If you have any of these components, we recommend keeping their drivers handy. This way you can install them and get your setup up and running in case your component is not supported by the VirtualBox driver.
How to Install and Start Using VirtualBox
Now that you are ready to virtualize, here’s how to use VirtualBox on your PC. Please follow the steps below to help you through the process.
Step 1: Download and Install VirtualBox
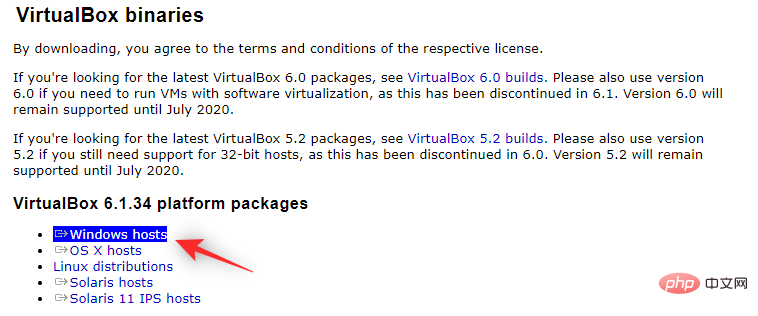
- VirtualBox | Download Link
Click the link above to install your Access the VirtualBox download page in your preferred browser. Now click Windows Hosting to download the latest VirtualBox for Windows package.
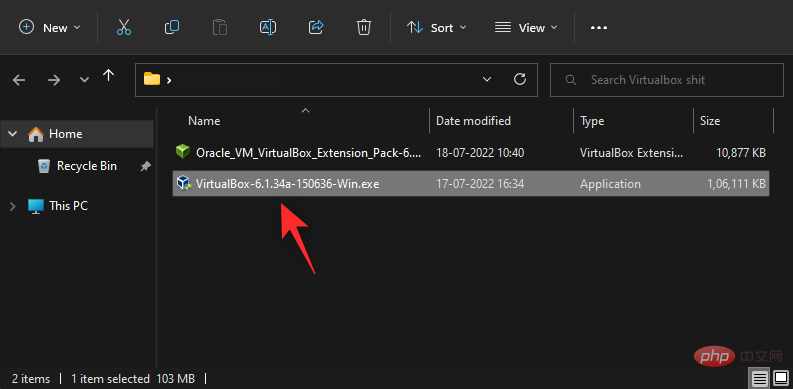
Save settings in a convenient location in local storage. Once downloaded, double-click and launch it on your PC.
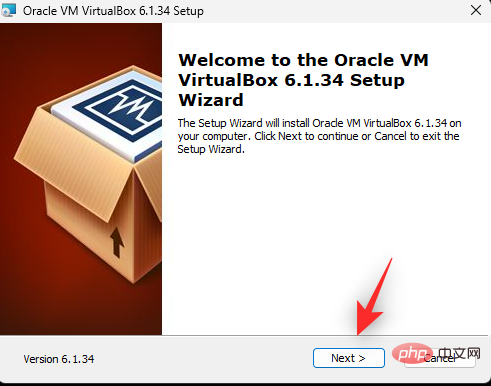
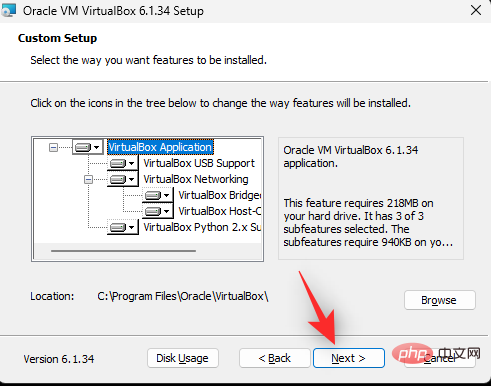
Click Next to start setup.
Click Browse and select the VirtualBox installation directory on your PC if necessary.
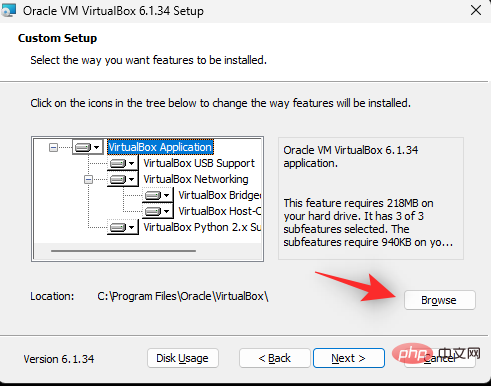
Note: This will be the VirtualBox installation directory, not the space used by the virtual machine, unless you specify the same.
Click Next step when completed.
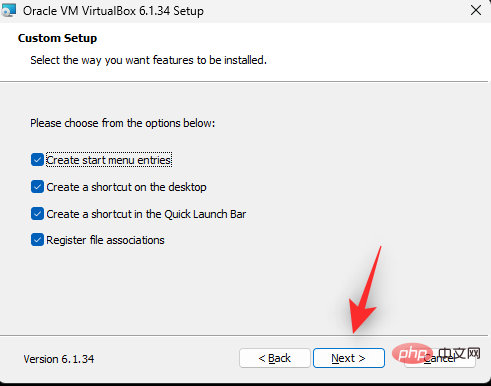
Check the boxes below depending on where you want to place VirtualBox shortcuts and context menus. If you are not sure what to choose, we recommend that you leave them at their default values.
- Create Start Menu Entry
- Create a shortcut on the desktop
- Create a shortcut in the Quick Launch Bar
- Register File Association
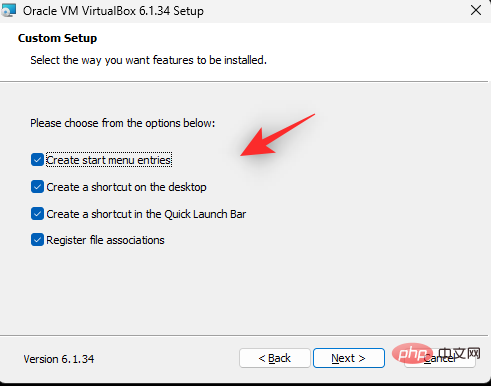
Click Next.
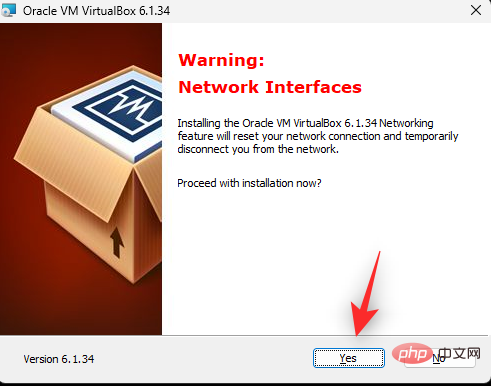
You will now be notified that the internet will be disconnected for a period of time during the installation process. This might be a good time to pause any ongoing downloads in the background. Click Yes when you are ready.
Click Install to confirm your choice.

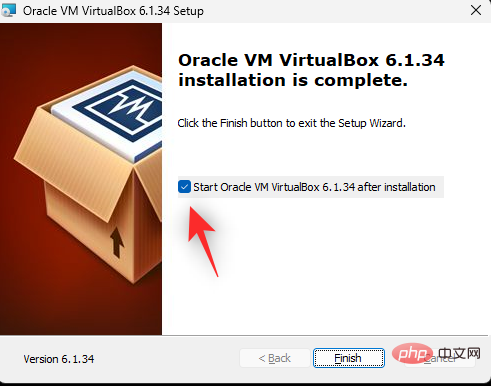
After the setup is complete, uncheck the Start Oracle VM VirtualBox nnnn after installation checkbox.
Click Finish.
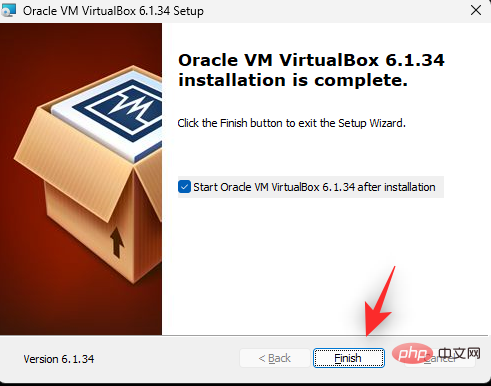
That's it! VirtualBox is now installed on your PC. You can now follow the next steps to create a new virtual machine on your PC using VirtualBox.
Step 2: Create your virtual machine and install the extension pack
Here’s how to create your first virtual machine in VirtualBox.
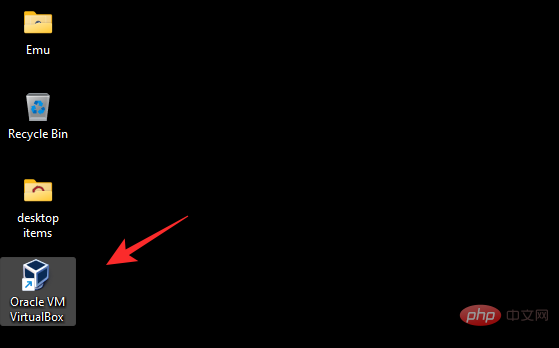
First launch VirtualBox using the desktop or start menu shortcut.
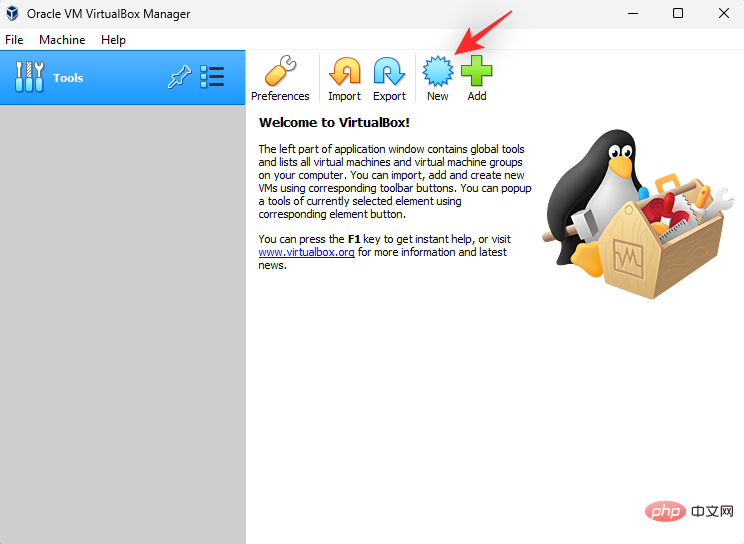
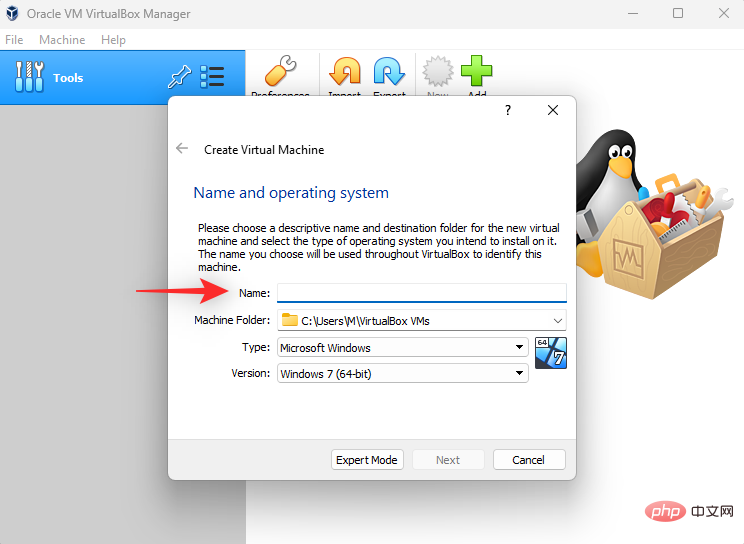
Click New.
Now enter the name of the new virtual machine at the top. We recommend using a name that will help you easily identify your machine and the operating system installed on it. We will be using Windows 10 in this tutorial.
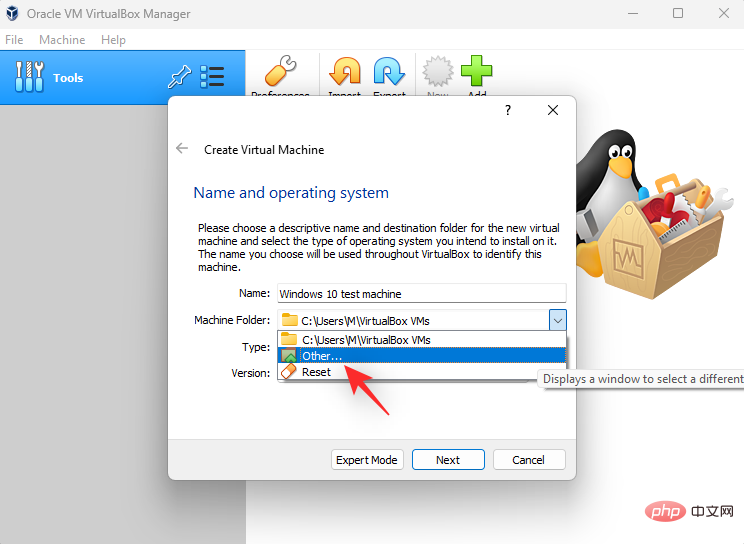
Now click on the drop-down menu for the Machine folder and select Other.
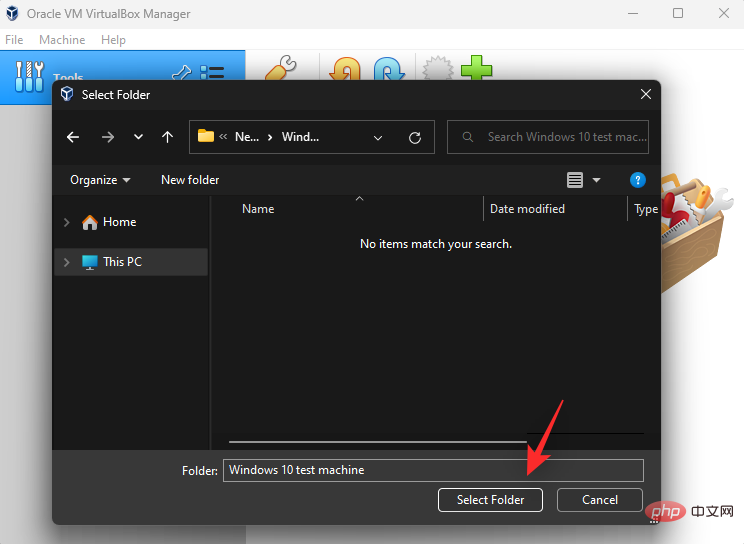
Select the location where the virtual machine will be created. Your virtual machine will use this space to install the operating system and other tools it needs. If you created a dedicated partition for it, you should select the same partition here. When finished click Select Folder.
Click the drop-down menu for type and select your operating system. We will choose Windows for this tutorial.
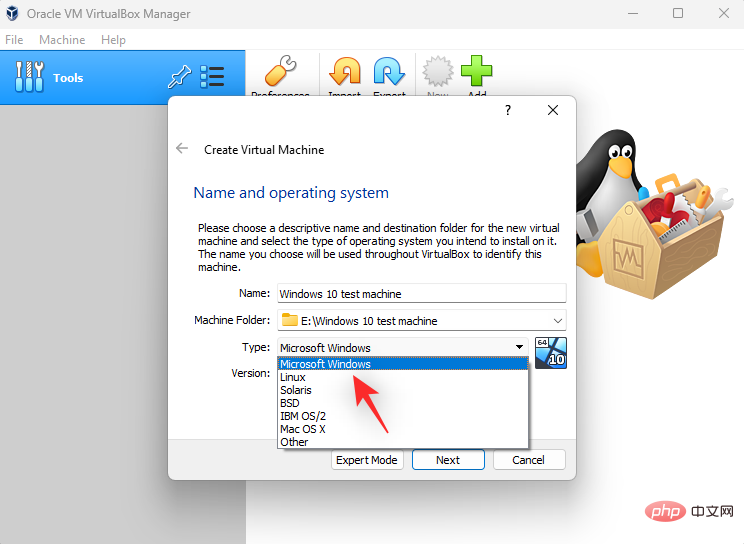
Then, click the drop-down menu for Version and select the appropriate operating system version you wish to install on the new virtual machine.
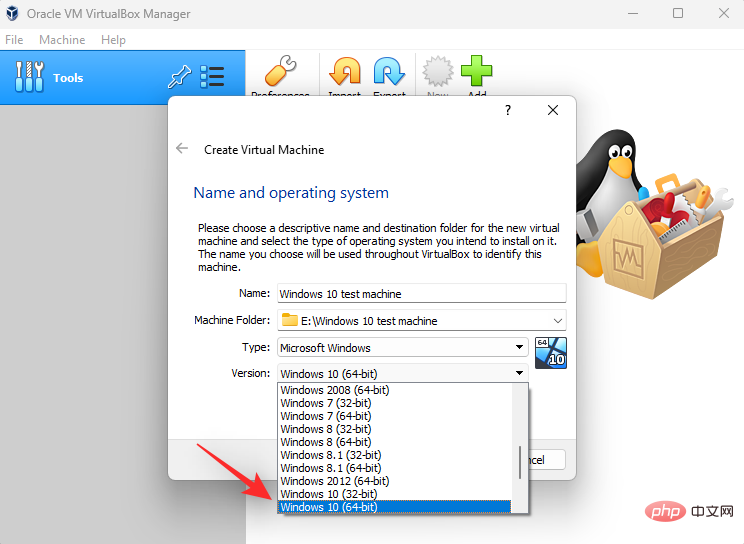
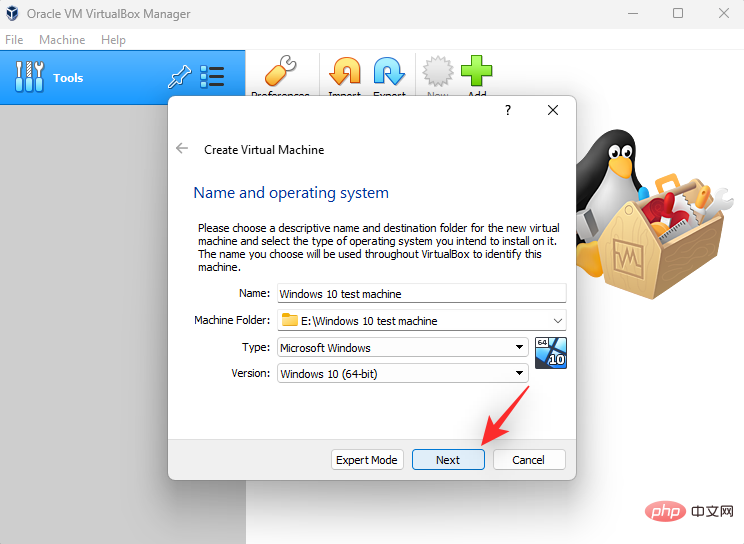
Click Next step when completed.
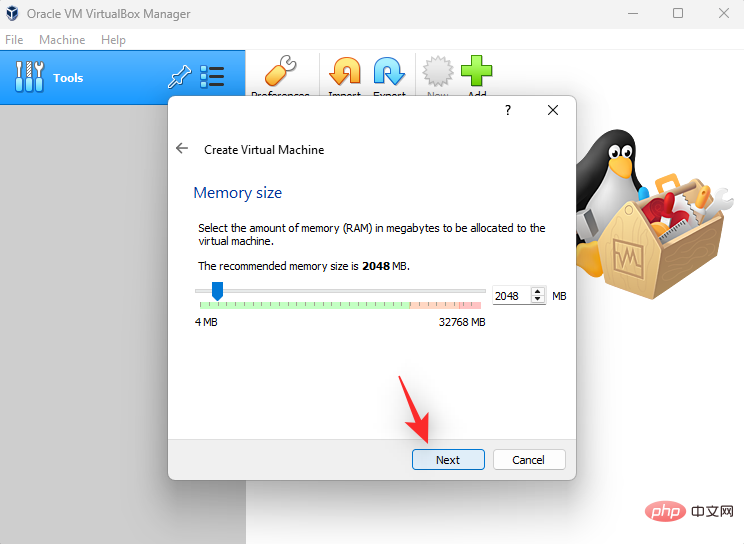
Now you will see the available RAM on your PC. This will be shared while your virtual machine is running. Use the slider to adjust the amount of RAM you want allocated to the virtual machine. VirtualBox will automatically select the recommended amount of RAM required for the selected operating system.
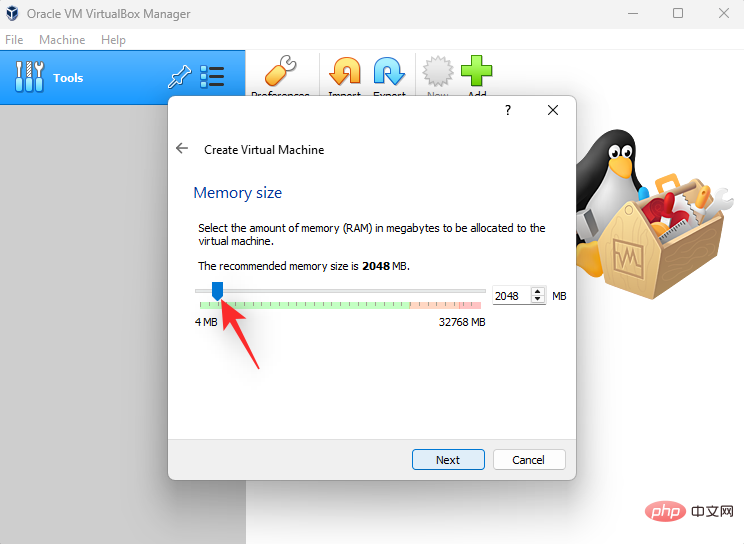
When finished, click Next.
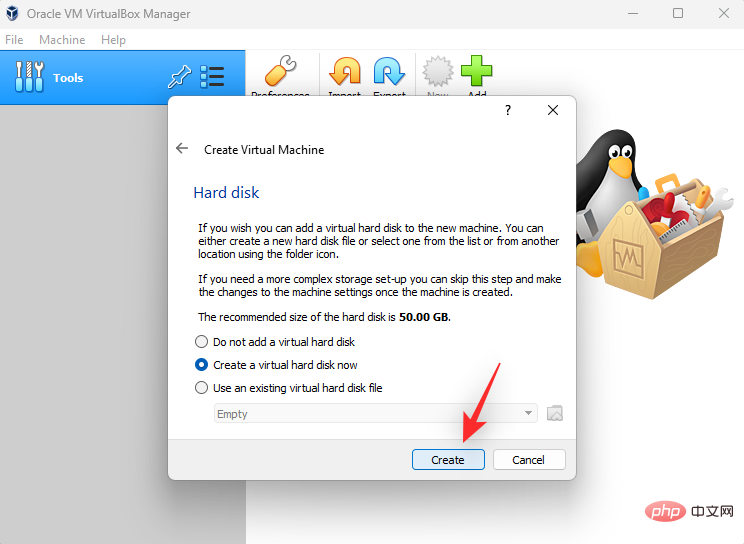
You will now be asked if you want to add a virtual hard drive. If you plan to use the operating system as is, adding a virtual hard drive is a good idea. However, if you wish to split storage or try a dual-boot setup, you can choose to do so later when you install the operating system as needed. Choose one of the options below based on your preference.
- Do not add a virtual hard disk
- Create a virtual hard disk now
- Use an existing virtual hard disk file
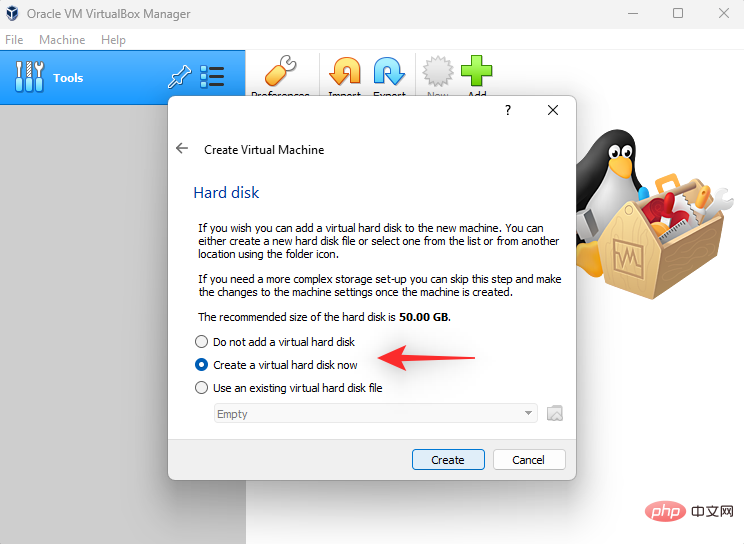
Click Create.
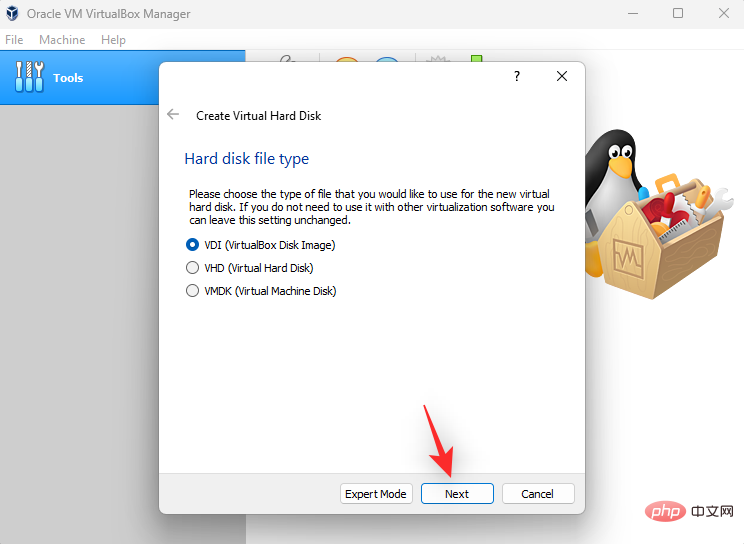
You will now be asked what type of virtual hard drive you want to create. If you wish to use the space only for VirtualBox, you can use the VDI option. If you wish to use it with other emulators or virtualization software, you can choose one of the following options depending on its support.
- Virtual Hard Disk (VHD)
- Virtual Machine Disk (VMDK)

Click after making your selection Next step.
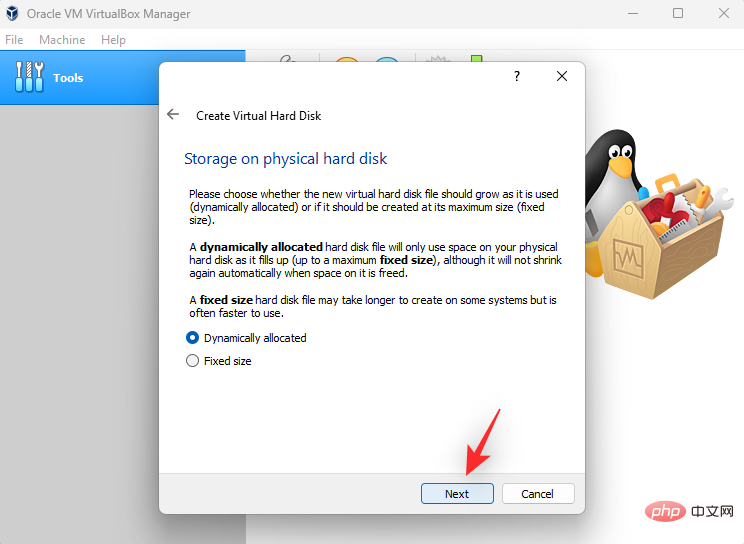
#Now select one of the following options based on the type of disk you want to create.
- Dynamic Allocation: A virtual disk uses up space on the physical disk as it fills up.
Note: Although the space will be used as needed, once the space is released it cannot be reclaimed.
- Fixed size: A fixed size will be allocated to your virtual drive. It will not be able to grow or shrink in the future.
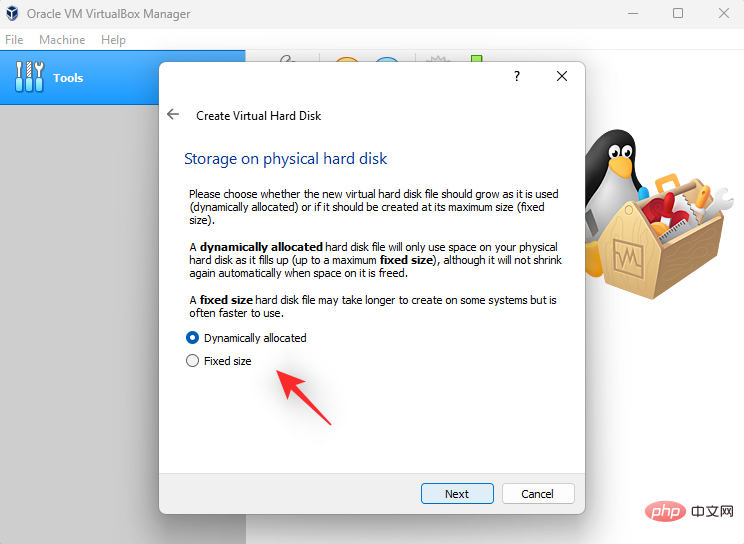
Click Next after making your selection.
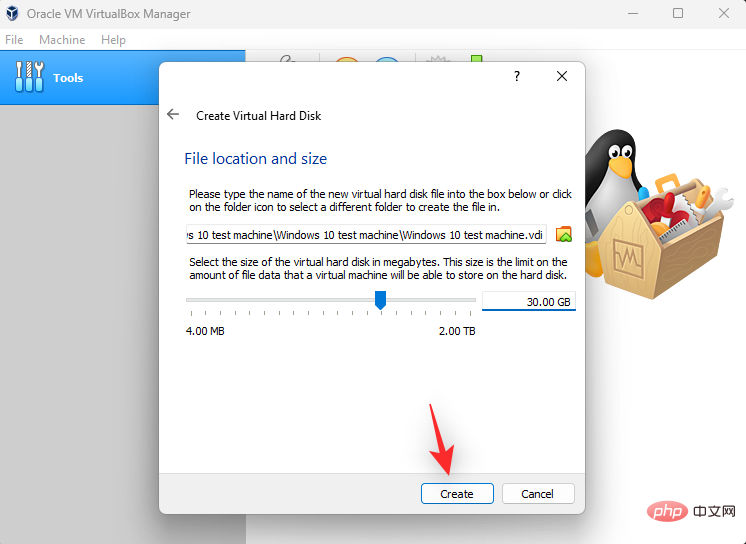
#Click the folder icon on the next page.
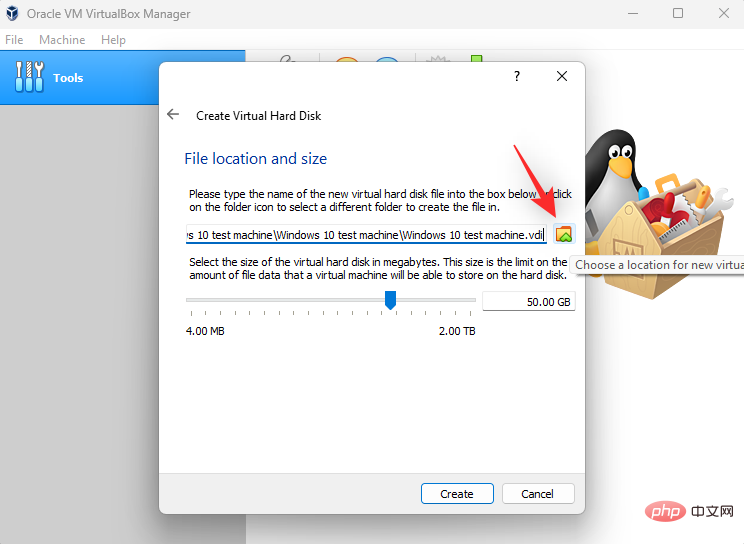
Now choose a location for the virtual hard disk on your system. Click Save.
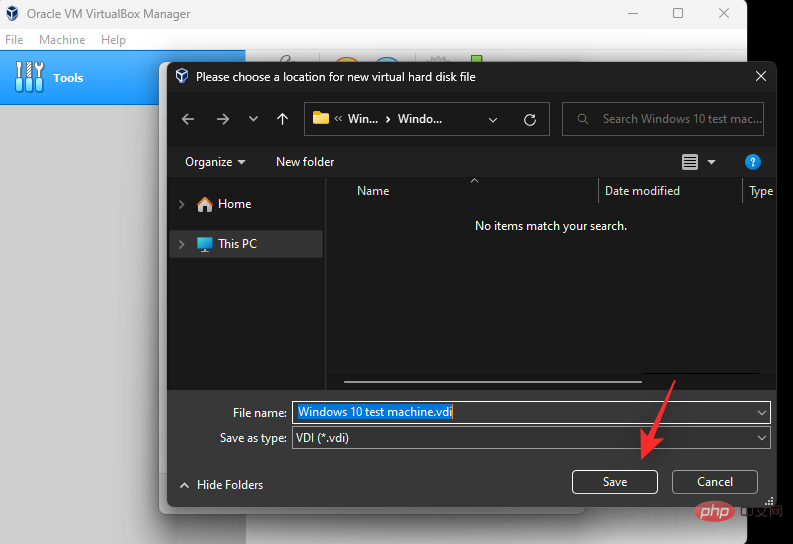
Note: Do not change the file extension of the virtual hard drive when selecting a location.
If you selected Dynamic Allocation previously, now use the slider at the bottom to select the initial space you wish to allocate to the virtual hard drive. If you select Same size, this will be the fixed size of your virtual hard drive.
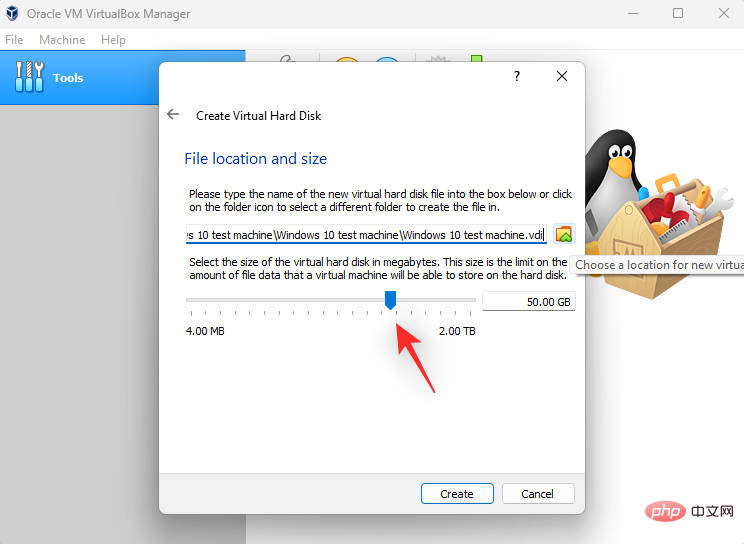
When finished, click Create.
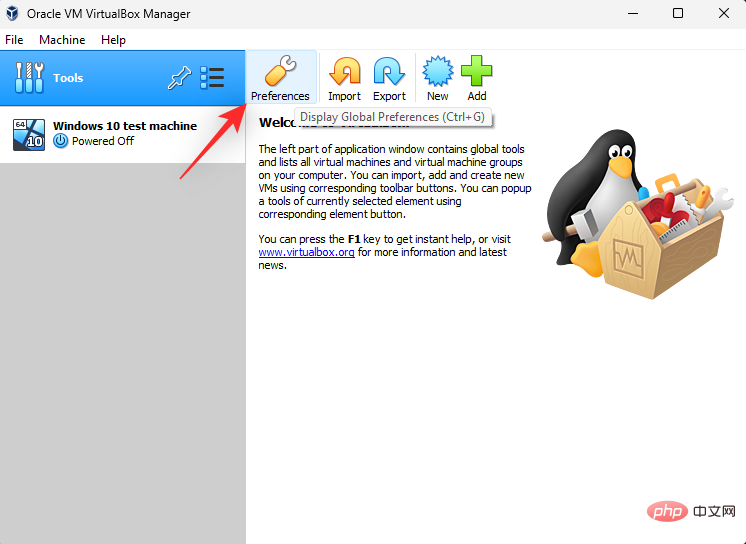
You will now create a new virtual machine. We will now install the extension pack. Start by downloading the expansion pack on your PC using the link below.
- VirtualBox Extension Pack
Switch back to VirtualBox. Click Tools on the left, then click Preferences at the top.
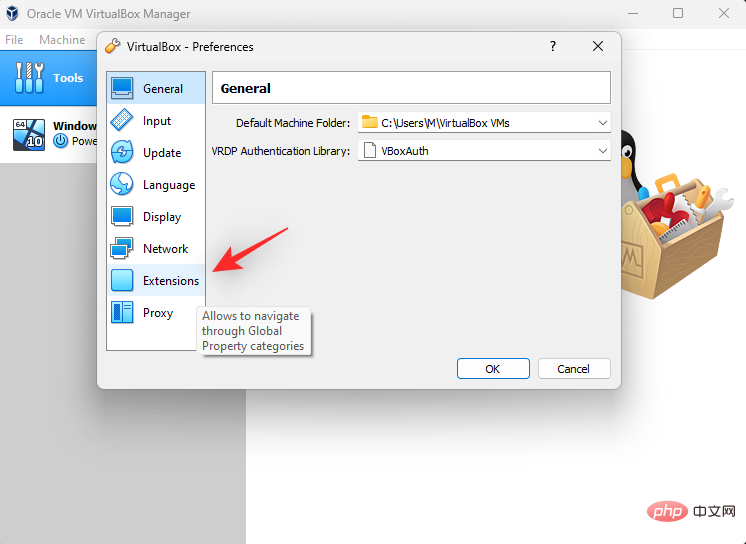
#Now click on Extensions on the left.
Click the Add extension icon.
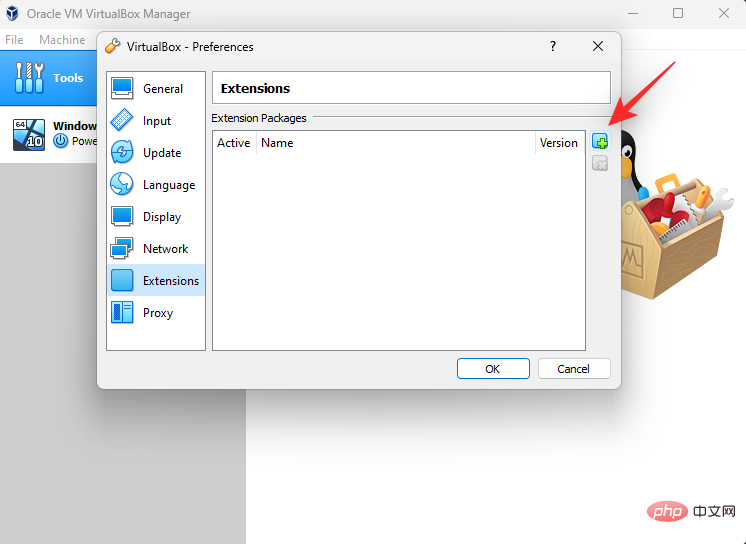
Select the expansion pack we downloaded before.
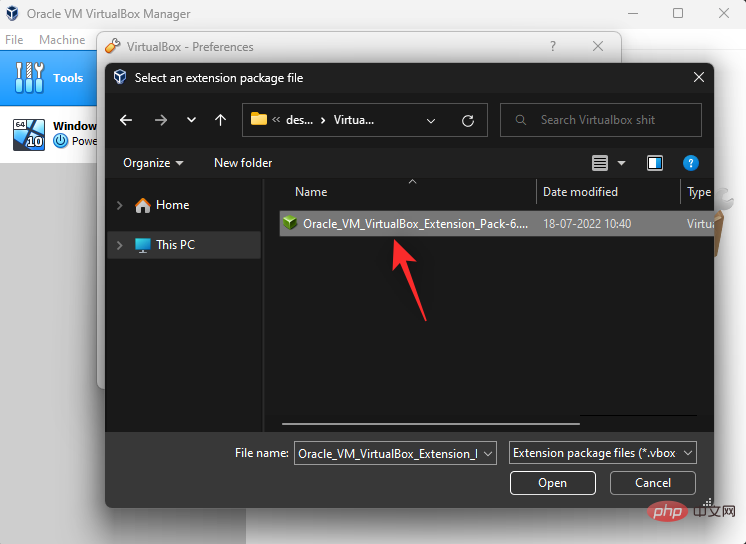
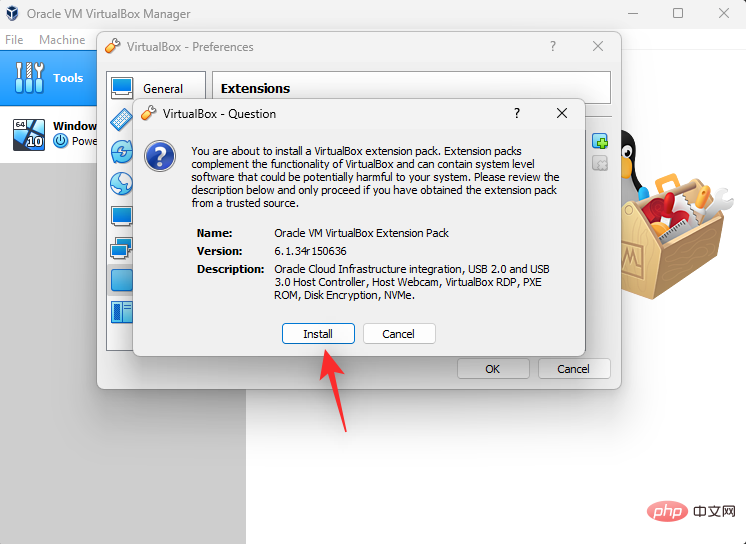
Click Install.
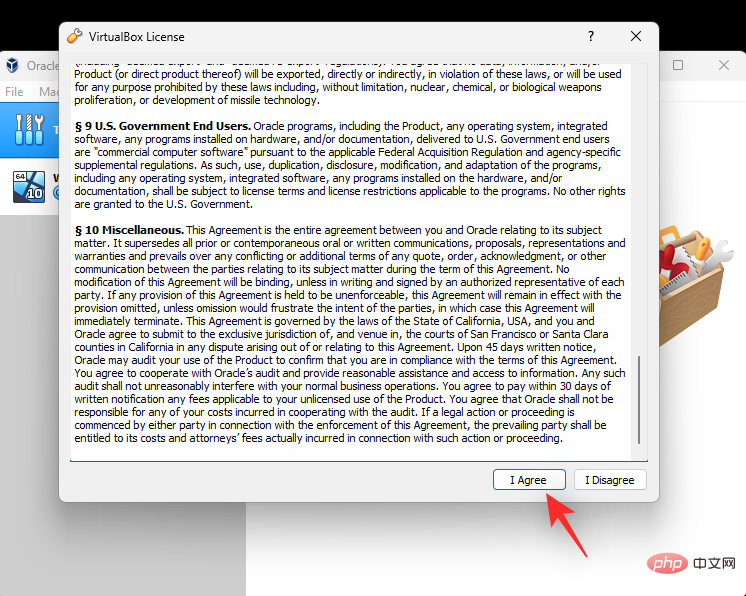
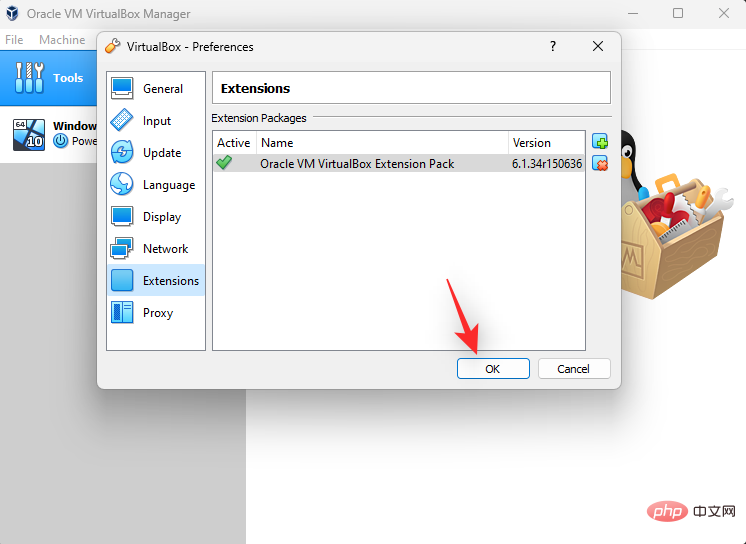
Scroll to the bottom of the License Agreement and click I agree when available.
After successful installation, click OK.
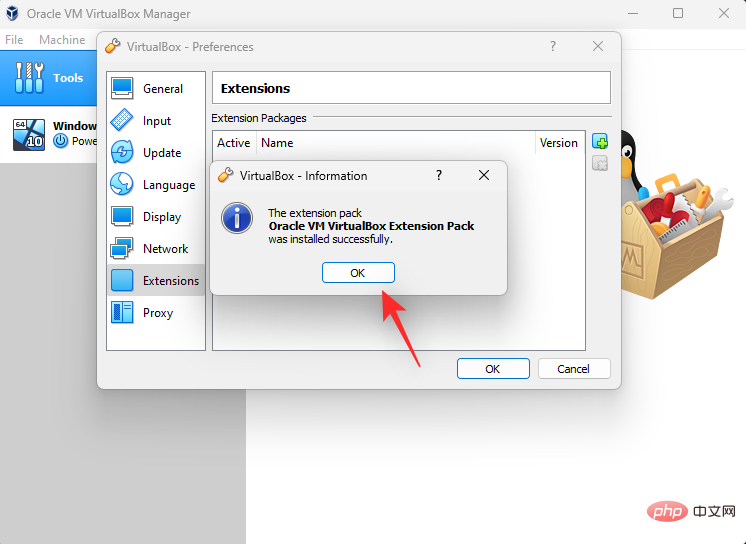
Click OK again.
You can now use the following steps to install the operating system on your new machine.
Step 3: Install the operating system on the virtual machine
Installing the operating system on a new virtual machine should be the same as installing an operating system on any setup. We'll use Windows 10 as an example for this tutorial, but the following steps should help you configure other operating systems as well. let's start.
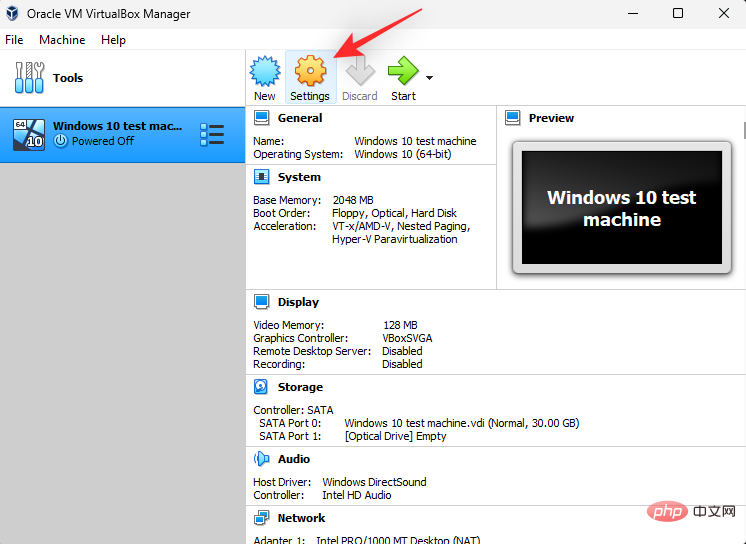
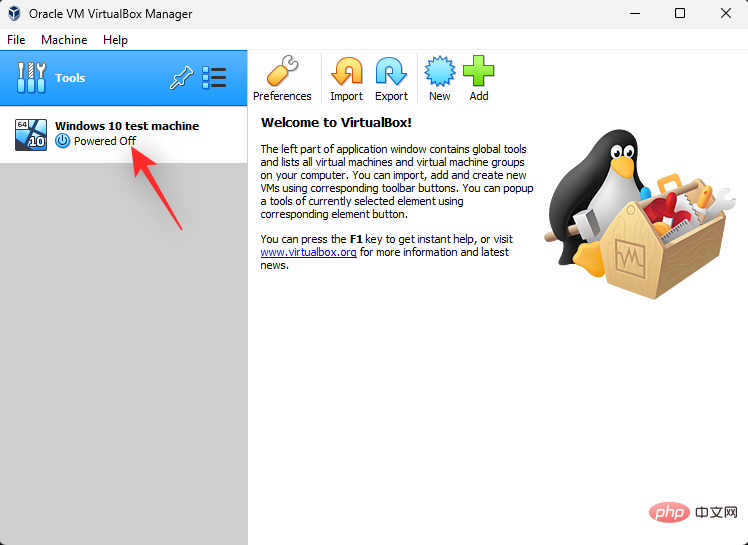
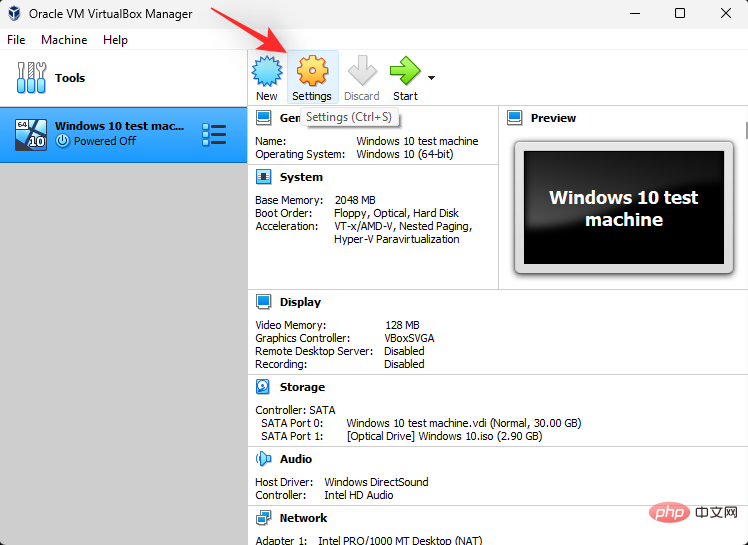
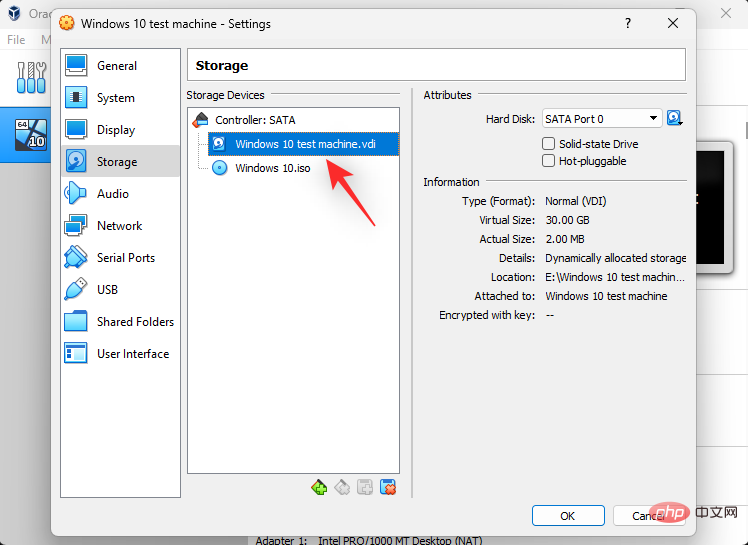
Launch VirtualBox on your PC, then click and select the desired machine from the left sidebar.

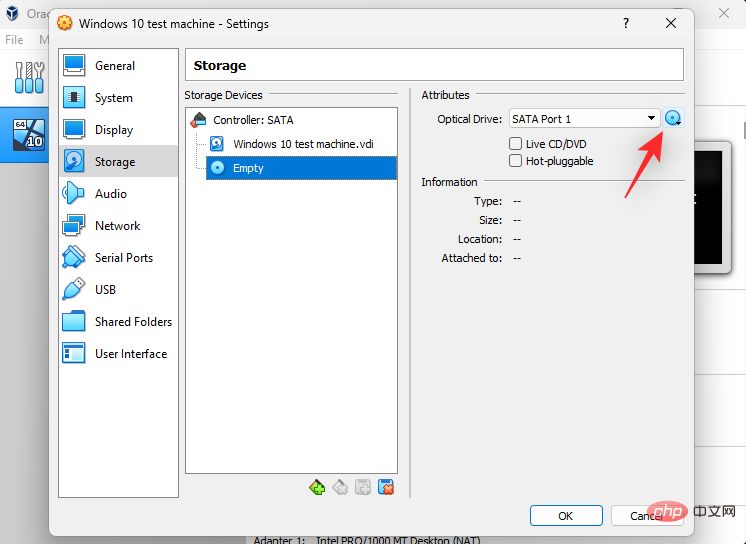
Click Settings.
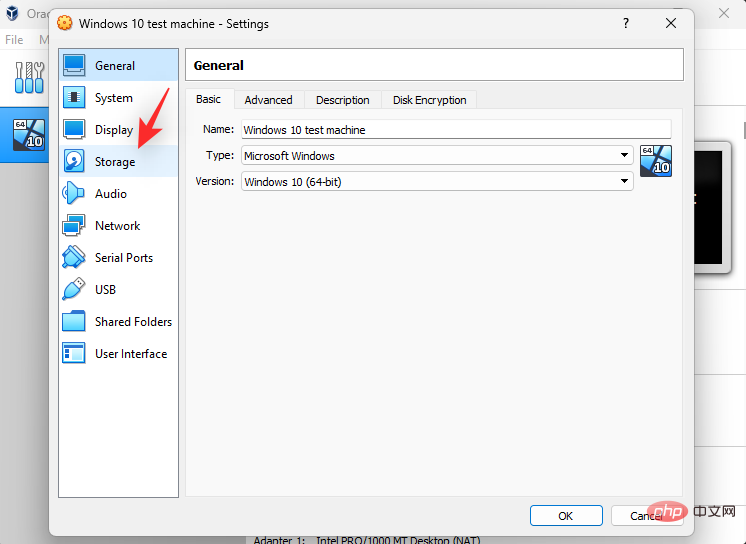
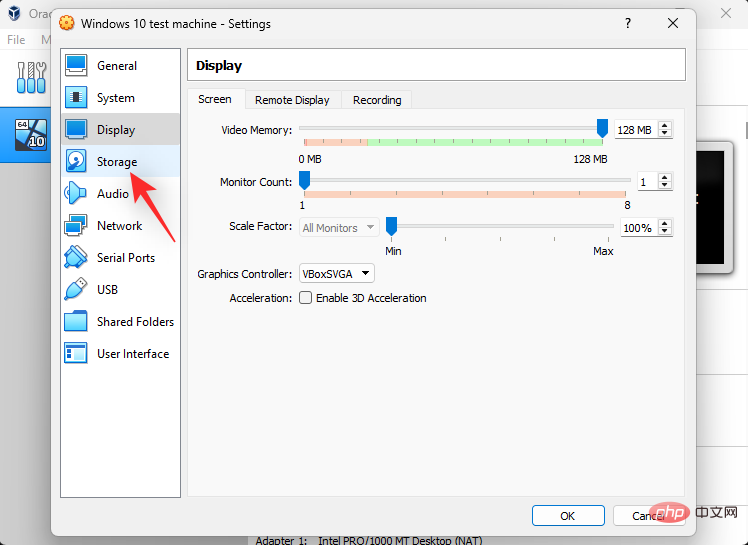
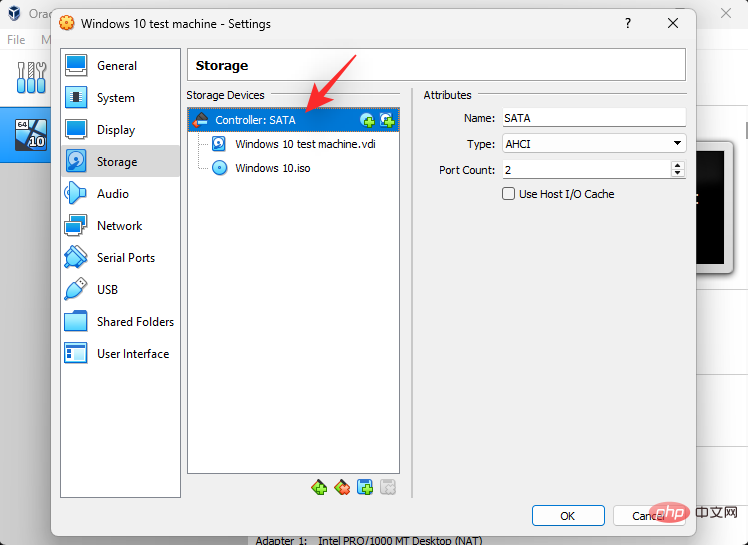
Click Storage on the left.
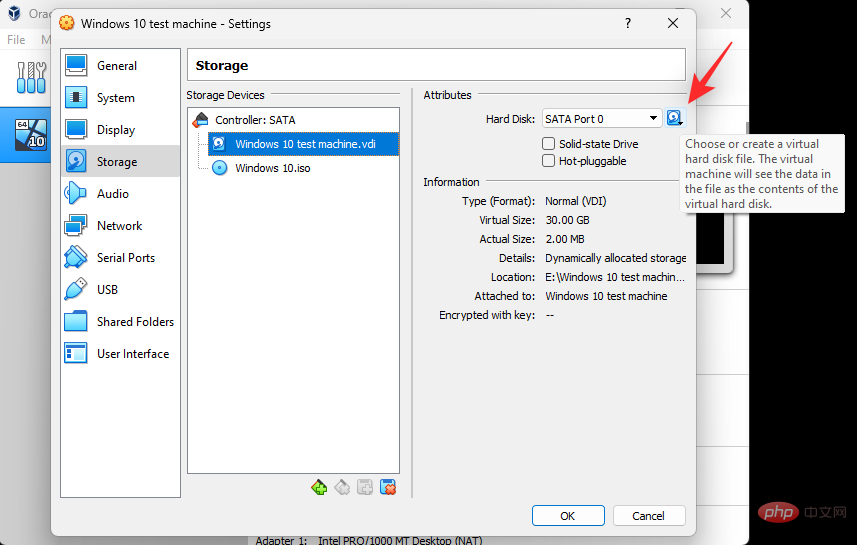
#Now click and select the disk icon below the virtual drive.
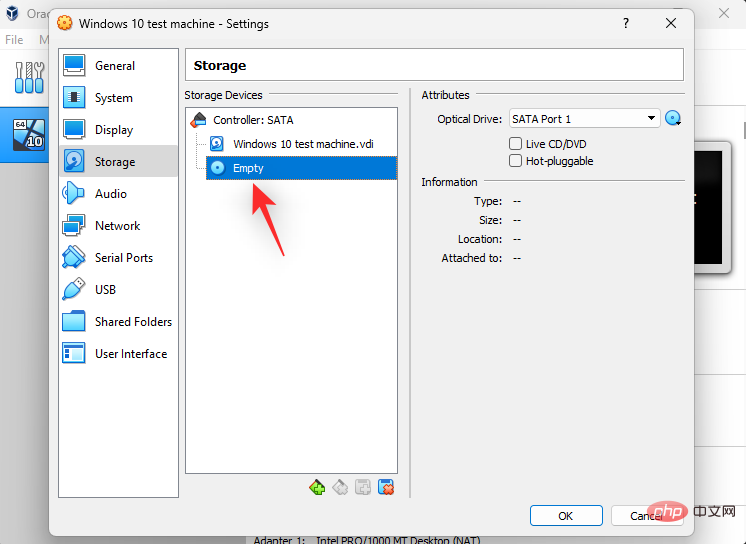
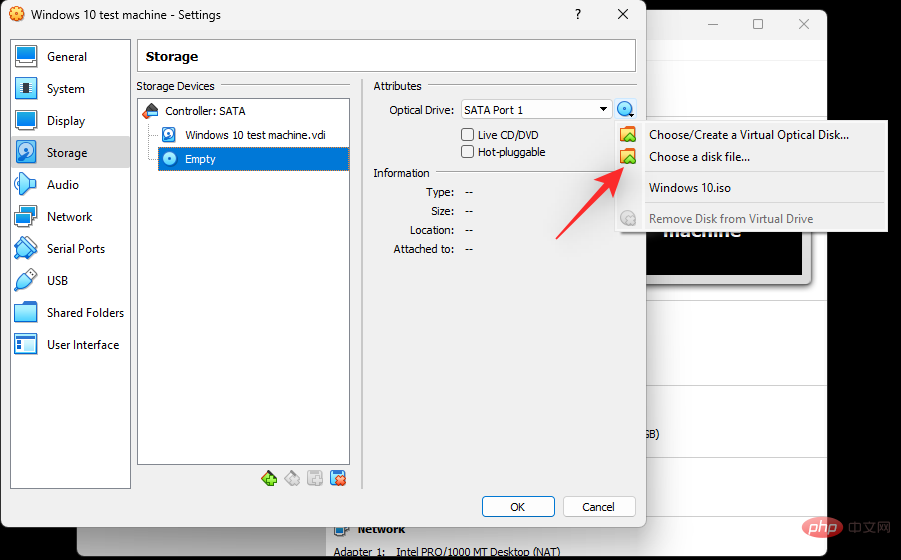
Click the disk icon next to the default SATA port on the right.
Click to select the disk file.
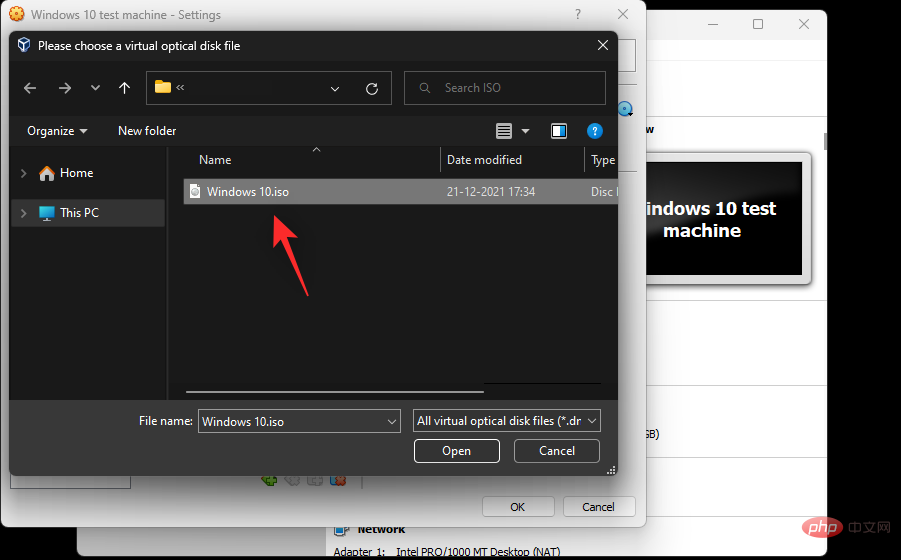
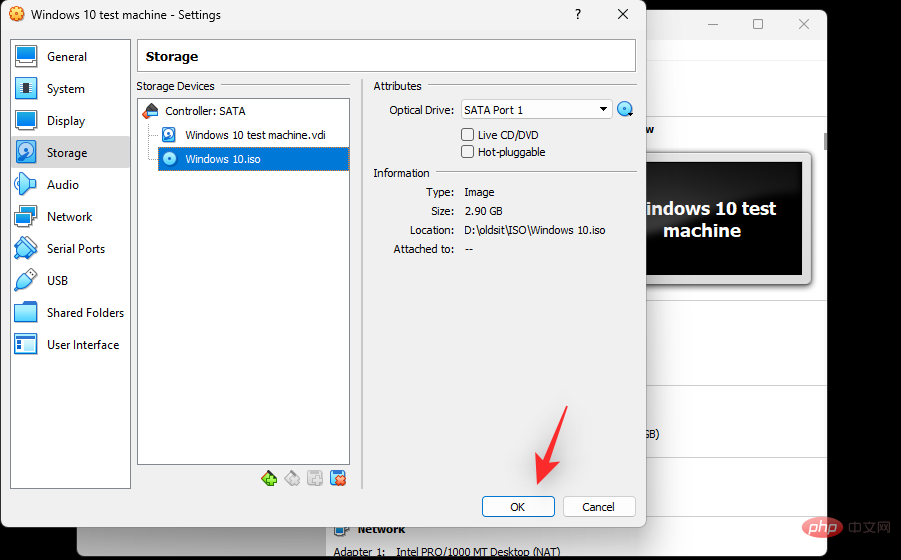
Now select the OS ISO that you downloaded earlier from local storage.
When finished, click OK.
You will now be taken back to the home page. Click at the top to get started.
#The virtual machine should now automatically boot on your system using the downloaded ISO. If not, use F12 to enter the boot menu and select the same.
How to use VirtualBox
Now that your virtual machine is set up in VirtualBox, here's how to use and troubleshoot it if you encounter any issues.
1. Power on and off
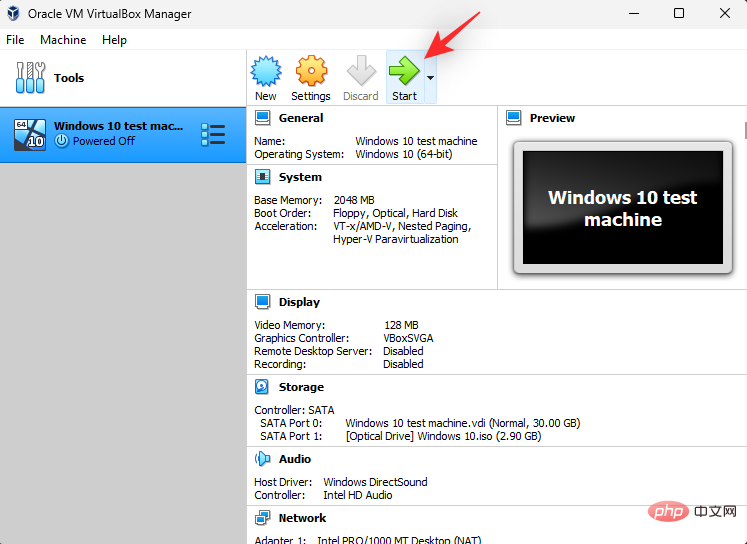
You can start the virtual machine by selecting the same virtual machine on the VirtualBox homepage and clicking Start.
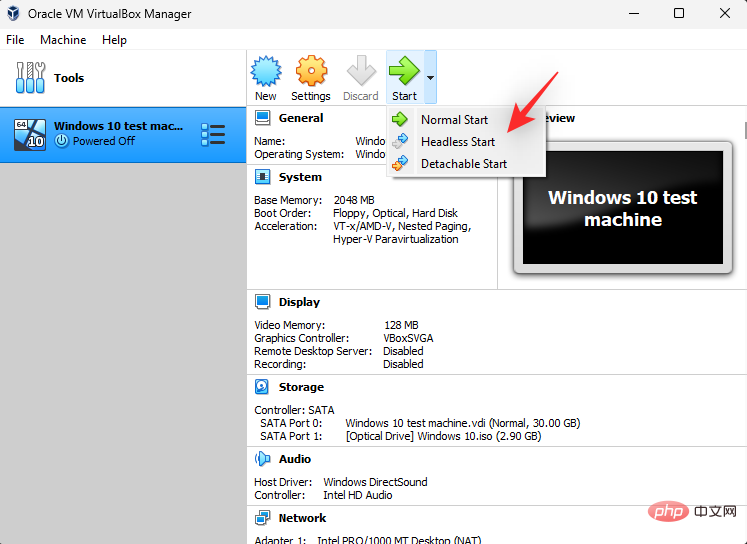
You can click the drop-down menu to access the following startup options for your virtual machine.
- Headless boot
- Removable boot
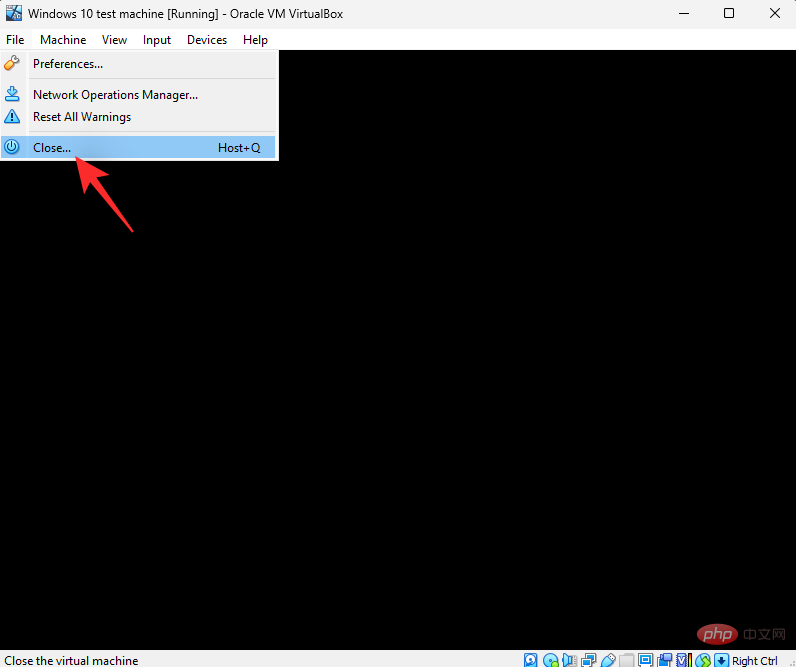
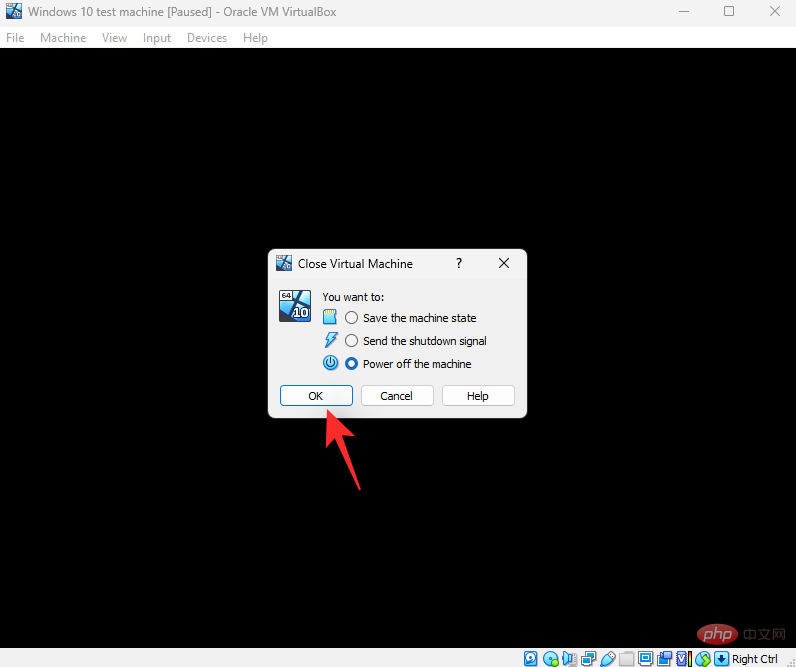
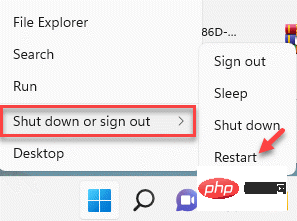
To shut down the machine, you can click File > Shutdown .
You can now choose one of the following options based on your preference.
- Save Machine State: This will simulate hibernation and start the machine from its current state when you turn it on in the future.
- Send shutdown signal: This will be the shutdown signal sent to the virtual machine. The operating system can then respond according to its default power settings.
- Power off the machine: This will simulate a manual power off of the virtual machine.
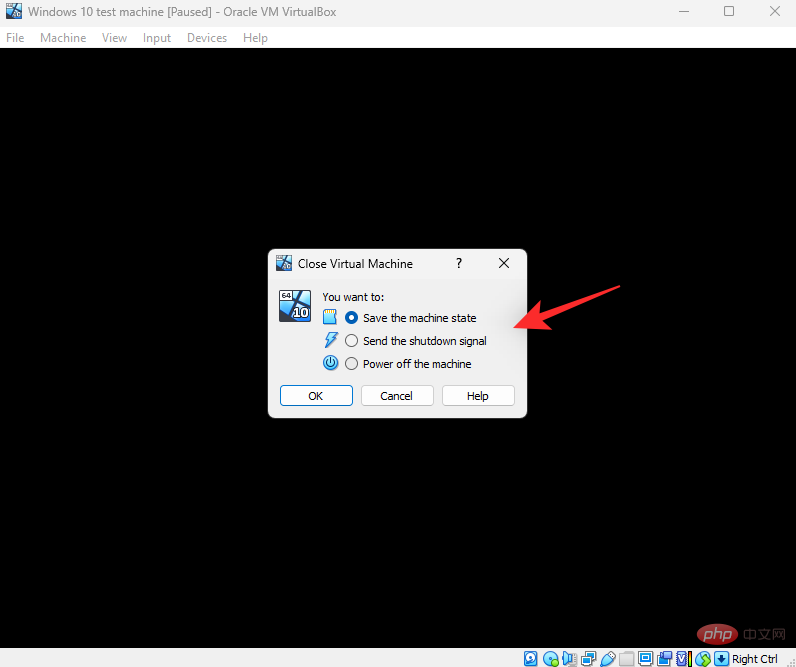
Click "OK" after making your selection.
You can also use the Host Q keyboard shortcut to access the Shutdown option. Host keys can be customized to your liking. By default, Right Ctrl will be the host key for every virtual machine created in VirtualBox.
2. Managing Resources
Let’s see how to manage resources such as RAM, video memory, graphics controllers, storage devices, monitors, audio devices, network interfaces, and serial ports .
Sometimes you may want to allocate more resources to a virtual machine. Here's how you can do the same thing in VirtualBox.
Launch VirtualBox on your system and click on the relevant virtual machine on the left.
Click Settings.
Click System.
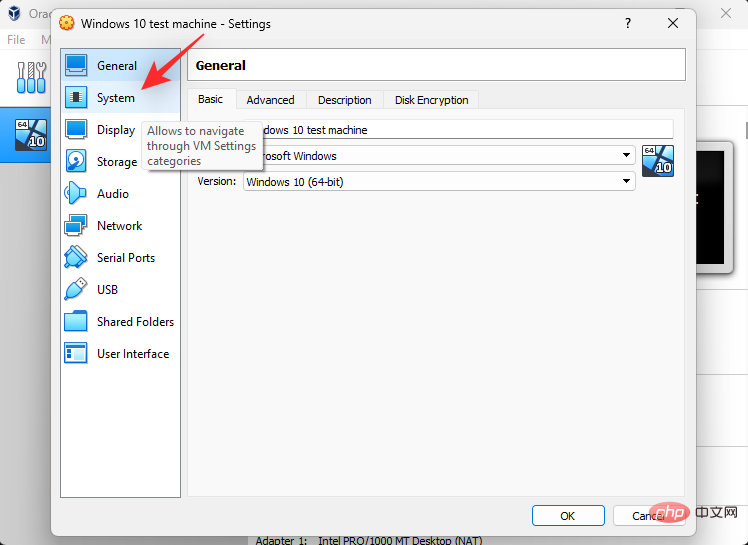
Use the Base Memory slider to increase or decrease the amount of RAM allocated to the virtual machine.
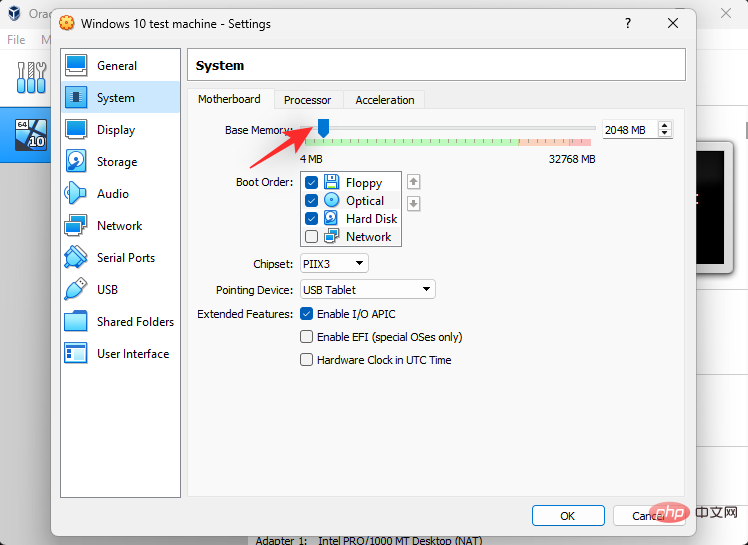
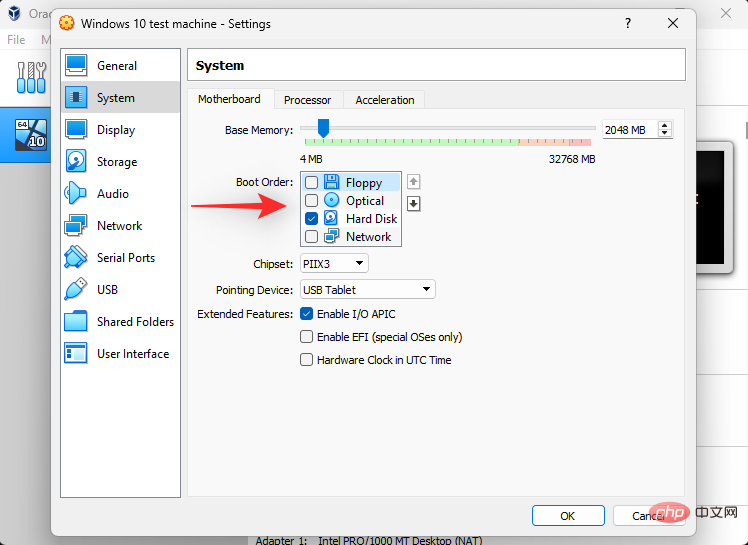
Use the Boot Order section to manage your boot devices. Check the checkboxes of boot devices to include them or uncheck the same checkboxes to exclude them.
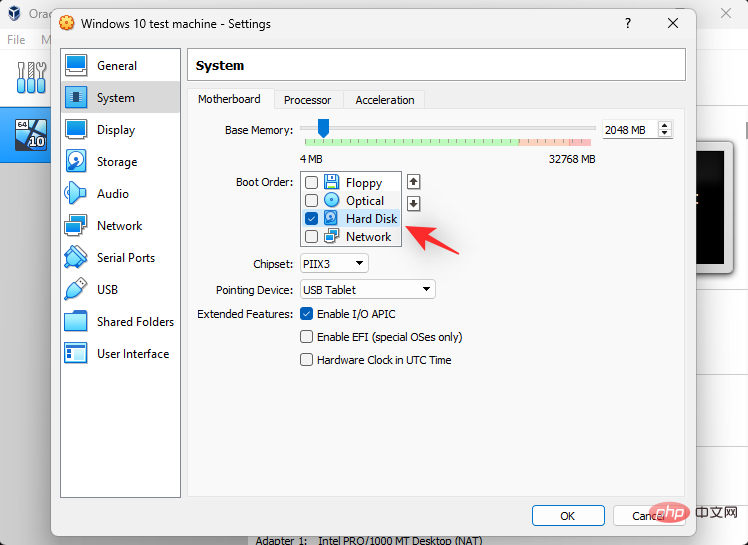
You can also reorder the devices to change the boot order. Click and select a device.
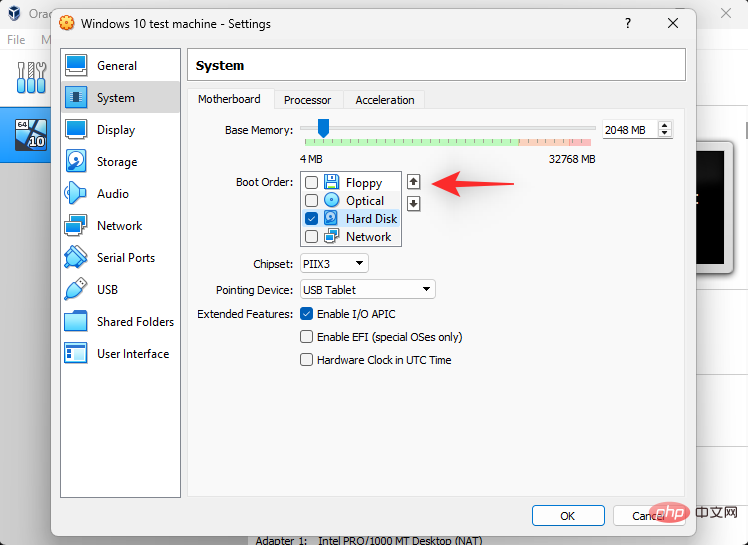
Now use the arrows on the right to move it up or down in the boot order as needed.
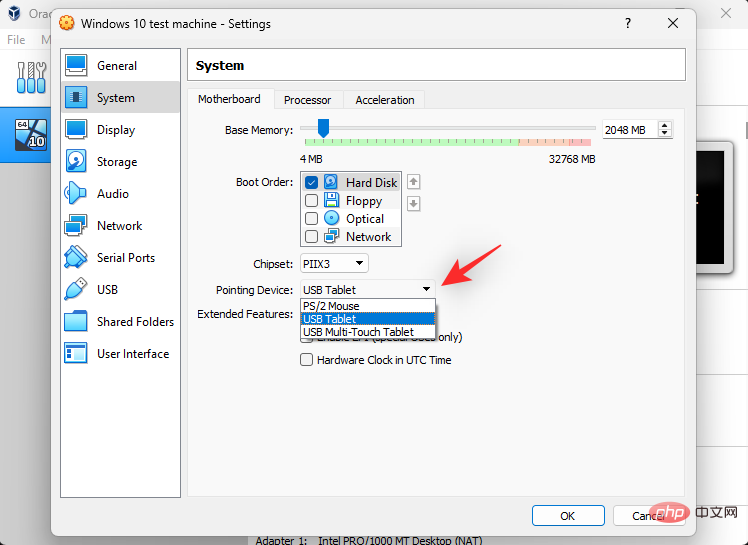
#If your operating system does not support touch input, you can use the Pointing Device's drop-down menu to select mouse input.
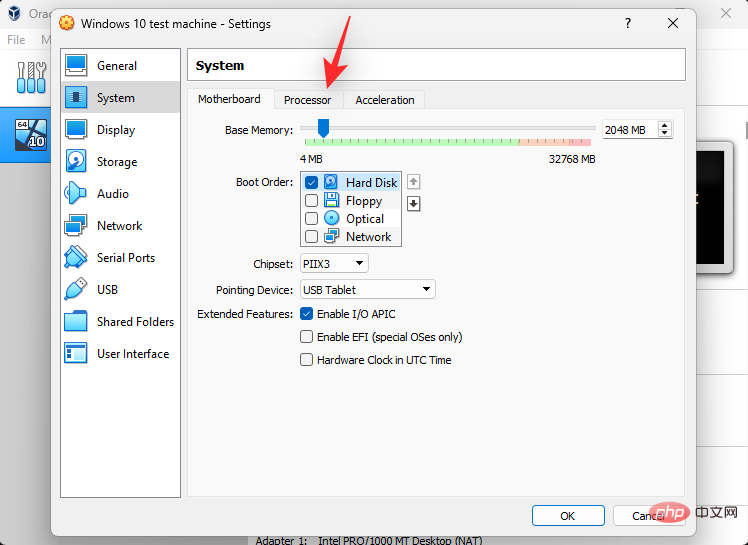
Now click and switch to the Processor tab.
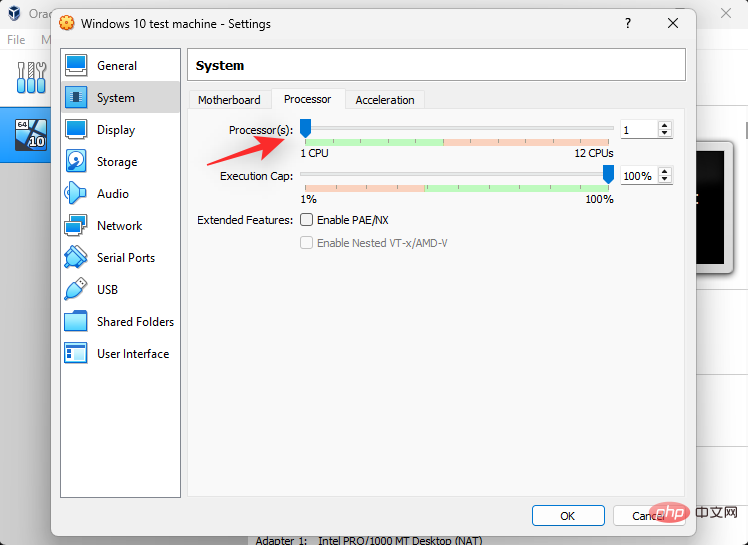
Use the Processor slider to increase or decrease the number of CPU threads used by the virtual machine. If you have a multi-CPU setup, then you should set a different slider for each CPU in this section.
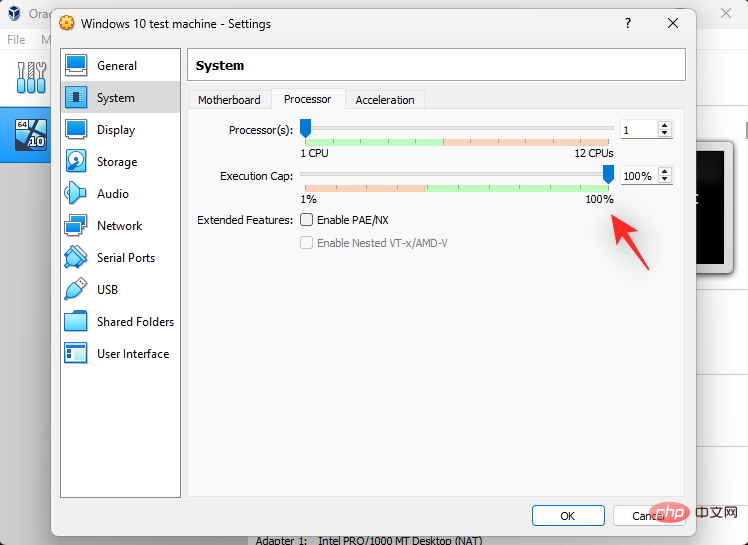
You can use the Execution Cap slider to indicate the CPU cap on allocated threads.
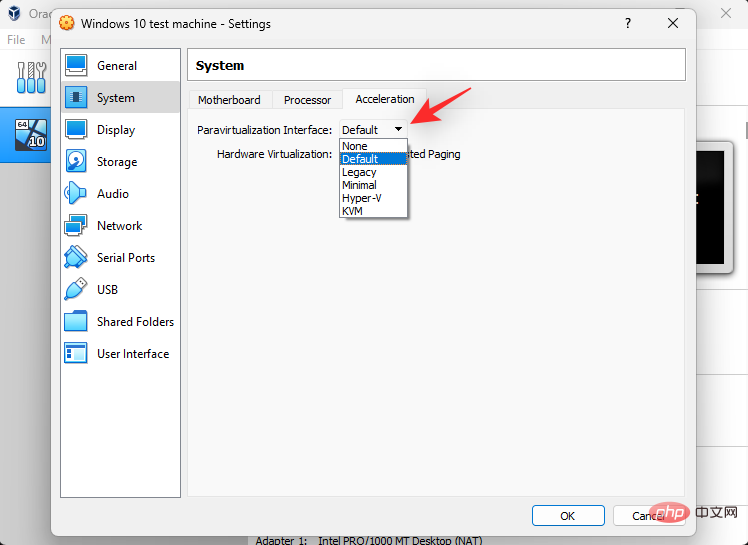
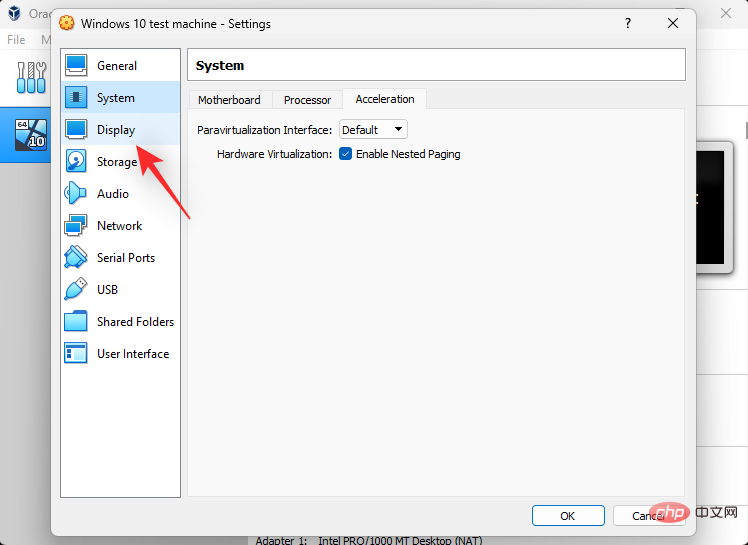
Click and switch to the Acceleration tab.

You can select your paravirtualization interface in this tab. This selection will help your guest operating system kernel work as expected and provide additional functionality based on your hardware. Here are the options available to you and the recommended operating systems for each.
- Minimum: Mainly required by the Mac OS X operating system.
- KVM: Linux hypervisor interface. Recommended choice for Linux operating system.
- Hyper-V: Microsoft's hypervisor interface, recommended for most Windows guest operating systems.
- None: Turn off the paravirtualization interface
- Default: This is the default option until you make a custom selection. It allows VirtualBox to choose the appropriate paravirtualization interface based on the operating system you are using.
- Legacy: This option applies when you are installing with an older version of VirtualBox and using a deprecated operating system.
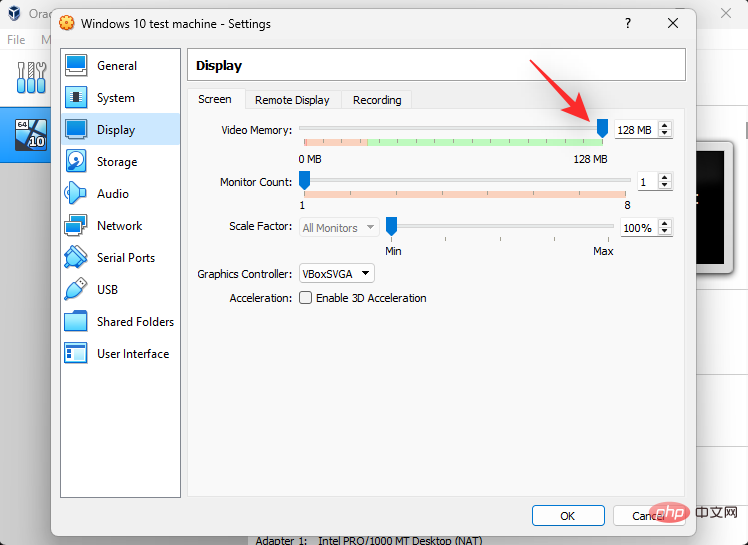
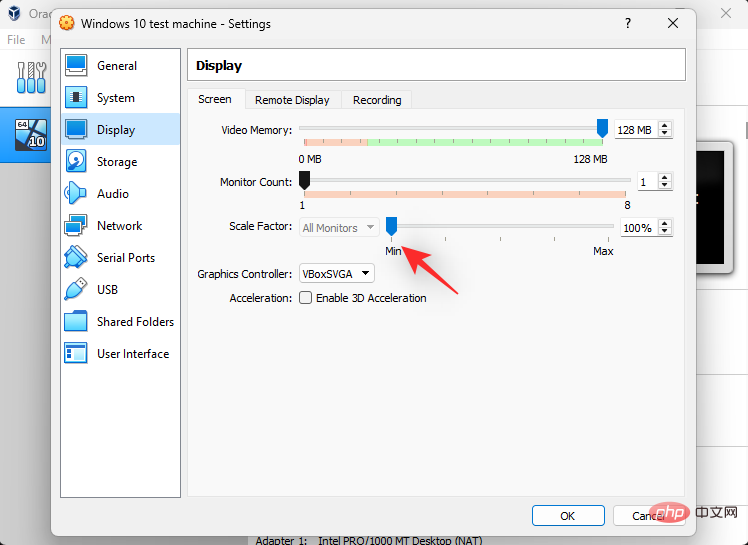
#When finished, click on the left to display.
#You can adjust the amount of video memory used by the virtual machine by adjusting the slider at the top.
If you have a multi-monitor setup, you can use the Monitor Count slider to increase or decrease the number of monitors used by the virtual machine.
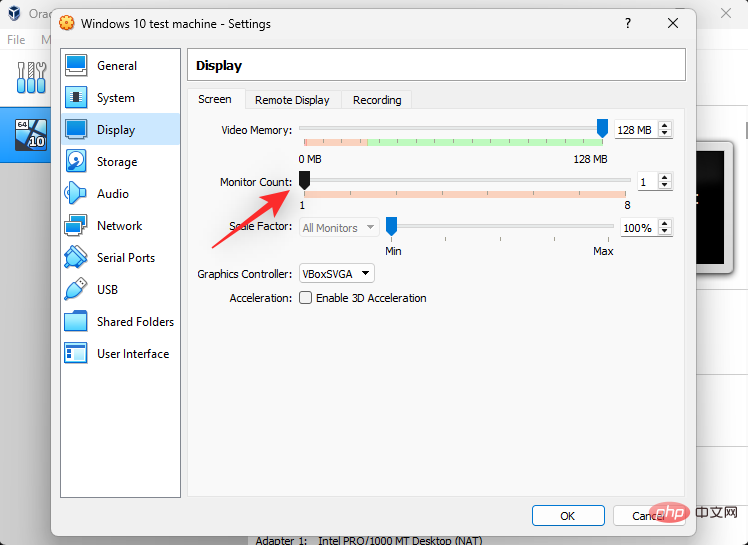
If your monitor has scaling issues, you can use the Scale Factor slider to increase or decrease the same value.
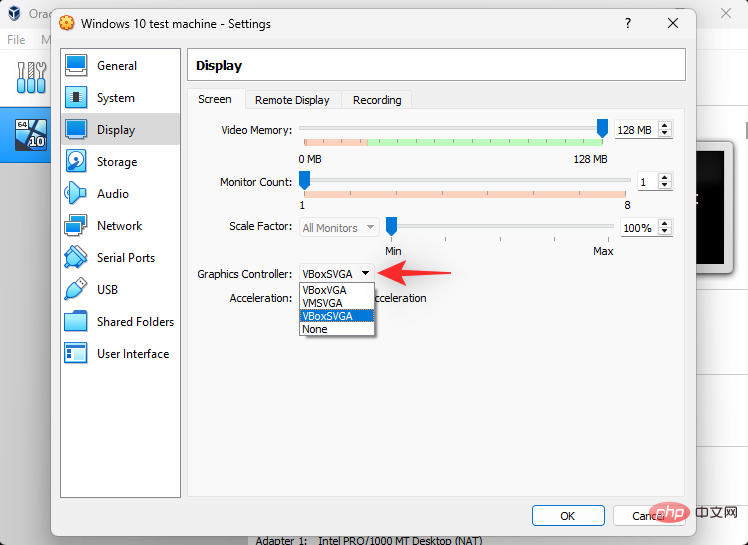
- VBoxVGA: This is an older analog graphics controller with poor 3D capabilities. Recommended for older versions of VirtualBox and older versions of Windows released before Windows 7.
- VMSVGA: This is a newer analog graphics controller with VMware SVGA 3D acceleration. It is a recommended choice for Linux users.
- VBoxSVGA: This is the same analog controller as VMSVGA. The only difference is hardware wise it reports itself with the same PCI ID as the VBoxVGA controller. This is the recommended graphics controller for modern versions of Windows.
- None: This will force VirtualBox to abandon the emulated graphics controller. This is the recommended option if you don't need a GPU or use a dedicated GPU with PCI passthrough to the virtual machine.
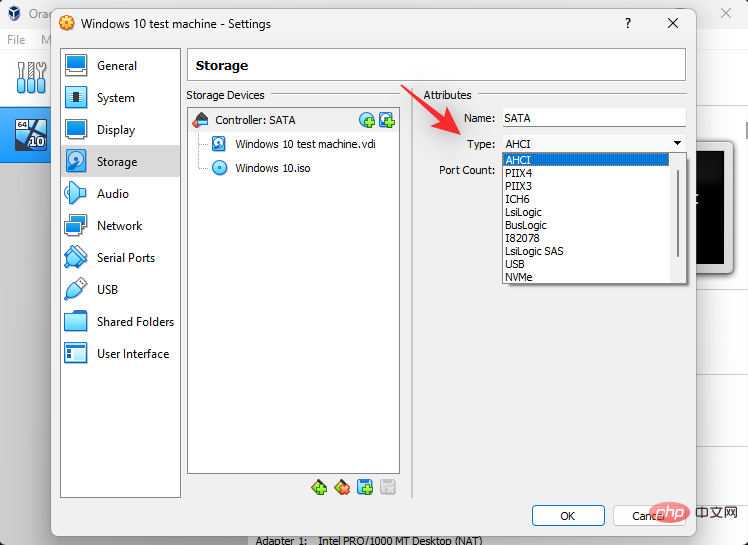
Storage on the left.

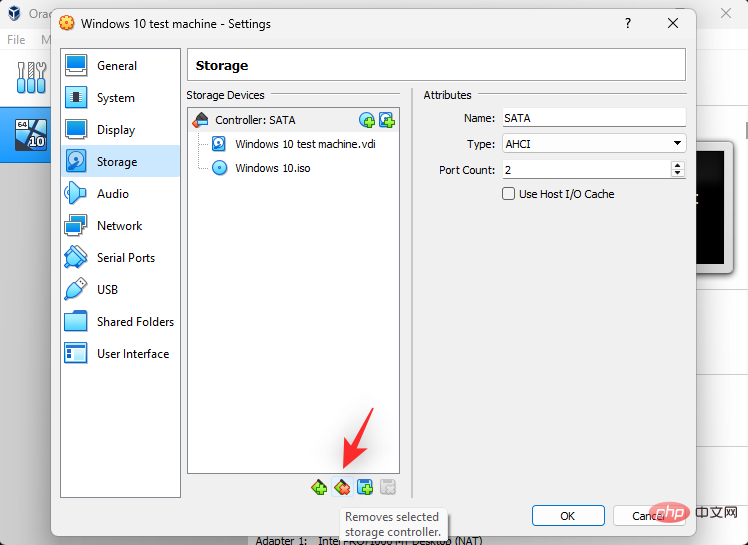

Type drop-down menu.
disk icon next to the storage controller as shown below to add the virtual disk to your computer.
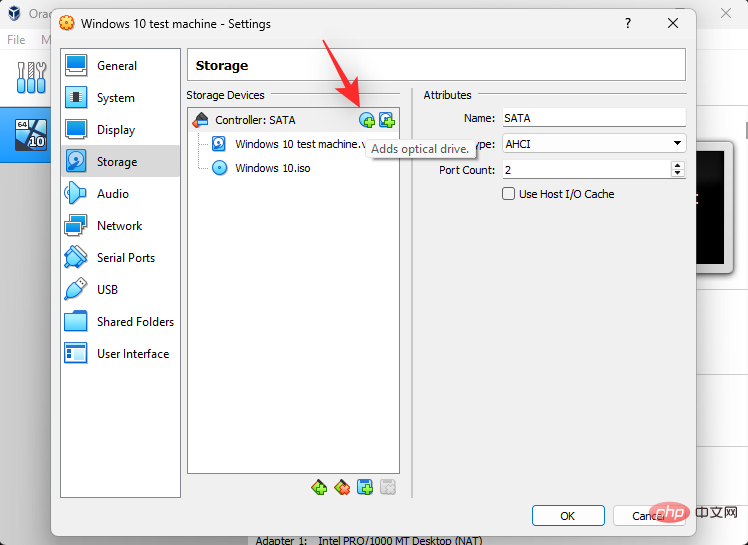
drive icon next to the storage controller to add a virtual drive to the virtual machine.
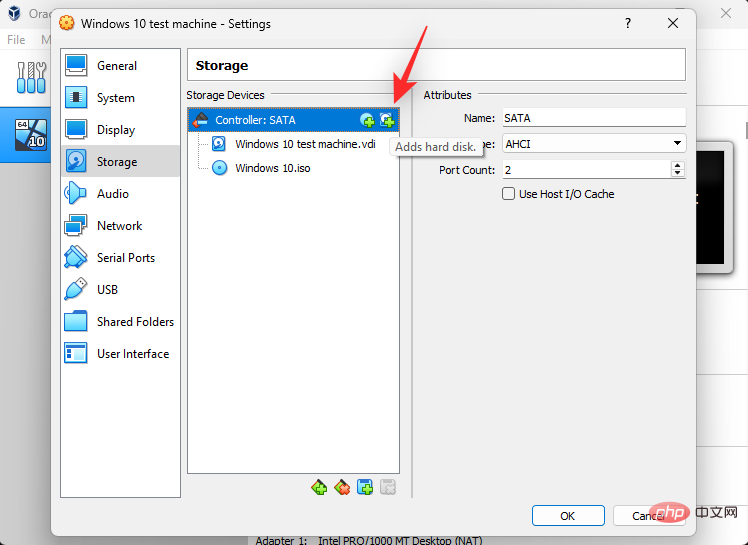
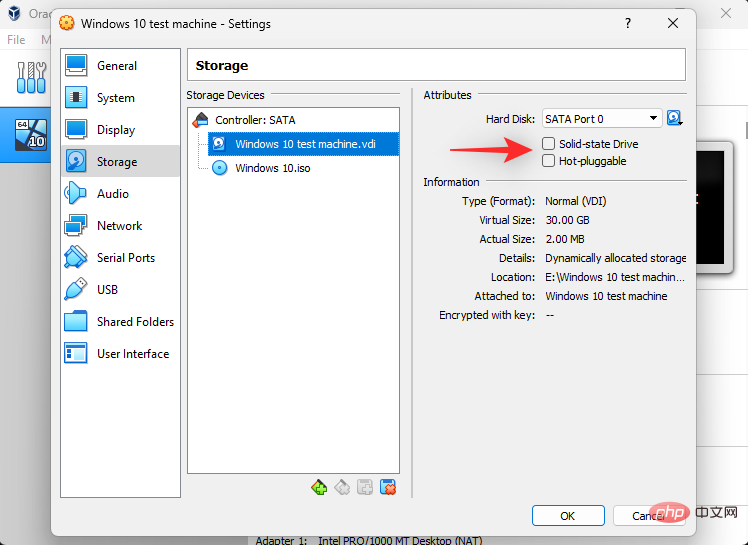
You can select a new virtual drive using the drive iconnext to the assigned SATA port. You can also use the same option to create a new virtual drive for your machine in VirtualBox.
Check the following boxes based on the type of drive you wish to emulate in your environment.
- SSD
- Hot Swap
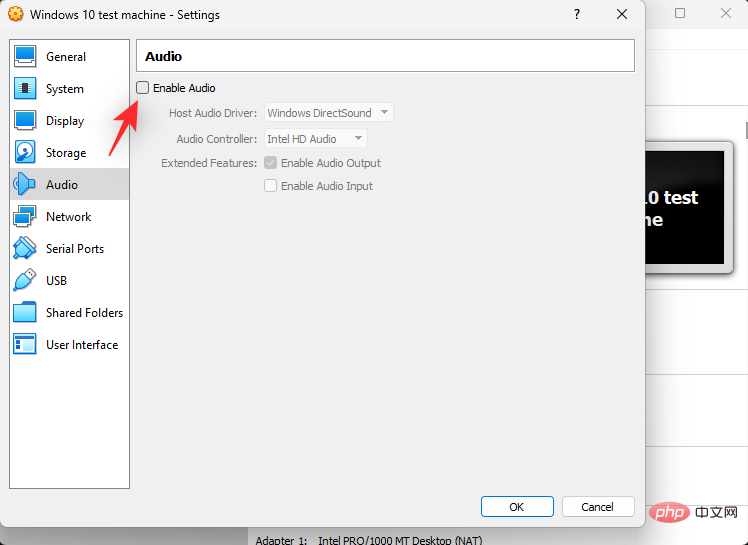
We can now go ahead and customize your machine’s audio device . Click Audio on the left.
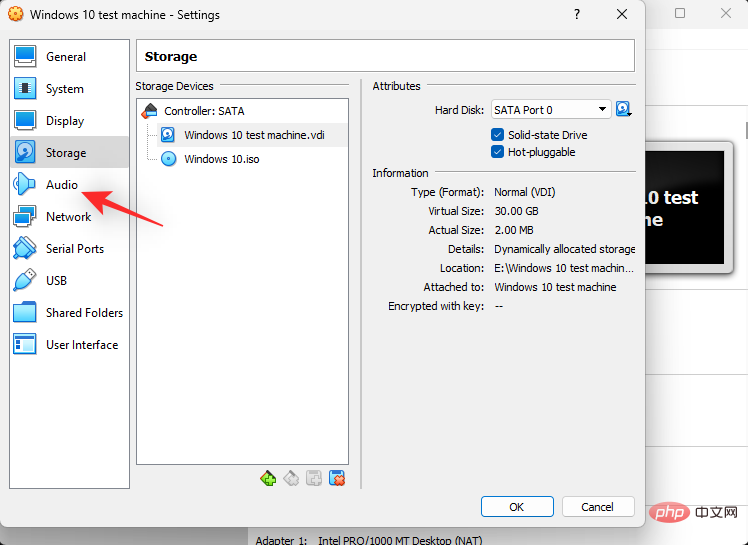
# Depending on your preference, check or uncheck the Enable Audio checkbox.
Click the drop-down menu for Host Audio Driver and select your audio driver.

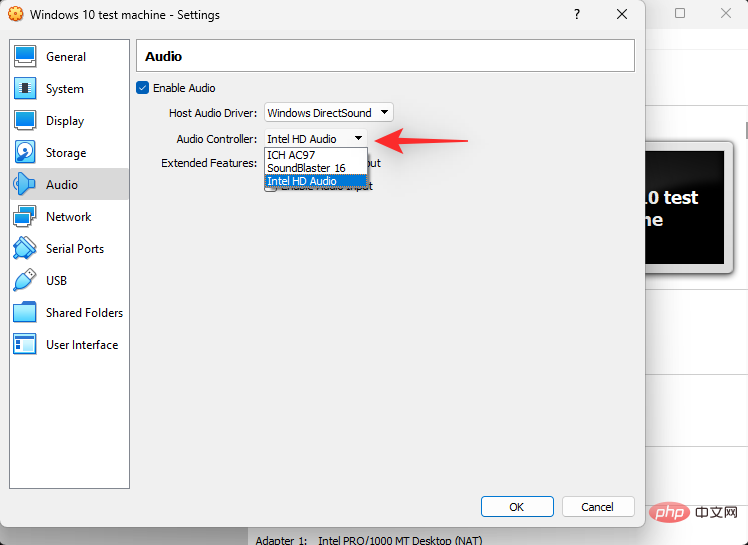
Again, use the Audio Controller drop-down menu to select your sound controller.
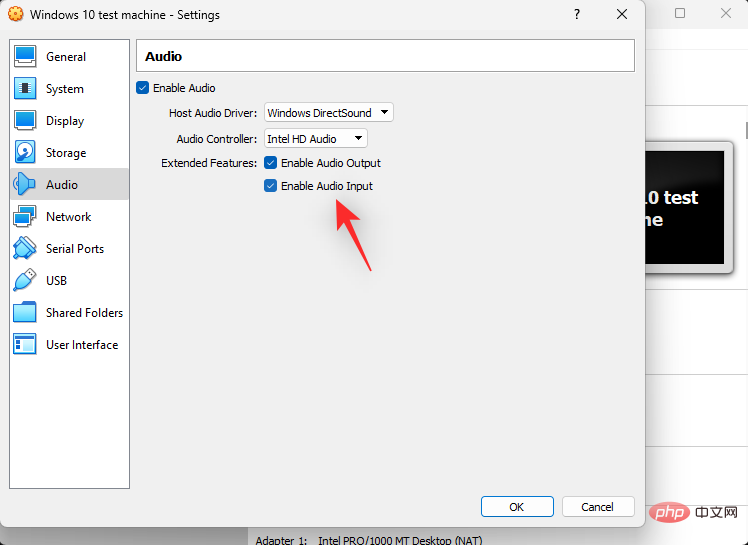
According to your preferences, check the following boxes under Extensions.
- Enable audio output: This option will help enable audio output for your virtual machine through your default device.
- Enable Audio Input: This will allow your virtual machine to access and use your audio input device from your host machine.
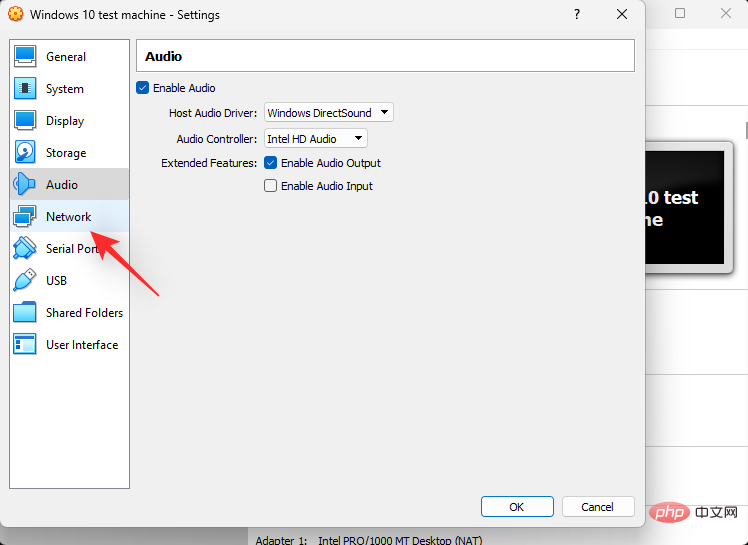
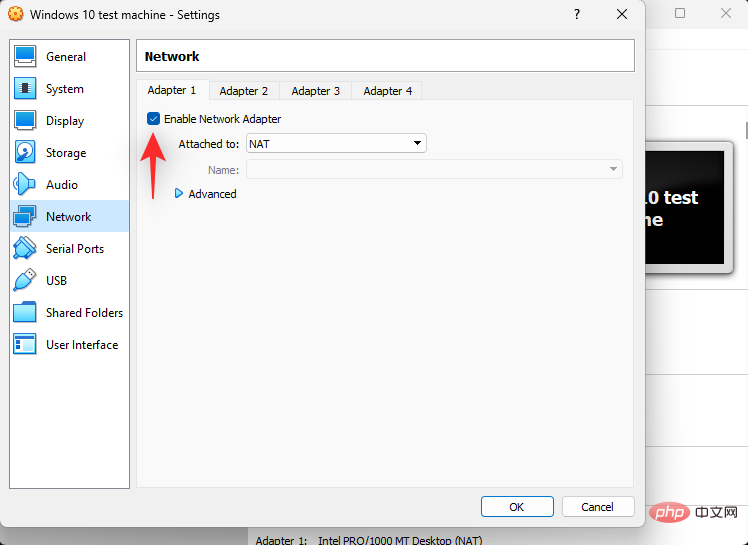
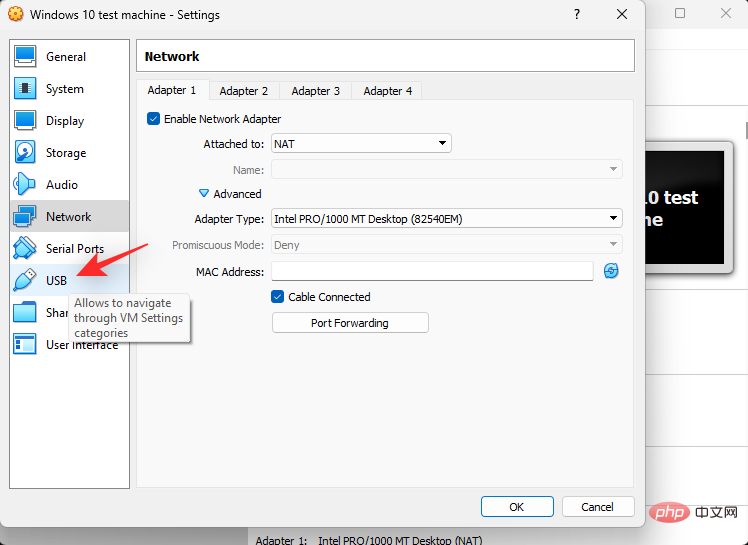
Click and select Network on the left.
If you wish to use the selected adapter, select the Enable Network Adapter checkbox. You can enable as many network adapters as needed using the tabs at the top.
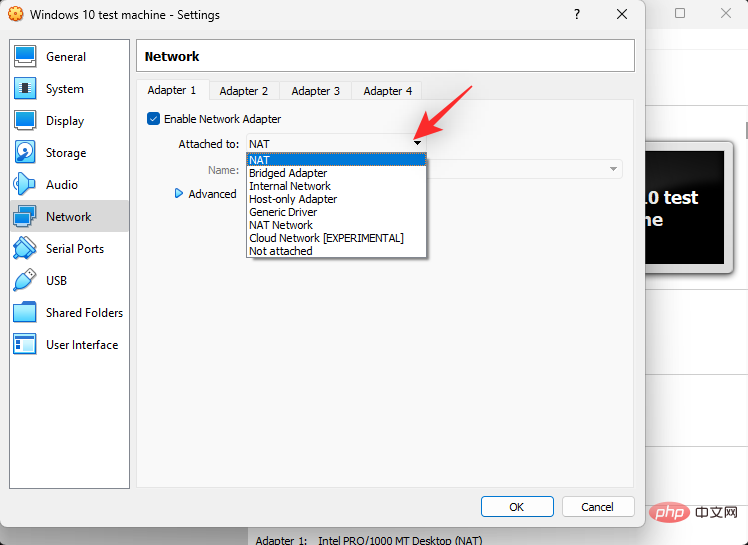
Now click on the drop-down menu attached to and configure your virtualized network adapter as required.
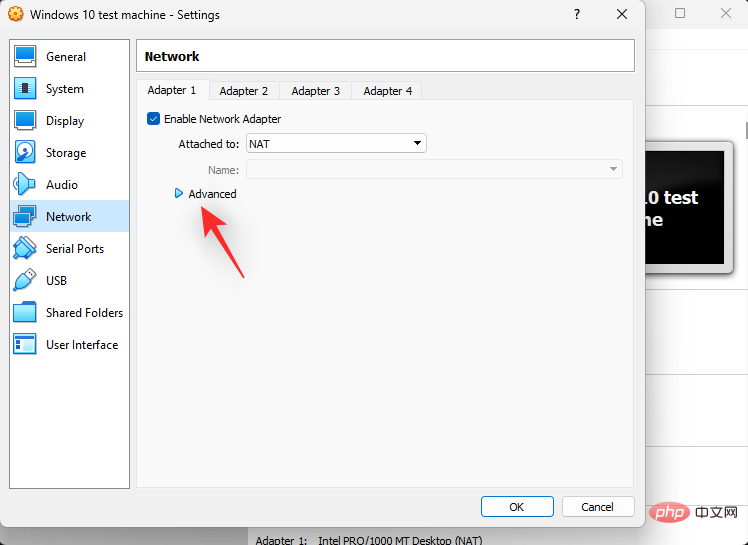
Click Advanced to configure additional settings for your network adapter.
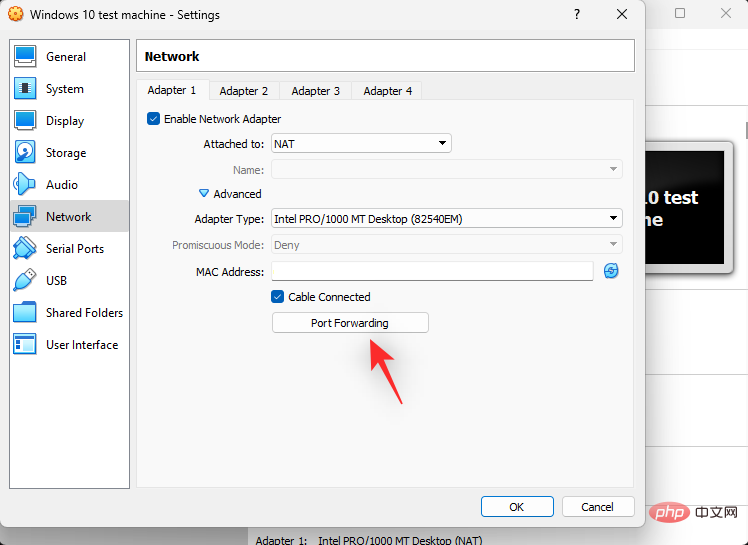
If necessary, click Port Forwarding and configure it to your preference.
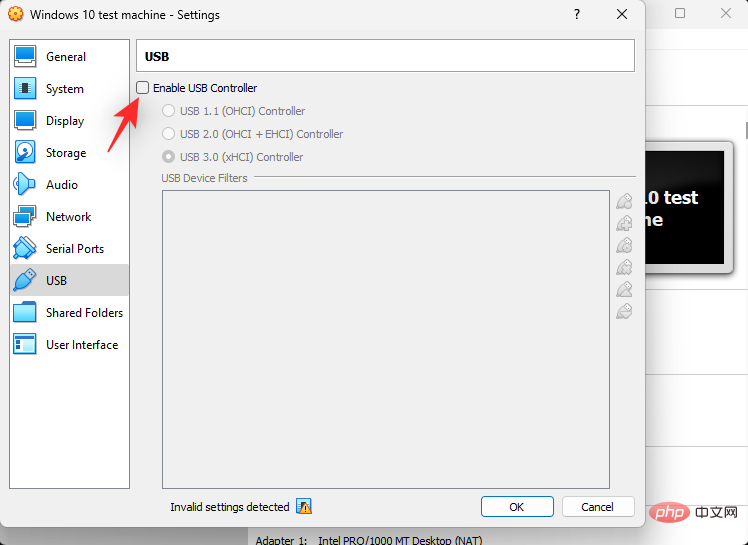
Click USB on the left.
If you wish to use a USB controller in the virtual machine, select the Enable USB Controller checkbox.
Now click on the on the right to add a new USB icon.
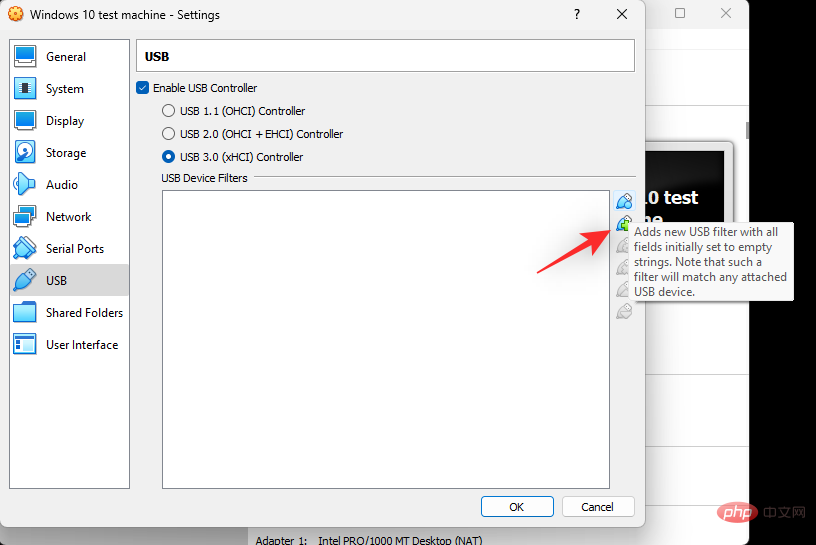
#Select the desired USB device from the USB devices available on the host. Continue to add more USB devices as needed, based on your current needs and your host's setup.

Finally, click OK.
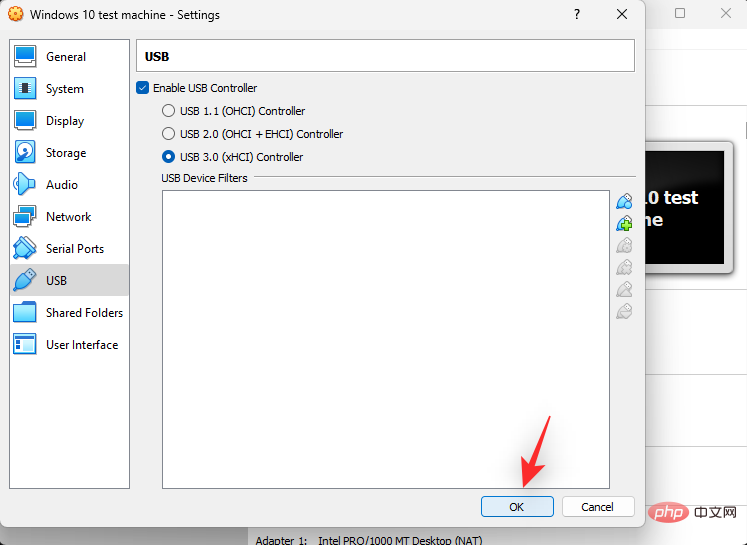
That's it! You will now customize the resources for your new virtual machine in VirtualBox.
Troubleshooting: How to Solve VirtualBox Issues
Here are some common issues encountered when setting up a new machine in VirtualBox. You can use the above fixes to try to resolve your issue accordingly.
Display Issues
Display issues are primarily caused by incorrect allocation of video memory and graphics controller. We recommend that you verify and assign the correct one based on your host and virtualization operating system.
Storage Issues
Storage issues can occur due to incorrect storage controller assignments or incorrect number of SATA ports. It's also possible that your boot order assignment is incorrect or is missing newer virtual drives and disks that you added. We recommend that you perform the same verification in your virtual machine setup. Also, keep in mind that virtual disks may not appear without an ISO or disk image assigned to them, depending on the operating system.
Audio Issues
Depending on your hardware and its PIN configuration, audio issues may or may not occur when virtualizing. We recommend that you adjust your audio settings and add new devices based on availability. You can also try switching drivers or audio controllers.
USB 2.0 and 3.0 Issues
With VirtualBox, out-of-the-box USB support is limited. USB 2.0 and 3.0 are not supported unless you install the VirtualBox extension pack. Use the steps above to add it to your setup. This will help introduce USB 2.0 and 3.0 support as well as the following features on your virtual machines.
- Host Webcam Passthrough
- VirtualBox Remote Desktop Protocol
- Disk Image Encryption (AES)
- Intel PXE Boot ROM
FAQ
Here are some frequently asked questions about installing and setting up VirtualBox to help you stay up to date. let's start.
Can I transfer a virtual machine?
Yes, VirtualBox allows you to easily export and import virtual machines between different hosts. Use the File > Export Devices or the Ctrl E keyboard shortcut to perform the same operation.
What are snapshots in VirtualBox?
A snapshot is a saved state of a VM that allows you to restore data or restore the machine to its snapshot state. This comes in handy when making changes, testing code, or developing applications.
Can I use the same keyboard and mouse on my virtual machine?
Yes, you can use the same keyboard and mouse on the VM by default. Use host keys to easily switch between your host and virtual machines. By default, Right Ctrl is your host key. You can easily customize this key using VirtualBox preferences.
The above is the detailed content of How to Install and Use VirtualBox on Windows 11: 2022 Detailed Step-by-Step Tutorial. For more information, please follow other related articles on the PHP Chinese website!

Hot AI Tools

Undresser.AI Undress
AI-powered app for creating realistic nude photos

AI Clothes Remover
Online AI tool for removing clothes from photos.

Undress AI Tool
Undress images for free

Clothoff.io
AI clothes remover

AI Hentai Generator
Generate AI Hentai for free.
Hot Article
Hot Tools

Notepad++7.3.1
Easy-to-use and free code editor

SublimeText3 Chinese version
Chinese version, very easy to use

Zend Studio 13.0.1
Powerful PHP integrated development environment

Dreamweaver CS6
Visual web development tools

SublimeText3 Mac version
God-level code editing software (SublimeText3)
Hot Topics
 1378
1378
 52
52

 How to fix hypervisor errors in Windows 11
Apr 16, 2023 pm 12:37 PM
How to fix hypervisor errors in Windows 11
Apr 16, 2023 pm 12:37 PM
For many users, Windows has a hidden built-in feature for easily creating and managing virtual machines. This feature is called Hypervisor or Hyper-V. But like other Windows features, this one isn't completely bug-free. In this article, we will show you how to fix Hyper-V issues easily and quickly. So without further ado, let’s jump into the solution and get the virtual machine up and running. Fix 1 – Check if your system supports Hyper-V The first thing you should try is to check if your system supports Hyper-V and is still active. 1. You must restart the system. To do this safely, press Wi once
 Install Windows XP ISO on Windows 11 using VirtualBox
May 05, 2023 pm 02:25 PM
Install Windows XP ISO on Windows 11 using VirtualBox
May 05, 2023 pm 02:25 PM
Windows XP on Windows 11 VirtualBox Virtual Machine The steps given here to install a Windows XP ISO image using VirtualBox are not limited to Windows 11. Users can follow these steps on Linux such as Ubuntu, macOS, Windows 10, 7, or other operating systems they are using and have Virtualbox. Download Windows
 How to fix VMMEM high memory and CPU usage
Apr 18, 2023 pm 04:40 PM
How to fix VMMEM high memory and CPU usage
Apr 18, 2023 pm 04:40 PM
Vmmem or virtual memory can cause high CPU or memory usage due to various factors. One of the key reasons behind this issue is some resource-intensive processes running in the virtual host. However, if this is not the case and the VM still consumes a lot of system resources in idle mode, it may be a driver failure. This slows down the virtual machine and your work may stop. So, follow the steps below to resolve the issue quickly. Fix 1 – End all resource-intensive processes If you are running some heavy applications or software versions, expect vmmem to use a lot of resources. There is nothing unusual about this. Even if you can kill these processes directly, it will free up more resources for your device. NOTE – You can
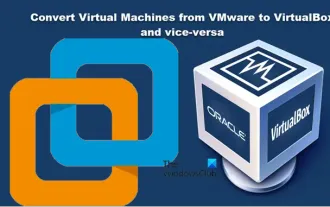 Convert VMware to VirtualBox and vice versa
Feb 19, 2024 pm 05:57 PM
Convert VMware to VirtualBox and vice versa
Feb 19, 2024 pm 05:57 PM
Virtual machines are an affordable way to experience and use multiple operating systems on a single computer. VMWare and VirtualBox are the two major brands in the virtual machine industry. You can easily convert a VMware virtual machine to a VirtualBox virtual machine and vice versa, giving you the flexibility to switch machines between them without having to recreate them. Migrating a virtual machine from VMWare to VirtualBox or vice versa is not complicated. Just follow the instructions below and it's easy to do. How to convert VMware to VirtualBoxVMwareVM is stored in .vmx format and then converted to .ovf, this is VirtualBox and VMWare
 How to install, configure and use the 'Windows Sandbox' feature
Feb 19, 2024 pm 01:00 PM
How to install, configure and use the 'Windows Sandbox' feature
Feb 19, 2024 pm 01:00 PM
Windows Sandbox is a feature built into the Windows 11 and Windows 10 operating systems that allows users to install and test unverified applications or visit websites in a lightweight virtual environment while protecting the main system from potential threats. Overall, this system provides a safe and isolated testing environment, similar to a virtual machine, but easier to use. Next, this article will introduce the detailed steps to install, configure and use the Windows Sandbox feature on Windows 11. Introduction to Windows Sandbox Features Windows Sandbox (also known as Windows Sandbox) is essentially a lightweight virtualization solution focused on providing efficient and secure virtual environments. compared to traditional
 The server encountered an error, 0x80070003, while creating a new virtual machine.
Feb 19, 2024 pm 02:30 PM
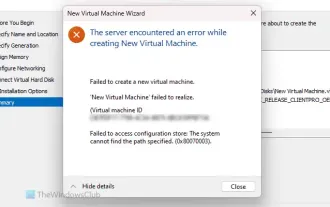
The server encountered an error, 0x80070003, while creating a new virtual machine.
Feb 19, 2024 pm 02:30 PM
If you encounter error code 0x80070003 when using Hyper-V to create or start a virtual machine, it may be caused by permission issues, file corruption, or configuration errors. Solutions include checking file permissions, repairing damaged files, ensuring correct configuration, and more. This problem can be solved by ruling out the different possibilities one by one. The entire error message looks like this: The server encountered an error while creating [virtual machine name]. Unable to create new virtual machine. Unable to access configuration store: The system cannot find the path specified. (0x80070003). Some possible causes of this error include: The virtual machine file is corrupted. This can happen due to malware, virus or adware attacks. Although the likelihood of this happening is low, you can't completely
 How to make an SSD the primary drive in Windows 11
May 15, 2023 pm 10:52 PM
How to make an SSD the primary drive in Windows 11
May 15, 2023 pm 10:52 PM
Why make SSD the primary drive in Windows 11? Pros: The difference between HDD and SSD is not a matter of degree, but of kind. HDDs have many moving parts - spindles, spinning disks, read/write arms, etc. - and damage to any one of them can cause the disk to fail. Therefore, durability is not HDD's strong suit. They also can't match the speeds offered by SSDs. HDD uses mechanical components, while SSD uses flash memory to save and access data. Since they have no moving parts, they are durable and less susceptible to damage from drops, which also makes them faster and more power-efficient. In most cases, SSDs will also last longer than their traditional counterparts. If you frequently introduce new files to your SSD, SS
 How to solve the problem that win11 virtual machine cannot connect to the network
Jan 04, 2024 pm 07:00 PM
How to solve the problem that win11 virtual machine cannot connect to the network
Jan 04, 2024 pm 07:00 PM
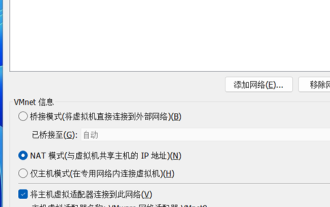
Many users have installed virtual machines on the win11 system after updating it, but many of them will be unable to connect to the network. So today I will bring you the solution to the problem that the win11 virtual machine cannot connect to the network. Come and see how to solve it. . What to do if the win11 virtual machine cannot connect to the network 1. First open the virtual machine and click "Edit - Virtual Network Editor - Restore Default Settings" in order. After doing this, it can be used. 2. In fact, in many cases it is due to changes in the network driver that the network cannot operate normally. You only need to reinstall the network module once! 3. If you encounter the problem that the network is suddenly cut off during use, even if the adapter has been configured correctly, the network will still be displayed.