

How to Dual Boot Windows 11 and Ubuntu [Both Directions]

Although Windows is the dominant operating system on the market, Linux is slowly but surely growing in popularity, and Ubuntu is one of the most interesting Linux distributions.
If you want to learn more about the differences between the two operating systems, check out our Windows 11 vs. Ubuntu article for an in-depth comparison.
As for this guide, we will show you how to dual-boot Windows 11 and Ubuntu using both operating systems side by side.
What are the hardware requirements for Ubuntu?
- CPU: 2GHz or higher
- Memory: 4GB or more
- Storage: 25GB or more
- Graphics Card: Graphics card with at least 256MB of RAM
As you can see, compared to Windows 11 requirements , Ubuntu's hardware requirements are relatively modest, and some distros can run on PCs below these requirements.
How to dual-boot Windows 11 and Ubuntu?
Dual booting is the most feasible way to have two operating systems that you intend to use regularly, and can be done in a variety of ways.
If you already have Windows 11 installed on your computer, like most users, follow these steps. Sometimes the opposite is true and you can also install Windows 11 after Ubuntu.
Installing Ubuntu after Windows 11
1. Create a dedicated Ubuntu partition
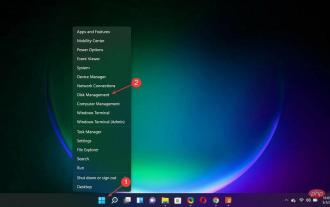
- Open"Disk Management". You can do this by pressing and selecting Disk Management from the list. Windows KeyX
![How to Dual Boot Windows 11 and Ubuntu [Both Directions]](/static/imghw/default1.png)
- Now, you need to select the drive that you want to shrink. Choose one with at least 50GB of free space, but you may need more if you plan to use Ubuntu extensively.
- Right-click on the desired drive and select "Shrink Volume" from the context menu.
- Enter the amount of space you want to shrink (in MB) set to 50000 or more and click Shrink.
- Next, click on the unallocated space you just created and select New Simple Volume.
- Set the simple volume size (in MB) to the maximum value and click Next.
- Finally, set the desired drive letter and label and click Finish when finished.
![How to Dual Boot Windows 11 and Ubuntu [Both Directions]](https://img.php.cn/upload/article/000/887/227/168153684414225.png)
![How to Dual Boot Windows 11 and Ubuntu [Both Directions]](https://img.php.cn/upload/article/000/887/227/168153684535044.png)
![How to Dual Boot Windows 11 and Ubuntu [Both Directions]](https://img.php.cn/upload/article/000/887/227/168153684533475.png)
You can also try Paragon Partition Manager, which is more efficient and has additional features that are useful for properly formatting partitioned drives.
2. Download the Ubuntu ISO and create a bootable flash drive
- Visit the Ubuntu download page and click the "Download" button Download the ISO file.
- Wait for the download to complete.
- Connect the USB flash drive to the computer. You will need 4GB or larger.
- Download Rufus and run it.
- Select your flash drive in the device list.
- Click the Select button and find your Ubuntu ISO file.
- Click "Start" to start the process.
- You will be asked to format the drive, so click "OK" to continue.
![How to Dual Boot Windows 11 and Ubuntu [Both Directions]](https://img.php.cn/upload/article/000/887/227/168153684570735.png)
![How to Dual Boot Windows 11 and Ubuntu [Both Directions]](https://img.php.cn/upload/article/000/887/227/168153684533871.png)
![How to Dual Boot Windows 11 and Ubuntu [Both Directions]](https://img.php.cn/upload/article/000/887/227/168153684557244.png)
![How to Dual Boot Windows 11 and Ubuntu [Both Directions]](https://img.php.cn/upload/article/000/887/227/168153684594299.png)
![How to Dual Boot Windows 11 and Ubuntu [Both Directions]](https://img.php.cn/upload/article/000/887/227/168153684687682.png)
![How to Dual Boot Windows 11 and Ubuntu [Both Directions]](https://img.php.cn/upload/article/000/887/227/168153684655619.png)
Wait for the process to complete. After creating the Ubuntu Live drive, you can install Ubuntu.
3. Select Ubuntu Drive and Install Ubuntu
- Make sure the Ubuntu flash drive is connected to your PC.
- When the computer starts, press and hold , or access the boot menu and select the USB drive. The key may vary depending on the motherboard. F2F10F12
- If you cannot open the boot menu, access the BIOS and set the flash drive to One starts the device and saves the changes.
- When your PC boots from the flash drive, select the option to Install Ubuntu.
- Select the language and keyboard layout you want to use.
- Then, select Normal installation and click Continue. You can also use a minimal installation and download the necessary updates later.
- SelectOther content.
- Next, select the partition you created for Ubuntu and format it with the ext4 file system.
- Click Install now.
- Select your location.
- Enter your Ubuntu login details and click Continue.
- Wait for the installation to complete.
- Click the Restart Now button.
![How to Dual Boot Windows 11 and Ubuntu [Both Directions]](https://img.php.cn/upload/article/000/887/227/168153684625303.jpg)
![How to Dual Boot Windows 11 and Ubuntu [Both Directions]](https://img.php.cn/upload/article/000/887/227/168153684679177.png)
![How to Dual Boot Windows 11 and Ubuntu [Both Directions]](https://img.php.cn/upload/article/000/887/227/168153684660985.png)
![How to Dual Boot Windows 11 and Ubuntu [Both Directions]](https://img.php.cn/upload/article/000/887/227/168153684666963.png)
![How to Dual Boot Windows 11 and Ubuntu [Both Directions]](https://img.php.cn/upload/article/000/887/227/168153684786857.png)
![How to Dual Boot Windows 11 and Ubuntu [Both Directions]](https://img.php.cn/upload/article/000/887/227/168153684743522.png)
![How to Dual Boot Windows 11 and Ubuntu [Both Directions]](https://img.php.cn/upload/article/000/887/227/168153684741519.png)
![How to Dual Boot Windows 11 and Ubuntu [Both Directions]](https://img.php.cn/upload/article/000/887/227/168153684789466.jpg)
#Once you've done this, you just need to choose the operating system you want to boot into. As you can see, dual-booting Windows 11 and Ubuntu is easy, especially if you already have Windows installed.
Installing Windows 11 after Ubuntu
1. Create a dedicated window partition
- Open a terminal and enter the following command:
<strong>sudo apt install gparted</strong> - Press Y to continue.
- Now open GParted.
- Find the partition to be shrunk. Keep in mind that you cannot shrink an Ubuntu partition while Ubuntu is running. If you want to do this, you'll need to use an Ubuntu flash drive.
- Right-click the partition and select Uninstall.
- After unmounting the partition, click Resize/Move.
- Set the new size to 50000 or larger and click Resize/Move.
- Click the Apply icon in the toolbar to save changes.
- Unallocated space will now be displayed. Right-click it and select New.
- Set the file system to ntfs and set the maximum size of the partition. Now click Add.
- Click the Apply icon to save changes.
- Finally, find the partition you unmounted, right-click on it and select Mount.
![How to Dual Boot Windows 11 and Ubuntu [Both Directions]](https://img.php.cn/upload/article/000/887/227/168153684741450.png)
![How to Dual Boot Windows 11 and Ubuntu [Both Directions]](https://img.php.cn/upload/article/000/887/227/168153684813688.png)
![How to Dual Boot Windows 11 and Ubuntu [Both Directions]](https://img.php.cn/upload/article/000/887/227/168153684814390.png)
![How to Dual Boot Windows 11 and Ubuntu [Both Directions]](https://img.php.cn/upload/article/000/887/227/168153684867426.png)
![How to Dual Boot Windows 11 and Ubuntu [Both Directions]](https://img.php.cn/upload/article/000/887/227/168153684891975.png)
![How to Dual Boot Windows 11 and Ubuntu [Both Directions]](https://img.php.cn/upload/article/000/887/227/168153684877138.png)
2. Download Windows 10 and create bootable media
- Go to the Microsoft download page.
- Select the version of Windows 10 you want to download.
- Select a language and make sure the 64-bit version is selected.
- Download the ISO file.
- Connect the USB flash drive to the computer. You'll need an 8GB drive, but a larger drive may be better.
- Open GParted and select your USB flash drive from the top right corner. It should be named /dev/sdb.
- If any partition has a key icon next to its name, right-click on them and select Uninstall.
- Right-click on the partition and select Format.
- Set the partition size to the maximum value and set the file system to ntfs or exfat.
- Click Apply in the toolbar to save changes.
- Locate the Windows 10 ISO file, right-click it and select Open with, then select Disk Image Mounter.
- Open the mounted ISO file.
- Select all files and copy them.
- Move to your USB flash drive and paste the file there.
![How to Dual Boot Windows 11 and Ubuntu [Both Directions]](https://img.php.cn/upload/article/000/887/227/168153684889870.png)
![How to Dual Boot Windows 11 and Ubuntu [Both Directions]](https://img.php.cn/upload/article/000/887/227/168153684958191.png)
![How to Dual Boot Windows 11 and Ubuntu [Both Directions]](https://img.php.cn/upload/article/000/887/227/168153684940705.png)
![How to Dual Boot Windows 11 and Ubuntu [Both Directions]](https://img.php.cn/upload/article/000/887/227/168153684962652.png)
![How to Dual Boot Windows 11 and Ubuntu [Both Directions]](https://img.php.cn/upload/article/000/887/227/168153684985169.jpg)
![How to Dual Boot Windows 11 and Ubuntu [Both Directions]](https://img.php.cn/upload/article/000/887/227/168153684925905.jpg)
We discovered that not all users have the option to mount ISO files in the context menu. If this is the case, do the following:
- Open Terminal.
- Now run the following command:
<strong>sudo mkdir /mnt/windows10/<br>sudo mount -t auto -o loop /path/to/window-10-iso /mnt /windows10/</strong> - Once you have done this, you should be able to do this by going to
<strong>/mnt/windows10/</strong>
Note that we are using the Windows 10 ISO because the Windows 11 ISO is not officially available for download yet.
3. Boot from the flash drive and install Windows 10
- Enter the BIOS and go to the Security section. Disable Secure Boot.
- Save changes and exit BIOS.
- Press the dedicated key to open the boot menu and select your flash drive. If you don't know the key, you can set the USB flash drive as the first boot device.
- When booting from the flash drive, select the desired language time format.
- Select the version to install and accept the terms of service.
- Then, select "Customize: Install Windows Only (Advanced) ".
- It is very important to choose a partition specifically for Windows. If you choose the wrong partition, you will lose your files permanently.
- The installation will now begin. Wait while Windows is installing.
- After the installation is complete, your PC will restart.
![How to Dual Boot Windows 11 and Ubuntu [Both Directions]](https://img.php.cn/upload/article/000/887/227/168153684967278.png)
![How to Dual Boot Windows 11 and Ubuntu [Both Directions]](https://img.php.cn/upload/article/000/887/227/168153684990877.png)
![How to Dual Boot Windows 11 and Ubuntu [Both Directions]](https://img.php.cn/upload/article/000/887/227/168153685049415.png)
![How to Dual Boot Windows 11 and Ubuntu [Both Directions]](https://img.php.cn/upload/article/000/887/227/168153685033375.png)
4. Join the Windows Insider Program and upgrade to Windows 11
- Open the Settings app and go toUpdate and Security" section.
- In the left pane, select Windows Insider Program. Now click on the Get Started button in the right pane.
- Click "LinkAccount" and select your Microsoft account.
- Select "Development Channel" and click "Confirm".
- Accept the privacy statement and click Restart Now.
- After joining the Windows Insider Program, return to the Settings app.
- Go to the "Update & Security" section and click the "Check for Updates" button.
- Windows will now automatically download Windows 11 updates.
- After downloading the update, restart your computer to install it.
![How to Dual Boot Windows 11 and Ubuntu [Both Directions]](https://img.php.cn/upload/article/000/887/227/168153685027399.png)
![How to Dual Boot Windows 11 and Ubuntu [Both Directions]](https://img.php.cn/upload/article/000/887/227/168153685057830.png)
![How to Dual Boot Windows 11 and Ubuntu [Both Directions]](https://img.php.cn/upload/article/000/887/227/168153685082840.png)
![How to Dual Boot Windows 11 and Ubuntu [Both Directions]](https://img.php.cn/upload/article/000/887/227/168153685038242.png)
Fix Grub
Many users have reported that if you dual-boot Windows 11 and Ubuntu, the latter is not available from the boot menu at all. To fix this issue, you just need to do the following:
- Press the boot menu key and select Ubuntu from the list.
- Make sure you are connected to the internet.
- Open Terminal and run the following command:
<strong>sudo add-apt-repository ppa:yannubuntu/boot-repair<br>sudo apt-get update<br>sudo apt-get install -y boot-repair && boot-repair</strong> - After installing boot-repair, type boot-repair in the terminal to start it.
- Select Suggested Fixes.
- After the repair is completed, check if the problem still exists.
![How to Dual Boot Windows 11 and Ubuntu [Both Directions]](https://img.php.cn/upload/article/000/887/227/168153685148306.png)
Alternatively, you can solve this problem by doing the following:
- Boot into Ubuntu, as we showed you in the previous section.
- Open Terminal and run the following command:
<strong>sudo update-grub2</strong> - After the process is completed, return to the BIOS.
- Go to the boot section and set Ubuntu as the first boot device.
Windows will always replace your bootloader, especially if you installed it after Ubuntu or any version of Linux, but hopefully this method will help you resolve the issue yourself.
To learn more, check out our guide on how to fix Windows 10 and Ubuntu dual-boot issues.
Note If you cannot access Ubuntu from the boot menu, please execute these commands in the Ubuntu Live environment. Just boot from your Ubuntu flash drive and follow the steps above.
Does Ubuntu support secure boot?
Secure Boot is a technology that verifies the code that a firmware starts with to prevent rootkits. Many Linux distributions do not support Secure Boot, so if you want to install them, you will need to disable Secure Boot first.
Expert Tips:
Sponsored
Some PC problems are difficult to solve, especially when they involve a corrupted repository or When losing Windows files. If you are having trouble fixing errors, your system may be partially corrupted.
We recommend installing Restoro, a tool that will scan your machine and determine what the fault is.
Click here to download and start repairing.
Ubuntu has been compatible with Secure Boot since version 12.10, and it should work on most PCs with Secure Boot enabled.
However, only the first stage EFI boot loader is signed by Microsoft, which may cause some boot issues on some PCs. If this occurs, Secure Boot must be disabled from the BIOS.
What are the disadvantages of dual boot?
Regarding the disadvantages, dual booting requires a lot of space on your PC, especially if you plan to use both operating systems regularly and install various software on them.
This isn't a problem with larger hard drives, but if you're low on storage, you may want to free up some space or consider upgrading your storage.
Another disadvantage of dual boot is multitasking. When using dual boot, there is no quick and easy way to boot into another operating system.
Instead, you need to restart your PC and select the operating system you want to access. Remember, you have to do this every time you want to switch to another operating system.
This isn't a major problem, but it can get tedious at times, especially if you frequently use both operating systems at the same time.
Finally, booting issues can occur, but this mostly happens when installing Windows after Ubuntu or any other version of Linux.
Which Ubuntu distributions can I dual-boot in Windows 11?
Ubuntu has 8 different official distributions, they are: Kubuntu, Lubuntu, Ubuntu Budgie, Ubuntu Kylin, Ubuntu MATE, Ubuntu Server and Ubuntu StudioXubuntu.
As for third-party distributions, there are about 40, if not more. Regarding popularity, these are the 3 most popular Ubuntu-based distributions:
- Linux Mint
- Bang! _OS
- Base Operating System
All Ubuntu distributions can dual-boot with Windows 11 without any major issues, and installing them in dual-boot mode works for all distributions are similar.
The only problem that may occur is if you have Secure Boot enabled and are trying to install an older version of Ubuntu, but this can be easily fixed.
If you want to dual-boot Windows 11 and Ubuntu, follow the instructions in our guide. However, since Windows 11 has not been officially released yet, you need to dual-boot Ubuntu with Windows 10 before upgrading to Windows 11.
The situation is no different if you want to dual-boot Windows 11 and Windows 7. Create a separate partition for other operating systems and follow our detailed process.
The above is the detailed content of How to Dual Boot Windows 11 and Ubuntu [Both Directions]. For more information, please follow other related articles on the PHP Chinese website!

Hot AI Tools

Undresser.AI Undress
AI-powered app for creating realistic nude photos

AI Clothes Remover
Online AI tool for removing clothes from photos.

Undress AI Tool
Undress images for free

Clothoff.io
AI clothes remover

Video Face Swap
Swap faces in any video effortlessly with our completely free AI face swap tool!

Hot Article
Hot Tools

Notepad++7.3.1
Easy-to-use and free code editor

SublimeText3 Chinese version
Chinese version, very easy to use

Zend Studio 13.0.1
Powerful PHP integrated development environment

Dreamweaver CS6
Visual web development tools

SublimeText3 Mac version
God-level code editing software (SublimeText3)
Hot Topics
 1387
1387
 52
52

 Windows 11 can't update the system reserved partition: 3 tips
Apr 26, 2023 pm 03:13 PM
Windows 11 can't update the system reserved partition: 3 tips
Apr 26, 2023 pm 03:13 PM
While updating Windows 11 or upgrading from Windows 10 to Windows 11, you may encounter the error Wecouldnotupdatesystemreservedpartition. This may be accompanied by error code 0xc1900104, 0x800f0922 or 0xc1900201. What causes system reserved partition error? This may be caused by a full System Reserved Partition (SRP) that can no longer be written to. Additionally, some third-party security and antivirus applications write to the SRP and can fill it up quickly. Dual booting with Linux can also be the cause of this error. Additionally, if you
![How to dual-boot Windows 11 and macOS [Complete Guide]](https://img.php.cn/upload/article/000/000/164/168146628429366.jpg?x-oss-process=image/resize,m_fill,h_207,w_330) How to dual-boot Windows 11 and macOS [Complete Guide]
Apr 14, 2023 pm 05:58 PM
How to dual-boot Windows 11 and macOS [Complete Guide]
Apr 14, 2023 pm 05:58 PM
Windows 11 brought some major changes, many of which were widely accepted by users around the world. While you can dual-boot Windows 11 and Windows 10, what about other operating systems? Windows 11 can be used with different operating systems, and you can dual-boot Windows 11 and Linux if needed. Many people often ask, can I dual-boot Windows and macOS? The answer is yes. When it comes to macOS, the situation is no different. You can dual-boot macOS and Windows to use Windows software or play games on your Mac. Some people may use dual boot to try out macOS on their PC. Dual boot Win
![How to Dual Boot Windows 11 and Ubuntu [Both Directions]](https://img.php.cn/upload/article/000/887/227/168153684433107.png?x-oss-process=image/resize,m_fill,h_207,w_330) How to Dual Boot Windows 11 and Ubuntu [Both Directions]
Apr 15, 2023 pm 01:34 PM
How to Dual Boot Windows 11 and Ubuntu [Both Directions]
Apr 15, 2023 pm 01:34 PM
Although Windows is the dominant operating system on the market, Linux is slowly but surely growing in popularity, and Ubuntu is one of the most interesting Linux distributions. If you want to learn more about the differences between the two operating systems, check out our Windows 11 vs. Ubuntu article for an in-depth comparison. As for this guide, we will show you how to dual-boot Windows 11 and Ubuntu using both operating systems side by side. What are the hardware requirements for Ubuntu? CPU: 2GHz or higher Memory: 4GB or more Storage: 25GB or more Graphics card: A graphics card with at least 256MB of RAM As you can see, this works with Windows
 How to Install and Use VirtualBox on Windows 11: 2022 Detailed Step-by-Step Tutorial
Apr 14, 2023 pm 11:43 PM
How to Install and Use VirtualBox on Windows 11: 2022 Detailed Step-by-Step Tutorial
Apr 14, 2023 pm 11:43 PM
Windows 11 has gone through its fair share of ups and downs since its release. The operating system is now more stable and has many changes that seem to work for most users. Windows as a platform has always been versatile, capable of creating virtual machines, drives, hardware devices, and more. This helps with internal testing, coding in different environments, or just some good old tinkering. If you've been wanting to emulate or virtualize your platform on Windows 11, VirtualBox is an excellent choice for you. Let’s learn more about it! What is VirtualBox? VirtualBox is a long-established virtualization software that has been favored by most users since its release. Currently provided by Ora
 Want to install AlmaLinux on Windows 11? how is this done
Apr 30, 2023 pm 08:13 PM
Want to install AlmaLinux on Windows 11? how is this done
Apr 30, 2023 pm 08:13 PM
There is now a version of AlmaLinux in the Microsoft Store that is compatible with Windows Subsystem for Linux. This gives users an impressive range of new options, so we’ll show you how to install AlmaLinux on Windows 11. It was released in March 2021, providing the first stable production version, and the non-profit foundation has since added many new members. The latest AMD to join was last month, in March 2022. With Windows Subsystem for Linux, developers working in both the Windows and Linux worlds
 Windows 11 vs. Windows 7: Is it worth upgrading now?
Apr 28, 2023 pm 02:55 PM
Windows 11 vs. Windows 7: Is it worth upgrading now?
Apr 28, 2023 pm 02:55 PM
If you're curious about the facts we discovered after comparing Windows 11 vs. Windows 7 and wondering if you should upgrade, read this article. Microsoft released Windows 11 on October 5, 2021. Since then, the operating system has brought varying experiences to many users. However, despite the strict hardware requirements, it has gained significant market share in the past few months. When Windows 11 gained user base, many people were still using Windows 7 and were unsure whether they should upgrade. If you want, you can see this tutorial on using Windows 7 forever. Windows 7 is indeed an excellent operation
 Microsoft releases emergency out-of-band update for Windows Server to fix remote desktop issues
Apr 25, 2023 pm 12:40 PM
Microsoft releases emergency out-of-band update for Windows Server to fix remote desktop issues
Apr 25, 2023 pm 12:40 PM
<ul><li><strong>Click to enter:</strong>ChatGPT tool plug-in navigation</li></ul>Microsoft has released an out-of-band (OOB) update for Windows Server to solve user problems You may encounter black screen, slow login, or general slowness on Windows Server 2019 and Windows Server 2012 R2. This problem also exists in Micr
 4 Simple Tips to Fix Missing @system32driverspci.sys Error
Apr 20, 2023 am 11:31 AM
4 Simple Tips to Fix Missing @system32driverspci.sys Error
Apr 20, 2023 am 11:31 AM
If your operating system files or applications are corrupted, your operating system will not boot properly and your applications will not run until the error is corrected. The same goes for missing or corrupted @system32driverspci.sys files that we will address today. The complete error message reads Windows cannot start because the following file system32DRIVERSpci.sys is missing or corrupt, which indicates that the PCI.sys file is corrupted and must be repaired by the system administrator. This error message usually appears on computers running Windows 2000 or Windows XP operating systems. But today we will be using Windows 11