

How to schedule text messages on iPhone

The Messages app comes in handy when it comes to sending messages to Apple and non-Apple users. You can edit a message to modify a sent message, or use Undo Send to recall a recently sent message. Another great aspect of messages is the ability to send them at scheduled times when you're not using your iPhone or away doing more important things.
Can you schedule text messages on the iOS Messages app?
Can't. The Messages app on your iPhone itself doesn't allow you to schedule a message to be sent later. Unlike the Google Messages app on Android, if you use the Messages app on iOS, there is no built-in option for creating a message and sending it later. Instead, you'll have to rely on workarounds and alternatives, some of which can be done natively on your iPhone, while others require you to install third-party apps.
How to schedule text messages on iPhone
- Requires: iOS 16 update
Since the iOS Messages app lacks the ability to send scheduled texts, if you more If you like to use iMessage for text communication with other Apple users, you need to use Shortcuts app to send such messages. There are two ways to do this - create a personalized automation in the Shortcuts app, or add a shortcut that can be used immediately to send messages.
Both methods send your scheduled texts to other Apple users via iMessage. If information about the program is sent to someone who does not have an iPhone or any other Apple device, the information will be sent via SMS or MMS.
Method #1: Create an Automation using Shortcuts
If you want to schedule messages in such a way that the same message is repeated on a regular basis, you can create an automation using the Shortcuts app. First, open the " Shortcuts" app on your iPhone.

#In the shortcut, click the Automation tab at the bottom.
#On this screen, click the icon in the upper right corner to create the automation. If you don't see this icon on your screen, you can continue to the next step, it's probably because you haven't created and added your automation to the Shortcuts app yet.

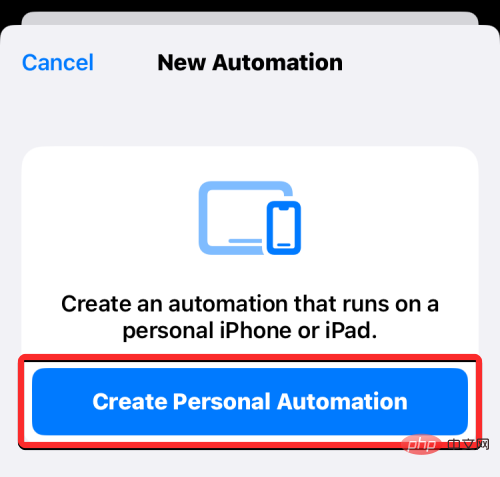
Now, on the next screen select Create Personal Automation.
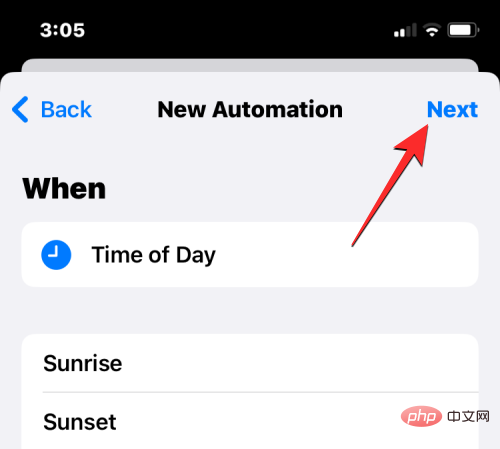
In the New Automation screen, select Time of Day.

On the next screen you must choose a specific time to send your message and configure how often you want this message to be sent again. Here you can choose Sunrise, Sunset, or Time of Day. If you choose the last option, you must set a time to send the message.

#You can change this time by clicking on the time box and then moving the hour and minute dials to your preferred time.

Next, you can select Daily, Weekly, or Every Month to configure when to repeat the message.
Depending on the recurrence option you choose, you will be able to set which days of the week or specific days of each month the messages you create will be sent.

After configuring the message time, click “Next” in the upper right corner.
#In the "Actions" screen that appears, click "Add Action".

You will now see a new pop-up menu that lists all the actions available on the Shortcuts app. In this pop-up window, click the search bar at the top and type "send" to search for related actions.

When the search results appear, select under "Share" to send a message.
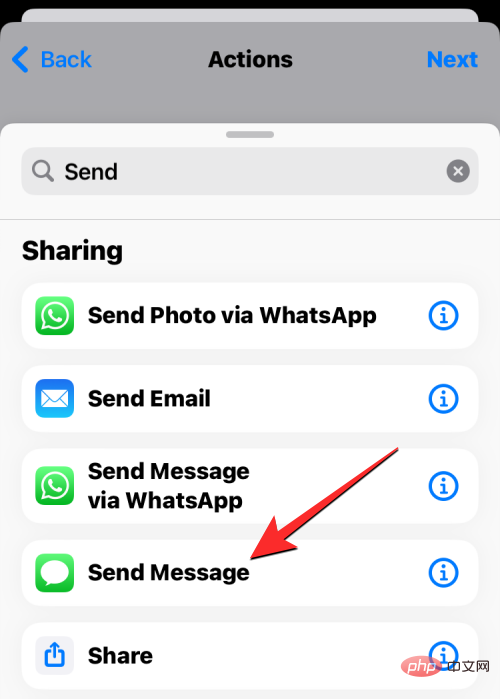
# The Send Message action will now appear within the Actions screen. On the action box, click Message.

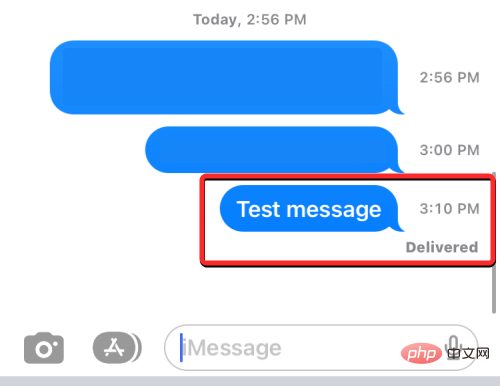
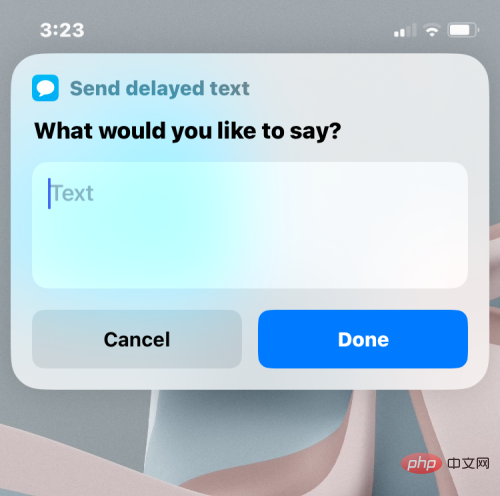
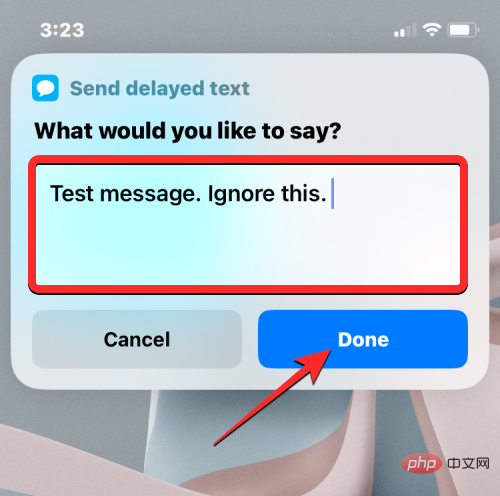
When the keyboard pops up, type the message you want to schedule, then tap above the keyboard to finish.

#Next, click recipients in the same action box.
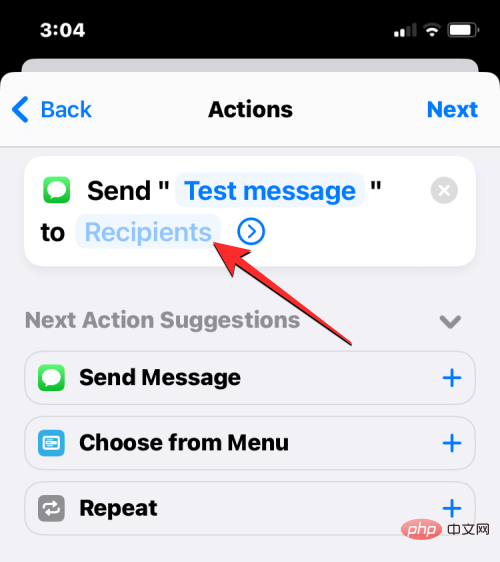
#On the next screen, enter the name or phone number of the person you want to send the message to in the To box. If you want to send this message to multiple contacts at once, click the icon to the right of the "To" box. If not, click Finish to continue.

Once you've scripted your message and selected your preferred contacts to send it to, click Next in the upper right corner.

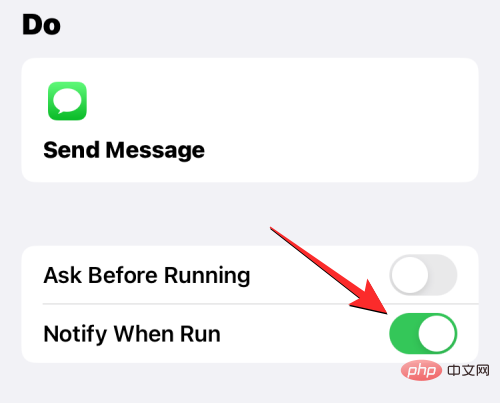
# The Shortcuts app will now show you a preview of the automation you created. Because scheduled messages are sent even when you're not actively using your phone, you may want to turn off the Ask before running switch on this screen.

In the prompt that appears, click Don’t ask to confirm.

You can now turn on the Runtime notifications switch to ensure you know when scheduled messages are sent from your iPhone.
To confirm the automation, click in the upper right corner to complete.
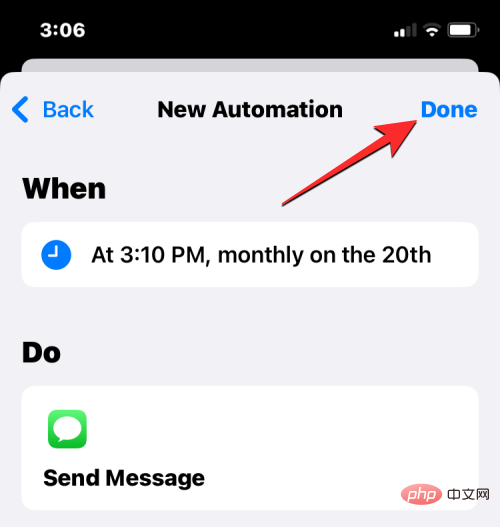
#The automations you created to send scheduled messages will now appear in the Automations tab of the Shortcuts app.
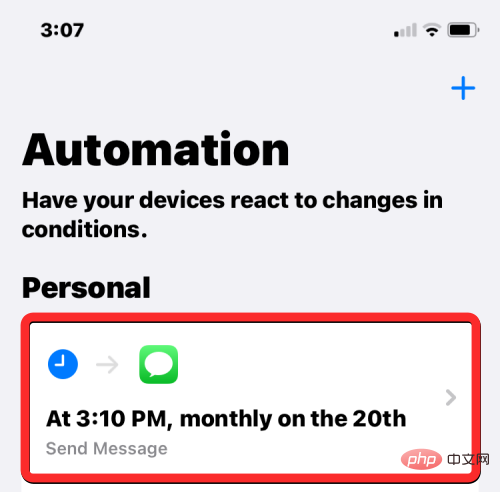
When the scheduled time arrives, the Shortcuts app will run the automation and send the preconfigured message to the selected contacts. You'll receive an alert on your lock screen and notification center that your automation is running.

# Your scheduled messages will now be sent from the Messages app on your iPhone.
Method #2: Use the Send Delayed SMS Shortcut
The above method is useful when you want to send recurring messages to the same person on a regular basis. If you want to schedule different messages for different people, you can use the Send Delayed Text Message shortcut. This user-created shortcut helps you schedule messages to anyone you want right from your home screen using the same shortcut app used in the method above.
To get started, click this link to open the Send Delayed Text Message shortcut page in Safari or any other web browser. After the page loads, click to get the shortcut.

#This will load the shortcut into the Shortcuts app on your iPhone. To add it to your device, tap at the bottom to add shortcut.

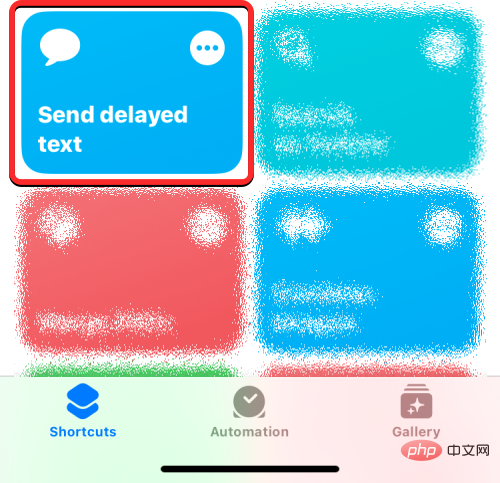
The new shortcut will now appear in the Shortcuts tab of the application. Whenever you wish to schedule a message, you will need to access this screen to use the "Send Delayed Text" shortcut.
If you don’t want to open the Shortcuts app again and again to send scheduled messages, you can add it as a widget to your home screen.
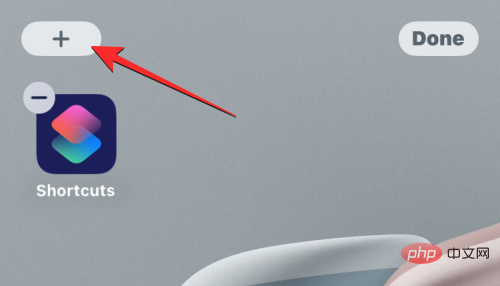
To make it easier to send scheduled messages, you can add a shortcut widget to your home screen. To do this, long press on an empty part of the home screen. When the icon starts to shake, click the button in the upper left corner.
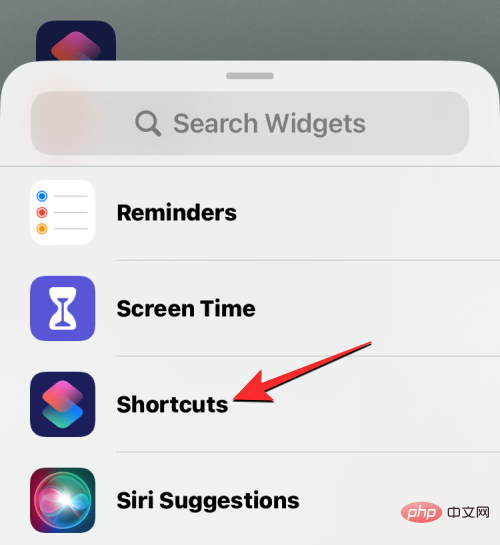
In the list of Widgets that appears, select Shortcuts.
If you only want a shortcut to send scheduled messages, select the smallest widget on this screen (the leftmost widget) and tap # at the bottom ##Add widget.

The Shortcut widget will now be added to your home screen. To select the Send Delayed Text shortcut for this widget, click the widget.

In the overflow box that appears, click Shortcut.

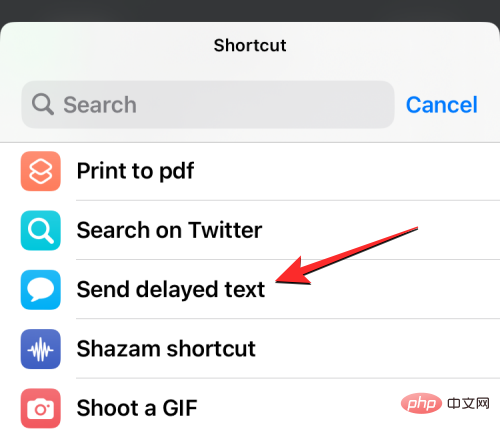
On the next screen, select Send Delayed Text from the shortcut list.
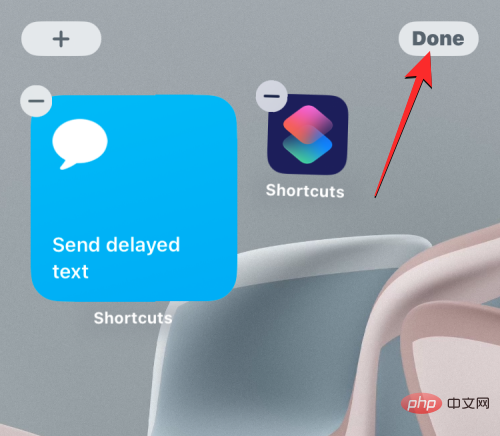
The selected shortcut will now appear on your home screen. To confirm your changes, click Done in the upper right corner.
When you want to schedule a message, tap the
Send Delayed Text widget on the home screen, or via Open the Shortcuts app on your iPhone to access it.

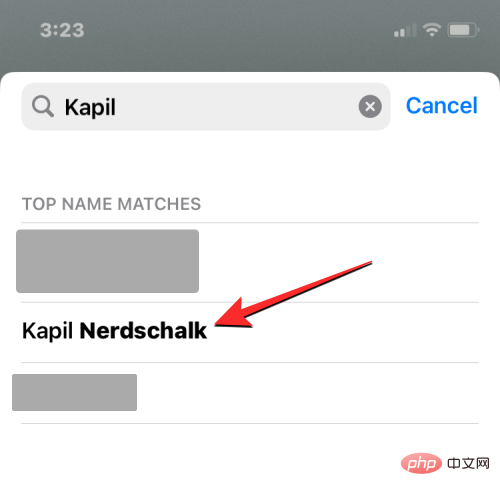
search bar at the top to type the name of the person you want to message.

Done.
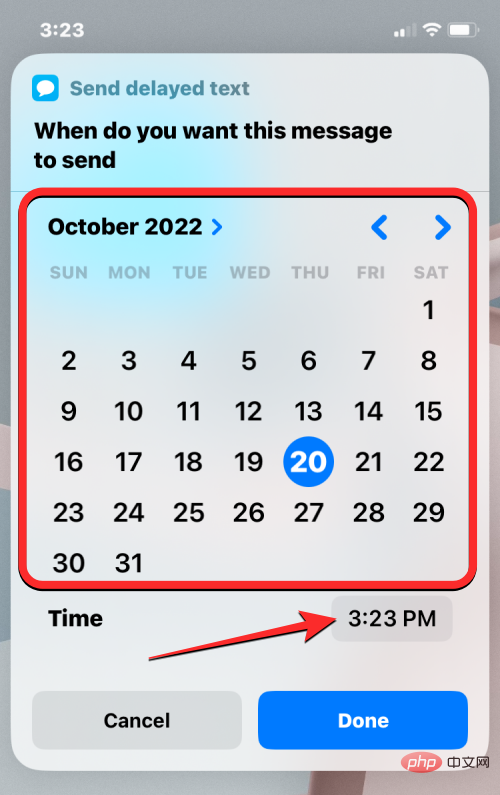
Done.

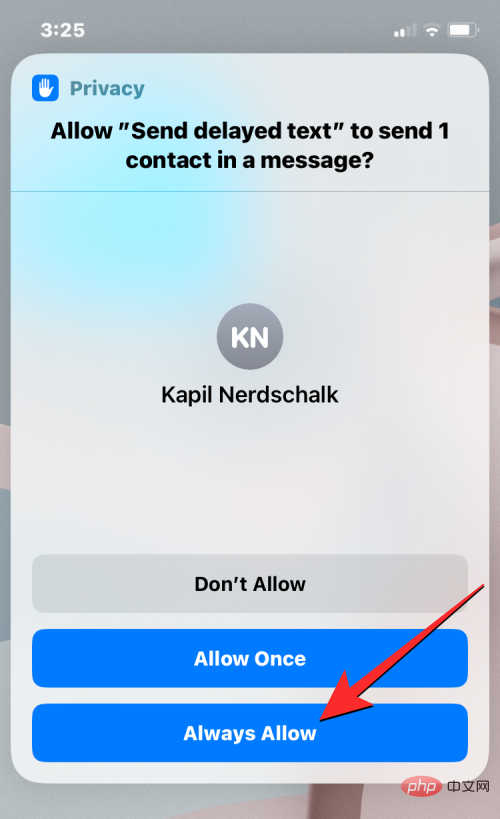
Always Allow. If you select Allow once, the Shortcuts app will ask for your permission every time it needs to send a message, which is useless when you're not actively using your iPhone. Therefore, we recommend selecting Always Allow when using this shortcut to send scheduled messages.

This is where method #2 comes in. Using this method, you can schedule messages directly from your home screen (using the Shortcuts widget) and create different messages to send to different people at different times. Messages you schedule are one-time events and will not be repeated to recipients in the future.
The Send Delayed Text shortcut works even if your iPhone is locked, although messages may be slightly delayed when locked. The only downside to this method is that you can't schedule a new message unless a previously scheduled message has been sent, since iOS can't run two instances of the same shortcut on your device.
Besides scheduling messages, what else can you do?
Since the Messages app on iOS doesn’t have a built-in option for scheduling messages, using the Shortcuts app is the only way you can automate your experience with the Messages app. If you find neither method convenient, you can check out the following alternatives that provide similar functionality, depending on how you wish to use them.
Use the Reminders app to notify yourself when to send a message
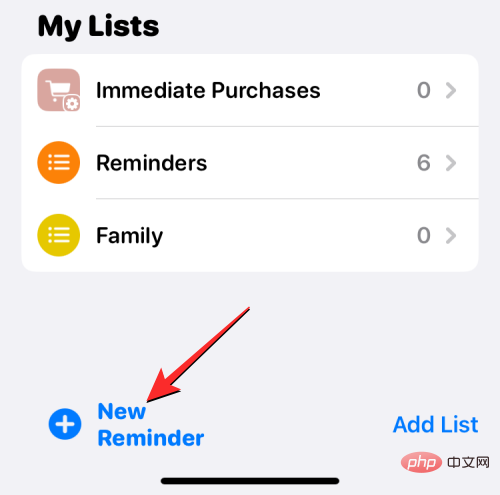
If you think it would be better for you to create a message that you wish to send later, one way to get it done is on your iPhone Set reminders. You can create a reminder by clicking New Reminder in the Reminder app on iOS.
When the New Reminder screen opens, select Details and open the DateandTime" switch to configure them to your specific time.

#When the time is up, the app will send you an alert to remind you that it's time to send a message to someone. You can achieve the same results more easily by activating Siri on your iPhone. Press and hold the side button until Siri appears on the screen, then say something like "Remind me to text John tomorrow at 8 a.m. about a staff meeting."

Create Events in Calendar to Schedule Messages
Just like Reminders, you can use the Calendar app on iOS to schedule events to notify you when Send messages when. To create such an event, open the Calendar app on your iPhone and tap the icon in the upper right corner.

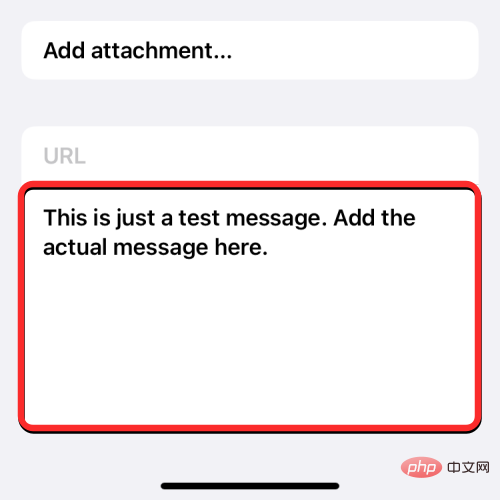
When the New Event screen appears, add a reminder message as a title to remind yourself. You can then configure the event period for the specific time period during which messages need to be sent. You can also choose to remind yourself minutes or hours before the set time so you don't forget.

On the same screen you can type the actual message you want to send in the Notes section so you can copy and paste it into Messages when the time comes in the application.
When the time arrives, the calendar app notifies you to send the scheduled message.
Use apps that offer scheduled messages
There are many third-party apps on the App Store that offer the ability to send scheduled messages. They can be used to send a one-time message to someone at a time of your choosing, or they can be configured to send messages at specific intervals. If you don’t find the above methods and alternatives useful, you can check out the following apps that support scheduled messages:
All of these apps have different ways to schedule messages on your iPhone, but functionality will be limited Limitations on in-app purchases or subscriptions.
Schedule messages on Apple Mail instead
Unlike the Messages app, Apple's Mail app offers the ability to compose an email and prepare it to be sent later. This feature is available as a scheduled delivery option with the release of iOS 16.
You can use this feature to send scheduled emails - either at 9:00 pm that day or the same time the next day. Additionally, you can schedule messages to be sent on your desired date and time if the existing options aren't your first choice.
The above is the detailed content of How to schedule text messages on iPhone. For more information, please follow other related articles on the PHP Chinese website!

Hot AI Tools

Undresser.AI Undress
AI-powered app for creating realistic nude photos

AI Clothes Remover
Online AI tool for removing clothes from photos.

Undress AI Tool
Undress images for free

Clothoff.io
AI clothes remover

AI Hentai Generator
Generate AI Hentai for free.

Hot Article
Hot Tools

Notepad++7.3.1
Easy-to-use and free code editor

SublimeText3 Chinese version
Chinese version, very easy to use

Zend Studio 13.0.1
Powerful PHP integrated development environment

Dreamweaver CS6
Visual web development tools

SublimeText3 Mac version
God-level code editing software (SublimeText3)
Hot Topics


 iPhone 16 Pro and iPhone 16 Pro Max official with new cameras, A18 Pro SoC and larger screens
Sep 10, 2024 am 06:50 AM
iPhone 16 Pro and iPhone 16 Pro Max official with new cameras, A18 Pro SoC and larger screens
Sep 10, 2024 am 06:50 AM
Apple has finally lifted the covers off its new high-end iPhone models. The iPhone 16 Pro and iPhone 16 Pro Max now come with larger screens compared to their last-gen counterparts (6.3-in on the Pro, 6.9-in on Pro Max). They get an enhanced Apple A1
 iPhone parts Activation Lock spotted in iOS 18 RC — may be Apple\'s latest blow to right to repair sold under the guise of user protection
Sep 14, 2024 am 06:29 AM
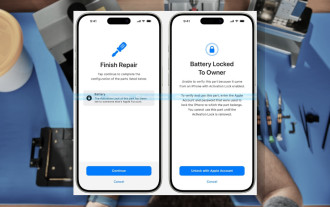
iPhone parts Activation Lock spotted in iOS 18 RC — may be Apple\'s latest blow to right to repair sold under the guise of user protection
Sep 14, 2024 am 06:29 AM
Earlier this year, Apple announced that it would be expanding its Activation Lock feature to iPhone components. This effectively links individual iPhone components, like the battery, display, FaceID assembly, and camera hardware to an iCloud account,
 Gate.io trading platform official app download and installation address
Feb 13, 2025 pm 07:33 PM
Gate.io trading platform official app download and installation address
Feb 13, 2025 pm 07:33 PM
This article details the steps to register and download the latest app on the official website of Gate.io. First, the registration process is introduced, including filling in the registration information, verifying the email/mobile phone number, and completing the registration. Secondly, it explains how to download the Gate.io App on iOS devices and Android devices. Finally, security tips are emphasized, such as verifying the authenticity of the official website, enabling two-step verification, and being alert to phishing risks to ensure the safety of user accounts and assets.
 iPhone parts Activation Lock may be Apple\'s latest blow to right to repair sold under the guise of user protection
Sep 13, 2024 pm 06:17 PM
iPhone parts Activation Lock may be Apple\'s latest blow to right to repair sold under the guise of user protection
Sep 13, 2024 pm 06:17 PM
Earlier this year, Apple announced that it would be expanding its Activation Lock feature to iPhone components. This effectively links individual iPhone components, like the battery, display, FaceID assembly, and camera hardware to an iCloud account,
 LCD iPhone becomes history! Apple will be completely abandoned: the end of an era
Sep 03, 2024 pm 09:38 PM
LCD iPhone becomes history! Apple will be completely abandoned: the end of an era
Sep 03, 2024 pm 09:38 PM
According to media reports citing sources, Apple will completely abandon the use of LCD (liquid crystal display) screens in iPhones, and all iPhones sold next year and beyond will use OLED (organic light-emitting diode) displays. Apple first used OLED displays on iPhoneX in 2017. Since then, Apple has popularized OLED displays in mid-to-high-end models, but the iPhone SE series still uses LCD screens. However, iPhones with LCD screens are about to become history. People familiar with the matter said that Apple has begun ordering OLED displays from BOE and LG for the new generation iPhone SE. Samsung currently holds about half of the iPhone OLED display market, LG
 Anbi app official download v2.96.2 latest version installation Anbi official Android version
Mar 04, 2025 pm 01:06 PM
Anbi app official download v2.96.2 latest version installation Anbi official Android version
Mar 04, 2025 pm 01:06 PM
Binance App official installation steps: Android needs to visit the official website to find the download link, choose the Android version to download and install; iOS search for "Binance" on the App Store. All should pay attention to the agreement through official channels.
 How to install and register an app for buying virtual coins?
Feb 21, 2025 pm 06:00 PM
How to install and register an app for buying virtual coins?
Feb 21, 2025 pm 06:00 PM
Abstract: This article aims to guide users on how to install and register a virtual currency trading application on Apple devices. Apple has strict regulations on virtual currency applications, so users need to take special steps to complete the installation process. This article will elaborate on the steps required, including downloading the application, creating an account, and verifying your identity. Following this article's guide, users can easily set up a virtual currency trading app on their Apple devices and start trading.
 Download link of Ouyi iOS version installation package
Feb 21, 2025 pm 07:42 PM
Download link of Ouyi iOS version installation package
Feb 21, 2025 pm 07:42 PM
Ouyi is a world-leading cryptocurrency exchange with its official iOS app that provides users with a convenient and secure digital asset management experience. Users can download the Ouyi iOS version installation package for free through the download link provided in this article, and enjoy the following main functions: Convenient trading platform: Users can easily buy and sell hundreds of cryptocurrencies on the Ouyi iOS app, including Bitcoin and Ethereum. and Dogecoin. Safe and reliable storage: Ouyi adopts advanced security technology to provide users with safe and reliable digital asset storage. 2FA, biometric authentication and other security measures ensure that user assets are not infringed. Real-time market data: Ouyi iOS app provides real-time market data and charts, allowing users to grasp encryption at any time