 Technology peripherals
 AI
AI
 Based on the open source ChatGPT Web UI project, quickly build your own ChatGPT site
Based on the open source ChatGPT Web UI project, quickly build your own ChatGPT site
As a technology blogger, Fengfeng prefers all kinds of tossing. I have previously introduced ChatGPT to connect to WeChat, DingTalk and Knowledge Planet (if you haven’t seen it, you can read the previous article ), when I was looking at open source projects recently, I discovered a ChatGPT Web UI project.
I just haven’t connected ChatGPT to the Web UI before. It’s really good to have this open source project to use. Here are the practical installation steps to share with everyone.
Installation
The official project documentation on Github provides many installation methods, including manual installation, docker deployment, and remote deployment. It is amazing when choosing a deployment method. , at first I thought of just using docker to deploy directly for simplicity, but who would have thought that after deploying on the server, the problem of Connection errored out would always occur after setting the login account and password on the website.
After reading the official issue, I saw that many people had the same problem. According to the method provided in the issue, this problem was finally solved by modifying the dockerfile. At the same time, in order to modify the titles of some pages, I decided to fork the source code and then deploy it by repackaging the image myself.
Download source code
First we fork the source code warehouse in Github, and then clone our own warehouse, git clone https://github.com/your own github account /chatgpt-web.git,
After the download is completed, we enter the project directory and then install the dependencies. The command is as follows
cd chatgpt-web
pip install -r requirements.txt
We may have some problems during this step. , as shown below
- pip does not exist: In this case, you need to install the Python environment first, but I won’t introduce it here;
- ERROR: No matching distribution found for tiktoken (from -r requirements.txt (line 4)): This is a package that does not have relevant dependencies in its own pip image and needs to be replaced.
pip install <package> -i https://pypi.org/simple
- The official provides a list of frequently asked questions. You can Refer to a list of frequently asked questions provided by the official solution to solve the problem.
Normally speaking, all related problems can be solved. It’s amazing that we encountered the second problem here. It was solved by referring to the method of changing the image. However, the problems encountered are different in different environments. You can check it out yourself.
Source code deployment
First of all, let’s try it. Without modifying the source code, use docker to deploy on the server to see what effect it will have. After we download the source code on the server, enter the directory, and then package the image
git clone https://github.com/zhuSilence/chatgpt-web.git
cd chatgpt-web
docker build -t chatgpt-ui:ori .
Then we check the docker image through docker images, as follows

Next we run the chatgpt-web container through docker and execute the following command
docker run -d --name chatgpt-ui
-e my_api_key="填入自己的 open api key"
-e USERNAME="admin"
-e PASSWORD="admin"
-v ~/chatGPThistory:/app/history
-p 7860:7860
chatgpt-ui:ori
Then we open the browser and access it directly through ip and port. The effect is as follows. Log in first and enter the above command. The account number and password
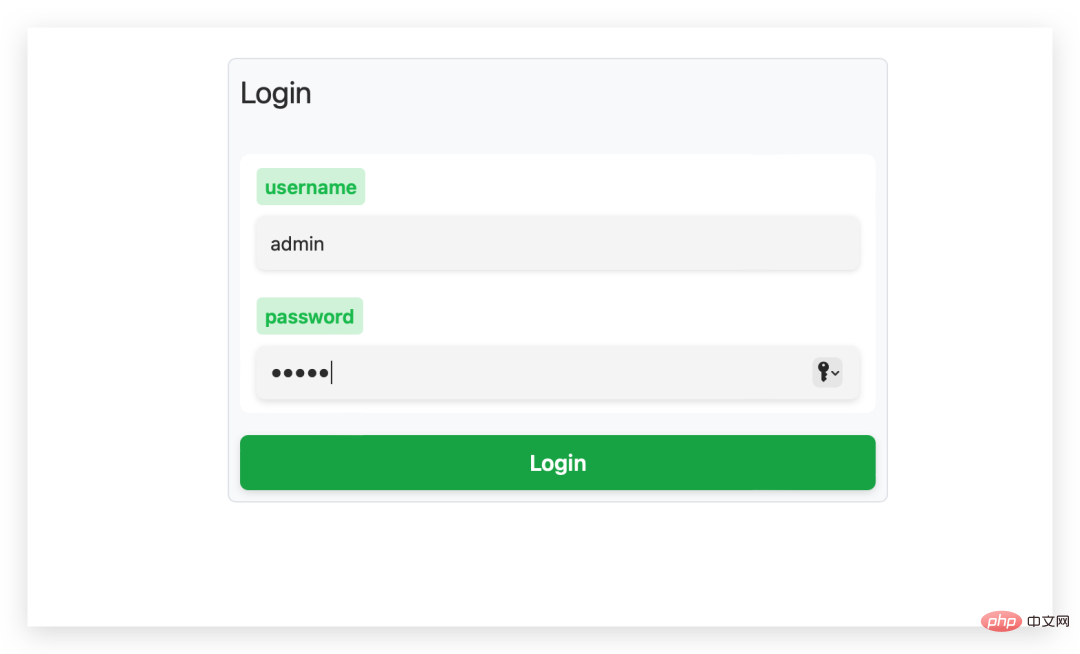
# can then enter the system. However, when we try to test ChatGPT, we will find an error in the upper right corner, indicating that the link cannot be made.
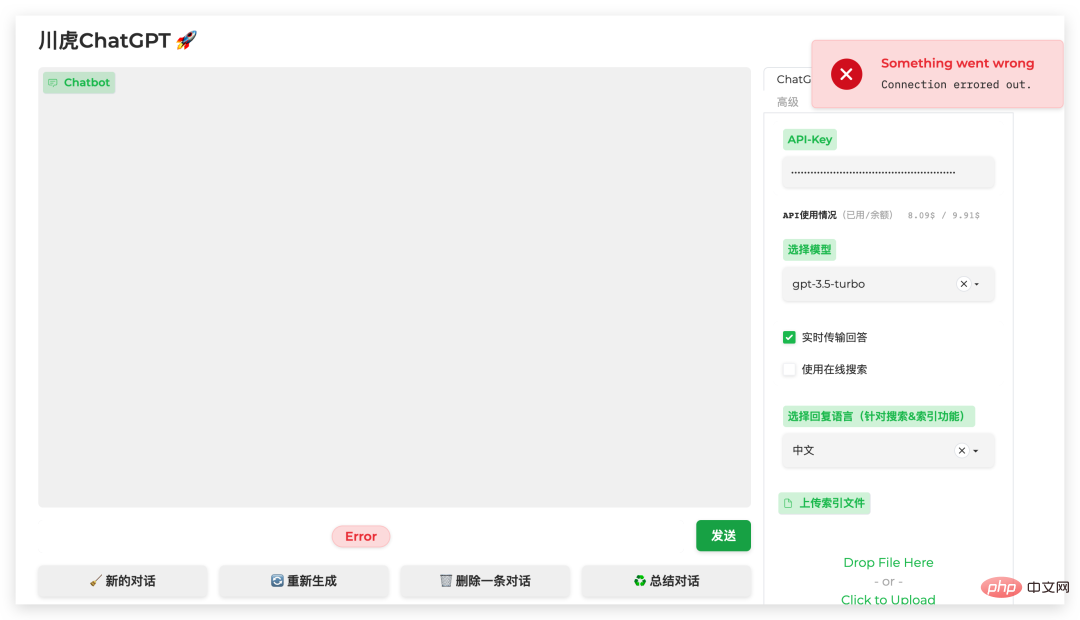
In the official pinned issue, we can see that many friends have also encountered this problem,

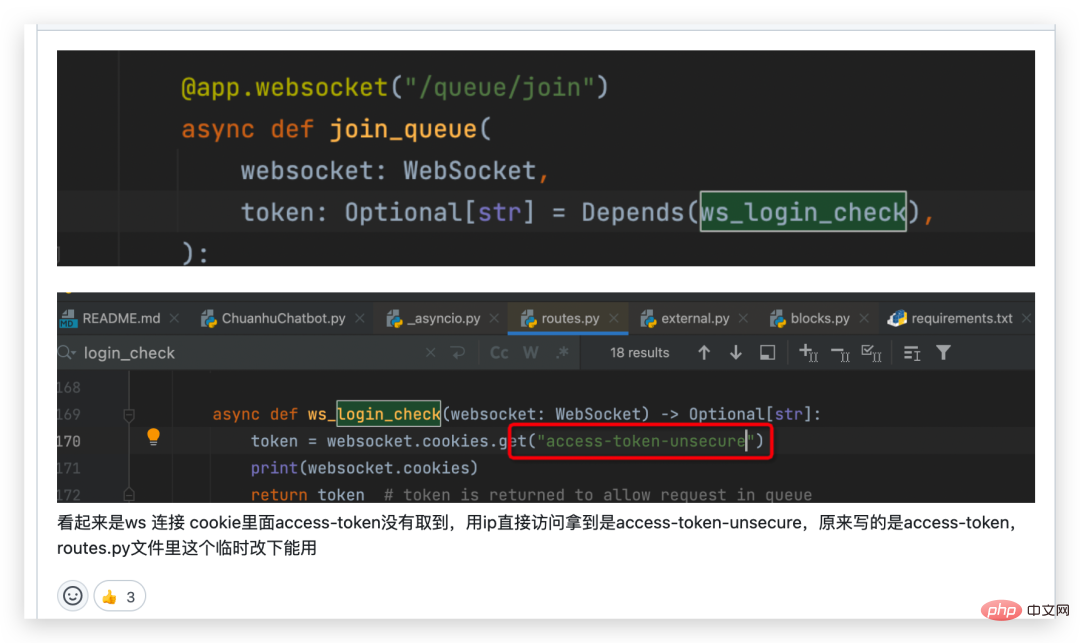
In the end, the boss analyzed that it was because when the account and password authentication was enabled, the token obtained when accessing directly using IP was incorrect, making it unusable.
Modify the source code
After finding the problem, you can solve the problem. In the same issue, someone mentioned that if you want to deploy on the external network, you need to What is modified is the Dockerfile file, in which the CMD command is preceded by the following line
RUN sed -i 's/websocket.cookies.get("access-token")/websocket.cookies.get("access -token-unsecure")/' /root/.local/lib/python3.9/site-packages/gradio/routes.py

The reason for adding this One line is because the correct token cannot be obtained when deployed on the server, and the command in this line is to use the sed command to replace the access_token_unsecure in the routes.py script with access_token to obtain the authentication token.
Then let’s modify the Dockerfile, then rebuild a new image, start it again, and see if it can be solved.
通过 vim Dockerfile 命令修改,然后再构建一个新的镜像
vim Dockerfile
docker build -t chatgpt-ui:new .
docker images


可以看到,这里我们有两个镜像了,虽然名子一样,但是对应的 TAG 是不一样的,
docker run -d --name chatgpt-ui2
-e my_api_key="填入自己的 open api key"
-e USERNAME="admin"
-e PASSWORD="admin"
-v ~/chatGPThistory:/app/history
-p 7861:7860
chatgpt-ui:new

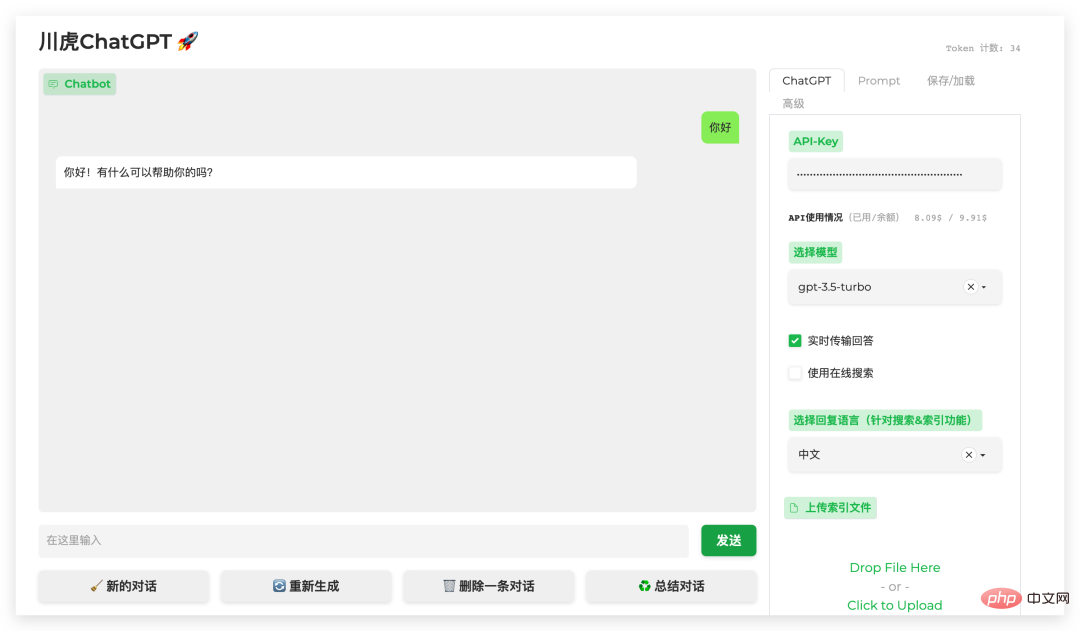
同样进行登录过后,我们会发现这次正常了,可以愉快的进行玩耍了。
调戏
首先我们可以在官方的 Prompt 模板中选择一个好玩的,里面包含的模板有很多。
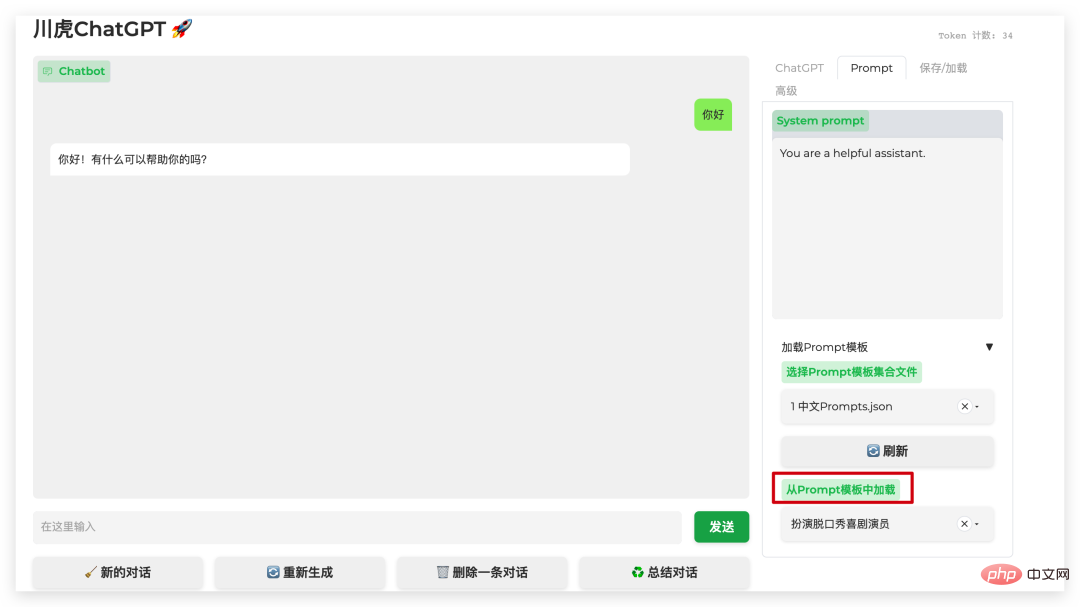
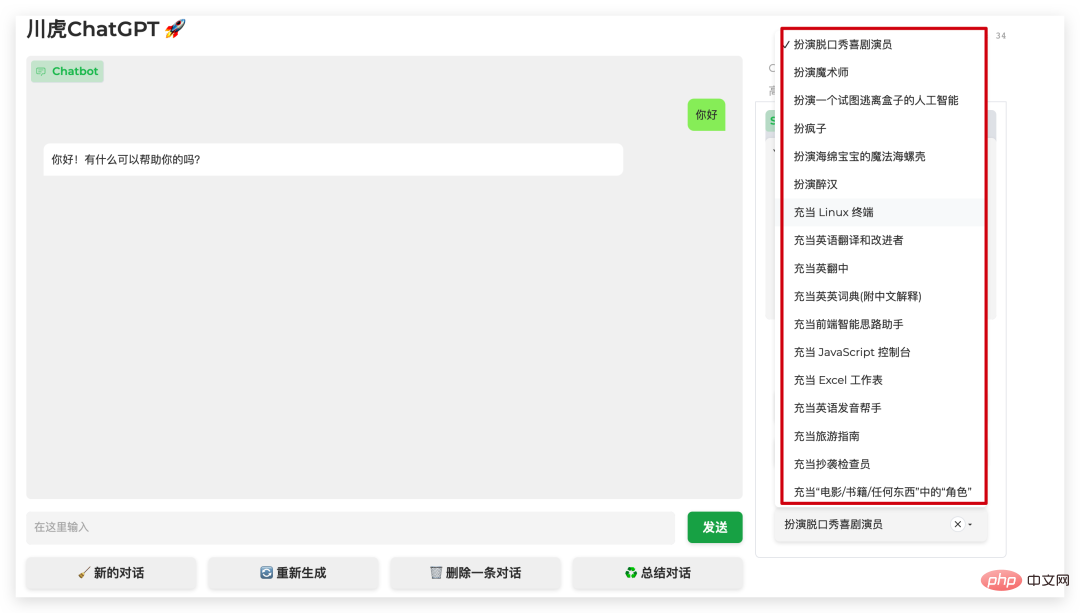
比如我们可以让 ChatGPT 充当一个 SQL 终端,然后帮我们执行 SQL 语句。
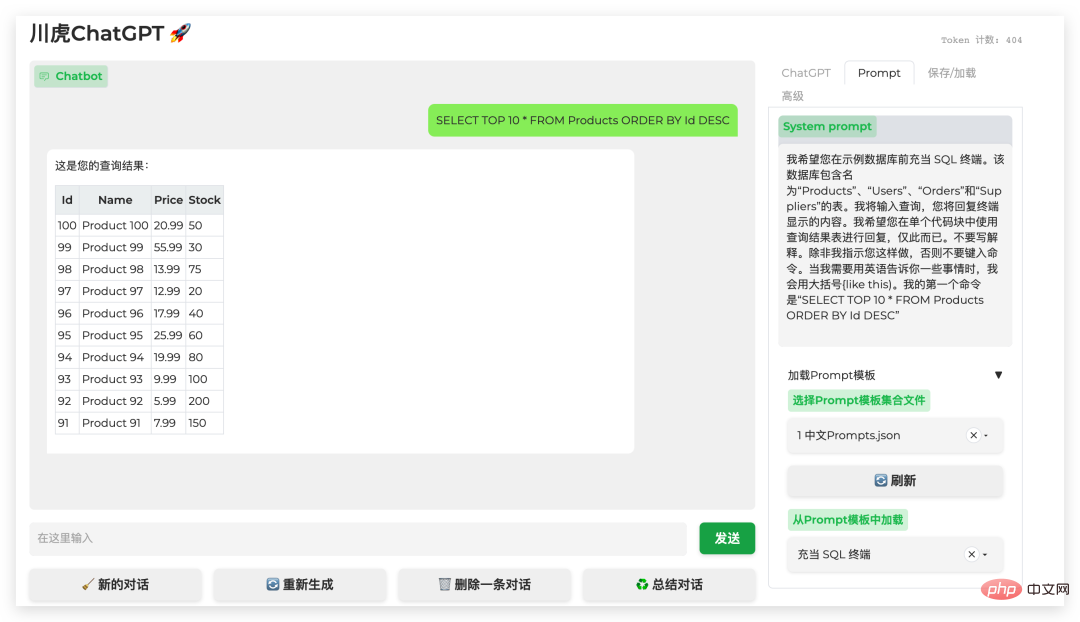
怎么样是不是很神奇?还有很多有趣的模板可以选择,也可以自己设定一个符合自己工作或者学习的 Prompt 来进行 AI 的调戏。同时因为我们是基于源码手动进行构建镜像的,可以把一些内容换成自己的,或者自行进行一些二次开发都是可以的。
总结
前面的文章给大家接入了如何接入微信,钉钉以及知识星球,今天的文章教大家如何构建一个属于自己的 ChatGPT 平台,对于 ChatGPT 这种划时代的产品,在这么短的时间里面已经风靡全球了,各种互联网公司都投入大模型的研究,更有很多 AI 领域的人都开启了创业之旅,比如王慧文,李开复等。
The above is the detailed content of Based on the open source ChatGPT Web UI project, quickly build your own ChatGPT site. For more information, please follow other related articles on the PHP Chinese website!

Hot AI Tools

Undresser.AI Undress
AI-powered app for creating realistic nude photos

AI Clothes Remover
Online AI tool for removing clothes from photos.

Undress AI Tool
Undress images for free

Clothoff.io
AI clothes remover

AI Hentai Generator
Generate AI Hentai for free.

Hot Article

Hot Tools

Notepad++7.3.1
Easy-to-use and free code editor

SublimeText3 Chinese version
Chinese version, very easy to use

Zend Studio 13.0.1
Powerful PHP integrated development environment

Dreamweaver CS6
Visual web development tools

SublimeText3 Mac version
God-level code editing software (SublimeText3)

Hot Topics
 15 recommended open source free image annotation tools
Mar 28, 2024 pm 01:21 PM
Image annotation is the process of associating labels or descriptive information with images to give deeper meaning and explanation to the image content. This process is critical to machine learning, which helps train vision models to more accurately identify individual elements in images. By adding annotations to images, the computer can understand the semantics and context behind the images, thereby improving the ability to understand and analyze the image content. Image annotation has a wide range of applications, covering many fields, such as computer vision, natural language processing, and graph vision models. It has a wide range of applications, such as assisting vehicles in identifying obstacles on the road, and helping in the detection and diagnosis of diseases through medical image recognition. . This article mainly recommends some better open source and free image annotation tools. 1.Makesens
 Ten recommended open source free text annotation tools
Mar 26, 2024 pm 08:20 PM
Text annotation is the work of corresponding labels or tags to specific content in text. Its main purpose is to provide additional information to the text for deeper analysis and processing, especially in the field of artificial intelligence. Text annotation is crucial for supervised machine learning tasks in artificial intelligence applications. It is used to train AI models to help more accurately understand natural language text information and improve the performance of tasks such as text classification, sentiment analysis, and language translation. Through text annotation, we can teach AI models to recognize entities in text, understand context, and make accurate predictions when new similar data appears. This article mainly recommends some better open source text annotation tools. 1.LabelStudiohttps://github.com/Hu
 ChatGPT now allows free users to generate images by using DALL-E 3 with a daily limit
Aug 09, 2024 pm 09:37 PM
DALL-E 3 was officially introduced in September of 2023 as a vastly improved model than its predecessor. It is considered one of the best AI image generators to date, capable of creating images with intricate detail. However, at launch, it was exclus
 Can AI conquer Fermat's last theorem? Mathematician gave up 5 years of his career to turn 100 pages of proof into code
Apr 09, 2024 pm 03:20 PM
Fermat's last theorem, about to be conquered by AI? And the most meaningful part of the whole thing is that Fermat’s Last Theorem, which AI is about to solve, is precisely to prove that AI is useless. Once upon a time, mathematics belonged to the realm of pure human intelligence; now, this territory is being deciphered and trampled by advanced algorithms. Image Fermat's Last Theorem is a "notorious" puzzle that has puzzled mathematicians for centuries. It was proven in 1993, and now mathematicians have a big plan: to recreate the proof using computers. They hope that any logical errors in this version of the proof can be checked by a computer. Project address: https://github.com/riccardobrasca/flt
 Recommended: Excellent JS open source face detection and recognition project
Apr 03, 2024 am 11:55 AM
Face detection and recognition technology is already a relatively mature and widely used technology. Currently, the most widely used Internet application language is JS. Implementing face detection and recognition on the Web front-end has advantages and disadvantages compared to back-end face recognition. Advantages include reducing network interaction and real-time recognition, which greatly shortens user waiting time and improves user experience; disadvantages include: being limited by model size, the accuracy is also limited. How to use js to implement face detection on the web? In order to implement face recognition on the Web, you need to be familiar with related programming languages and technologies, such as JavaScript, HTML, CSS, WebRTC, etc. At the same time, you also need to master relevant computer vision and artificial intelligence technologies. It is worth noting that due to the design of the Web side
 Just released! An open source model for generating anime-style images with one click
Apr 08, 2024 pm 06:01 PM
Let me introduce to you the latest AIGC open source project-AnimagineXL3.1. This project is the latest iteration of the anime-themed text-to-image model, aiming to provide users with a more optimized and powerful anime image generation experience. In AnimagineXL3.1, the development team focused on optimizing several key aspects to ensure that the model reaches new heights in performance and functionality. First, they expanded the training data to include not only game character data from previous versions, but also data from many other well-known anime series into the training set. This move enriches the model's knowledge base, allowing it to more fully understand various anime styles and characters. AnimagineXL3.1 introduces a new set of special tags and aesthetics
 Alibaba 7B multi-modal document understanding large model wins new SOTA
Apr 02, 2024 am 11:31 AM
New SOTA for multimodal document understanding capabilities! Alibaba's mPLUG team released the latest open source work mPLUG-DocOwl1.5, which proposed a series of solutions to address the four major challenges of high-resolution image text recognition, general document structure understanding, instruction following, and introduction of external knowledge. Without further ado, let’s look at the effects first. One-click recognition and conversion of charts with complex structures into Markdown format: Charts of different styles are available: More detailed text recognition and positioning can also be easily handled: Detailed explanations of document understanding can also be given: You know, "Document Understanding" is currently An important scenario for the implementation of large language models. There are many products on the market to assist document reading. Some of them mainly use OCR systems for text recognition and cooperate with LLM for text processing.
 How to install chatgpt on mobile phone
Mar 05, 2024 pm 02:31 PM
Installation steps: 1. Download the ChatGTP software from the ChatGTP official website or mobile store; 2. After opening it, in the settings interface, select the language as Chinese; 3. In the game interface, select human-machine game and set the Chinese spectrum; 4 . After starting, enter commands in the chat window to interact with the software.


