Spend 1 yuan to make your website support ChatGPT
This article is reproduced from the WeChat public account "Front-end Sinan", written by Tusi. To reprint this article, please contact the front-end Sinan public account.
ChatGPT has become so popular in the technical circle recently, and the voting circle has also been flooded. I also decided to join in the fun and add a ChatGPT conversation function to my blog.
Attach the experience link first, the source code can also be found at the bottom.
Thank you for your support. The free quota of my Open AI personal account has been exhausted. I am very sorry. Please build your own experience according to the article and source code, or register an account to experience it in the backend.
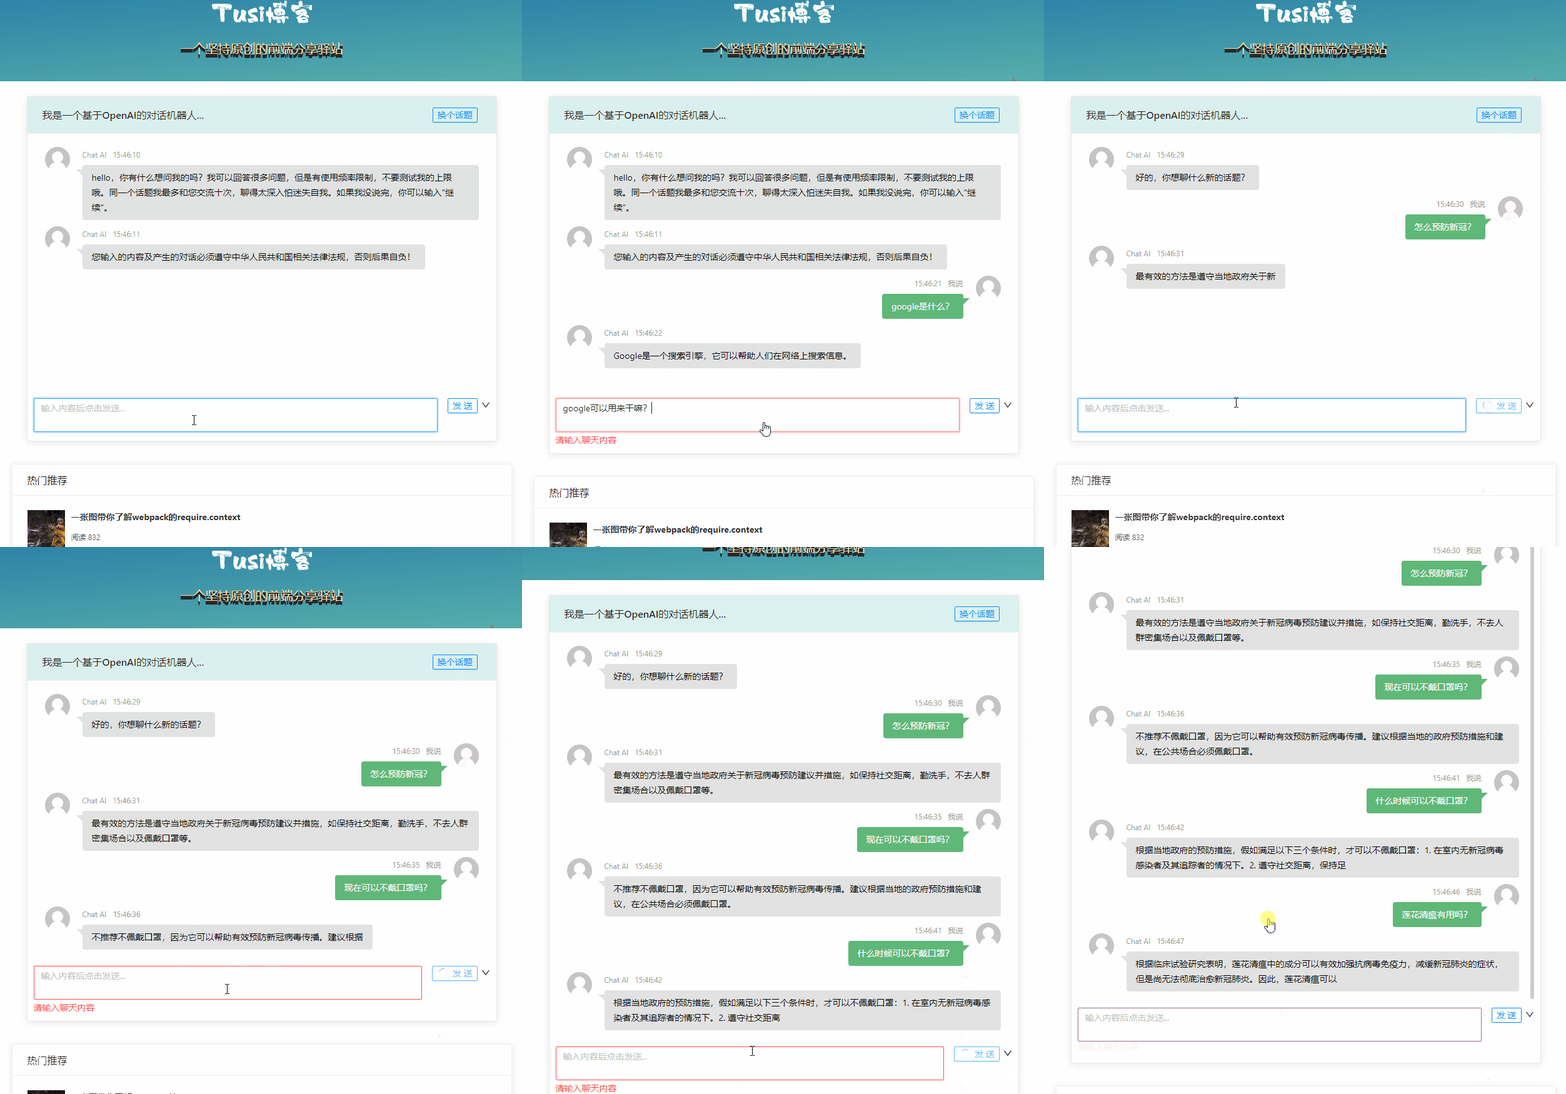
Experience ChatGPT
ChatGPT is an AI dialogue model trained by Open AI that can support intelligent dialogue in a variety of scenarios.
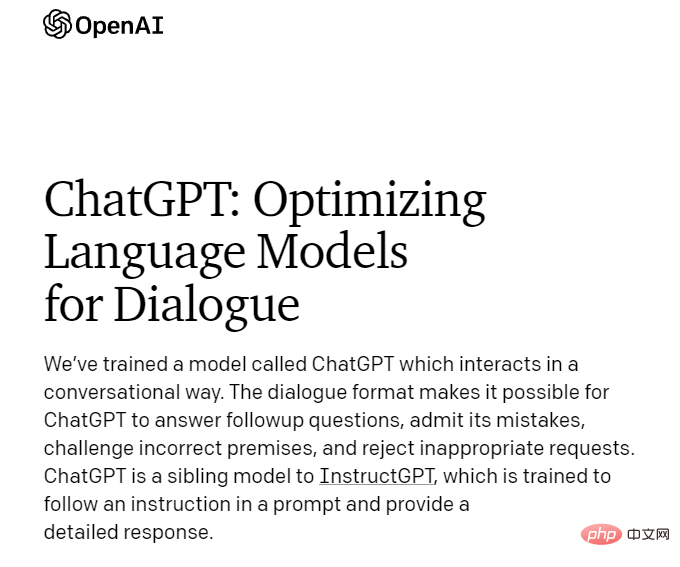
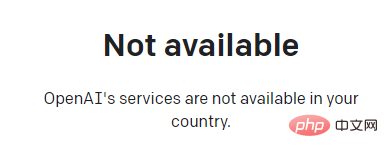
If you want to experience ChatGPT, you must first register an account. However, this product cannot be used directly on domestic networks, and you need to solve network problems by yourself.
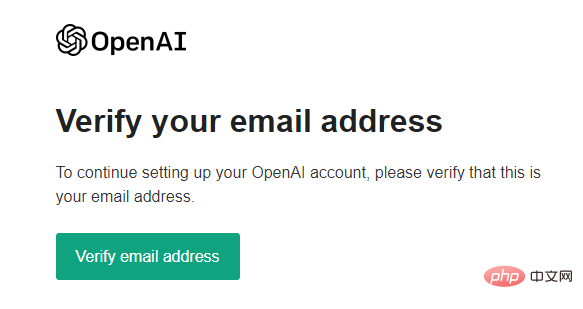
After solving the network problem, you will be asked to provide email verification when registering.
Then you will need to verify your mobile phone number. Unfortunately, domestic mobile phone numbers cannot be used.
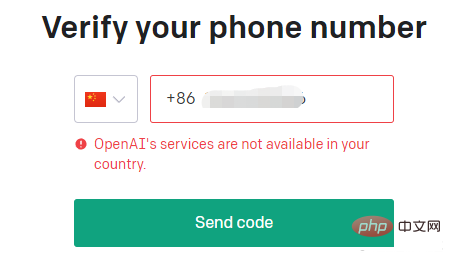
#You can also choose to log in with a Google account, but you still need to verify your mobile phone number in the end.
So we need to first find a foreign mobile phone number that can receive SMS verification codes. At this time, we can use SMS-ACTIVATE.
This is a website for registering accounts in millions of services on the planet. We offer virtual numbers in most countries around the world so that you can receive text messages with confirmation codes online. Among our services are also long-term rental of virtual numbers, forwarding connections, phone verification and much more.
The price on SMS-ACTIVATE is rubles. We need to use a mobile phone number for SMS verification. After inquiry, we can find that the cheapest is a mobile phone number in India, with a retail price of 10.5 rubles.
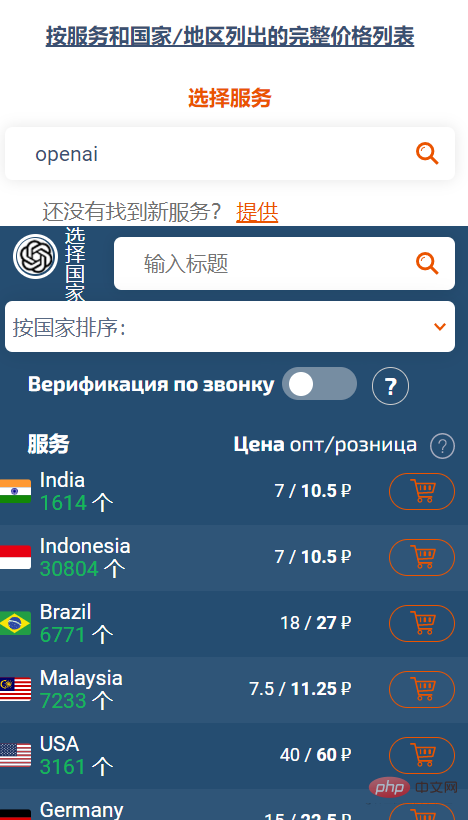
Calculated based on the exchange rate, it’s probably more than 1 RMB.

#SMS-ACTIVATE supports recharging with a certain treasure. I bought an Indian account and can receive the verification code from Open AI.
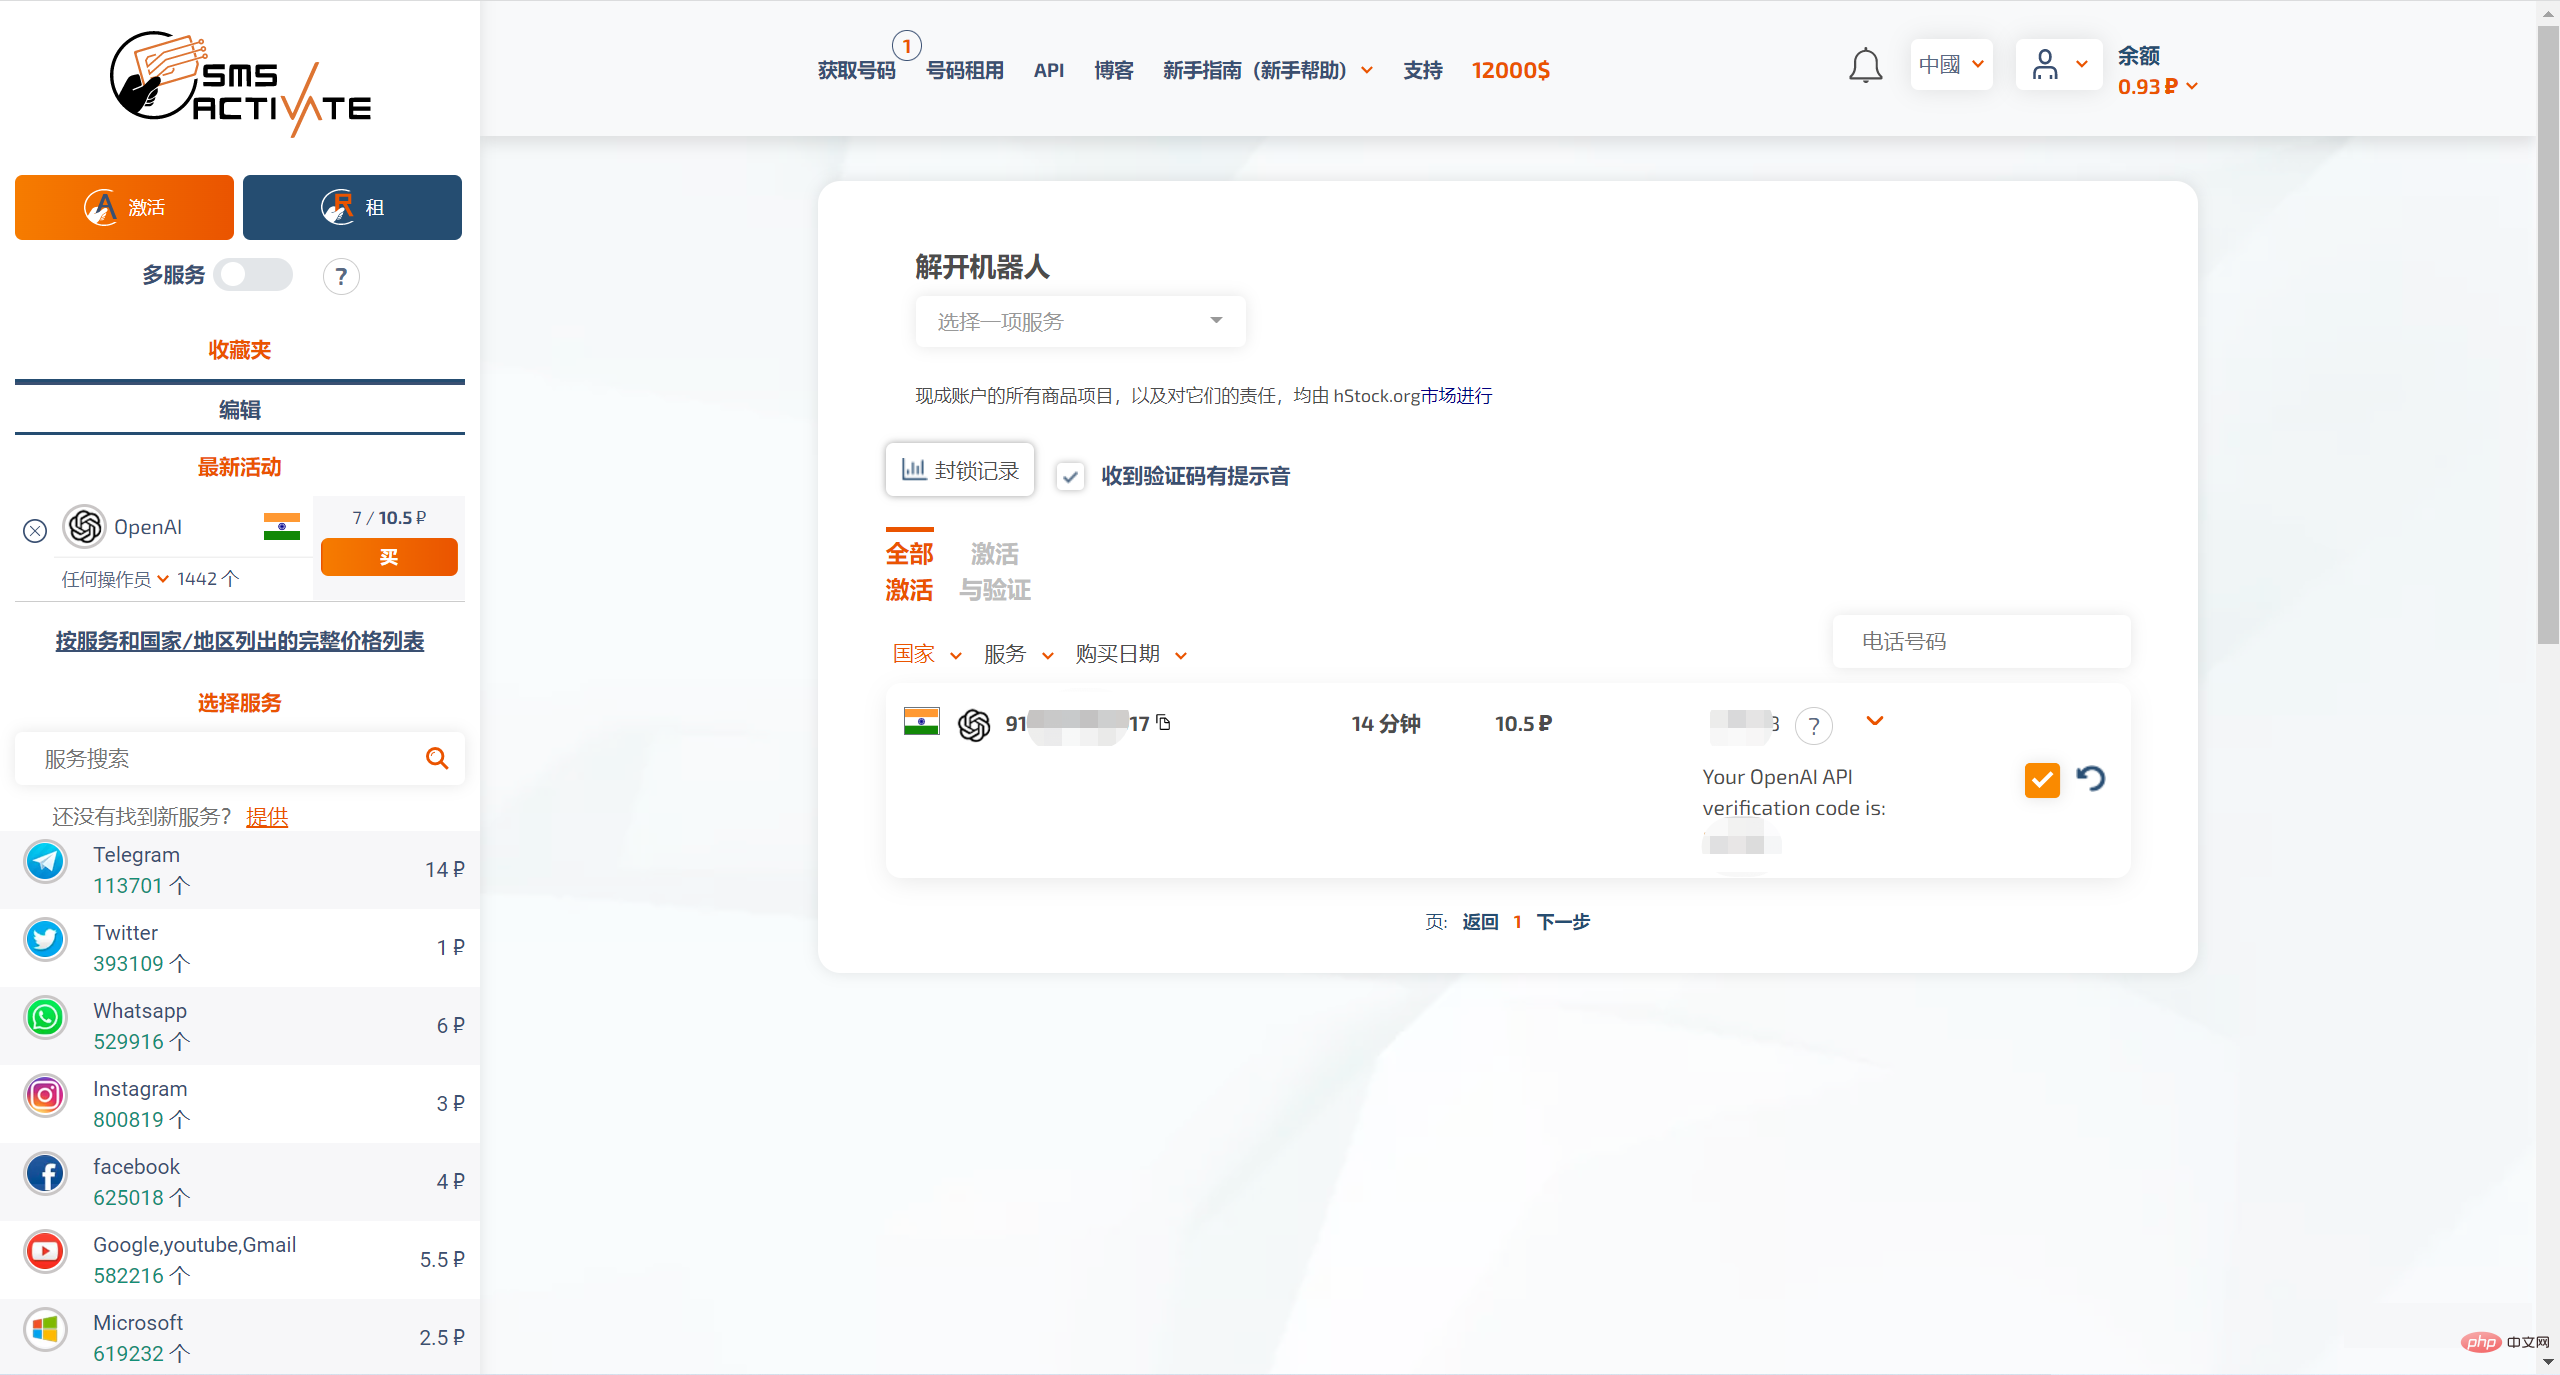
Note that this number is only for rent and has a time limit, so we must hurry up and complete the registration process. After 20 minutes, this number is no longer yours. .
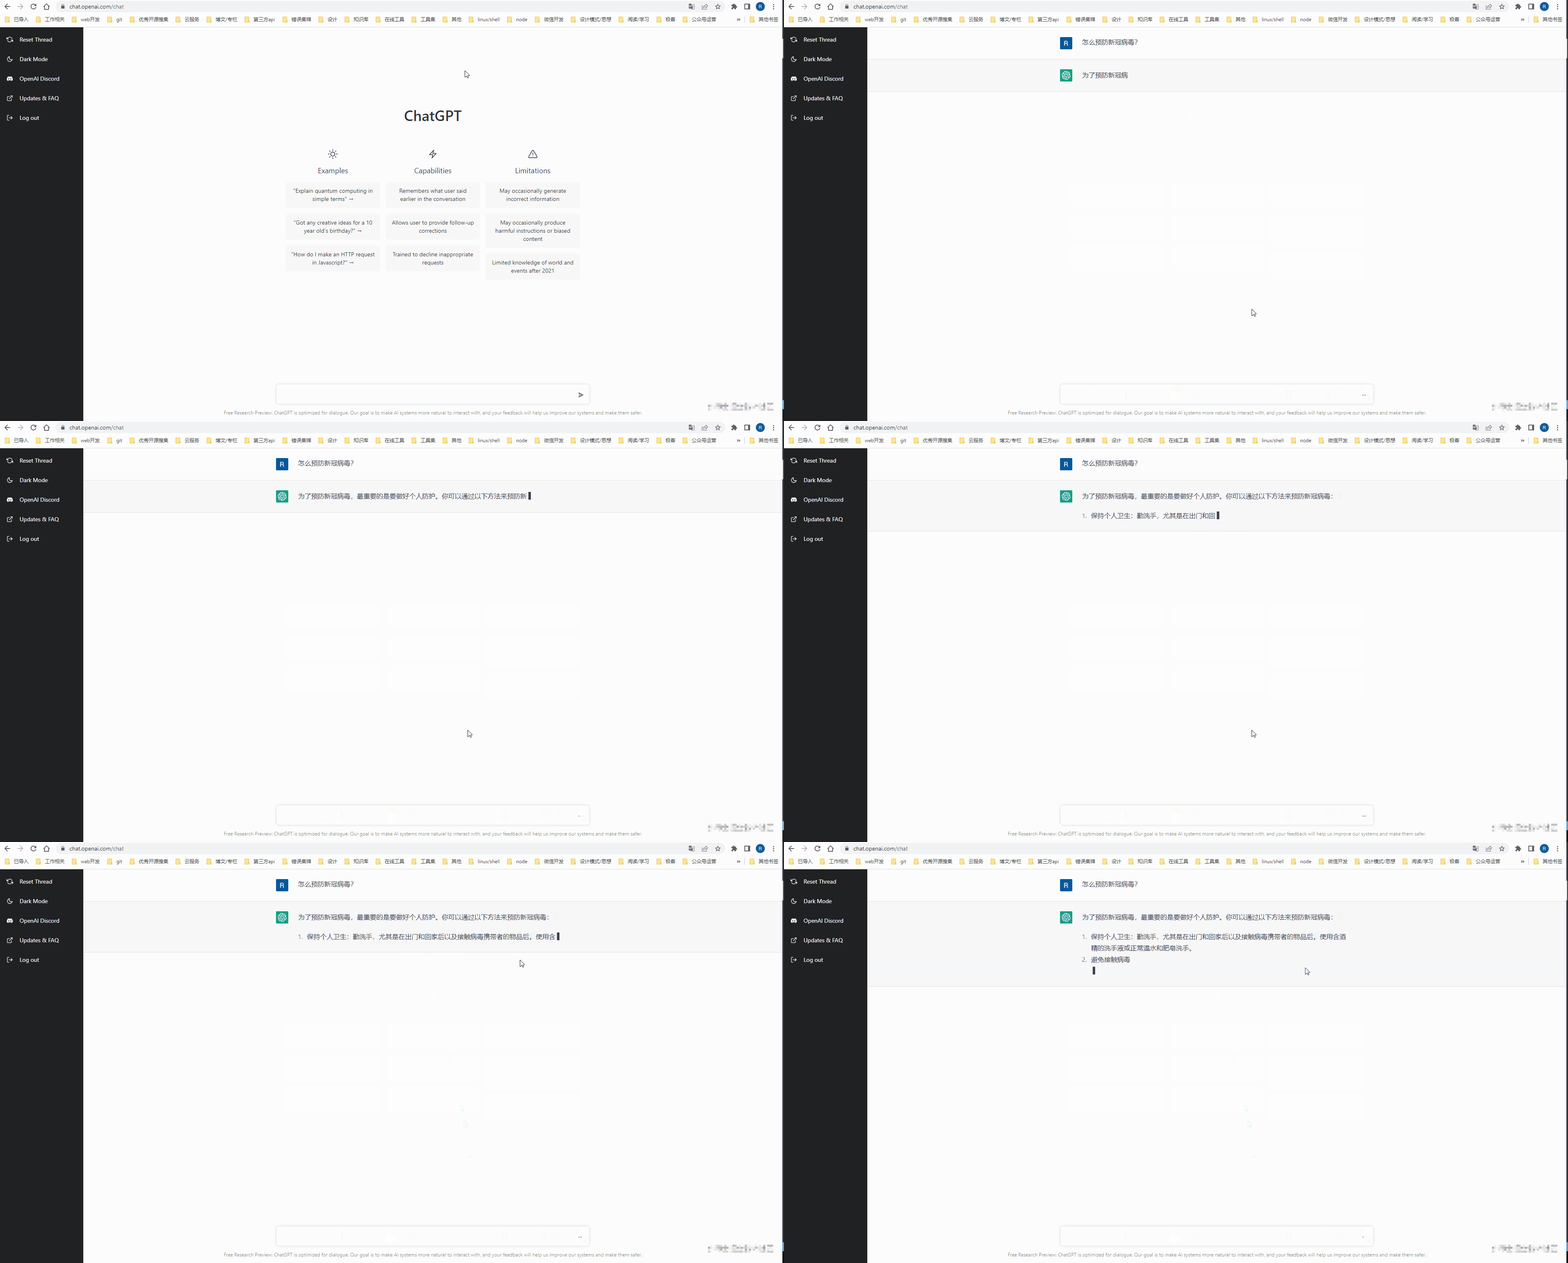
After registering an Open AI account, you can go to the ChatGPT Web workbench to experience an AI conversation.
Access Open AI capabilities through API
After experiencing ChatGPT, for those of us who are engaged in technology, we may be thinking about how to connect this capability. into your own products.
Get started quickly
ChatGPT is a model trained by Open AI. Open AI also provides APIs for developers to call, and the documents and cases are also relatively comprehensive.
A very important step in machine learning is to adjust parameters, but for front-end developers, most people definitely don’t know how to adjust parameters, so we will refer to the official cases that best suit our needs. That's great, this Chat case fits our scenario needs very well.
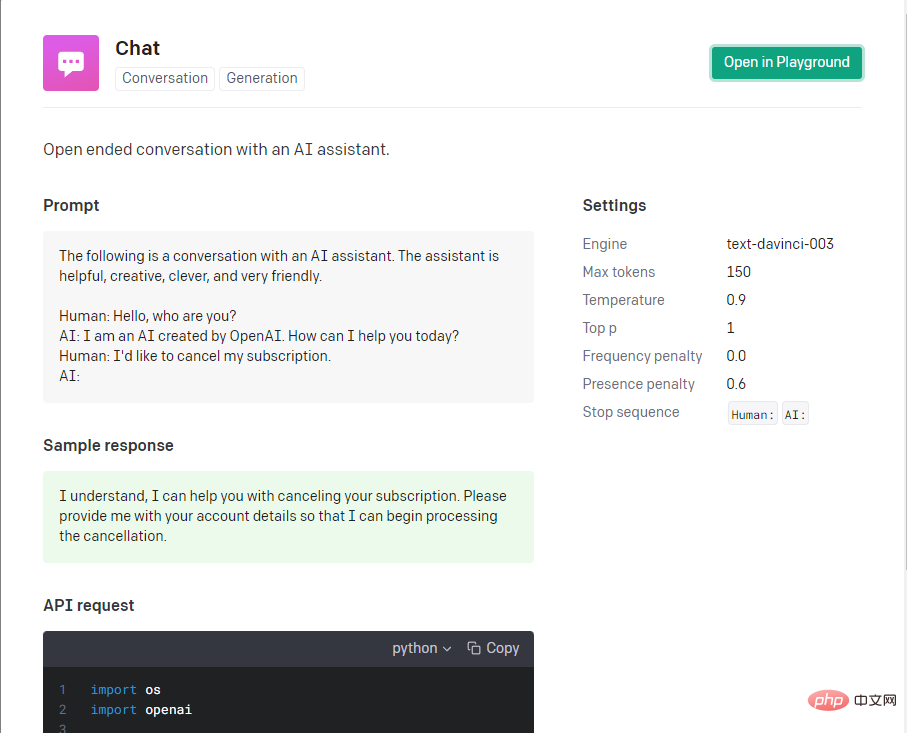
The official provides a nodejs starter, based on which we can quickly get started and test it.
git clone https://github.com/openai/openai-quickstart-node.git
Its core code is this part, and the openai used in it is the officially encapsulated NodeJS Library.
const completion = await openai.createCompletion({
model: "text-davinci-003",
prompt: '提问内容',
temperature: 0.9,
max_tokens: 150,
top_p: 1,
frequency_penalty: 0,
presence_penalty: 0.6,
});You need to generate an API Key in your Open AI account before calling the API.
Currently, the official free limit is 18 knives, and you need to pay for the excess. Billing is calculated based on Token. As for what Token is, please refer to Key concepts.

Let’s take the parameters of the above Chat case and use them directly. Basically, we have a 70% or 80% AI that answers questions. You can try this yourself. The effect is not complicated.
The next step is to study how to integrate the key code of this starter into your own product.
产品分析
我之前有在自己的博客中做过一个简单的 WebSocket 聊天功能,而在 AI 对话这个需求中,前端 UI 部分基本上可以参考着WebSocket 聊天功能改改,工作量不是很大,主要工作量还是在前后端的逻辑和对接上面。
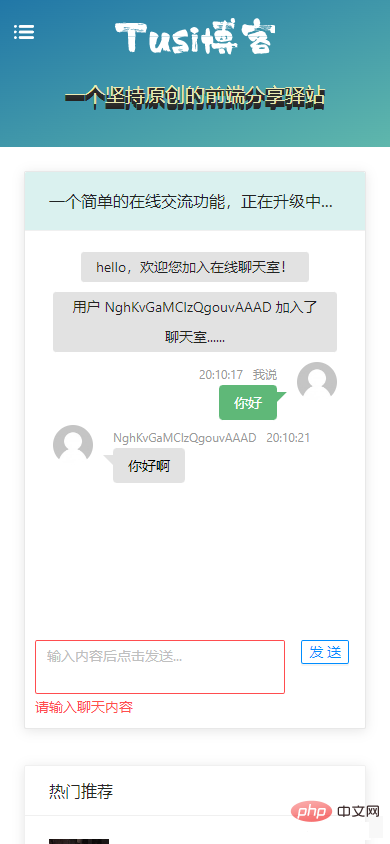
ChatGPT 的这个产品模式,它不是一个常规的 WebSocket 全双工对话,而是像我们平常调接口一样,发生用户输入后,客户端发送请求到服务端,等待服务端响应,最后反馈给用户,它仅仅是从界面上看起来像是聊天,实际上不是一个标准的聊天过程。所以前后端交互主要还是靠 HTTP 接口对接。
核心要素 Prompt
在openai.createCompletion调用时有一个很重要的参数prompt,它是对话的上下文信息,只有这个信息足够完整,AI 才能正确地做出反馈。
举个例子,假设在对话过程中有2个回合。
// 回合1
你:爱因斯坦是谁?
AI: 爱因斯坦(Albert Einstein)是20世纪最重要的物理学家,他被誉为“时空之父”。他发现了相对论,并获得诺贝尔物理学奖。
第一个回合中,传参prompt是爱因斯坦是谁?,机器人很好理解,马上能给出符合实际的回复。
// 回合2
你:他做了什么贡献?
AI: 他为社会做出了许多贡献,例如改善公共卫生、建立教育基础设施、提高农业生产能力、促进经济发展等。
第二个回合传参prompt是他做了什么贡献?,看到机器人的答复,你可能会觉得有点离谱,因为这根本就是牛头不对马嘴。但是仔细想想,这是因为机器人不知道上下文信息,所以机器人不能理解他代表的含义,只能通过他做了什么贡献?整句话去推测,所以从结果上看就是符合语言的逻辑,但是不符合我们给出的语境。
如果我们把第二个回合的传参prompt改成你: 爱因斯坦是谁?nAI: 爱因斯坦(Albert Einstein)是20世纪最重要的物理学家,他被誉为“时空之父”。他发现了相对论,并获得诺贝尔物理学奖。n你: 他做了什么贡献?nAI:,机器人就能够理解上下文信息,给出接下来的符合逻辑的答复。
// 改进后的回合2
你:他做了什么贡献?
AI: 爱因斯坦对科学有着重大的贡献,他发明了相对论,改变了人们对世界、物理定律和宇宙的认识,并为量子力学奠定了基础。他还发现了...
所以,我们的初步结论是:prompt参数应该包含此次对话主题的较完整内容,才能保证 AI 给出的下一次回答符合我们的基本认知。
前后端交互
对于前端来说,我们通常关注的是,我给后端发了什么数据,后端反馈给我什么数据。所以,前端关注点之一就是用户的输入,用上面的例子说,爱因斯坦是谁?和他做了什么贡献?这两个内容,应该分别作为前端两次请求的参数。而且,对于前端来说,我们也不需要考虑后端传给 Open AI 的prompt是不是完整,只要把用户输入的内容合理地传给后端就够了。
对于后端来说,我们要关注 session 问题,每个用户应该有属于自己和 AI 的私密对话空间,不能和其他的用户对话串了数据,这个可以基于 session 实现。前端每次传过来的信息只有简单的用户输入,而后端要关注与 Open AI 的对接过程,结合用户的输入以及会话中保留的一些信息,合并成一个完整的prompt传给 Open AI,这样才能得到正常的对话过程。
所以基本的流程应该是这个样子:
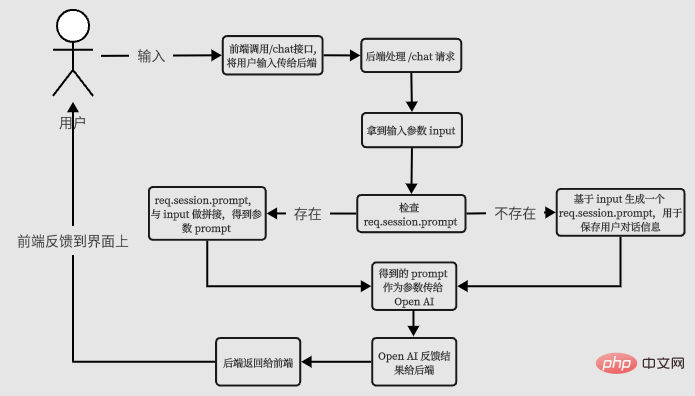
我们根据这个流程输出第一版代码。
后端V1版本代码
router.get('/chat-v1', async function(req, res, next) {
// 取得用户输入
const wd = req.query.wd;
// 构造 prompt 参数
if (!req.session.chatgptSessionPrompt) {
req.session.chatgptSessionPrompt = ''
}
const prompt = req.session.chatgptSessionPrompt + `n提问:` + wd + `nAI:`
try {
const completion = await openai.createCompletion({
model: "text-davinci-003",
prompt,
temperature: 0.9,
max_tokens: 150,
top_p: 1,
frequency_penalty: 0,
presence_penalty: 0.6,
stop: ["n提问:", "nAI:"],
});
// 调用 Open AI 成功后,更新 session
req.session.chatgptSessionPrompt = prompt + completion.data
// 返回结果
res.status(200).json({
code: '0',
result: completion.data.choices[0].text
});
} catch (error) {
console.error(error)
res.status(500).json({
message: "Open AI 调用异常"
});
}
});前端V1版本关键代码
const sendChatContentV1 = async () => {
// 先显示自己说的话
msgList.value.push({
time: format(new Date(), "HH:mm:ss"),
user: "我说",
content: chatForm.chatContent,
type: "mine",
customClass: "mine",
});
loading.value = true;
try {
// 调 chat-v1 接口,等结果
const { result } = await chatgptService.chatV1({ wd: chatForm.chatContent });
// 显示 AI 的答复
msgList.value.push({
time: format(new Date(), "HH:mm:ss"),
user: "Chat AI",
content: result,
type: "others",
customClass: "others",
});
} finally {
loading.value = false;
}
};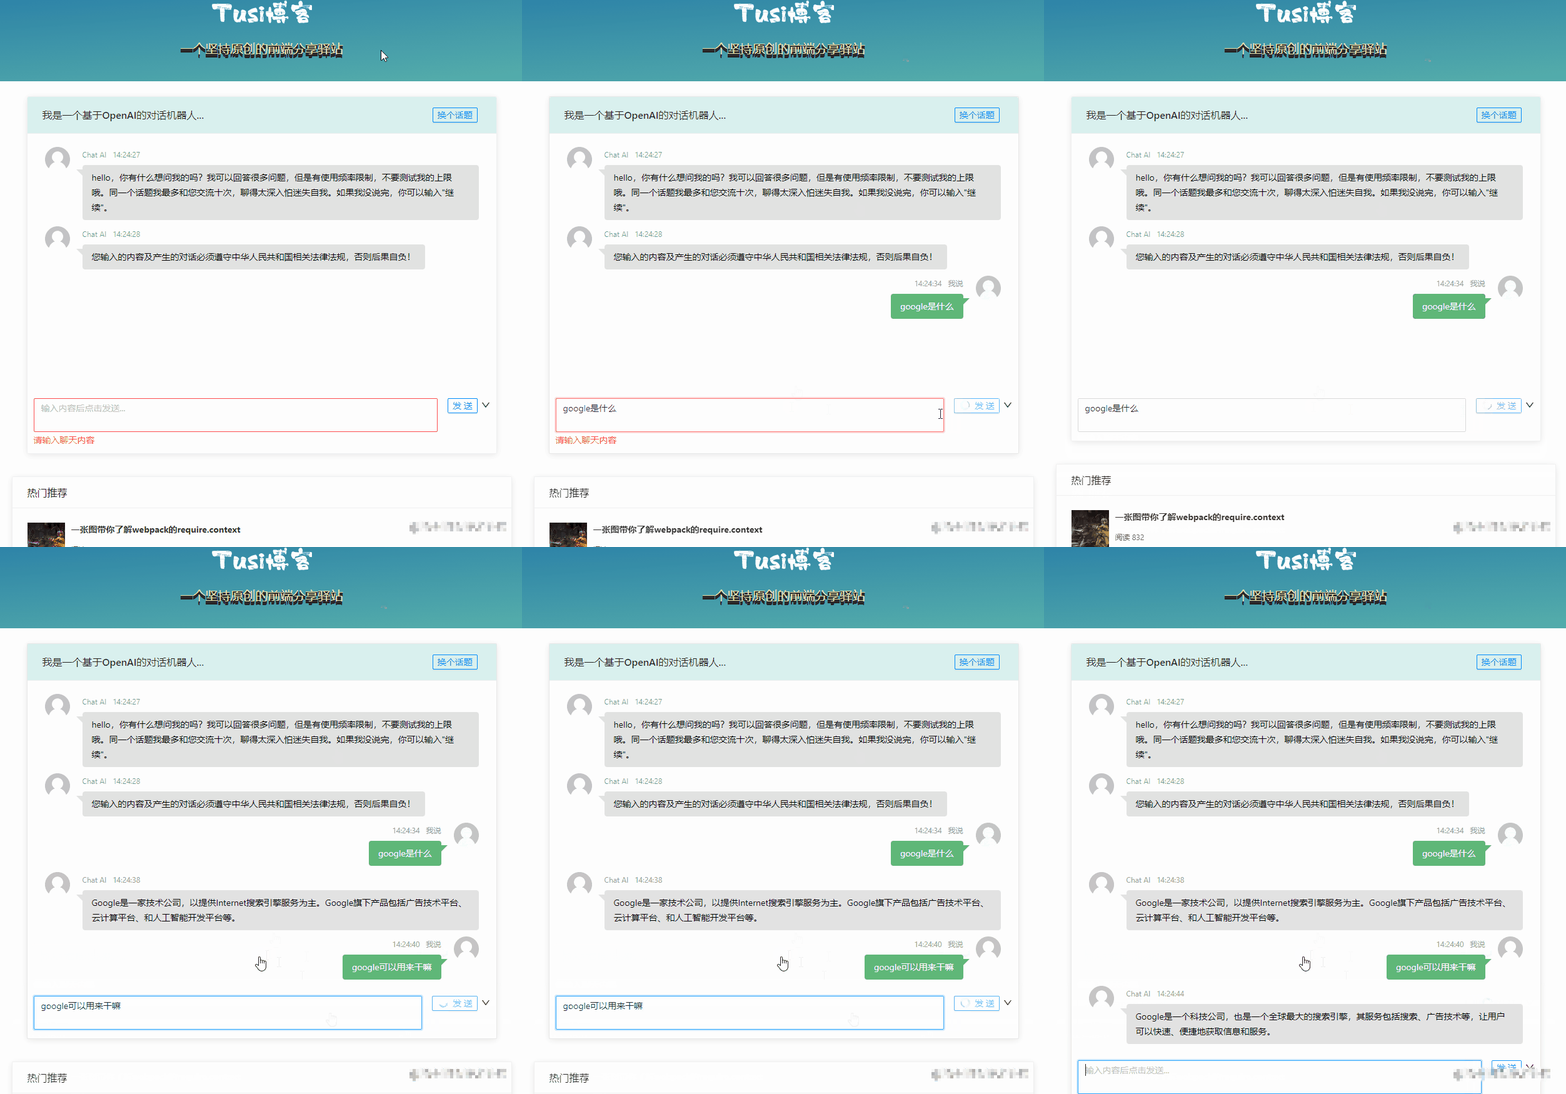
基本的对话能力已经有了,但是最明显的缺点就是一个回合等得太久了,我们希望他速度更快一点,至少在交互上看起来快一点。
流式输出(服务器推 + EventSource)
还好 Open AI 也支持 stream 流式输出,在前端可以配合 EventSource 一起用。
You can also set the stream parameter to true for the API to stream back text (as data-only server-sent events).
基本的数据流是这个样子的:

后端改造如下:
router.get('/chat-v2', async function(req, res, next) {
// ...省略部分代码
try {
const completion = await openai.createCompletion({
// ...省略部分代码
// 增加了 stream 参数
stream: true
}, { responseType: 'stream' });
// 设置响应的 content-type 为 text/event-stream
res.setHeader("content-type", "text/event-stream")
// completion.data 是一个 ReadableStream,res 是一个 WritableStream,可以通过 pipe 打通管道,流式输出给前端。
completion.data.pipe(res)
}
// ...省略部分代码
});前端放弃使用 axios 发起 HTTP 请求,而是改用 EventSource。
const sendChatContent = async () => {
// ...省略部分代码
// 先显示自己说的话
msgList.value.push({
time: format(new Date(), "HH:mm:ss"),
user: "我说",
content: chatForm.chatContent,
type: "mine",
customClass: "mine",
});

// 通过 EventSource 取数据
const es = new EventSource(`/api/chatgpt/chat?wd=${chatForm.chatContent}`);

// 记录 AI 答复的内容
let content = "";

// ...省略部分代码

es.onmessage = (e) => {
if (e.data === "[DONE]") {
// [DONE] 标志数据结束,调用 feedback 反馈给服务器
chatgptService.feedback(content);
es.close();
loading.value = false;
updateScrollTop();
return;
}
// 从数据中取出文本
const text = JSON.parse(e.data).choices[0].text;
if (text) {
if (!content) {
// 第一条数据来了,先显示
msgList.value.push({
time: format(new Date(), "HH:mm:ss"),
user: "Chat AI",
content: text,
type: "others",
customClass: "others",
});
// 再拼接
content += text;
} else {
// 先拼接
content += text;
// 再更新内容,实现打字机效果
msgList.value[msgList.value.length - 1].content = content;
}
}
};
};从代码中可以发现前端在 EventSource message 接收结束时,还调用了一个 feedback 接口做反馈。这是因为在使用 Pipe 输出时,后端没有记录 AI 答复的文本,考虑到前端已经处理了文本,这里就由前端做一次反馈,把本次 AI 答复的内容完整回传给后端,后端再更新 session 中存储的对话信息,保证对话上下文的完整性。
feedback 接口的实现比较简单:
router.post('/feedback', function(req, res, next) {
if (req.body.result) {
req.session.chatgptSessionPrompt += req.body.result
res.status(200).json({
code: '0',
msg: "更新成功"
});
} else {
res.status(400).json({
msg: "参数错误"
});
}
});我这里只是给出一种简单的做法,实际产品中可能要考虑的会更多,或者应该在后端自行处理 session 内容,而不是依靠前端的反馈。
最终的效果大概是这个样子:

限制访问频次
由于 Open AI 也是有免费额度的,所以在调用频率和次数上也应该做个限制,防止被恶意调用,这个也可以通过 session 来处理。我这里也提供一种比较粗糙的处理方式,具体请往下看。实际产品中可能会写 Redis,写库,加定时任务之类的,这方面我也不够专业,就不多说了。
针对访问频率,我暂定的是 3 秒内最多调用一次,我们可以在调用 Open AI 成功之后,在 session 中记录时间戳。
req.session.chatgptRequestTime = Date.now()
当一个新的请求过来时,可以用当前时间减去上次记录的chatgptRequestTime,判断一下是不是在 3 秒内,如果是,就返回 HTTP 状态码 429;如果不在 3 秒内,就可以继续后面的逻辑。
if (req.session.chatgptRequestTime && Date.now() - req.session.chatgptRequestTime <= 3000) {
// 不允许在3s里重复调用
return res.status(429).json({
msg: "请降低请求频次"
});
}关于请求次数也是同样的道理,我这里也写得很简单,实际上还应该有跨天清理等逻辑要做。我这里偷懒了,暂时没做这些。
if (req.session.chatgptTimes && req.session.chatgptTimes >= 50) {
// 实际上还需要跨天清理,这里先偷懒了。
return res.status(403).json({
msg: "到达调用上限,欢迎明天再来哦"
});
}同一个话题也不能聊太多,否则传给 Open AI 的 prompt 参数会很大,这就可能会耗费很多 Token,也有可能超过 Open AI 参数的限制。
if (req.session.chatgptTopicCount && req.session.chatgptTopicCount >= 10) {
// 一个话题聊的次数超过限制时,需要强行重置 chatgptSessionPrompt,换个话题。
req.session.chatgptSessionPrompt = ''
req.session.chatgptTopicCount = 0
return res.status(403).json({
msg: "这个话题聊得有点深入了,不如换一个"
});
}切换话题
客户端应该也有切换话题的能力,否则 session 中记录的信息可能会包含多个话题的内容,可能导致与用户的预期不符。那我们做个接口就好了。
router.post('/changeTopic', function(req, res, next) {
req.session.chatgptSessionPrompt = ''
req.session.chatgptTopicCount = 0
res.status(200).json({
code: '0',
msg: "可以尝试新的话题"
});
});结语
总的来说,Open AI 开放出来的智能对话能力可以满足基本需求,但是还有很大改进空间。我在文中给出的代码仅供参考,不保证功能上的完美。
附上源码地址,可以点个 star 吗,球球了[认真脸]。
参考
[1]体验链接: https://blog.wbjiang.cn/chatgpt
[2]ChatGPT: https://openai.com/
[3]注册: https://beta.openai.com/login/
[4]SMS-ACTIVATE: https://sms-activate.org/cn
[5]Web工作台: https://chat.openai.com/chat
[6]文档: https://beta.openai.com/
[7]案例: https://beta.openai.com/examples
[8]openai: https://www.npmjs.com/package/openai
[9]生成一个 API Key: https://beta.openai.com/account/api-keys
[10]Key concepts: https://beta.openai.com/docs/introduction/key-concepts
[11]WebSocket 聊天功能: https://blog.wbjiang.cn/chat
[12]data-only server-sent events: https://developer.mozilla.org/en-US/docs/Web/API/Server-sent_events/Using_server-sent_events#Event_stream_format
[13]源码地址: https://github.com/cumt-robin/vue3-ts-blog-frontend
The above is the detailed content of Spend 1 yuan to make your website support ChatGPT. For more information, please follow other related articles on the PHP Chinese website!

Hot AI Tools

Undresser.AI Undress
AI-powered app for creating realistic nude photos

AI Clothes Remover
Online AI tool for removing clothes from photos.

Undress AI Tool
Undress images for free

Clothoff.io
AI clothes remover

Video Face Swap
Swap faces in any video effortlessly with our completely free AI face swap tool!

Hot Article

Hot Tools

Notepad++7.3.1
Easy-to-use and free code editor

SublimeText3 Chinese version
Chinese version, very easy to use

Zend Studio 13.0.1
Powerful PHP integrated development environment

Dreamweaver CS6
Visual web development tools

SublimeText3 Mac version
God-level code editing software (SublimeText3)

Hot Topics
 ChatGPT now allows free users to generate images by using DALL-E 3 with a daily limit
Aug 09, 2024 pm 09:37 PM
DALL-E 3 was officially introduced in September of 2023 as a vastly improved model than its predecessor. It is considered one of the best AI image generators to date, capable of creating images with intricate detail. However, at launch, it was exclus
 Is there any website for learning C language?
Jan 30, 2024 pm 02:38 PM
Websites for learning C language: 1. C Language Chinese Website; 2. Rookie Tutorial; 3. C Language Forum; 4. C Language Empire; 5. Script House; 6. Tianji.com; 7. Red and Black Alliance; 8, 51 Self-study network; 9. Likou; 10. C Programming. Detailed introduction: 1. C language Chinese website, which is a website dedicated to providing C language learning materials for beginners. It is rich in content, including basic grammar, pointers, arrays, functions, structures and other modules; 2. Rookie tutorials, This is a comprehensive programming learning website and more.
 How to install chatgpt on mobile phone
Mar 05, 2024 pm 02:31 PM
Installation steps: 1. Download the ChatGTP software from the ChatGTP official website or mobile store; 2. After opening it, in the settings interface, select the language as Chinese; 3. In the game interface, select human-machine game and set the Chinese spectrum; 4 . After starting, enter commands in the chat window to interact with the software.
 How to develop an intelligent chatbot using ChatGPT and Java
Oct 28, 2023 am 08:54 AM
In this article, we will introduce how to develop intelligent chatbots using ChatGPT and Java, and provide some specific code examples. ChatGPT is the latest version of the Generative Pre-training Transformer developed by OpenAI, a neural network-based artificial intelligence technology that can understand natural language and generate human-like text. Using ChatGPT we can easily create adaptive chats
 How to build an intelligent customer service robot using ChatGPT PHP
Oct 28, 2023 am 09:34 AM
How to use ChatGPTPHP to build an intelligent customer service robot Introduction: With the development of artificial intelligence technology, robots are increasingly used in the field of customer service. Using ChatGPTPHP to build an intelligent customer service robot can help companies provide more efficient and personalized customer services. This article will introduce how to use ChatGPTPHP to build an intelligent customer service robot and provide specific code examples. 1. Install ChatGPTPHP and use ChatGPTPHP to build an intelligent customer service robot.
 Can chatgpt be used in China?
Mar 05, 2024 pm 03:05 PM
chatgpt can be used in China, but cannot be registered, nor in Hong Kong and Macao. If users want to register, they can use a foreign mobile phone number to register. Note that during the registration process, the network environment must be switched to a foreign IP.
 The perfect combination of ChatGPT and Python: building a real-time chatbot
Oct 28, 2023 am 08:37 AM
The perfect combination of ChatGPT and Python: Building a real-time chatbot Introduction: With the rapid development of artificial intelligence technology, chatbots play an increasingly important role in various fields. Chatbots can help users provide immediate and personalized assistance while also providing businesses with efficient customer service. This article will introduce how to use OpenAI's ChatGPT model and Python language to create a real-time chat robot, and provide specific code examples. 1. ChatGPT
 SearchGPT: Open AI takes on Google with its own AI search engine
Jul 30, 2024 am 09:58 AM
Open AI is finally making its foray into search. The San Francisco company has recently announced a new AI tool with search capabilities. First reported by The Information in February this year, the new tool is aptly called SearchGPT and features a c


