7 fixes to make if Windows 11's weather widget isn't showing up in the taskbar
Windows 11 gets rid of the News and Interests section and replaces it with Widgets, which you can turn on or off through settings.
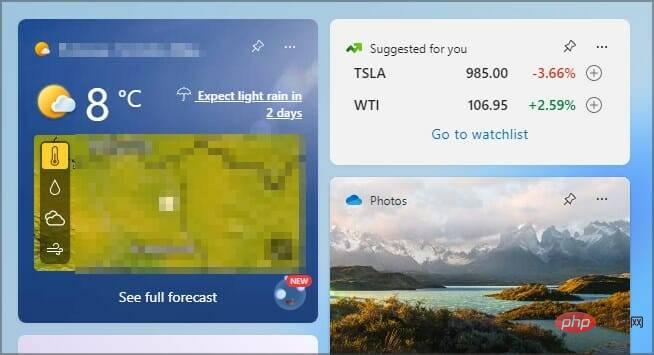
Weather app comes with widgets that show all the details and information you want about the weather. To do this, you have to click and open the app to view it.
Some users are experiencing difficulty when trying to display the weather in the taskbar. Some people end up abandoning the feature because they can't solve the problem.
Many people have reported missing taskbar icons on Windows 11, but this is easy to fix. For more information about the weather widget, be sure to keep reading.
What is the reason why Windows 11 weather is not showing up on the taskbar?
#There are several reasons why the taskbar does not display the weather function. Some of the main reasons include:
- Pending updates from a specific version or previous updates during migration from Windows 10 to 11
- Corrupted registry and system files
- Incorrect setup and configuration
- Conflicting user accounts
- Issues with TLS and SSL
If the Windows 11 weather widget does not show up in the task bar, how do I fix it?
1. Check the widget settings
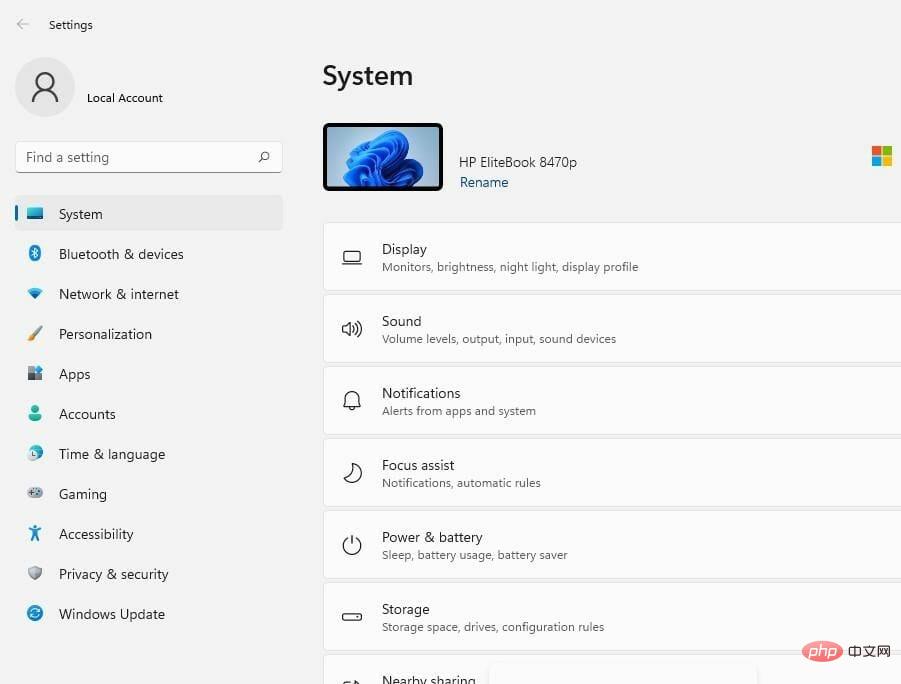
- Go to the Search button, enter Settings, and hit Enter.

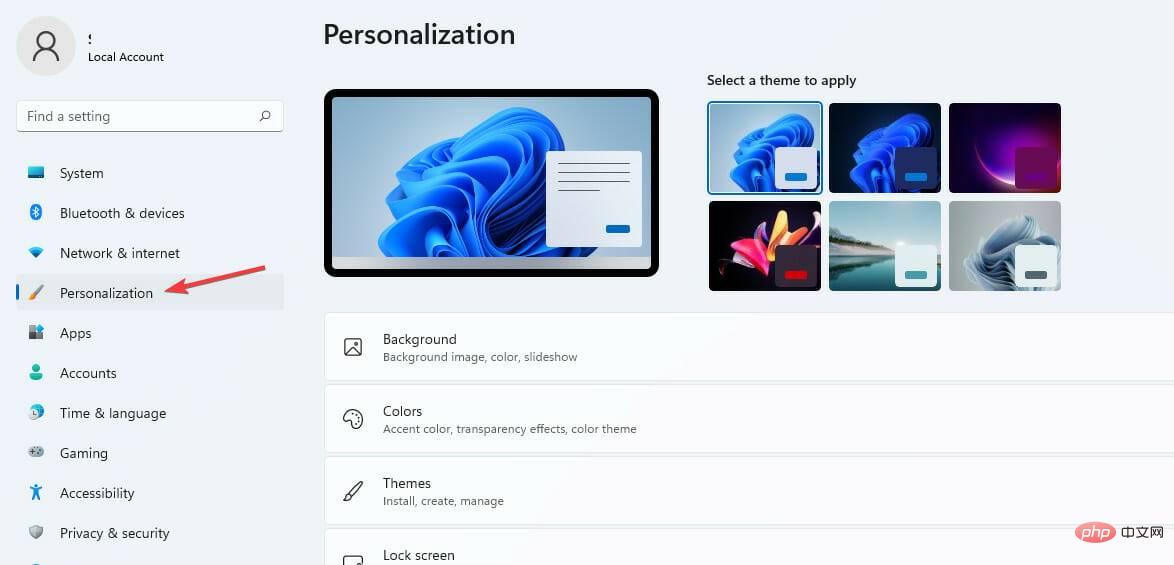
- # Click the Personalize tab.

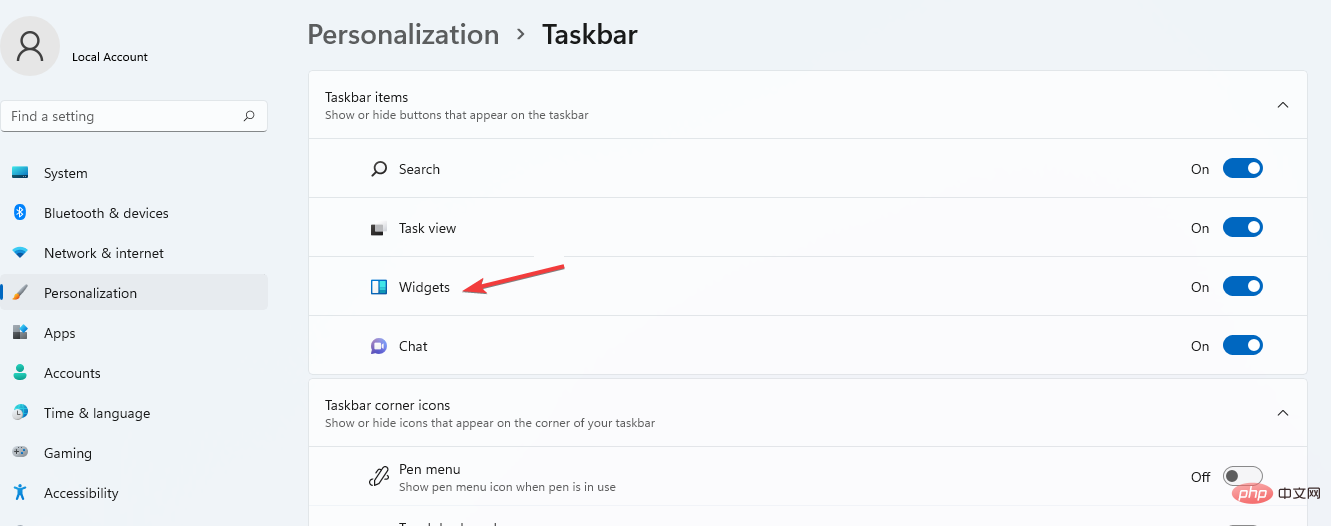
- In the list of taskbar items, find the Widgets option.

- Toggle the Widget button to turn it on.
2. Clean PC files
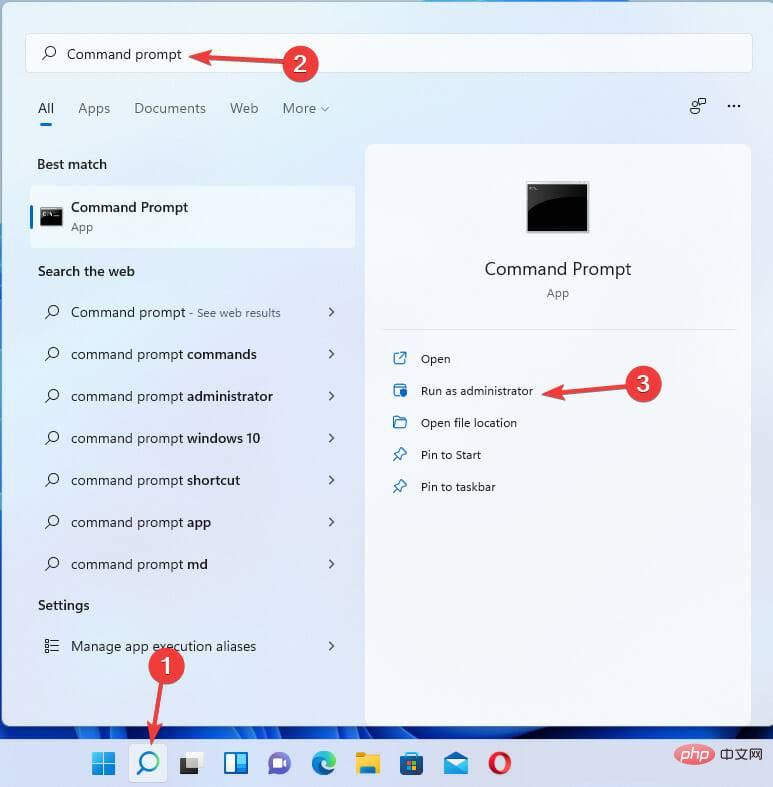
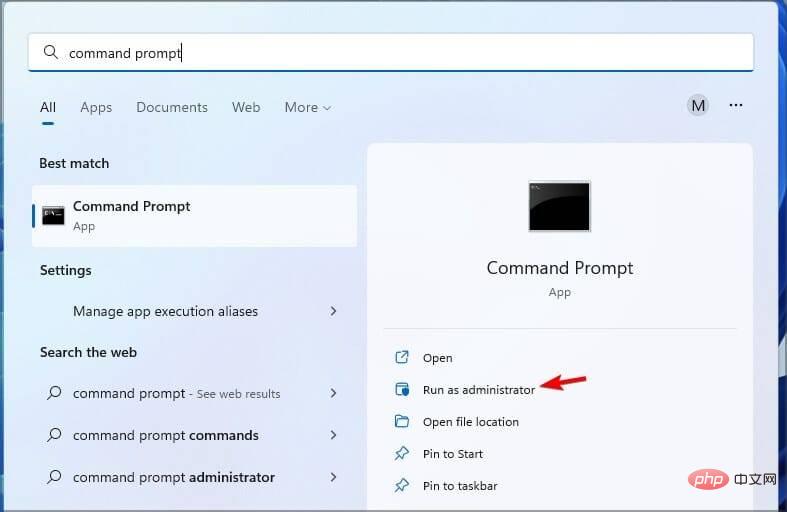
- Open the start search box, type command prompt and select as administrator Run options.

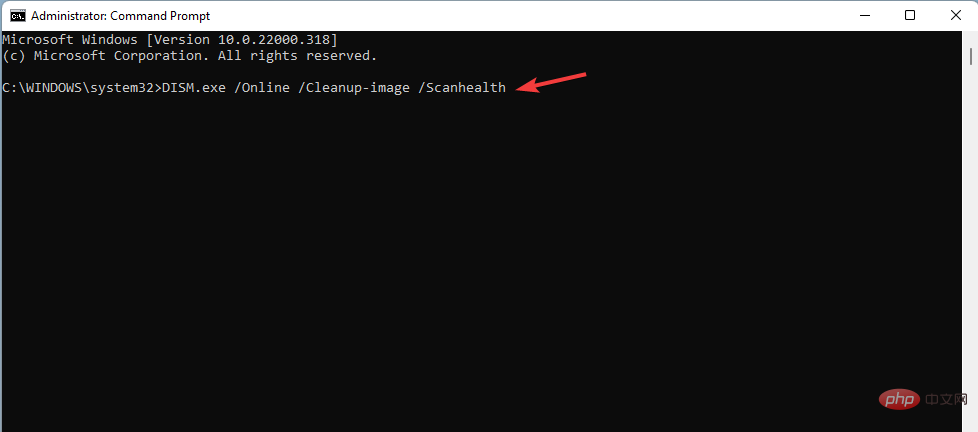
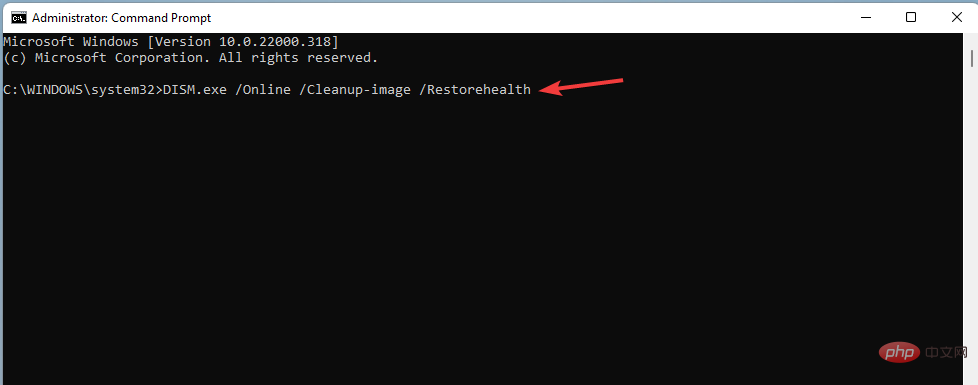
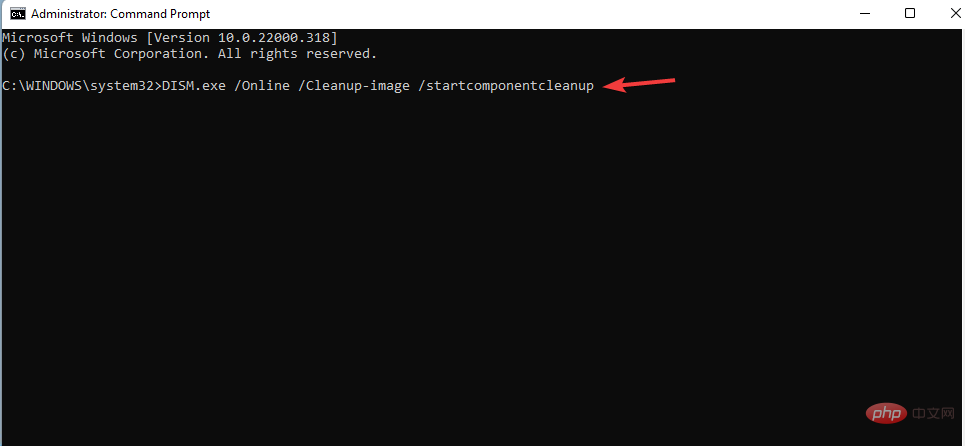
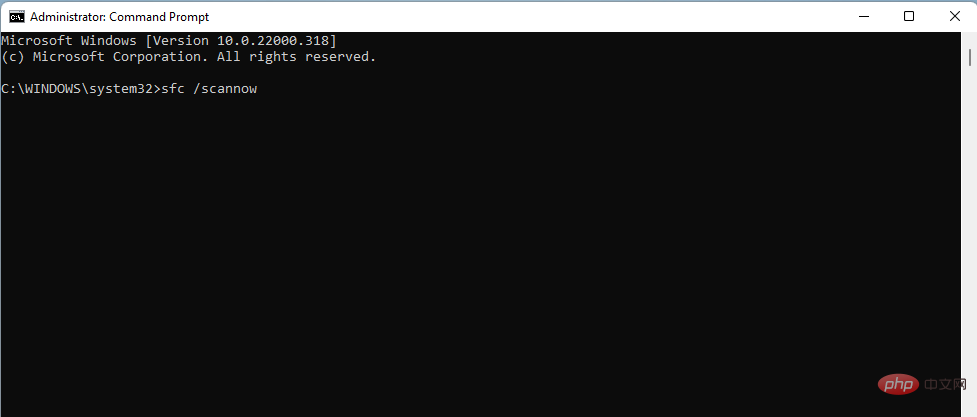
- Type the following commands in the following order and click Enter respectively:
<strong>DISM.exe /Online /Cleanup-image /Scanhealth</strong>
<strong>DISM.exe /Online /Cleanup-image /Restorehealth</strong>
##DISM.exe / Online /Cleanup-image /startcomponentcleanup<strong></strong>
sfc /scannow<strong></strong> Restart Your PC
⇒ Get Recovery
3. Enable SSL and TLS
- Press the I key on your Windows keyboard to open the Settings app.
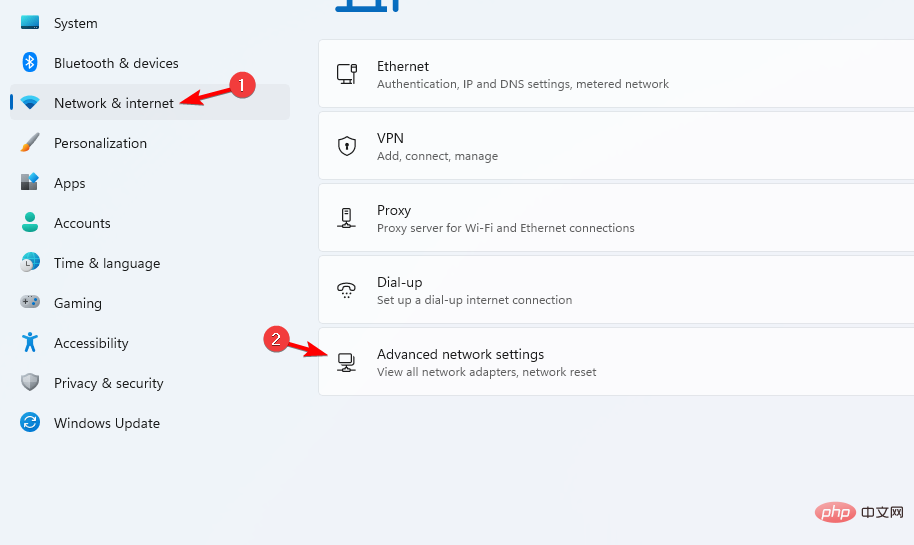
- Select the Network and Internet tab. Click Advanced network settings.

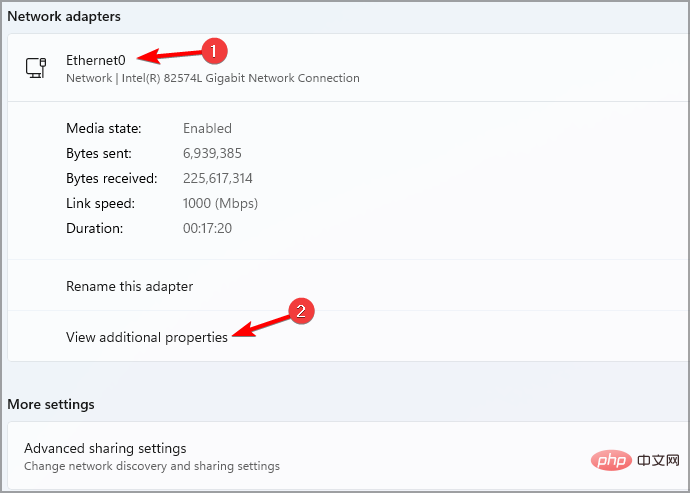
- Select the network type you are using.
- Click to view all properties.

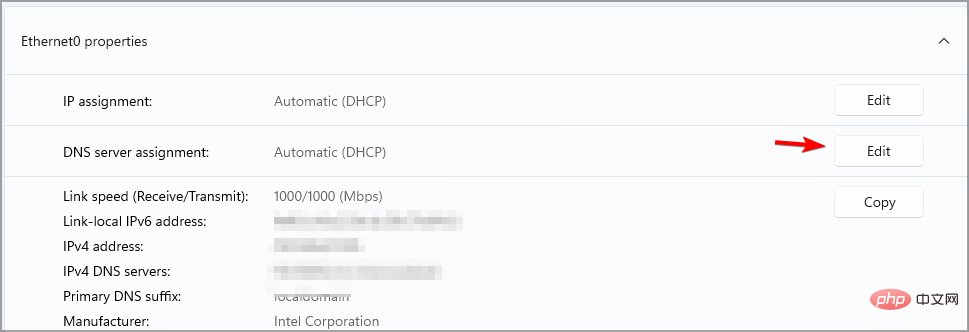
- Select the Edit button on the DNS Server Assignment tab.

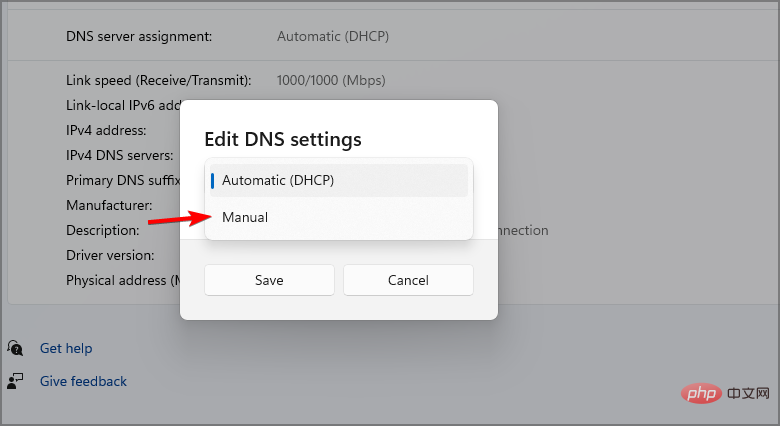
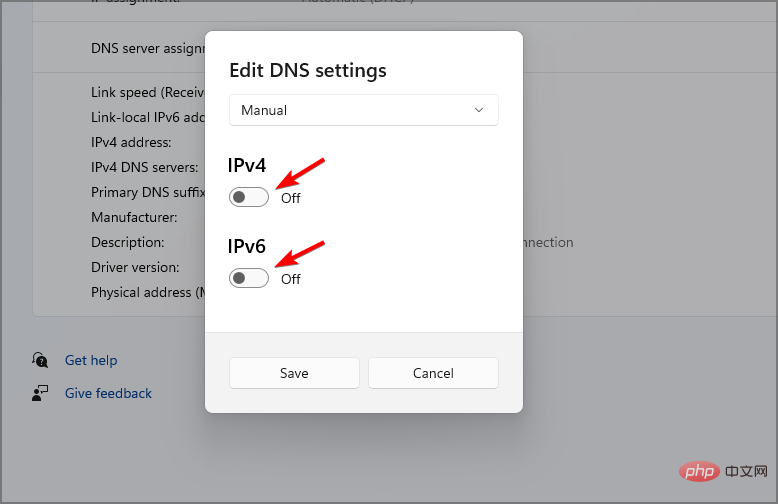
- Change DNS settings from Automatic (DHCP) to Manual.

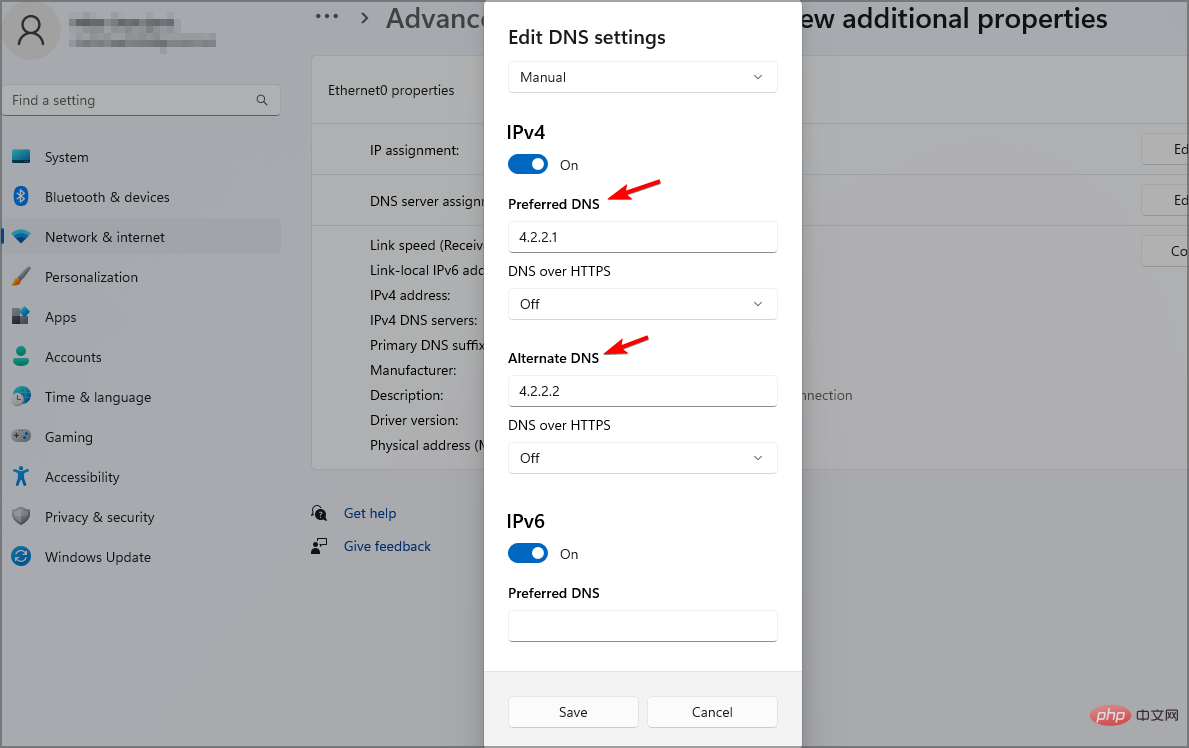
- Toggle the IPv4 and IPv6 buttons and turn them on.

- Change the preferred DNS details to 4.2.2.1 and the backup DNS to 4.2.2.2 .

- Click OK to save changes.
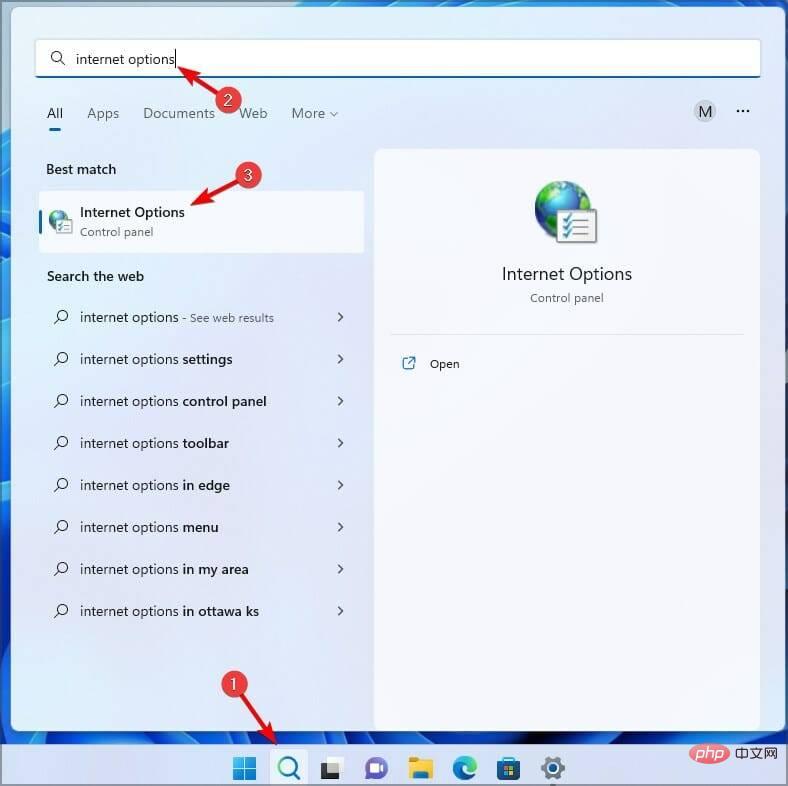
- Return to the Start button Search Internet Options, and press Enter to open Internet properties.

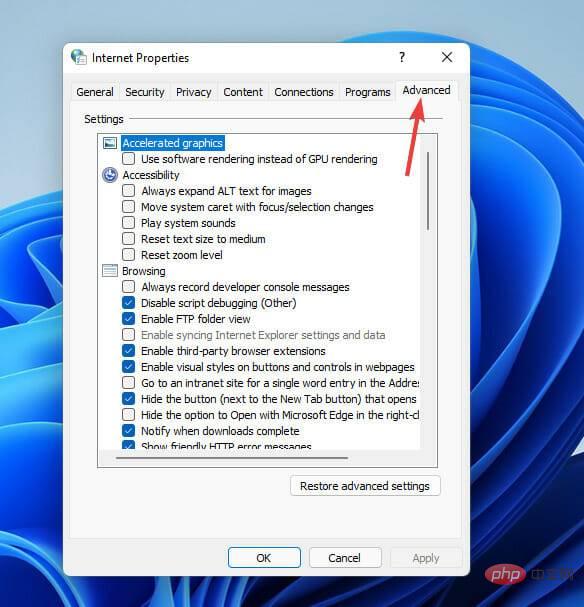
- Click the Advanced tab.

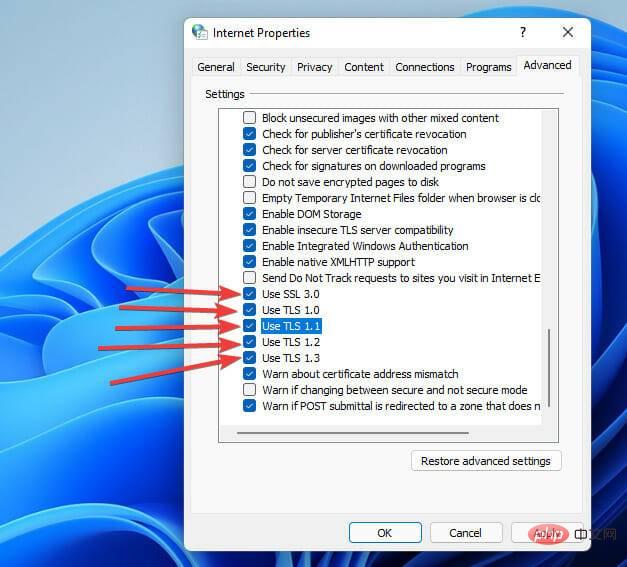
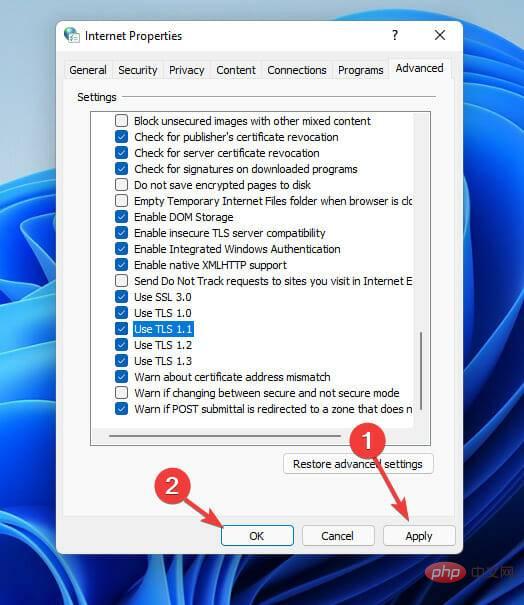
- Scroll to the Security category and check these options: SSL 3.0, TLS 1.0, TLS 1.1, TLS 1.2, TLS 1.3.

- Click Apply and OK to apply the changes.

4. Use third-party software
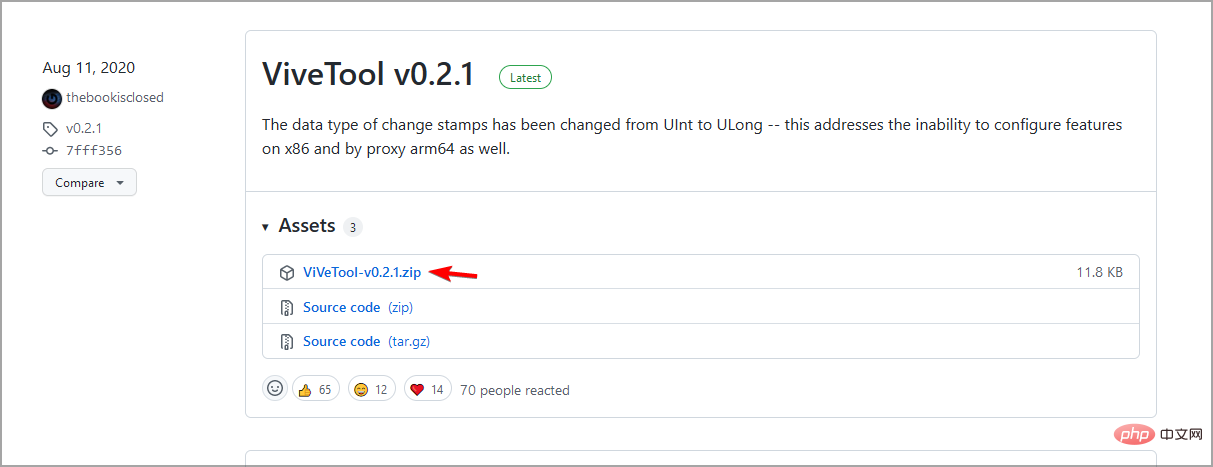
- Go to Vivetool official website to download.

- Copy all contents of Vivetool to the following directory:
<strong>Windows\System 32</strong> - Go to search and type command prompt and select the Run as administrator option.

- Type each of these commands as you click Enter:
<strong>vivetool addconfig 34301415 2<br>vivetool addconfig 36226456 2<br>vivetool addconfig 36553793 2<br>vivetool addconfig 36226054 2</strong>##Restart your computer.
5. Configure Group Policy
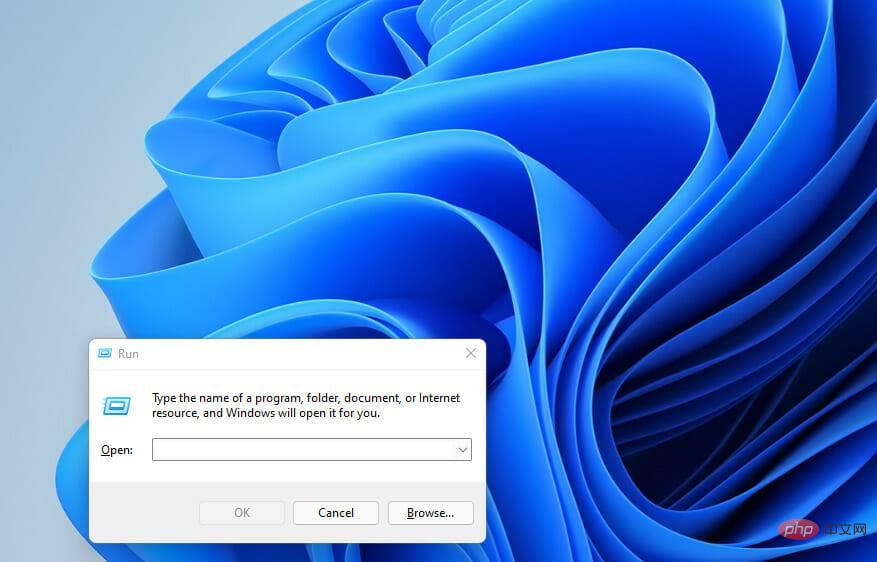
- Press the R key on the Windows keyboard to open an empty Run dialog box.

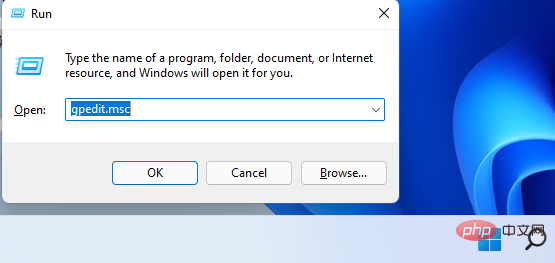
- Type gpedit.msc and click OK.

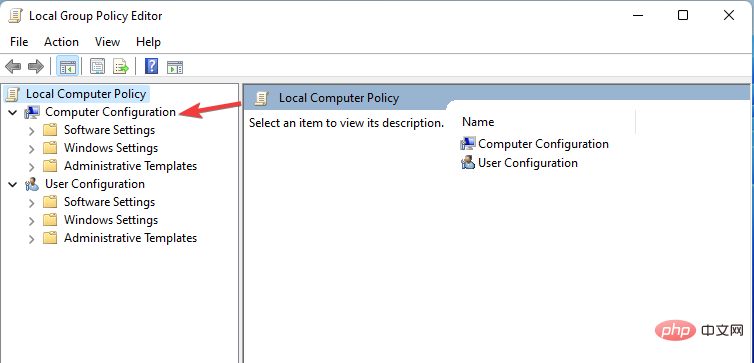
- Navigate to the computer configuration directory.

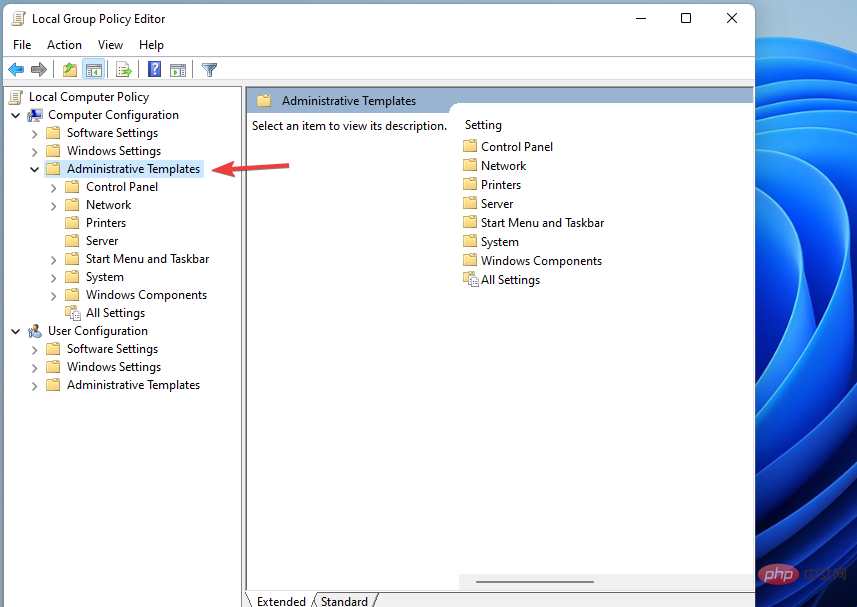
- Select Administrative Templates and then select Windows Components.

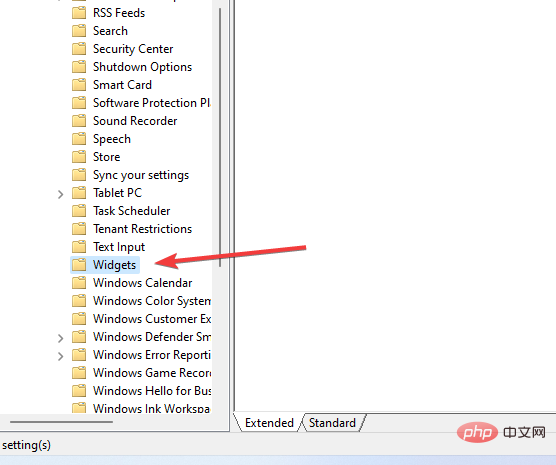
- Find the Widgets folder and double-click it to open it.

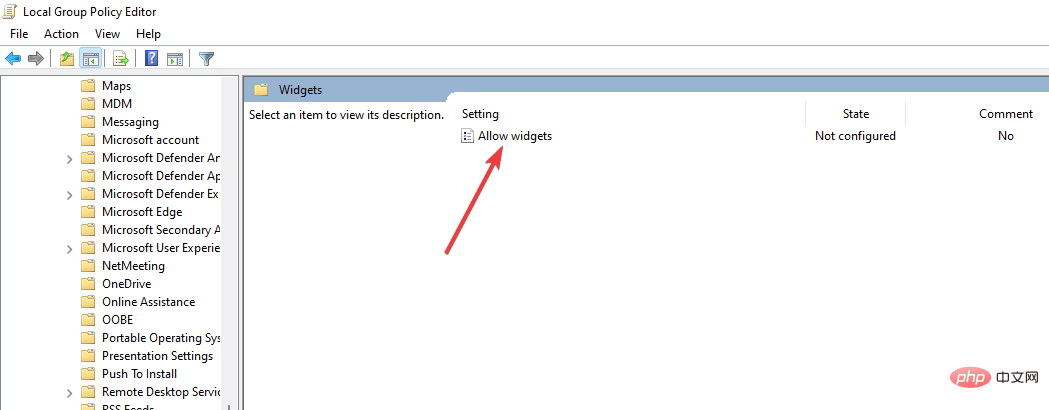
- Click the Allow widgets option to open the expanded window.

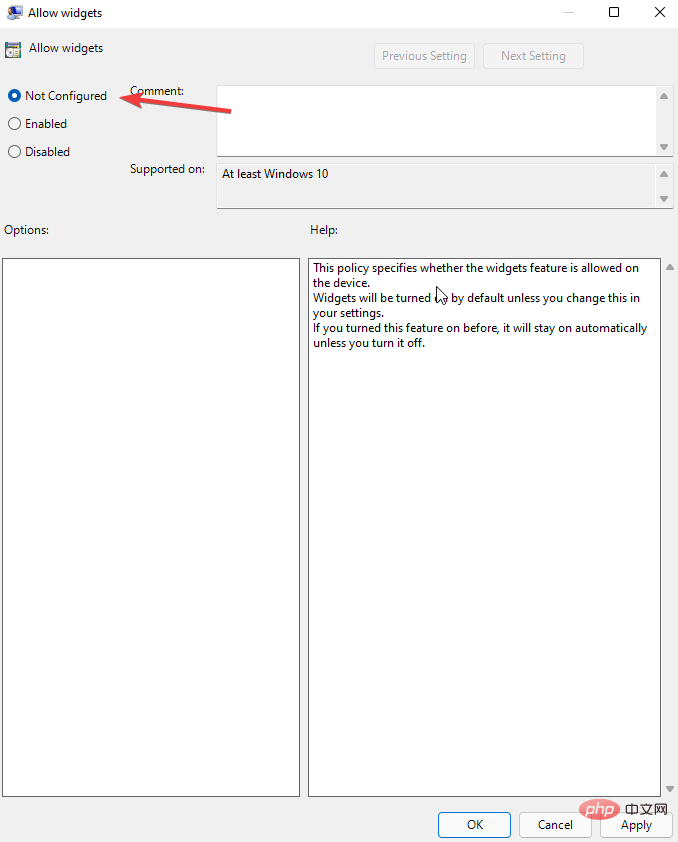
- Select the Not Configured option and click Apply, then Click OK to save the changes.

6. Create a new user account
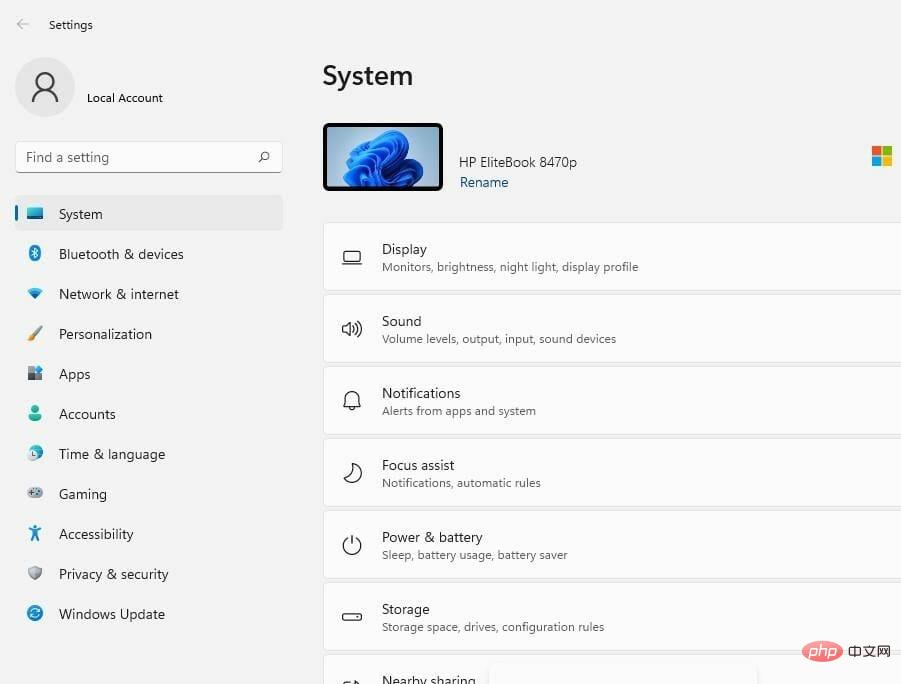
- Click the Start Search button, type Settings, Then click Enter.
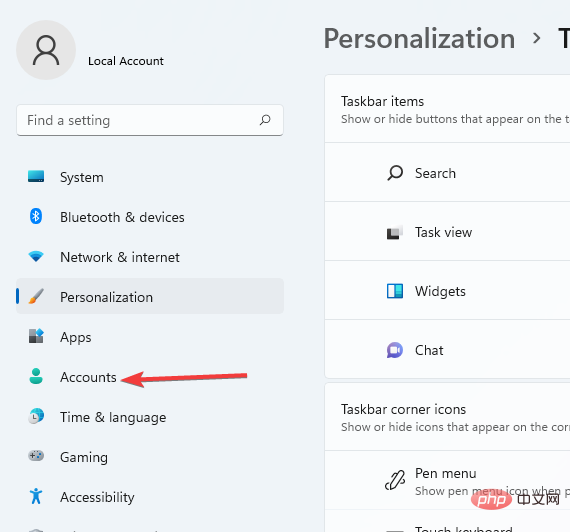
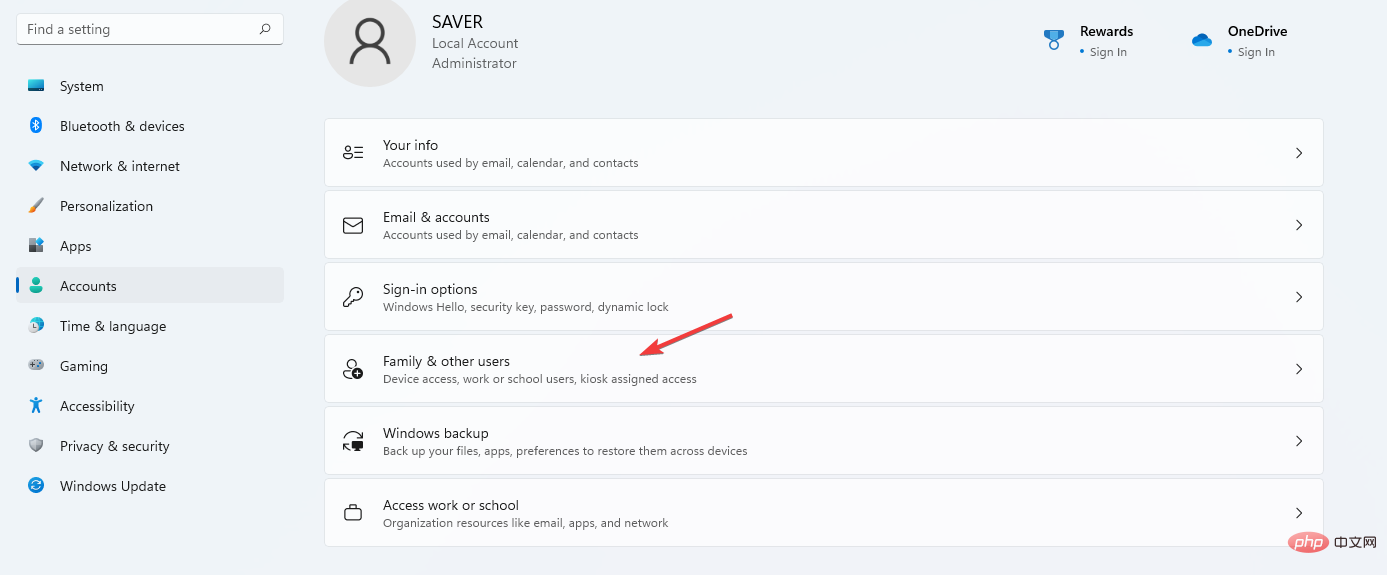
- Click on the Account option.

- Select the Family and other users option.

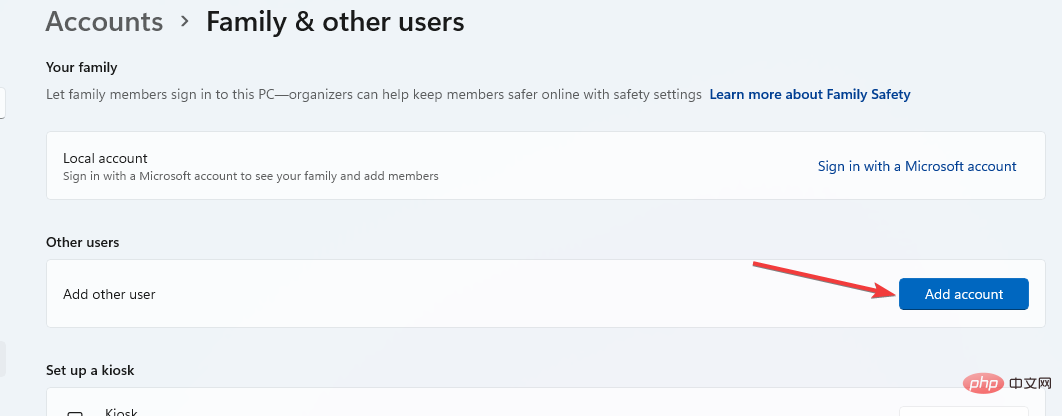
- On the Other Users tab, select Add Account to add additional users.

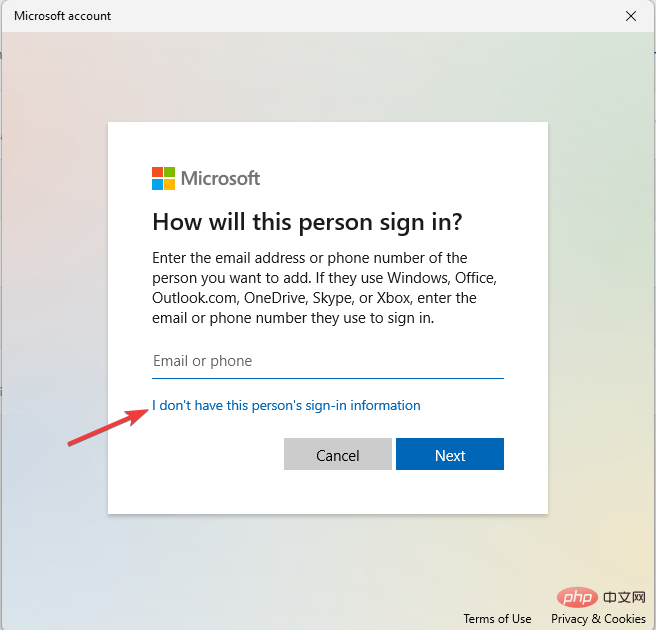
- When prompted for your Microsoft account, select I don't have login information for this person.

- Select the Add users without a Microsoft account option. Enter your username, password, password hint, click Next, and follow the prompts to complete the process.
After creating the account, log out of the old account and log in to the new account. Repeat the same process and log in to your previous account. The problem is solved.
7. Check for your Windows updates
- Press the I key on your Windows keyboard to open "Settings”Apply.

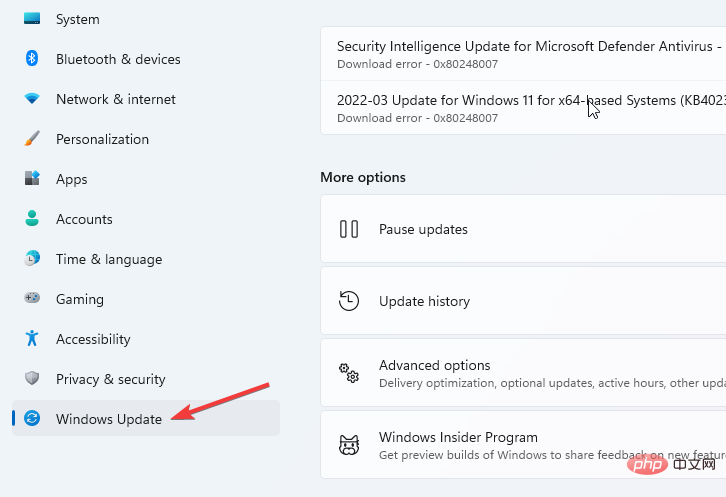
- Click on the Windows Update tab.

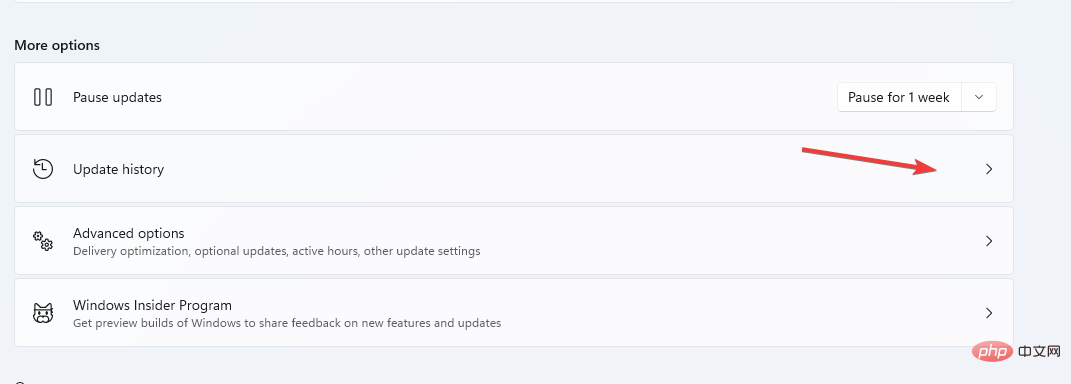
- Click Update History. If you have the KB5010414 update, please try it. If the update is not present, install it and try again.

This option is primarily intended for users who upgraded directly from Windows 10 to 11 using updates. The weather feature was released with the KB5010414 update, so it is a must to enjoy the weather feature.
Why is the Windows 11 weather widget not updating?
If the weather widget is not updating, there may be network issues preventing it from working properly, so be sure to check.
A corrupt Windows installation can also cause this problem, so you may need to repair the installation or recreate the user profile.
Windows 11 has a lot of widgets for different purposes. Some of the other widgets that come with the new operating system include calendar, photos, tips, entertainment, transportation, and more.
The above is the detailed content of 7 fixes to make if Windows 11's weather widget isn't showing up in the taskbar. For more information, please follow other related articles on the PHP Chinese website!

Hot AI Tools

Undresser.AI Undress
AI-powered app for creating realistic nude photos

AI Clothes Remover
Online AI tool for removing clothes from photos.

Undress AI Tool
Undress images for free

Clothoff.io
AI clothes remover

AI Hentai Generator
Generate AI Hentai for free.

Hot Article

Hot Tools

Notepad++7.3.1
Easy-to-use and free code editor

SublimeText3 Chinese version
Chinese version, very easy to use

Zend Studio 13.0.1
Powerful PHP integrated development environment

Dreamweaver CS6
Visual web development tools

SublimeText3 Mac version
God-level code editing software (SublimeText3)

Hot Topics
 How to fine-tune deepseek locally
Feb 19, 2025 pm 05:21 PM
Local fine-tuning of DeepSeek class models faces the challenge of insufficient computing resources and expertise. To address these challenges, the following strategies can be adopted: Model quantization: convert model parameters into low-precision integers, reducing memory footprint. Use smaller models: Select a pretrained model with smaller parameters for easier local fine-tuning. Data selection and preprocessing: Select high-quality data and perform appropriate preprocessing to avoid poor data quality affecting model effectiveness. Batch training: For large data sets, load data in batches for training to avoid memory overflow. Acceleration with GPU: Use independent graphics cards to accelerate the training process and shorten the training time.
 deepseek image generation tutorial
Feb 19, 2025 pm 04:15 PM
DeepSeek: A powerful AI image generation tool! DeepSeek itself is not an image generation tool, but its powerful core technology provides underlying support for many AI painting tools. Want to know how to use DeepSeek to generate images indirectly? Please continue reading! Generate images with DeepSeek-based AI tools: The following steps will guide you to use these tools: Launch the AI Painting Tool: Search and open a DeepSeek-based AI Painting Tool (for example, search "Simple AI"). Select the drawing mode: select "AI Drawing" or similar function, and select the image type according to your needs, such as "Anime Avatar", "Landscape"
 Pi Node Teaching: What is a Pi Node? How to install and set up Pi Node?
Mar 05, 2025 pm 05:57 PM
Detailed explanation and installation guide for PiNetwork nodes This article will introduce the PiNetwork ecosystem in detail - Pi nodes, a key role in the PiNetwork ecosystem, and provide complete steps for installation and configuration. After the launch of the PiNetwork blockchain test network, Pi nodes have become an important part of many pioneers actively participating in the testing, preparing for the upcoming main network release. If you don’t know PiNetwork yet, please refer to what is Picoin? What is the price for listing? Pi usage, mining and security analysis. What is PiNetwork? The PiNetwork project started in 2019 and owns its exclusive cryptocurrency Pi Coin. The project aims to create a one that everyone can participate
 How to ask deepseek
Feb 19, 2025 pm 04:39 PM
The search accuracy of DeepSeek depends on the way of asking questions. To achieve ideal results, the question should contain the following key elements: Clear topic: Specific specified information objectives. Specific angles: Cut into the topic from a specific perspective. Expected output form: define the desired result type (summary, analysis, list, etc.).
 How to download deepseek
Feb 19, 2025 pm 05:45 PM
Make sure to access official website downloads and carefully check the domain name and website design. After downloading, scan the file. Read the protocol during installation and avoid the system disk when installing. Test the function and contact customer service to solve the problem. Update the version regularly to ensure the security and stability of the software.
 How to use deepseek
Feb 19, 2025 pm 04:45 PM
DeepSeek is an efficient data search and analysis tool with an indexing mechanism at its core. Factors that affect their efficiency include: data type, data size, search strategy, and DeepSeek performance. High-quality data, refined search queries and sufficient computing resources are essential to optimize search results.
 How to adjust Sesame Open Exchange into Chinese
Mar 04, 2025 pm 11:51 PM
How to adjust Sesame Open Exchange to Chinese? This tutorial covers detailed steps on computers and Android mobile phones, from preliminary preparation to operational processes, and then to solving common problems, helping you easily switch the Sesame Open Exchange interface to Chinese and quickly get started with the trading platform.
 Ouyi Exchange Download Official Portal
Feb 21, 2025 pm 07:51 PM
Ouyi, also known as OKX, is a world-leading cryptocurrency trading platform. The article provides a download portal for Ouyi's official installation package, which facilitates users to install Ouyi client on different devices. This installation package supports Windows, Mac, Android and iOS systems. Users can choose the corresponding version to download according to their device type. After the installation is completed, users can register or log in to the Ouyi account, start trading cryptocurrencies and enjoy other services provided by the platform.


