

How long does it take to install Windows 11: Everything you need to know

It’s been almost a year since Microsoft released Windows 11, and since then, more features have been rolled out and bugs fixed. But many users are still migrating from Windows 10 to 11, and if you are one of them, you must be wondering how much time it takes to install Windows 11.
Not only Windows 10 users, if you are installing Windows 11 again for some reason, then you may also be wondering how long Windows 11 installation usually takes. Well, that’s everything you need to know about Windows 11 installation duration and the factors that affect it.
Content DisplayHow long does it usually take to install Windows 11?
Ideally, installing Windows 11 on your PC should not take more than 15 to 20 minutes. However, there is no single answer when it comes to Windows 11 installation times specific to individual settings. Continue reading below to learn more.
What affects Windows installation time?
Although Microsoft has significantly optimized and improved the process, there are still several variables specific to your PC that can affect installation time. Let's get acquainted with them.
1. Specifications (Available Resources)
#Depending on how your PC is configured and the resources you currently have available, they may have an impact on Windows 11 installation times Tremendous influence. During installation, Windows 11 customizes, partitions, installs, and performs a number of other processes that help set up your PC based on the specific requirements of your hardware components.
While you don't lose anything for lack of a GPU, you may suffer when you're short on RAM, have a limited CPU due to available cores or thermal design, or have a slower SSD or HDD A slow experience.
2. Bandwidth
Bandwidth and network speed are variables only if you are trying to install Windows 11 via the cloud. If you're using recovery or installation media, this won't be a factor for you. On the network installation side, downloads can be instant, especially if you have a gigabit connection via LAN.
However, if you are using Wi-Fi, your experience may vary. When installing Windows 11 in the cloud, the following factors may affect your download speed and slow down the installation time.
- Network Speed: If you have a slow network or share your current Wi-Fi network with many connected devices, you will experience slow download speeds , resulting in increased installation time.
- Ping: End-of-day downloads require a stable connection to transfer and install files without interruption. If your ping is high resulting in an unstable connection, you will face increased installation times due to slower download speeds.
- Wi-Fi Band: If you are in a densely populated or public place with many Wi-Fi connections nearby, the Wi-Fi band you are currently using can also play an important role. Covers Windows 11 installation time. This is especially true if you're on a 2.4GHz Wi-Fi network, resulting in slower download speeds.
3. USB transfer speed
#If you use USB storage media to install Windows 11 on your PC, then it can 11 plays an important role in the time required. If you are using any of the following devices
then we recommend that you check its USB specifications and the corresponding specifications on USB. You can then use the next section to measure your download time.
- External Hard Drive/SSD
- USB Memory Stick
- External CD/DVD Drive
- Other External Mass Storage Device
4. Server Availability

Microsoft's servers may sometimes experience download issues, especially when recent updates/patches are released to all PCs situation. This may result in increased wait times due to limited bandwidth and server availability. Additionally, servers in your region may face issues or downtime.
Although rare, this situation can happen, causing an error that prevents you from installing Windows 11 for a period of time. Another factor that can cause server unavailability or issues could be issues faced by your ISP. In some cases, your DNS settings may also cause problems with downloads. We recommend that you refer to the relevant sections below for more information.
How long does it take to install Windows 11 under different circumstances?
Here's how long it takes, depending on the variables that play an important role in your current setup.
Ideally
 ##
##
If you have a good connection running on a cloud installation or have good transfer speeds over USB, then ideally, installing Windows 11 on your PC should take no more than 10 to 20 minutes. This is also considering you are not limited by CPU, RAM or HDD/SSD.
If you have limited resources

Complete Windows 11 on PC if you are limited by CPU, RAM, HDD/SSD, or other hardware components Installation may take 20 to 40 minutes. The combination of the above limitations may also result in a further increase in installation time, which may exceed an hour.
If you are limited by network speed/bandwidth

#Network limitations can be very finicky when calculating download and subsequent Windows 11 installation times. On a good connection, your installation time may vary between 20 and 30 minutes, however, you can use the following steps to further determine and confirm your download and installation times.
We recommend you first run a speed test on your connection using the link below. Once you determine your download speed, you can multiply it by 0.125 and you should get your maximum possible download speed.
You can then use the formula below to calculate your download time and then estimate your installation time accordingly.
- Time= File size/ (Download speed Mbps / 8 )
You can also use this online speed calculator to help you with the process. Keep in mind that these are estimates and may change with time and hardware components.
If you are limited by USB transfer speeds

USB ports and their variations are often the cause of slow Windows 11 installations. While you may have a fast USB stick, the USB port on your PC may be slower. You may also be limited by the HDD/SSD on your system. With SSDs, you may be limited by the motherboard port capabilities or the SSD's NVRAM.
When transferring data when incompatible, the USB port or device defaults to the speed of the older version. For example, using a USB 3.0 stick with a USB 2.0 port will default to USB 2.0 speeds. This also works in case of Type-C USB variant. You can use the following speeds as a reference and measure of the capabilities of your current PC and storage devices.
NOTE: The speeds mentioned below can be achieved under ideal circumstances where compatibility and hardware are not obstacles.
- USB 1.1
- Speed: 1.2MBps
- USB 2.0
- Speed: 480MBps
##USB 3.0 (now called USB 3.2 Gen 1×1) - Speed: 600MBps
USB 3.1 Gen 1 (now called USB 3.2 Gen 1×1)- Speed: 625MBps
USB 3.1 Gen 2 (now called USB 3.2 Gen 2×1) - Speed: 1250MBps

The above is the detailed content of How long does it take to install Windows 11: Everything you need to know. For more information, please follow other related articles on the PHP Chinese website!

Hot AI Tools

Undresser.AI Undress
AI-powered app for creating realistic nude photos

AI Clothes Remover
Online AI tool for removing clothes from photos.

Undress AI Tool
Undress images for free

Clothoff.io
AI clothes remover

AI Hentai Generator
Generate AI Hentai for free.

Hot Article
Hot Tools

Notepad++7.3.1
Easy-to-use and free code editor

SublimeText3 Chinese version
Chinese version, very easy to use

Zend Studio 13.0.1
Powerful PHP integrated development environment

Dreamweaver CS6
Visual web development tools

SublimeText3 Mac version
God-level code editing software (SublimeText3)
Hot Topics
 1384
1384
 52
52

 When your USB C is not recognized by Windows 11, there are over 5 fixes to choose from.
May 08, 2023 pm 11:22 PM
When your USB C is not recognized by Windows 11, there are over 5 fixes to choose from.
May 08, 2023 pm 11:22 PM
USB-C connectors are now standard on most modern phones, laptops, and tablets. In other words, we have entered the USB-C era, and the traditional rectangular USB Type-A plugs we have become accustomed to are gradually disappearing. You can now charge your Windows 11 PC and communicate via USB-C connection with other USB Type-C gadgets that have USB-C ports (such as display adapters, docking stations, phones, etc.). Unfortunately, certain software and hardware combinations can cause problems. When this happens, you may see a message indicating that the USB-C connection has failed. In this article, we will show how to fix Win
 Commands to install BalenaEtcher on Windows 11
Apr 19, 2023 pm 05:46 PM
Commands to install BalenaEtcher on Windows 11
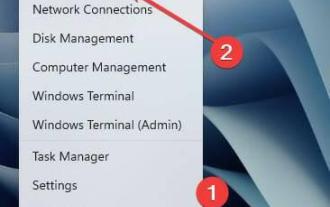
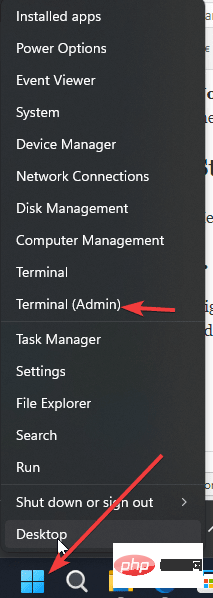
Apr 19, 2023 pm 05:46 PM
Steps to Install BalenaEtcher on Windows 11 Here we will show the quick way to install BalenaEthcer on Windows 11 without visiting its official website. 1. Open a command terminal (as an administrator), right-click the Start button and select Terminal (Admin). This will open a Windows Terminal with administrative rights to install software and perform other important tasks as superuser. 2. Install BalenaEtcher on Windows 11 Now, on your Windows terminal, just run Using the default Windows package manager
 How to fix Garmin USB devices not being detected or recognized on Windows PC
May 06, 2023 pm 09:25 PM
How to fix Garmin USB devices not being detected or recognized on Windows PC
May 06, 2023 pm 09:25 PM
Garmin is a manufacturer of advanced GPS tracking and navigation equipment, producing high-quality wearable devices for ordinary users. If you are using a Garmin device and cannot connect it to your Windows 11/10 system and are looking for a quick solution, you have just arrived at the right destination. This article is helpful for those users who are unable to establish a connection between their device and Windows computer. Fix 1 – Try Restarting Your System Before jumping to the software side of the problem, you should try restarting your system. So, before you do anything, you should do two things. The first is to restart your computer. A temporary issue or one-off bug may cause this issue. Before restarting the system
 Windows 11 doesn't recognize Android phone? Here's a quick fix
Apr 13, 2023 pm 04:31 PM
Windows 11 doesn't recognize Android phone? Here's a quick fix
Apr 13, 2023 pm 04:31 PM
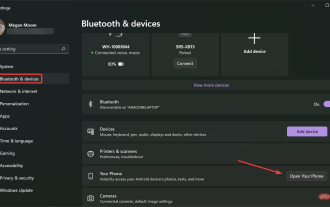
Microsoft users can connect their phones to their PCs using the app Phone Link (formerly Your Phone). This application allows your Windows PC to access photos, texts, notifications, and other data on your phone. Phone Link will be able to mirror the screen of your Android device. Currently, this feature is still in the testing phase for some Samsung smartphones. Users can still connect their Android devices to their PC using a USB cable, however, this only allows users to transfer files, photos, music, and other media between their PC and smartphone. To access texts and calls,
 How to fix error code 0x800701B1 on Windows 10/11
Apr 15, 2023 pm 07:13 PM
How to fix error code 0x800701B1 on Windows 10/11
Apr 15, 2023 pm 07:13 PM
While transferring files from a drive to another driver in File Explorer, you may encounter this error message stating "Error x800701B1: A non-existent device was specified". While many users have reported this issue while copy-pasting large files on USB devices, a few of them have also encountered this issue while trying to install Windows on HDD/SSD connected to a USB port. Fix 1 – Plug the drive into another port As you know, there are several types of ports on your system. However, some newer external SSDs/HDDs only work with USB3.0. Therefore, if you have plugged into a USB2.0 port, you may get this error. 1. You have to eject the USB drive. So click
 Fix: Device Manager keeps refreshing in Windows 11, 10
Apr 18, 2023 pm 10:55 PM
Fix: Device Manager keeps refreshing in Windows 11, 10
Apr 18, 2023 pm 10:55 PM
Many Windows users have reported that their Device Manager frequently refreshes after startup. Therefore, they cannot search for any device driver or perform any specified operations such as update, install, and uninstall. There can be many reasons for such problems on Windows systems, including corrupted system files, firewall or third-party antivirus software installed on the system, faulty connected USB devices, certain error reporting services, etc. In this post, we have gathered some details about the possible causes of the problem and put them into a collection of fixes that may help solve the problem on your Windows 11 system. Fix 1 – Find the USB device responsible for this issue This issue may be caused by the USB device
 Unknown USB device, device enumeration bug fix on Windows 11/10
Apr 18, 2023 pm 10:13 PM
Unknown USB device, device enumeration bug fix on Windows 11/10
Apr 18, 2023 pm 10:13 PM
After using USB devices for a long time, we all know that when you plug the USB device into your Windows PC, first install the driver required for the USB, and then you can see the USB device in File Explorer. Can be accessed. Whenever any hardware device is connected to a Windows PC, a driver is required to help communicate with the device. However, if the driver is corrupted, Windows will not recognize the hardware device. One such error that occurs while using USB devices on Windows computers is UnknownUSBDevice(DeviceFailedEnumeration)Error. USB
 How to create a Windows 11 bootable USB using Rufus
Apr 13, 2023 pm 06:10 PM
How to create a Windows 11 bootable USB using Rufus
Apr 13, 2023 pm 06:10 PM
Rufus is a small and popular utility for creating bootable USB drives with various operating systems. Unlike the Microsoft Media Creation Tool (MCT) application, which only supports Windows 10 and 11, Rufus also works on Windows 7, 8.1, 10, 11, Linux, and other operating systems. In addition to better operating system support, Rufus also offers several quality-of-life improvements, especially for those looking to install Windows 11. For starters, Rufus can bypass TPM 2.0 and Secure Boot requirements to create builds with older and officially unsupported hardware