

How to Fix Processor Thermal Trip Error in Windows 11/10 [Fix]

Most devices such as laptops and desktops are frequently used by young gamers and coders for a long time. The system sometimes hangs due to application overload. This forces users to shut down their systems. This mainly happens to players who install and play heavy games.
When the system tries to boot after force shutdown, it throws an error on a black screen as shown below:
The following are the warnings detected during this boot.
These can be viewed in the settings of the event log page.
Warning: Processor thermal trip.
Press any key to continue. . .
These types of warning messages are always thrown when the processor temperature of a desktop or laptop exceeds its threshold temperature. Listed below are the reasons why this happens on Windows systems.
- Many heavy applications run simultaneously on any system.
- The system fan is not working.
- Overclocking.
- When the CPU is located in any high temperature location without proper ventilation or heat dissipation.
In this article, you will find many solutions to this warning message on your system and will guide you through the fix.
Listed below are some troubleshooting methods or workarounds.
- When large amounts of dust or dirt particles accumulate in and around the system fan, the ventilation space becomes smaller and the temperature increases. So use any clean cloth to clean your system fan and other hardware components.
- Even after cleaning the system fan does not solve the problem, then you need to make sure that the thermal paste is applied correctly on the processor for better cooling. This method involves opening the system's processor and applying thermal paste to the top of the processor. If you are unsure, you can contact a computer technician and they will take care of it.
How to Check System Core Temperature
There is a dedicated application for this purpose, simply called Core Temp. You need to download and install this software on your Windows system. This application displays system core temperature and other important information about the processor and more.
Here are the steps on how to check your system core temperature.
Step 1: Open a web browser on your system, such as chrome, firefox.
Step 2: In the new tab, type https://www.alcpu.com/CoreTemp/ and press Enter.
Step 3: This will open the download page for the Core Temp software.
Step 4: Click the Download button as shown in the screenshot below.
![How to Fix Processor Thermal Trip Error in Windows 11/10 [Fix]](https://img.php.cn/upload/article/000/000/164/168169038677968.png)
Step 5: This will start downloading the Core-Temp-setup file on your system.
Step 6: After downloading, go to the DownloadsFiles folder on your system and double-click the Core-Temp-setup file.
NOTE - You need to accept the UAC prompt to continue.
![How to Fix Processor Thermal Trip Error in Windows 11/10 [Fix]](https://img.php.cn/upload/article/000/000/164/168169038637616.png)
#Step 7: Follow the on-screen instructions to install the Core Temp software on your system.
Step 8: After installing the software, press the Windows key and enter core temp to open it on your system.
Step 9: Select the Core Temp application from the search results as shown below.
![How to Fix Processor Thermal Trip Error in Windows 11/10 [Fix]](https://img.php.cn/upload/article/000/000/164/168169038729520.png)
Step 10: After the Core Temp application is opened, you can see all the information like the processor, and at the bottom you can see the core temperature of the processor as follows As shown in the figure.
![How to Fix Processor Thermal Trip Error in Windows 11/10 [Fix]](https://img.php.cn/upload/article/000/000/164/168169038739314.png)
Step 11: The ideal temperature is below 60-65 degrees Celsius. If it's over 65 degrees Celsius, here's what you need to do to fix this temperature issue.
Fix 1 – Turn off overclocking on your system
To improve system performance, there is an option to increase system speed beyond what is set by the manufacturer, called overclocking. When overclocking is enabled, it increases system performance and speed, causing the processor temperature to increase, causing a warning message on reboot.
So, follow the steps below to learn how to turn off overclocking on your system.
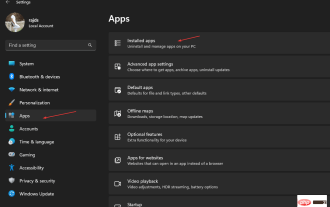
Step 1: Open the recovery page on your system by pressing the Wind ows key and typing recovery options.
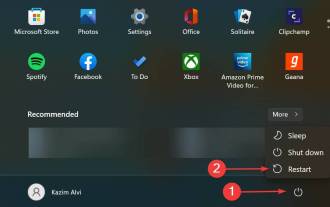
Step 2: Select Restore OptionsSystem Settings from the results as shown below.
![How to Fix Processor Thermal Trip Error in Windows 11/10 [Fix]](https://img.php.cn/upload/article/000/000/164/168169038724634.png)
Step 3: Click Advanced Startup option's Restart now, as shown in the figure below.
![How to Fix Processor Thermal Trip Error in Windows 11/10 [Fix]](https://img.php.cn/upload/article/000/000/164/168169038756050.png)
Step 4: This will reboot the system and you will see a blue screen with many options to choose from.
Step 5: Click Troubleshoot.
![How to Fix Processor Thermal Trip Error in Windows 11/10 [Fix]](https://img.php.cn/upload/article/000/000/164/168169038720524.png)
Step 6: Then select Advanced Options to view the options on the Advanced Options page.
![How to Fix Processor Thermal Trip Error in Windows 11/10 [Fix]](https://img.php.cn/upload/article/000/000/164/168169038733308.png)
Step 7: On the Advanced Options page, select UEFI Firmware Settings to change the settings for the system UEFI firmware.
![How to Fix Processor Thermal Trip Error in Windows 11/10 [Fix]](https://img.php.cn/upload/article/000/000/164/168169038721354.png)
Step 8: Next, the system reboots into the BIOS, you need to select the Advanced option and then in the Performance option Disable Overclocking.
Step 9: After disabling the overclocking option, save the settings and boot the system.
Fix 2 – Kill all background applications
When there is a very heavy load of background applications running on the system, it consumes most of the RAM memory and causes the system temperature to rise. So, to reduce this, make sure you don’t have too many applications running on your system at the same time.
Step 1: Press the Ctrl, Shift and Esc keys on your keyboard simultaneously.
Step 2: This will open the Task Manager window on your system.
Step 3: Now go to the “Processes” tab, which lists a number of applications that are currently open on your system.
Step 4: Under Background Processes, you will see all background application instances still running.
Step 5: This takes up a lot of space and triggers the core temperature and causes a warning message.
Step 6: So, Right click on the App Program and select End Task from the context menu as shown in the image below.
![How to Fix Processor Thermal Trip Error in Windows 11/10 [Fix]](https://img.php.cn/upload/article/000/000/164/168169038882419.png)
Step 7: Repeat the same operation to close all open unnecessary background processes.
Caution – Do not close any important Windows services that are open in background processes.
Step 8: Once completed, close Task Manager.
Fix 3 – Increase the RAM (Random Access Memory) on the system
When RAM is small, heavy games installed on the system can drain resources and cause the system core temperature to increase question. So, the solution to this problem is to increase the RAM of your system by inserting a new RAM in an available slot on the motherboard.
The above is the detailed content of How to Fix Processor Thermal Trip Error in Windows 11/10 [Fix]. For more information, please follow other related articles on the PHP Chinese website!

Hot AI Tools

Undresser.AI Undress
AI-powered app for creating realistic nude photos

AI Clothes Remover
Online AI tool for removing clothes from photos.

Undress AI Tool
Undress images for free

Clothoff.io
AI clothes remover

AI Hentai Generator
Generate AI Hentai for free.

Hot Article
Hot Tools

Notepad++7.3.1
Easy-to-use and free code editor

SublimeText3 Chinese version
Chinese version, very easy to use

Zend Studio 13.0.1
Powerful PHP integrated development environment

Dreamweaver CS6
Visual web development tools

SublimeText3 Mac version
God-level code editing software (SublimeText3)
Hot Topics
 1378
1378
 52
52

 How to disable driver signature enforcement in Windows 11
May 20, 2023 pm 02:17 PM
How to disable driver signature enforcement in Windows 11
May 20, 2023 pm 02:17 PM
Microsoft has built several security features into Windows to ensure your PC remains secure. One of them is driver signature enforcement in Windows 11. When this feature is enabled, it ensures that only drivers digitally signed by Microsoft can be installed on the system. This helps most of the users to a great extent as it protects them. But there is a downside to enabling driver signature enforcement. Suppose you find a driver that works for your device, but it is not signed by Microsoft, although it is completely safe. But you won't be able to install it. Therefore, you must know how to disable driver signing in Windows 11
 4 Ways to Enable or Disable Microsoft Store on Windows 11 or 10
May 14, 2023 am 10:46 AM
4 Ways to Enable or Disable Microsoft Store on Windows 11 or 10
May 14, 2023 am 10:46 AM
Here are some possible reasons why you need to disable Microsoft Store: Stop unwanted notifications. Preserves data by limiting the background processes of the Microsoft Store to improve security or privacy Addresses some issues related to the Store or the apps it installs. Restrict children, family members, or other users from downloading applications without permission. Steps to Disable or Enable Windows Store Before following this tutorial, disabling the Microsoft Store will also stop the installation of any apps that require its services. To use the store, users need to enable its service in the same way as blocking it. 1. Block WindowsStore background service Let us from restricting Microsoft Store as
 How to fix Windows 11 activation error 0xc004c060
May 17, 2023 pm 08:47 PM
How to fix Windows 11 activation error 0xc004c060
May 17, 2023 pm 08:47 PM
Why am I encountering Windows 11 activation error 0xc004c060? First make sure you are using genuine Windows and that the license key is valid. Also, check if it was obtained from an official source and if the key is suitable for the installed OS version. If there is an issue with any of these, you may encounter Windows 11 activation error 0xc004c060. So be sure to verify these and if you find everything is in order, move on to the next section. If you obtained the key through unreliable means or believe that the installed copy is a pirated version, you will need to purchase a valid key from Microsoft. In addition to this, misconfigured settings, missing
 0x80010105: How to fix this Windows update error
May 17, 2023 pm 05:44 PM
0x80010105: How to fix this Windows update error
May 17, 2023 pm 05:44 PM
Microsoft regularly releases Windows updates to improve functionality or increase the security of the operating system. You can ignore some of these updates, but it's important to always install security updates. While installing these updates, you may encounter error code; 0x80010105. An unstable connection usually causes most update errors, and once the connection is reestablished you're good to go. However, some require more technical troubleshooting, such as the 0x80010105 error, which is what we will see in this article. What causes WindowsUpdate error 0x80010105? This error may occur if your computer has not been updated in a while. Some users may have permanently disabled W for their reasons
 How to fix runtime error 339 on Windows 11/10
May 13, 2023 pm 11:22 PM
How to fix runtime error 339 on Windows 11/10
May 13, 2023 pm 11:22 PM
There can be several reasons why runtime error 339 occurs when running a program. Some of them may be that some ocx or dll files are missing, damaged or the dll or ocx is not registered. This would be an annoying experience for the smooth execution of the application. Here are some of the possible error messages you may see for Runtime Error 339 Error – Runtime Error 339: Component DUZOCX32.OCX is not registered correctly or the file is missing. Error – Runtime Error 339. Component MSMASK32.ocx or one of its dependencies is not registered correctly; the file is missing or invalid. Error – Runtime Error '339': Component 'FM20.DLL' or one of its dependencies was not correctly noted
 How to disable display scaling for high DPI settings in Windows 11 or 10
May 22, 2023 pm 10:11 PM
How to disable display scaling for high DPI settings in Windows 11 or 10
May 22, 2023 pm 10:11 PM
The default display scaling feature on Windows 10 or later is a core component of the Windows operating system. But sometimes, this feature of certain apps can cause compatibility issues, unreadable text, blurry logos, and ultimately, app crashes. This can be a huge headache if you're dealing with 2160p or higher resolutions. There are many ways to disable the default display scaling feature on high DPI settings. We've selected the best ones and detailed step-by-step instructions for each process. How to Disable Display Scaling on High DPI Settings There is a way, all you have to do is disable high DPI scaling for a single application, and there is a way to do it for the entire Window
 How to disable core parking on Windows 10
May 16, 2023 pm 01:07 PM
How to disable core parking on Windows 10
May 16, 2023 pm 01:07 PM
If you are a Windows user and want to disable the core parking functionality in your system, this article will guide you through the process. What is core parking? The core parking function is a power saving mechanism. It puts some of your processors into a sleep mode that doesn't perform any tasks and consumes very little or no power. This helps reduce energy consumption and therefore heat in the system. These cores are unparked when needed. Few users need to disable this feature, especially gamers. Disabling this feature will improve your system performance. Disable Windows Core Parking using Windows Registry Editor Step 1: Use Windows + R keys simultaneously to open the run prompt. Step 2: At the run prompt
 Not migrating device settings on Windows 11? This is the fix
May 13, 2023 pm 02:10 PM
Not migrating device settings on Windows 11? This is the fix
May 13, 2023 pm 02:10 PM
Obviously, not all device migrations go smoothly. Device settings not migrating is a very common issue in Windows 11 and may occur when upgrading from Windows 7 and 10. This issue may also occur if you have already installed the operating system and are installing new updates. When upgrading to Windows 11, your device also needs to meet the system requirements and other important elements required to function properly. If you wish to keep your personal data, files, photos, and apps from your previous installation of Windows, be sure to select the option Keep personal files and apps when you first upgrade to Windows 11. When you upgrade to Windows 11, the installer checks