
Here are two simple test displays, and there are more test examples at the end.
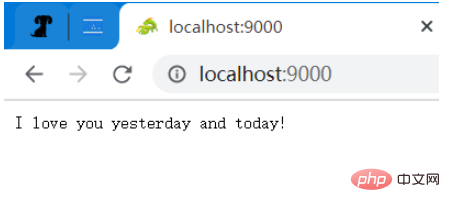
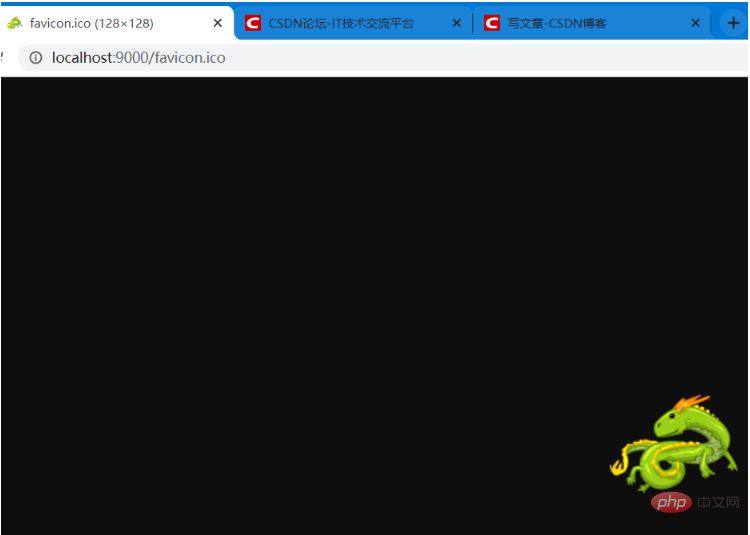
Access the root directory, and then a sentence (string) will be returned (Note: The green dragon can only be seen using a browser, and the picture itself also belongs to a request .) Content-Type: application/json
Access this picture individually, and the return value is the picture (binary data)
So as long as the user sets the request information and response information in advance, when accessing a specific request, he can Return specific data. Therefore, I designed a simple xml file to configure this information. It is more convenient to use xml configuration. The properties configuration file cannot express hierarchical information and can only be applied to simple configuration requirements.
A large request_and_responses represents many request and response configurations, each request_and_response node represents a request request and response Response information, which contains basic information about the request and response. GET request mainly includes: (method) request method and (path) request path and parameters. The POST method request also includes a (param) request parameter. response includes: content_type (response content type) and value (response content).
The difference between GET and POST is that the request path and request parameters of GET are together (both in the request header, without the request body), while the request parameters of POST are in In the request body, there is a CRLF separation between the request header and the request body.
<?xml version="1.0" encoding="UTF-8"?>
<request_and_responses>
	<!-- & 需要使用转义字符 & -->

	<request_and_response>
		<request>
			<method>GET</method>
			<path>/</path>
		</request>
		<response>
			<content_type>application/json</content_type>
			<value>I love you yesterday and today!</value>
		</response>
	</request_and_response>

	<request_and_response>
		<request>
			<method>GET</method>
			<path>/login?account=123&pwd=456</path>
		</request>

		<response>
			<content_type>application/json</content_type>
			<value>success</value>
		</response>
	</request_and_response>

	<request_and_response>
		<request>
			<method>GET</method>
			<path>/query/龙</path>
		</request>
		<response>
			<content_type>application/json</content_type>
			<value>龙是中国等东亚国家古代神话传说生活于海中的神异生物。</value>
		</response>
	</request_and_response>

	<request_and_response>
		<request>
			<method>POST</method>
			<path>/login</path>
			<param>account=123&pwd=456</param>
		</request>

		<response>
			<content_type>application/json</content_type>
			<value>{"result":success}</value>
		</response>
	</request_and_response>


	<request_and_response>
		<request>
			<method>POST</method>
			<path>/login</path>
			<param>workId=12345</param>
		</request>

		<response>
			<content_type>application/json</content_type>
			<value>{"result":"success", "data":{"name":"李工", "sex":"男", "age":35}}</value>
		</response>
	</request_and_response>


	<request_and_response>
		<request>
			<method>GET</method>
			<path>/pictures/husky.jpeg</path>
		</request>

		<response>
			<content_type>image/jpeg</content_type>
			<value>D:/DB/husky.jpeg</value>
		</response>
	</request_and_response>

	<!-- 浏览器访问时的图标 -->
	<request_and_response>
		<request>
			<method>GET</method>
			<path>/favicon.ico</path>
		</request>

		<response>
			<content_type>image/webp</content_type>
			<value>D:/DB/favicon.ico</value>
		</response>
	</request_and_response>

</request_and_responses>The information in xml is read into the memory and an entity class is used to encapsulate the information.
package com.dragon;

public class RequestAndResponse {
	private String method;
	private String path;
	private String param;
	private String content_type;
	private String value;

	public String getMethod() {
		return method;
	}
	public void setMethod(String method) {
		this.method = method;
	}
	public String getPath() {
		return path;
	}
	public void setPath(String path) {
		this.path = path;
	}
	public String getParam() {
		return param;
	}
	public void setParam(String param) {
		this.param = param;
	}
	public String getContent_type() {
		return content_type;
	}
	public void setContent_type(String content_type) {
		this.content_type = content_type;
	}
	public String getValue() {
		return value;
	}
	public void setValue(String value) {
		this.value = value;
	}

	@Override
	public String toString() {
		return "RequestAndResponse [method=" + method + ", path=" + path + ", param=" + param + ", content_type="
				+ content_type + ", value=" + value + "]";
	}
}Use a class to parse xml files into Java objects, and then use a List collection to store all objects.
Note: I’m not very good at naming, it’s a bit too long, so I’ll just make do with it! Ha ha. Note: A jar package for xml parsing is used here: dom4j.
package com.dragon;

import java.io.File;
import java.util.ArrayList;
import java.util.Iterator;
import java.util.List;

import org.dom4j.Document;
import org.dom4j.DocumentException;
import org.dom4j.Element;
import org.dom4j.io.SAXReader;

/**
 * 解析 xml 文件中配置的用户请求和响应数据。
 * */
public class RequestAndResponseResolver {
	private static final String method = "method";
	private static final String path = "path";
	private static final String param = "param";
	private static final String content_type = "content_type";
	private static final String value = "value";

	public static List<RequestAndResponse> listRequestAndResponse(String filePath) throws DocumentException{
		File file = new File(filePath);
		SAXReader reader = new SAXReader();
		Document doc = reader.read(file);

		Element root = doc.getRootElement();
		//获取根元素下面所有的子元素,利用迭代器方式
		Iterator<?> it = root.elementIterator();

		List<RequestAndResponse> requestAndResponses = new ArrayList<>();
		while (it.hasNext()) {
			//取出元素request_and_response
			Element e = (Element)it.next();
			//依次遍历每一个 request_and_response,获取相应的信息
			Element request = e.element("request");
			Element response = e.element("response");

			RequestAndResponse requestAndResponse = new RequestAndResponse();
			requestAndResponse.setMethod(request.elementText(method));
			requestAndResponse.setPath(request.elementText(path));
			requestAndResponse.setParam(request.elementText(param));   //GET 方式,这个属性为 null
			requestAndResponse.setContent_type(response.elementText(content_type));
			requestAndResponse.setValue(response.elementText(value));

			requestAndResponses.add(requestAndResponse);
		}

		return requestAndResponses;
	}
}The following is an introduction to the part that uses Socket to receive and process requests. The knowledge involved here is basically the same as using Socket. The only difference is the processing of the content itself, because the content itself contains data and non-data parts. (From the perspective of HTTP, you can only see the data part.) Using Socket programming simply means listening to a port and processing it once a connection arrives. (Traditional BIO is used here, I don’t know the NIO part.)
My processing here is to use a thread pool for processing, and each connection uses one thread for processing. For the complete code of this class (Server class), see below.
	public void receive() {
		//使用线程池处理请求
		ExecutorService pool = Executors.newFixedThreadPool(THREAD_NUMBER);

		while (true) {
			try {
				Socket connection = server.accept();
				pool.submit(new UserConnection(connection));
			} catch (IOException e) {
				System.out.println(this.getDate()+" 用户连接断开");
				e.printStackTrace();
			}
		}
}package com.dragon;
import java.io.IOException;
import java.net.ServerSocket;
import java.net.Socket;
import java.text.SimpleDateFormat;
import java.util.Date;
import java.util.concurrent.ExecutorService;
import java.util.concurrent.Executors;
public class Server {
private static final int THREAD_NUMBER = 10;
private ServerSocket server;
private int port;
public Server(int port) {
this.port = port;
}
//启动服务。
public void start() {
try {
server = new ServerSocket(port);
System.out.println(this.getDate()+" 服务启动!");
this.receive();
} catch (IOException e) {
System.out.println(this.getDate()+" 服务启动失败!");
e.printStackTrace();
}
}
public void receive() {
//使用线程池处理请求
ExecutorService pool = Executors.newFixedThreadPool(THREAD_NUMBER);
while (true) {
try {
Socket connection = server.accept();
pool.submit(new UserConnection(connection));
} catch (IOException e) {
System.out.println(this.getDate()+" 用户连接断开");
e.printStackTrace();
}
}
}
private String getDate() {
String format = "yyyy-MM-dd HH:mm:ss";
Date now = new Date();
SimpleDateFormat dateFormat = new SimpleDateFormat(format);
return dateFormat.format(now);
}
}Http request message is a binary data stream from the TCP level (the network is layered), so we can Directly use TCP to receive this stream, Because the parsing of messages involving binary data (such as file upload) is more complicated, and I don’t know how to do it, so here I just test a simple request that does not contain binary files. )
Note: Because the specific analysis is also very complicated, it involves the structure of the HTTP message, but if it does not involve file upload, then the entire message is some character data, so read all at once The request message is then converted into a string and parsed using the string.
in = connection.getInputStream();
out = connection.getOutputStream();

//这个数字是随便设置的,因为要一次性读取整个请求报文,不能太小。(但是其实这个也很大了)
byte[] b = new byte[5*1024];
BufferedInputStream input = new BufferedInputStream(in);
int count = input.read(b);
String requestMessage = new String(b, 0, count);
System.out.println("====================报文分隔符上界===================");
System.out.println(requestMessage);
System.out.println("====================报文分隔符下界===================");Request and response information initialization Description: Use static initialization block to initialize information, and configure user xml in advance Information is read into memory, which was mentioned earlier.
// 初始化配置好的信息
	static {
		try {
			requestAndResponses = RequestAndResponseResolver.listRequestAndResponse("./src/com/dragon/request_and_response.xml");
		} catch (DocumentException e) {
			e.printStackTrace();
		}
}Request processing and obtaining response information Because this is a simulated call, I mainly focus on the three parts of data in the request header: Request method (method), request path (path), request parameter (param) . The GET method and the POST method are processed separately. The difference between GET and POST is briefly introduced above (but it is not detailed enough, you can refer to other information on the Internet to understand).
Through this code, if it is the GET method, take out the content_type (return value data type) and value (return value data) in the RequestAndResponse object, and assign them to local variables content_type and value.
if ("GET".compareTo(method) == 0) {
	for (RequestAndResponse r : requestAndResponses) {
		//这里需要对 get 方式时的请求进行解码,因为一些非 ASCII 码字符会被编码,比如汉字。
		path = URLDecoder.decode(path, ENCODE);
		if (r.getMethod().equals(method) && r.getPath().equals(path)) {
			content_type = r.getContent_type();
			value = r.getValue();
			break;
		}
	}
} else {
	//POST 方式,请求参数是在请求体中的,请求头和请求体中间有一个换行符。
	String param = requestMessage.substring(requestMessage.lastIndexOf(CRLF) + 2); //这里是不包括 CRLF 的两个字符的。
	for (RequestAndResponse r : requestAndResponses) {                 //因为这个get方式的 参数为空,所以这里必须是 param 在前。
		if (r.getMethod().equals(method) && r.getPath().equals(path) && param.equals(r.getParam())) {
			content_type = r.getContent_type();
			value = r.getValue();
			break;
		}
	}
}这里介绍一个知识:URL 中的字符是特定的,不允许中文等字符的出现,所以发送请求时会对中文等字符进行编码,如果直接使用 equals 方法的,当然不会相等了,所以需要先对数据进行解码,然后再调用 equals 方法进行处理。这个是我们平时广泛使用 的东西,有时候使用浏览器可以看到带很多奇怪字符 URL,它们都是被处理过的。
举一个简单的例子:
String str = "我爱你";
String en_str = java.net.URLEncoder.encode(str, "UTF-8");
String de_str = java.net.URLDecoder.decode(en_str, "UTF-8");
System.out.println("编码字符:" + en_str);
System.out.println("解码字符:" + de_str);
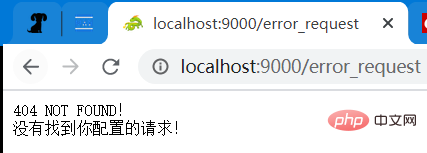
注意:这里有一个特殊的情况,如果发起了没有配置的请求方法和路径,那么程序会出错。所以,这里的 content_type 和 value 有一个默认的值,而且非常有趣!
执行响应 响应信息主要关注几点:响应信息长度(Content-Length)(按字节数计算)、响应内容类型(Content-Type)。
虽然发送的请求里不能带二进制文件,但是响应信息是可以返回文件的,而且使用 Content-Length (一次性发送),不使用 Chunked 分块发送(这里我还不太明白,而且只是模拟,应该使用一些简单的小文件。)。
下面是区分响应类型为 json (字符串) 还是 文件(二进制数据) 的代码:
如果是字符串,则 value 的值是字符串的值,如果是文件,则 value 的值为一个具体的本地路径。(不应该使用网络图片,即使修改程序可以做到也没有必要,因为这样就需要依赖网络了。)
	//这里我只处理字符串类和文件类两种响应体
	//响应体
	int len = 0;
	String responseBody = null;   //响应值是 json 数据
	File file = null; //响应值是 文件
	if (content_type.equals("application/json")) {  //如果是 json 数据,否则就是 文件类数据(图片、文档或其它文件)
		 responseBody = value;
		 len = responseBody.getBytes().length;   //响应体的字节数,注意是字节数!
	} else {
		 file = new File(value);
		 len = (int) file.length();
}然后就可以准备发送响应数据了,下面是发送响应的代码,注意报文的具体结构。
	//响应头
	responseHeader.append("HTTP/1.1").append(BLANK);
	responseHeader.append(200).append(BLANK);
	responseHeader.append("OK").append(CRLF);
	responseHeader.append("Server:"+"CrazyDragon").append(CRLF);
	responseHeader.append("Date:").append(BLANK).append(date).append(CRLF);
	responseHeader.append("Content-Type:").append(BLANK).append(content_type).append(CRLF);
	responseHeader.append("Content-Length:").append(BLANK).append(len).append(CRLF);
	responseHeader.append(CRLF);

	//如果 字符串变量 responseBody 不为空,则说明返回值是 json 数据(字符串)
	//否则就是文件类的流了。
	if (responseBody != null) {
		String response = responseHeader.toString() + responseBody;
		out.write(response.getBytes("UTF-8"));
	} else {
		out.write(responseHeader.toString().getBytes("UTF-8"));

		int hasRead = 0;
		byte[] data = new byte[4*1024];
		try (BufferedInputStream inputStream = new BufferedInputStream(new FileInputStream(file))) {
			while ((hasRead = inputStream.read(data)) != -1) {
				out.write(data, 0, hasRead);
			}
		}
	}
out.flush(); //必要的刷新流操作。User Connection 的完整代码:
package com.dragon;

import java.io.BufferedInputStream;
import java.io.File;
import java.io.FileInputStream;
import java.io.IOException;
import java.io.InputStream;
import java.io.OutputStream;
import java.net.Socket;
import java.net.URLDecoder;
import java.text.SimpleDateFormat;
import java.util.Date;
import java.util.List;
import java.util.Locale;
import java.util.TimeZone;

import org.dom4j.DocumentException;

public class UserConnection implements Runnable{
	private static final String BLANK = " ";
	private static final String CRLF = "\r\n"; //换行符,不能写反了!
	private static final String ENCODE = "UTF-8";
	private static final String default_content_type = "application/json";   //当任何匹配路径都没有时。
	private static final String default_value = "404 NOT FOUND!\n没有找到你配置的请求!";


	private static List requestAndResponses;
	private Socket connection;


	// 初始化配置好的信息
	static {
		try {
			requestAndResponses = RequestAndResponseResolver.listRequestAndResponse("./src/com/dragon/request_and_response.xml");
		} catch (DocumentException e) {
			e.printStackTrace();
		}
	}


	public UserConnection(Socket connection) {
		this.connection = connection;
	}

	@Override
	public void run() {
		InputStream in = null;
		OutputStream out = null;
		try {
			in = connection.getInputStream();
			out = connection.getOutputStream();

			//这个数字是随便设置的,因为要一次性读取整个请求报文,不能太小。(但是其实这个也很大了)
			byte[] b = new byte[5*1024];
			BufferedInputStream input = new BufferedInputStream(in);
			int count = input.read(b);
			String requestMessage = new String(b, 0, count);
			System.out.println("====================报文分隔符上界===================");
			System.out.println(requestMessage);
			System.out.println("====================报文分隔符下界===================");

			//以第一个 换行符 CRLF 为界限取出 请求路径和请求参数
			String requestLine = requestMessage.substring(0, requestMessage.indexOf(CRLF));
			String[] line = requestLine.split("\\s");
			String method = line[0];  //考虑大小写。
			String path = line[1];
			//这个数组是有三个元素,最后一个是 协议的版本,这里不需要,就不处理了。
			String content_type = default_content_type;
			String value = default_value;
			if ("GET".compareTo(method) == 0) {
			//	System.out.println("请求方式:" + method + " 请求路径(含参数):" + path);
				for (RequestAndResponse r : requestAndResponses) {
					//这里需要对 get 方式时的请求进行解码,因为一些非 ASCII 码字符会被编码,比如汉字。
					path = URLDecoder.decode(path, ENCODE);
					if (r.getMethod().equals(method) && r.getPath().equals(path)) {
						content_type = r.getContent_type();
						value = r.getValue();
						break;
					}
				}
			} else {
				//POST 方式,请求参数是在请求体中的,请求头和请求体中间有一个换行符。
				String param = requestMessage.substring(requestMessage.lastIndexOf(CRLF) + 2); //这里是不包括 CRLF 的两个字符的。
				for (RequestAndResponse r : requestAndResponses) {                 //因为这个get方式的 参数为空,所以这里必须是 param 在前。
					if (r.getMethod().equals(method) && r.getPath().equals(path) && param.equals(r.getParam())) {
						content_type = r.getContent_type();
						value = r.getValue();
						System.out.println(content_type+" "+value);
						break;
					}
				}
			}

			StringBuilder responseHeader = new StringBuilder();
			String date = this.getDate();


			//这里我只处理字符串类和文件类两种响应体
			//响应体
			int len = 0;
			String responseBody = null;   //响应值是 json 数据
			File file = null; //响应值是 文件
			if (content_type.equals("application/json")) {  //如果是 json 数据,否则就是 文件类数据(图片、文档或其它文件)
				 responseBody = value;
				 len = responseBody.getBytes().length;   //响应体的字节数,注意是字节数!
			} else {
				 file = new File(value);
				 len = (int) file.length();
			}

			//响应头
			responseHeader.append("HTTP/1.1").append(BLANK);
			responseHeader.append(200).append(BLANK);
			responseHeader.append("OK").append(CRLF);
			responseHeader.append("Server:"+"CrazyDragon").append(CRLF);
			responseHeader.append("Date:").append(BLANK).append(date).append(CRLF);
			responseHeader.append("Content-Type:").append(BLANK).append(content_type).append(CRLF);
			responseHeader.append("Content-Length:").append(BLANK).append(len).append(CRLF);
			responseHeader.append(CRLF);

			//如果 字符串变量 responseBody 不为空,则说明返回值是 json 数据(字符串)
			//否则就是文件类的流了。
			if (responseBody != null) {
				String response = responseHeader.toString() + responseBody;
				out.write(response.getBytes("UTF-8"));
			} else {
				out.write(responseHeader.toString().getBytes("UTF-8"));

				int hasRead = 0;
				byte[] data = new byte[4*1024];
				try (BufferedInputStream inputStream = new BufferedInputStream(new FileInputStream(file))) {
					while ((hasRead = inputStream.read(data)) != -1) {
						out.write(data, 0, hasRead);
					}
				}
			}
			out.flush();   //必要的刷新流操作。
		} catch (IOException e) {
			e.printStackTrace();
		} finally {
			try {
				if (in != null)
					in.close();
			} catch (IOException e) {
				e.printStackTrace();
			}
		}
	}

	private String getDate() {
		Date date = new Date();
		SimpleDateFormat format = new SimpleDateFormat("EEE, d MMM yyyy HH:mm:ss 'GMT'", Locale.CHINA);
		format.setTimeZone(TimeZone.getTimeZone("GMT")); // 设置时区为GMT
		return format.format(date);
	}
} package com.dragon;
public class Main {
public static void main(String[] args) {
Server server = new Server(9000);
server.start();
}
}更多的测试示例
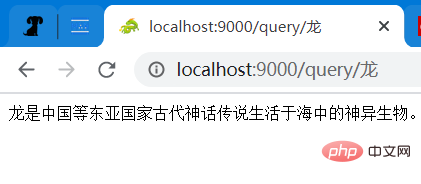
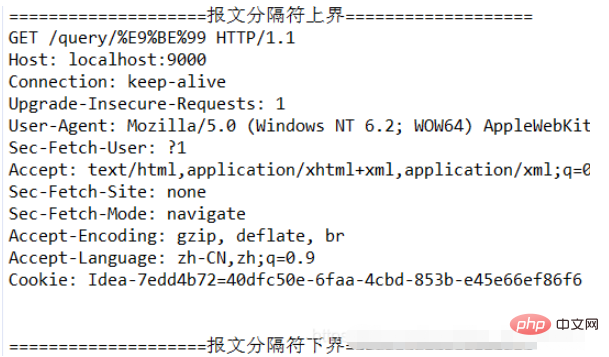
请求方式:GET 请求路径和参数:/query/龙 预期的响应类型:application/json 预期的响应值:龙是中国等东亚国家古代神话传说生活于海中的神异生物。 测试结果:
请求方式:GET 请求路径和参数:/login?account=123&pwd=456 预期的响应类型:application/json 预期的响应值:success 测试结果:

请求方式:GET 请求路径和参数:/pictures/husky.jpeg 预期的响应类型:image/jpeg 预期的响应值:一张图片(地址为:D:/DB/husky.jpeg)
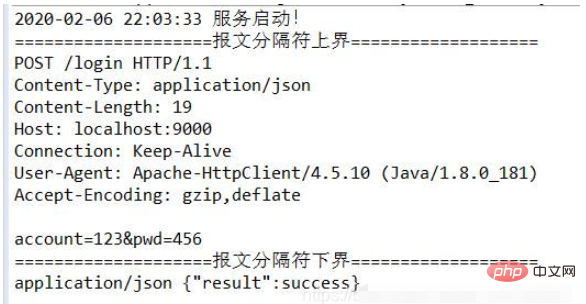
请求方式:POST 请求路径:/login 请求参数:account=123&pwd=456 预期的响应类型:application/json 预期的响应值:{“result”:success} 测试结果:

注:这是使用 HttpClient 发送的 POST 请求。

接收到的 POST 请求:
接收到的 GET 请求(含中文参数): /query/龙 注意:“龙” 已经被编码了。
The above is the detailed content of How to implement HttpServer simulated front-end interface call in Java. For more information, please follow other related articles on the PHP Chinese website!


