

Can't remove keyboard layout in Windows 11? Fix it in 3 easy ways

Keyboard layouts are a great way to input multiple languages into your computer without requiring specialized hardware. However, some users reported that they were unable to remove the keyboard layout in Windows 11.
While this does not cause major problems, there is always the possibility of selecting the wrong keyboard layout by mistake.
Also, many users prefer a clean PC without unnecessary settings or applications that could impede progress, so extra keyboard layouts need to be removed.
So, if you have been trying but unable to remove keyboard layout in Windows 11, here are the most effective ways to fix the problem.
What if I can't remove my keyboard layout in Windows 11?
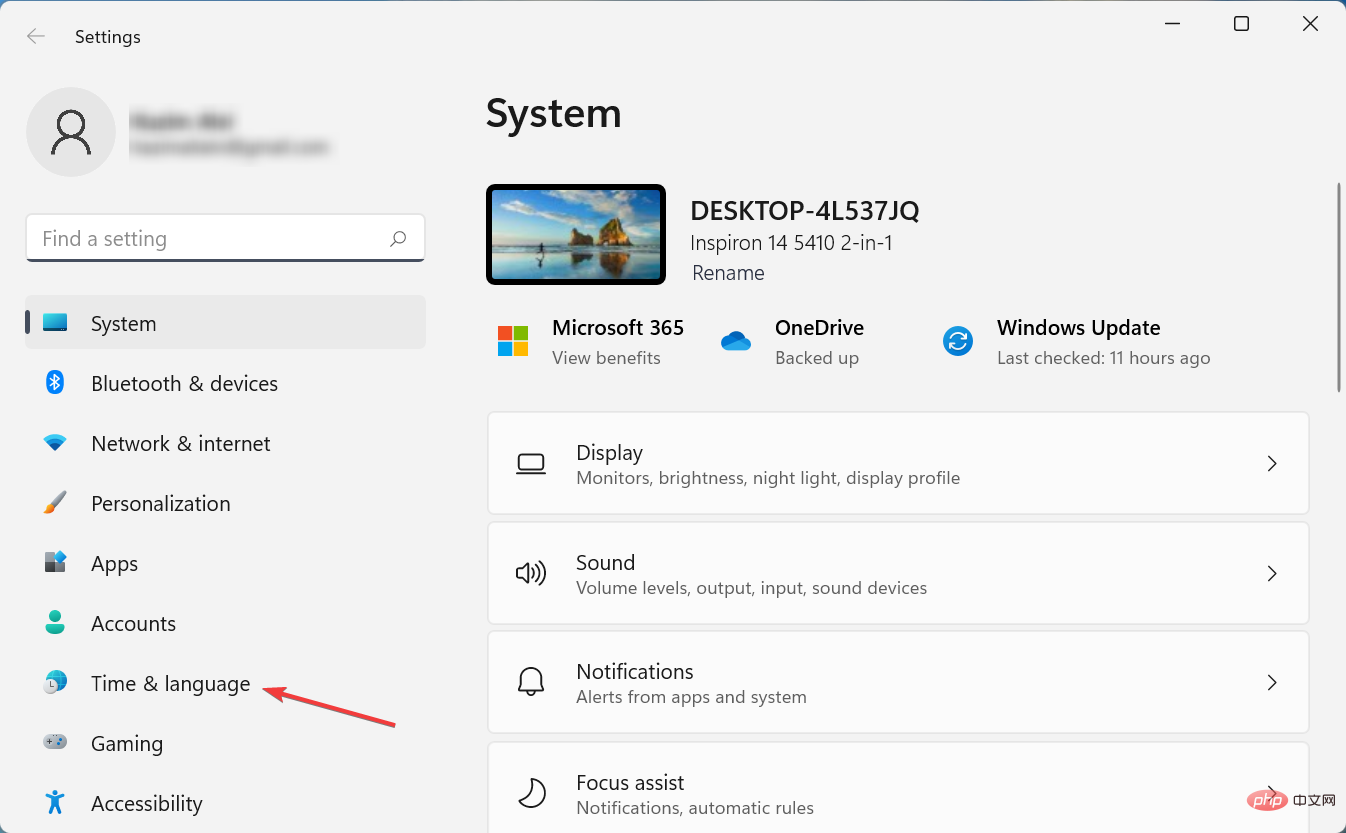
1. Using Settings
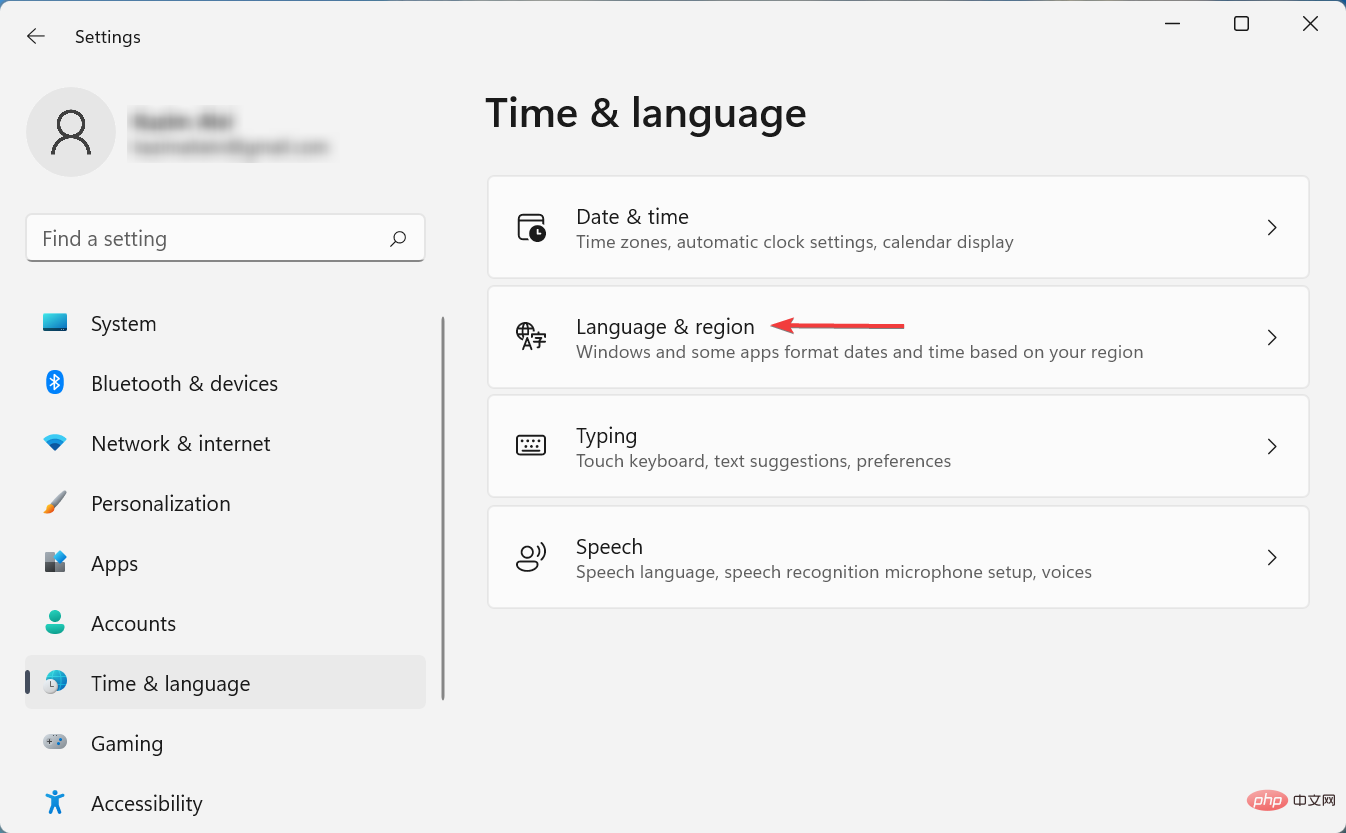
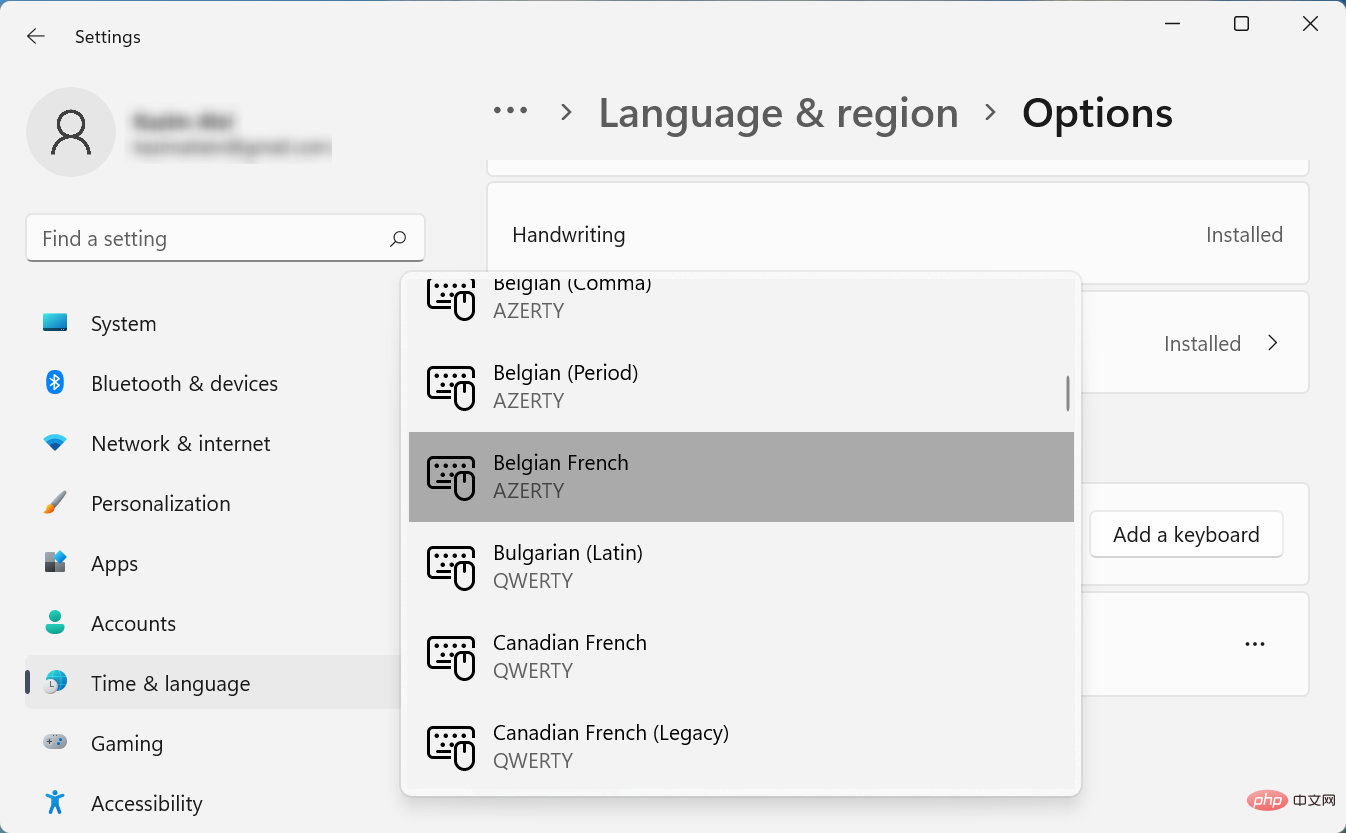
- Press Windows I to launch the Settings application and navigate from the left Select Time and Language from the tabs in the pane.

- Click on the language and region on the right.
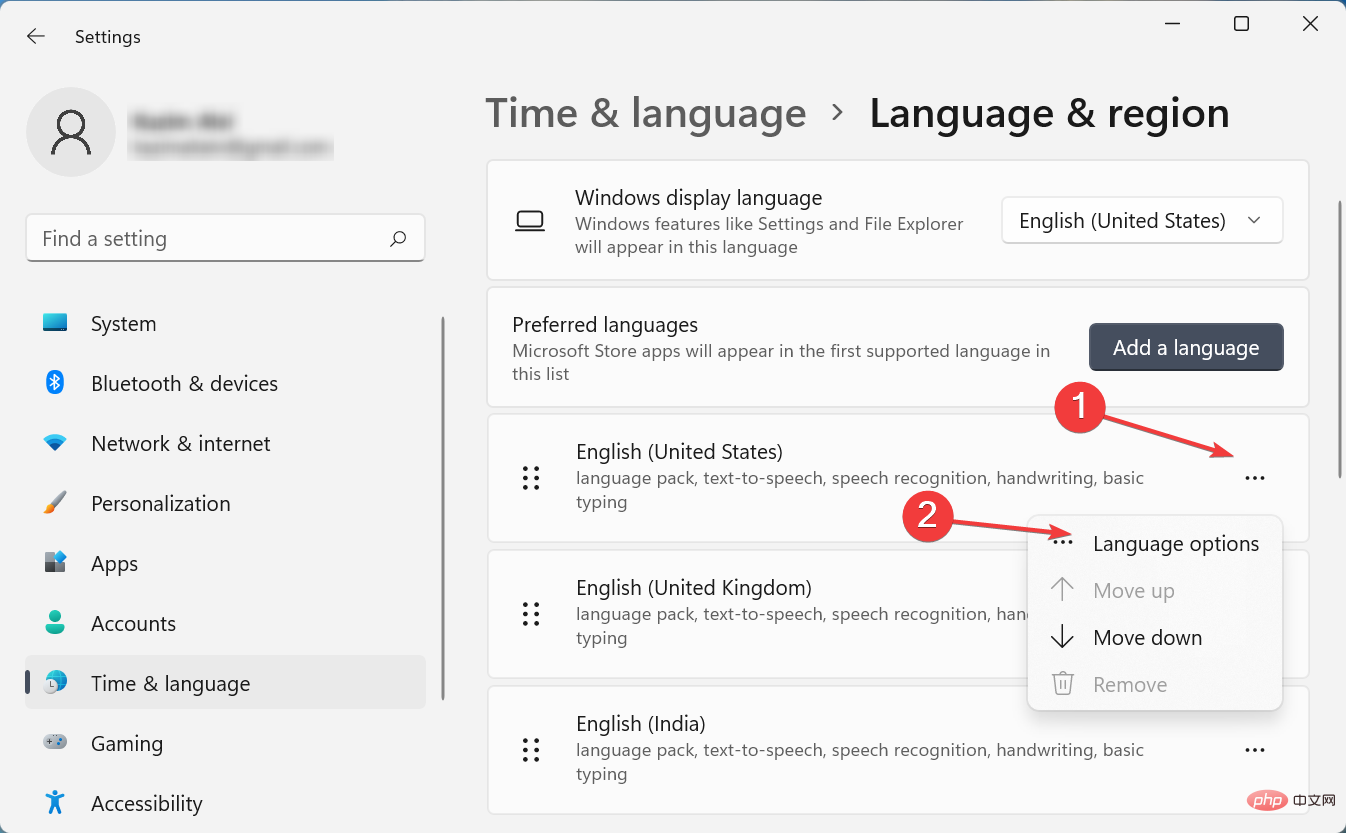
- Now click on the ellipsis next to the language under which the layout you want to delete appears and select Language options.
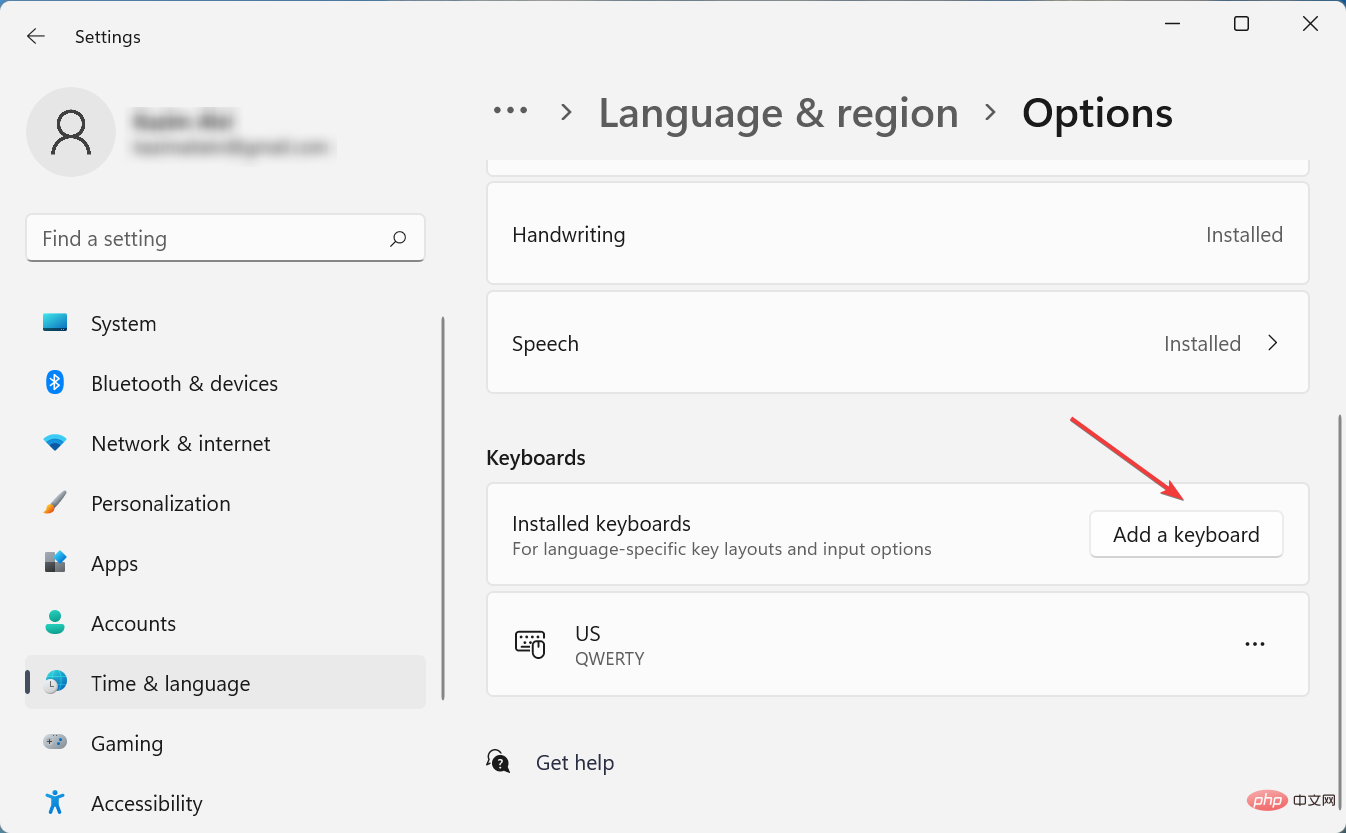
- Click the Add a keyboard button next to Installed keyboards.
- Select the same layout from the list that you cannot delete.
- Once completed, close the Settings app and restart your computer.
- Now, go to Language Options again.
- Click the ellipsis next to the layout you are trying to delete and select Delete from the pop-up menu.
- Again, restart your computer for the changes to take effect.

The layout will be removed once the computer is turned on. This method works great if you are unable to remove keyboard layout in Windows 11 on Dell, Lenovo or HP.
The idea here is to add the layout that keeps appearing and then remove it manually. Similar issues were encountered in previous iterations, namely Windows 10. If this method doesn't work, move on to the next one.
2. Using Windows PowerShell
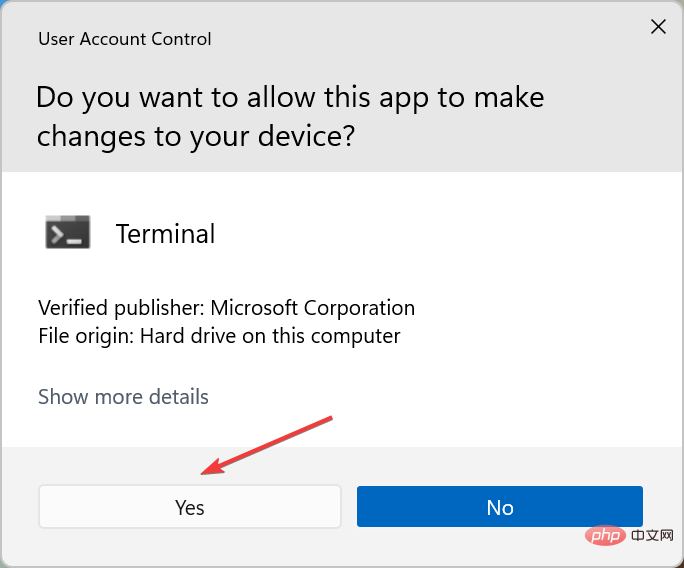
- Press Windows S to launch the Search menu in the top text field Enter Terminal, right-click the relevant search result, and select Run as administrator from the context menu.
- Click Yes on the UAC (User Account Control) prompt that pops up.
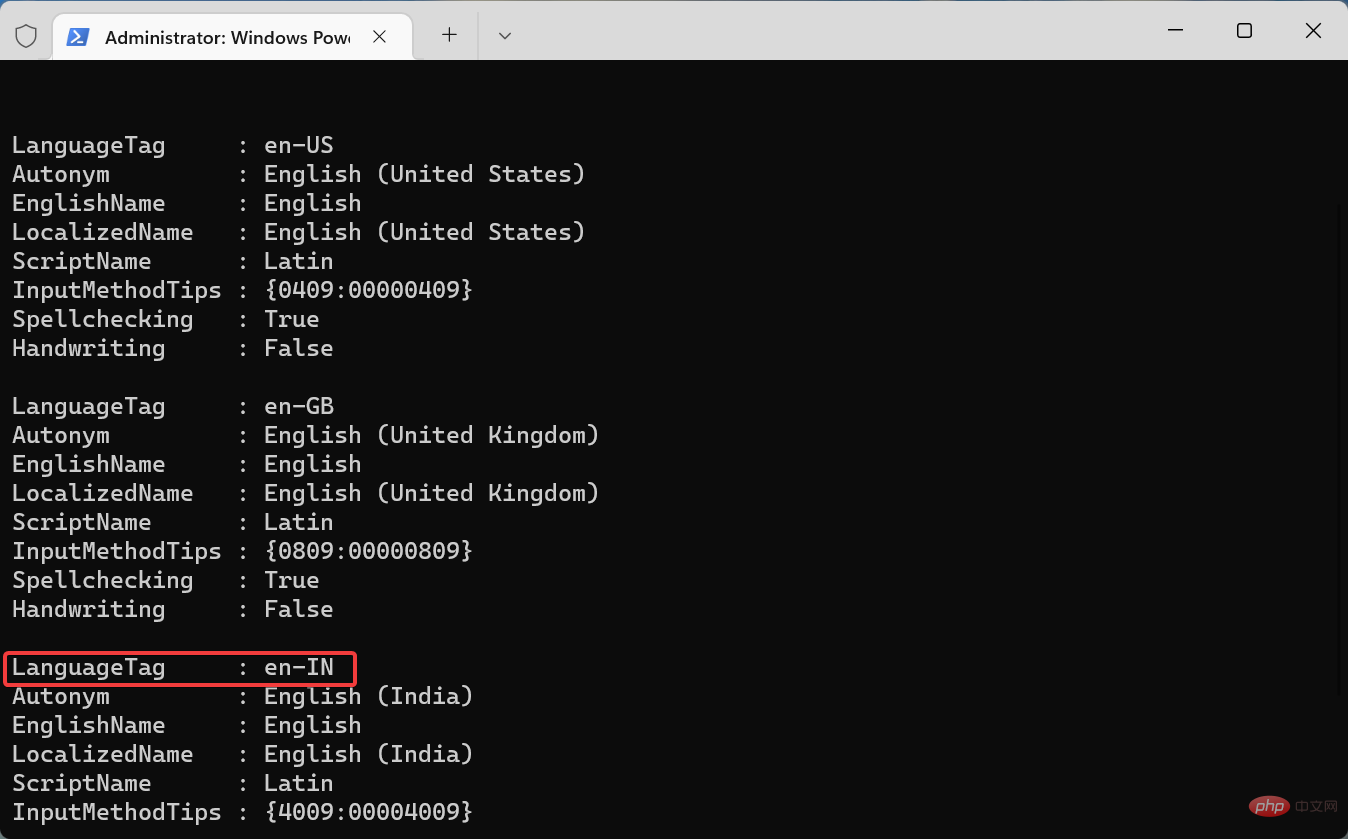
- Now, paste the following command and hit Enter to list all keyboard layouts added to the system:
<strong>Get-WinUserLanguageList</strong>
- Take note of the value listed next to the LanguageTag of the layout you want to delete.
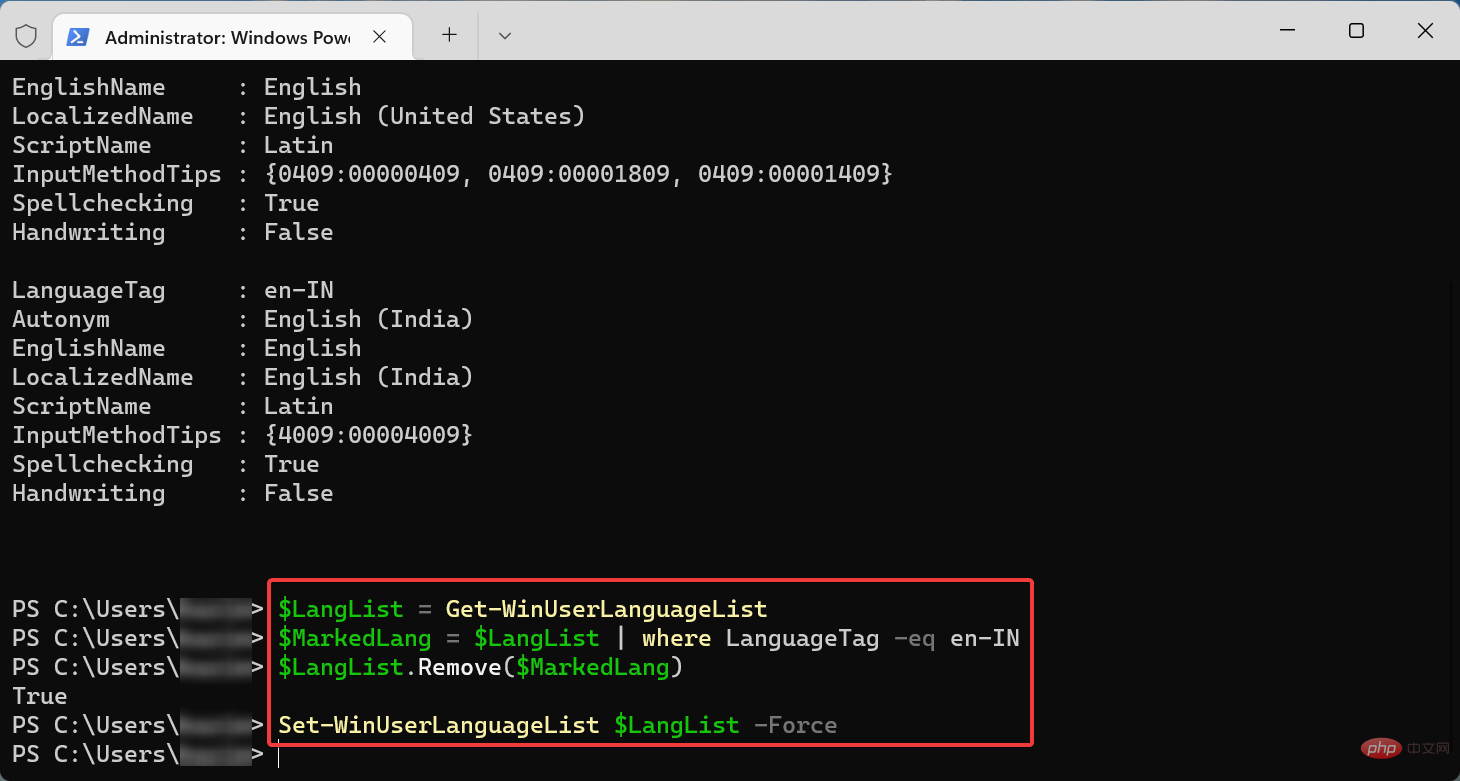
- Next, execute the following four commands one at a time, replacing the
in the second command with the command you noted down earlier: <strong>$LangList = Get-WinUserLanguageList</strong><strong>$MarkedLang = $LangList | where LanguageTag -eq <languagetag></languagetag></strong><strong>$LangList.Remove($ MarkedLang)</strong><strong>Set-WinUserLanguageList $LangList -Force</strong> - For example, if you want to delete a tag that has LanguageTag as en-IN layout, the four commands are as follows:
<strong>$LangList = Get-WinUserLanguageList</strong>##$MarkedLang = $LangList | where LanguageTag -eq en -IN<strong></strong>$LangList.Remove($MarkedLang)<strong></strong>Set-WinUserLanguageList $LangList -Force<strong></strong>Once completed, restart your computer for the changes to take effect.


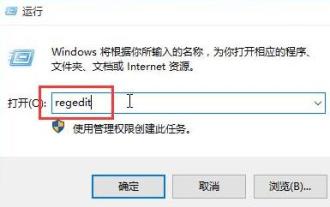
3. Modify the registry
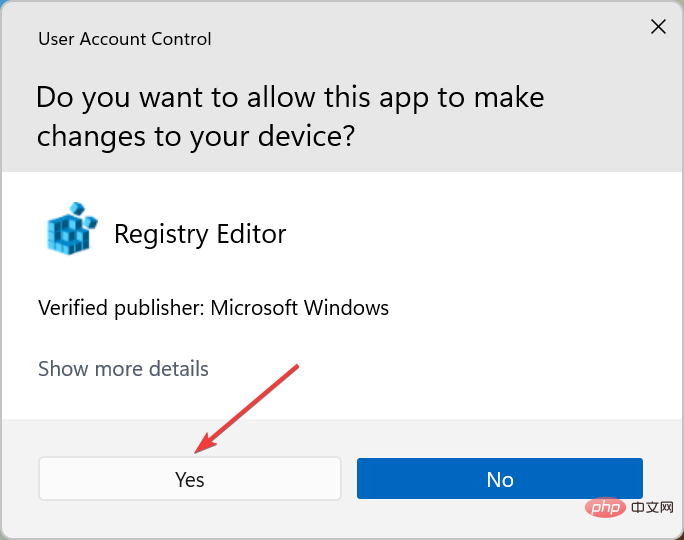
- Press Windows R to start the Run command dialog box and enter # in the text field ##regedit, and then click OK or click Enter to launch Registry Editor. Click
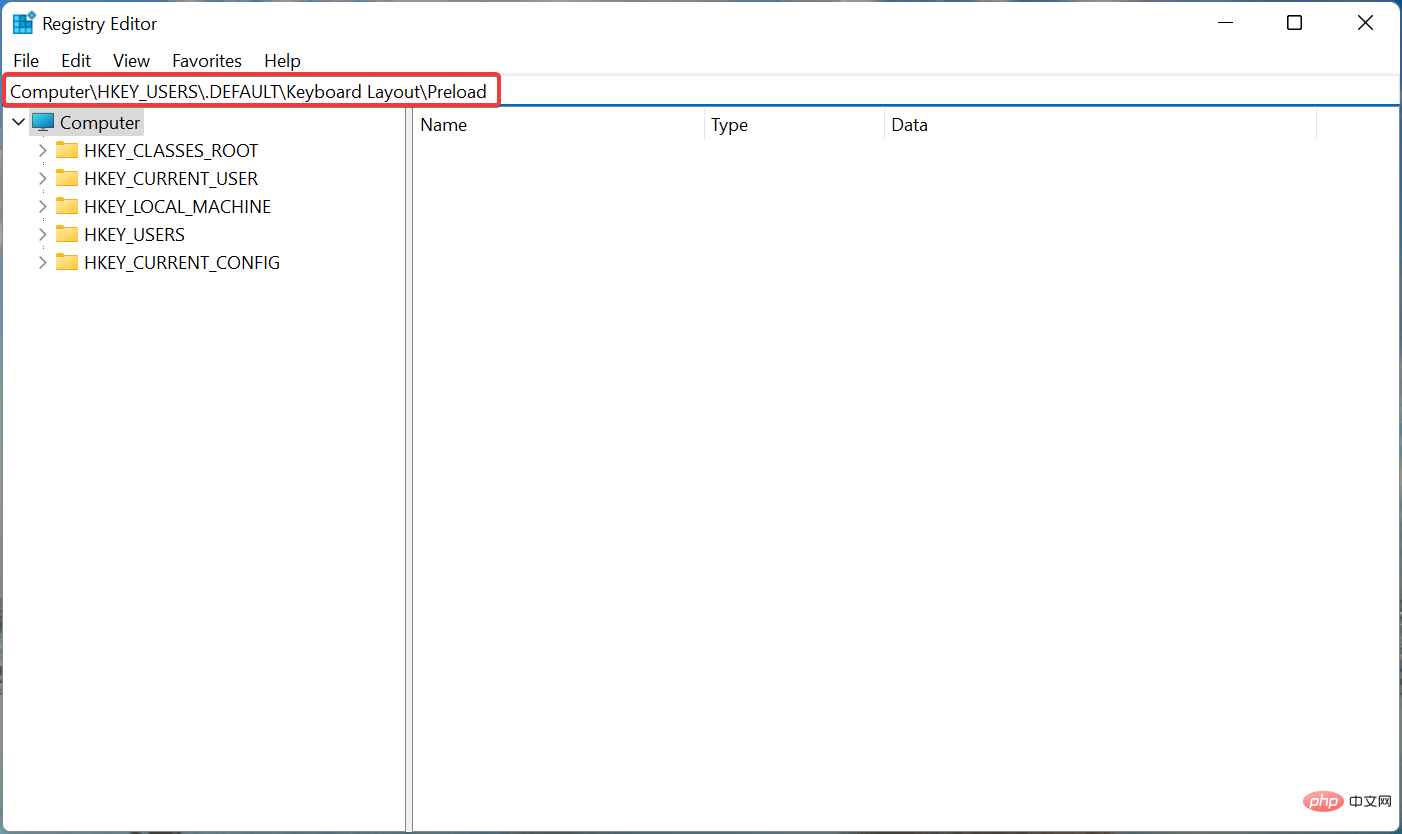
- Yes in the pop-up UAC prompt. Now, paste the following path into the address bar at the top and hit
- Enter. Alternatively, you can use the left pane to navigate to it.
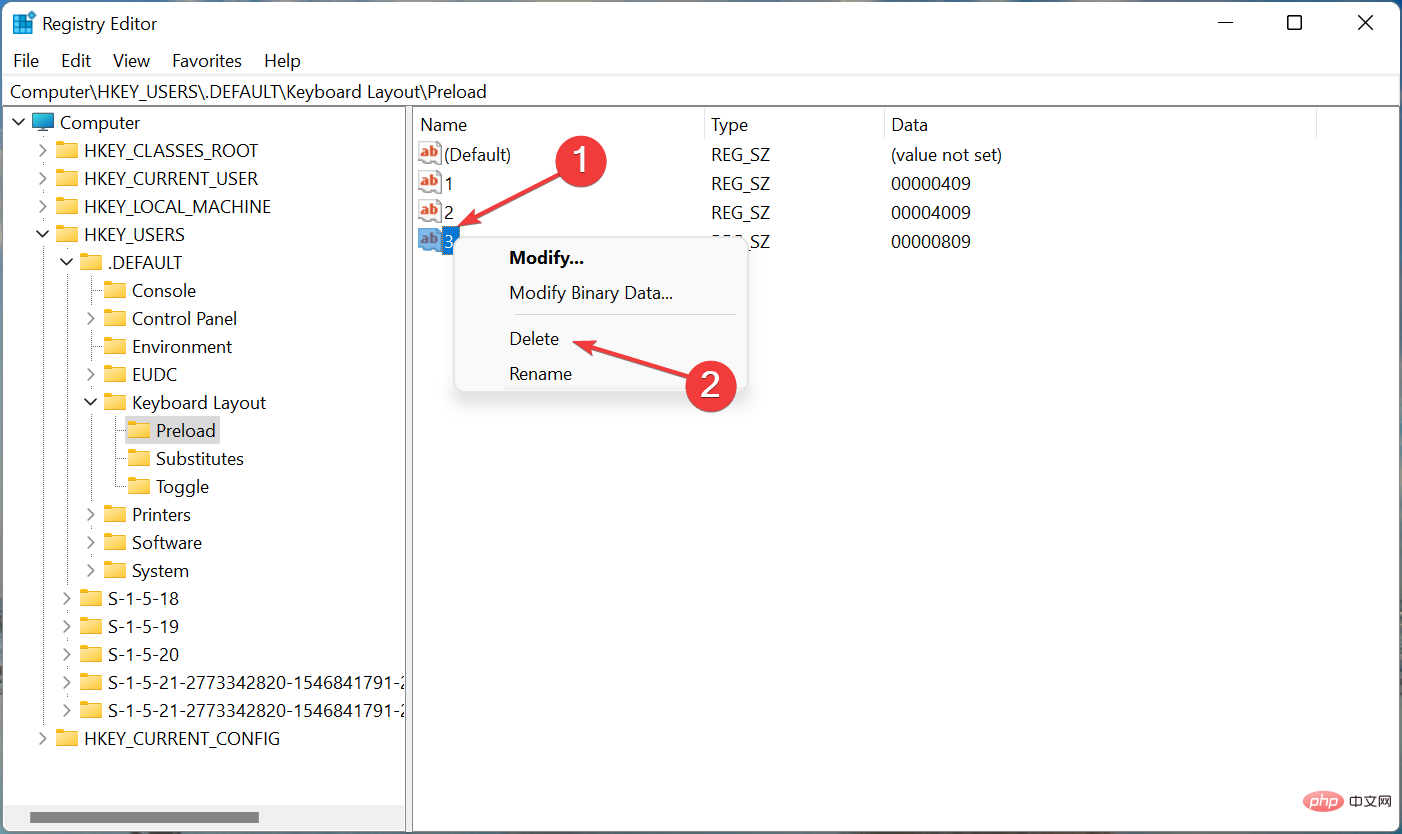
Computer\HKEY_USERS.DEFAULT\Keyboard Layout\Preload<strong></strong>You will now find a list of entries on the right, each entry represents the Specific keyboard layout. Check Microsoft's official website for - Keyboard Identifier to find out which one you want to remove. Once you are able to identify the layout you want to delete, right-click on it and select
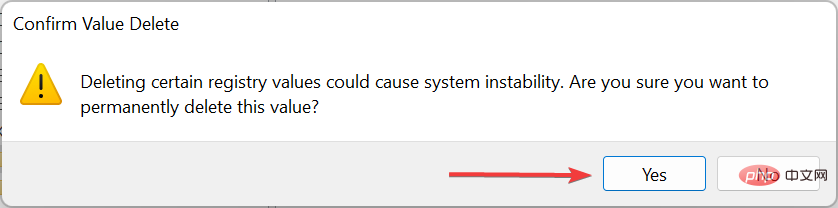
- Delete from the context menu. Click
- Yes on the confirmation prompt that appears. Restart your computer for the changes to take effect.

Ctrl Shift and then the Shift key to select another language.
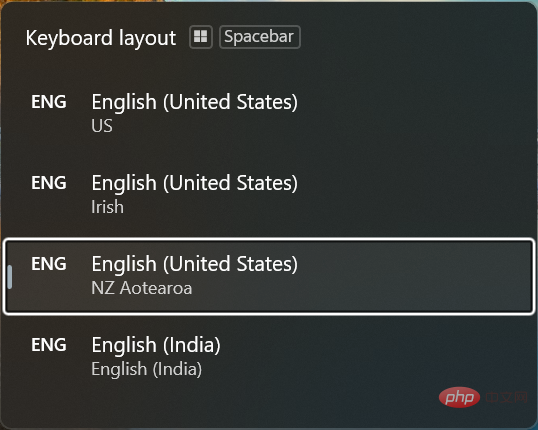
Windows Space Bar and then click Space Bar to browse the listed entries and select one.
If you can’t remove keyboard layout in Windows 11, this is what the concept is all about, and the most effective solutions. Furthermore, these methods also help to remove keyboard layout in Windows 10. Also, learn what to do if your keyboard language changes automatically in Windows 11. The problem is usually caused by problematic updates, conflicting applications, misconfigured settings, or a corrupted registry.The above is the detailed content of Can't remove keyboard layout in Windows 11? Fix it in 3 easy ways. For more information, please follow other related articles on the PHP Chinese website!

Hot AI Tools

Undresser.AI Undress
AI-powered app for creating realistic nude photos

AI Clothes Remover
Online AI tool for removing clothes from photos.

Undress AI Tool
Undress images for free

Clothoff.io
AI clothes remover

Video Face Swap
Swap faces in any video effortlessly with our completely free AI face swap tool!

Hot Article
Hot Tools

Notepad++7.3.1
Easy-to-use and free code editor

SublimeText3 Chinese version
Chinese version, very easy to use

Zend Studio 13.0.1
Powerful PHP integrated development environment

Dreamweaver CS6
Visual web development tools

SublimeText3 Mac version
God-level code editing software (SublimeText3)
Hot Topics
 1387
1387
 52
52

 This Apple ID is not yet in use in the iTunes Store: Fix
Jun 10, 2024 pm 05:42 PM
This Apple ID is not yet in use in the iTunes Store: Fix
Jun 10, 2024 pm 05:42 PM
When logging into iTunesStore using AppleID, this error saying "This AppleID has not been used in iTunesStore" may be thrown on the screen. There are no error messages to worry about, you can fix them by following these solution sets. Fix 1 – Change Shipping Address The main reason why this prompt appears in iTunes Store is that you don’t have the correct address in your AppleID profile. Step 1 – First, open iPhone Settings on your iPhone. Step 2 – AppleID should be on top of all other settings. So, open it. Step 3 – Once there, open the “Payment & Shipping” option. Step 4 – Verify your access using Face ID. step
 How to fix red-eye on iPhone
Feb 23, 2024 pm 04:31 PM
How to fix red-eye on iPhone
Feb 23, 2024 pm 04:31 PM
So, you took some great photos at your last party, but unfortunately, most of the photos you took were of red eyes. The photo itself is great, but the red eyes in it kind of ruin the image. Not to mention, some of those party photos might be from your friends’ phones. Today we'll look at how to remove red eye from photos. What causes the red eyes in the photo? Red-eye often occurs when taking photos with flash. This is because the light from the flash shines directly into the back of the eye, causing the blood vessels under the eye to reflect the light, giving the effect of red eyes in the photo. Fortunately, with the continuous advancement of technology, some cameras are now equipped with red-eye correction functions that can effectively solve this problem. By using this feature, the camera takes pictures
 How to solve the problem of Win11 failing to verify credentials?
Jan 30, 2024 pm 02:03 PM
How to solve the problem of Win11 failing to verify credentials?
Jan 30, 2024 pm 02:03 PM
When a Win11 user uses credentials to log in, he or she receives an error message stating that your credentials cannot be verified. What is going on? After the editor investigated this problem, I found that there may be several different situations that directly or indirectly cause this problem. Let's take a look with the editor.
 Comprehensive Guide to PHP 500 Errors: Causes, Diagnosis and Fixes
Mar 22, 2024 pm 12:45 PM
Comprehensive Guide to PHP 500 Errors: Causes, Diagnosis and Fixes
Mar 22, 2024 pm 12:45 PM
A Comprehensive Guide to PHP 500 Errors: Causes, Diagnosis, and Fixes During PHP development, we often encounter errors with HTTP status code 500. This error is usually called "500InternalServerError", which means that some unknown errors occurred while processing the request on the server side. In this article, we will explore the common causes of PHP500 errors, how to diagnose them, and how to fix them, and provide specific code examples for reference. Common causes of 1.500 errors 1.
 An easy guide to fixing Windows 11 blue screen issues
Dec 27, 2023 pm 02:26 PM
An easy guide to fixing Windows 11 blue screen issues
Dec 27, 2023 pm 02:26 PM
Many friends always encounter blue screens when using computer operating systems. Even the latest win11 system cannot escape the fate of blue screens. Therefore, today I have brought you a tutorial on how to repair win11 blue screens. No matter whether you have encountered a blue screen or not, you can learn it first in case you need it. How to fix win11 blue screen method 1. If we encounter a blue screen, first restart the system and check whether it can start normally. 2. If it can start normally, right-click "Computer" on the desktop and select "Manage" 3. Then expand "System Tools" on the left side of the pop-up window and select "Event Viewer" 4. In the event viewer, we will You can see what specific problem caused the blue screen. 5. Then just follow the blue screen situation and events
 How to fix the volume cannot be adjusted in WIN10
Mar 27, 2024 pm 05:16 PM
How to fix the volume cannot be adjusted in WIN10
Mar 27, 2024 pm 05:16 PM
1. Press win+r to open the run window, enter [regedit] and press Enter to open the registry editor. 2. In the opened registry editor, click to expand [HKEY_LOCAL_MACHINESOFTWAREMicrosoftWindowsCurrentVersionRun]. In the blank space on the right, right-click and select [New - String Value], and rename it to [systray.exe]. 3. Double-click to open systray.exe, modify its numerical data to [C:WindowsSystem32systray.exe], and click [OK] to save the settings.
 Table 'table_name' is marked as crashed and should be repaired - How to solve MySQL error: Table is marked as crashed and needs to be repaired
Oct 05, 2023 am 09:25 AM
Table 'table_name' is marked as crashed and should be repaired - How to solve MySQL error: Table is marked as crashed and needs to be repaired
Oct 05, 2023 am 09:25 AM
Title: Table'table_name'ismarkedascrashedandshouldberepaired-How to solve MySQL error: The table is marked as crashed and needs to be repaired. Specific code examples are required. Article text: MySQL is a powerful relational database management system that is widely used in various websites and The application is under development. However, due to various reasons, sometimes we may encounter some errors and problems. in
 iPhone stuck in airplane mode: How to fix it
Jun 15, 2024 pm 02:16 PM
iPhone stuck in airplane mode: How to fix it
Jun 15, 2024 pm 02:16 PM
Airplane mode is very convenient in some situations. However, the same airplane mode may give you a headache if your iPhone suddenly gets stuck on it. In this article, we have designed this set of solutions to get your iPhone out of airplane mode. Quick fix – 1. Try disabling Airplane Mode directly from Control Center. 2. If you are unable to disable Airplane Mode from Control Center, you can disable Airplane Mode directly from the Settings tab – If these tips don’t work, follow the fixes below to resolve the issue. Fix 1 – Force Restart Your Device The process of force restarting your device is very simple. All you have to do is follow these step-by-step instructions. Step 1 – You can start the process by pressing and releasing the Volume Up button. step