

How to fix VMMEM high memory and CPU usage

Vmmem or virtual memory may cause high CPU or memory usage due to various factors. One of the key reasons behind this issue is some resource-intensive processes running in the virtual host. However, if this is not the case and the VM still consumes a lot of system resources in idle mode, it could be a driver failure. This slows down the virtual machine and your work may stop. So, follow the steps below to resolve the issue quickly.
Fix 1 – End all resource-intensive processes
If you are running some heavy applications or software versions, expect vmmem to use a lot of resources. There is nothing unusual about this. Even if you can kill these processes directly, it will free up more resources for your device.
NOTE – You can end these processes in a variety of ways. These steps may vary depending on the host operating system. We have shown the steps in Windows operating system.
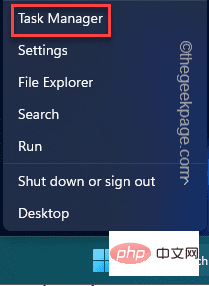
1. Open the virtual machine.
2. There, right-click the Windows icon and click "Task Manager" to open it.

#3. When Task Manager appears, go to the Processes tab.
4. There, look for any processes taking up CPU usage exceeding 70%. If you can identify any such process, right-click on it and click "End Task".

#This way, any unnecessary processes consuming power and resources in the background can be killed. This will free up more resources and vmmem will not have high CPU or RAM usage.
Fix 2 – Restart WSL
Try restarting Windows Subsystem for Linux (WSL) on your computer.
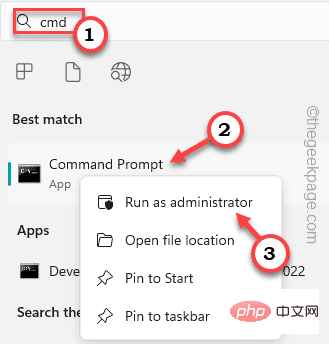
1. Open the search bar and type "cmd".
2. Then, right-click "Command Prompt" and click "Run as administrator".
3. After opening the CMD terminal, you can easily copy-paste this code and press Enter
wsl --shutdown
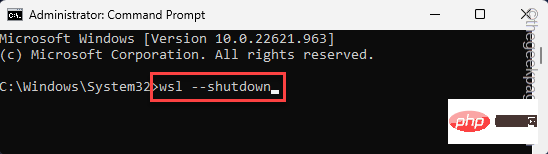
This should shut down the Windows Subsystem for Linux on your computer. The virtual machine will shut down automatically.
If this doesn’t work, you can perform the following steps –
1. Open File Explorer.
2. Then you have to go to WSL configuration file. You can find it at this address -
C:\Users\your-username\.wslconfig

3. This configuration file will open in Notepad.
4. So when it does this, copy-paste this line into the config file.
[wsl2] guiApplications=false
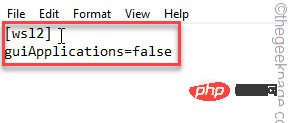
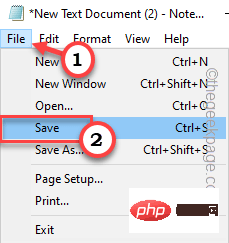
File" and "Save" to save the configuration file immediately .
.wslconfig file.
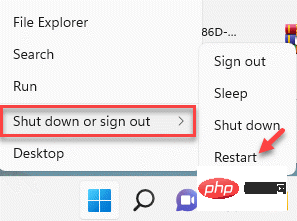
Then you mustrestart the system. Rebooting the system completely terminates the vmmem process.
Note –
You have stopped the vmmem process and shut down Windows Subsystem for Linux (WSL). Therefore, you cannot run any Linux-based GUI applications. To do this, the WSL service must be restarted and you can follow these simple steps: 1. Click on the "Search" box and type "PowerShell".
2. Then, right-click "Windows PowerShell" and click "Run as administrator"Open as administratorPowerShell.

write this line and press Enter key to restart the WSL service.
Restart-Service LxssManager

powershell".
2. Then, right-click "Windows PowerShell" and click "Run as administrator".
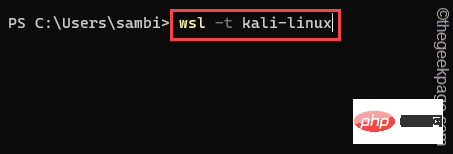
write this exact line here and press Enter key. This command will display a list of virtual machines and their current status.
wsl -l -v

4. 最后,您可以使用此特定代码停止正在运行的虚拟机 –
wsl -t nameofvm
[现在,将“nameofvm”替换为系统上运行的虚拟机的名称。假设你有 Kali Linux,命令是这样的——
wsl -t kali-linux
]
终止 Linux 机器后,vmmem 不会消耗那么多 CPU 或 RAM 处理能力。
修复4 –增加分配的资源
已分配给虚拟机的主机资源可能供应不足,具体取决于您在虚拟机上执行的操作。因此,如果您正在运行某些内容或测试需要大量资源的版本,vmmem 将消耗大量的 CPU 和 RAM。
Hyper-V 用户
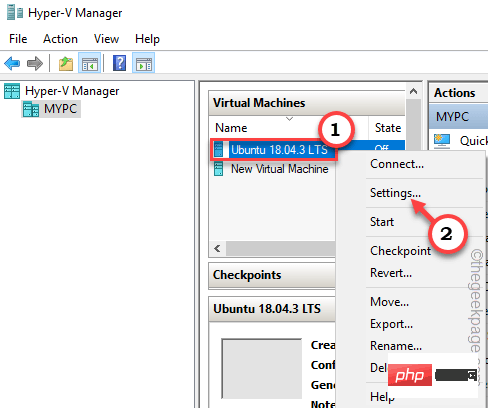
1. 打开 Hyper-V 管理器。
2.在那里,右键单击列表中的虚拟机,然后点击“设置”。
3.在“设置”页面上,您可以找到与“内存”,“处理器”相关的薮猫选项。
4. 现在,您可以增加虚拟机的内存和处理器计数。
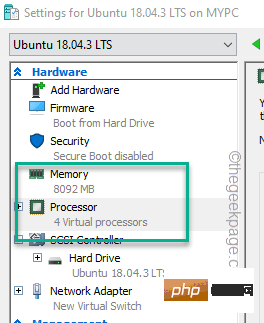
如果虚拟机已在系统上运行,则必须重新启动它才能使此更改生效。
VMWare 工作站用户
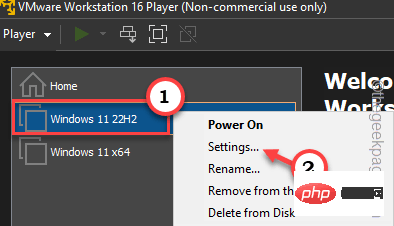
1. 打开 VMware 工作站。
2.然后,在左侧窗格中,您可以找到堆叠为一列的所有虚拟机。
3. 接下来,右键单击虚拟机,然后单击“设置”。
4.现在,转到“硬件”部分。
5.在那里,您可以看到分配的“内存”和“处理器”。
根据您的需要和资源限制调整这些设置。
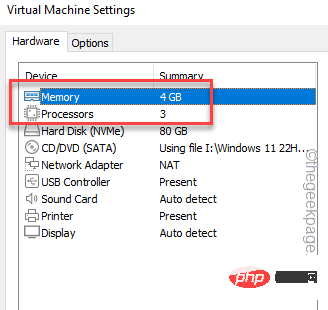
您必须关闭虚拟机一次,然后重新启动它。
这样,vmmem 将消耗更少的资源。
附加积分 –
您应该注意某些要点。
1.检查是否有任何进程正在流失资源。这样,所有资源都被浪费了 所以,所以从进程管理器测试它。
2. 恶意软件和潜在有害感染可能导致资源过度使用。因此,运行完整的恶意软件扫描以识别并读取恶意软件文件。
The above is the detailed content of How to fix VMMEM high memory and CPU usage. For more information, please follow other related articles on the PHP Chinese website!

Hot AI Tools

Undresser.AI Undress
AI-powered app for creating realistic nude photos

AI Clothes Remover
Online AI tool for removing clothes from photos.

Undress AI Tool
Undress images for free

Clothoff.io
AI clothes remover

AI Hentai Generator
Generate AI Hentai for free.

Hot Article
Hot Tools

Notepad++7.3.1
Easy-to-use and free code editor

SublimeText3 Chinese version
Chinese version, very easy to use

Zend Studio 13.0.1
Powerful PHP integrated development environment

Dreamweaver CS6
Visual web development tools

SublimeText3 Mac version
God-level code editing software (SublimeText3)
Hot Topics


 How to fix hypervisor errors in Windows 11
Apr 16, 2023 pm 12:37 PM
How to fix hypervisor errors in Windows 11
Apr 16, 2023 pm 12:37 PM
For many users, Windows has a hidden built-in feature for easily creating and managing virtual machines. This feature is called Hypervisor or Hyper-V. But like other Windows features, this one isn't completely bug-free. In this article, we will show you how to fix Hyper-V issues easily and quickly. So without further ado, let’s jump into the solution and get the virtual machine up and running. Fix 1 – Check if your system supports Hyper-V The first thing you should try is to check if your system supports Hyper-V and is still active. 1. You must restart the system. To do this safely, press Wi once
 How to fix high CPU usage issue with Steam client in Windows 11?
Apr 21, 2023 pm 05:19 PM
How to fix high CPU usage issue with Steam client in Windows 11?
Apr 21, 2023 pm 05:19 PM
Many gamers have reported seeing game stuttering and lag issues when using the Steam app. After checking the details, the issue seems to be mainly caused by SteamVRWebHelper. SteamVRWebHelper is the internal browser used by the Steam application to set up the required display of the Steam store game library. This can use up to 70% of the CPU, causing stuttering and lag issues on Steam. In this article, we’ve put together a list of fixes that can help you overcome high CPU usage issues with Steam client WebHelper. Fix 1: Disable animated avatars Step 1: Open Steam
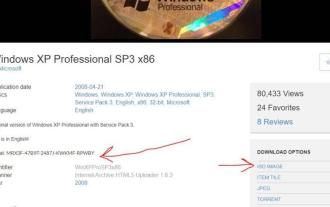 Install Windows XP ISO on Windows 11 using VirtualBox
May 05, 2023 pm 02:25 PM
Install Windows XP ISO on Windows 11 using VirtualBox
May 05, 2023 pm 02:25 PM
Windows XP on Windows 11 VirtualBox Virtual Machine The steps given here to install a Windows XP ISO image using VirtualBox are not limited to Windows 11. Users can follow these steps on Linux such as Ubuntu, macOS, Windows 10, 7, or other operating systems they are using and have Virtualbox. Download Windows
 How to fix VMMEM high memory and CPU usage
Apr 18, 2023 pm 04:40 PM
How to fix VMMEM high memory and CPU usage
Apr 18, 2023 pm 04:40 PM
Vmmem or virtual memory can cause high CPU or memory usage due to various factors. One of the key reasons behind this issue is some resource-intensive processes running in the virtual host. However, if this is not the case and the VM still consumes a lot of system resources in idle mode, it may be a driver failure. This slows down the virtual machine and your work may stop. So, follow the steps below to resolve the issue quickly. Fix 1 – End all resource-intensive processes If you are running some heavy applications or software versions, expect vmmem to use a lot of resources. There is nothing unusual about this. Even if you can kill these processes directly, it will free up more resources for your device. NOTE – You can
 Convert VMware to VirtualBox and vice versa
Feb 19, 2024 pm 05:57 PM
Convert VMware to VirtualBox and vice versa
Feb 19, 2024 pm 05:57 PM
Virtual machines are an affordable way to experience and use multiple operating systems on a single computer. VMWare and VirtualBox are the two major brands in the virtual machine industry. You can easily convert a VMware virtual machine to a VirtualBox virtual machine and vice versa, giving you the flexibility to switch machines between them without having to recreate them. Migrating a virtual machine from VMWare to VirtualBox or vice versa is not complicated. Just follow the instructions below and it's easy to do. How to convert VMware to VirtualBoxVMwareVM is stored in .vmx format and then converted to .ovf, this is VirtualBox and VMWare
 How to install, configure and use the 'Windows Sandbox' feature
Feb 19, 2024 pm 01:00 PM
How to install, configure and use the 'Windows Sandbox' feature
Feb 19, 2024 pm 01:00 PM
Windows Sandbox is a feature built into the Windows 11 and Windows 10 operating systems that allows users to install and test unverified applications or visit websites in a lightweight virtual environment while protecting the main system from potential threats. Overall, this system provides a safe and isolated testing environment, similar to a virtual machine, but easier to use. Next, this article will introduce the detailed steps to install, configure and use the Windows Sandbox feature on Windows 11. Introduction to Windows Sandbox Features Windows Sandbox (also known as Windows Sandbox) is essentially a lightweight virtualization solution focused on providing efficient and secure virtual environments. compared to traditional
 Why does the CPU usage go up and down?
May 04, 2023 pm 05:34 PM
Why does the CPU usage go up and down?
May 04, 2023 pm 05:34 PM
The sudden high and low CPU usage is caused by a program error. The solution is: 1. Use reliable anti-virus software to completely clean the system memory and local hard disk; 2. Open the system setting software and check whether there are any abnormally started programs; 3. Use the computer time, don’t take too long.
 How to fix high CPU usage of widgets in Windows 11
Apr 13, 2023 pm 05:43 PM
How to fix high CPU usage of widgets in Windows 11
Apr 13, 2023 pm 05:43 PM
Windows 11 has a built-in widget platform that may cause high CPU usage. These widgets can be used to display weather forecasts, sports scores and clocks. While they may be useful to some extent, some users complain that Windows 11 widgets use too much CPU. This widget issue is most common on Windows 11 devices, but older versions of Windows may also experience this issue. Widgets are a useful feature that provide you with information at a glance. However, sometimes, when a widget panel is open, it starts consuming CPU or memory and system performance degrades. The CPU is the brain of the computer. It executes the operation of your machine