

Fix: Device Manager keeps refreshing in Windows 11, 10

Many Windows users report that their Device Manager frequently refreshes after startup. Therefore, they cannot search for any device driver or perform any specified operations such as update, install, and uninstall.
There may be many reasons for such problems on Windows systems, including corrupted system files, firewall or third-party antivirus software installed on the system, failure of the connected USB device, certain error reporting services, etc. Waiting.
In this article, we have collected some details about the possible causes of the problem and put them into a collection of fixes that may help solve the problem on Windows 11 system.
Fix 1 – Locate the USB device responsible for the issue
This issue may be caused by a USB device. Try removing the USB devices connected to the system one by one to see which USB is causing the problem.
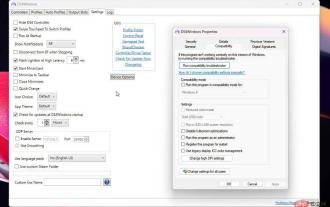
You can also download http://www.nirsoft.net/utils/usb_log_view.html from nirsoft and find out which USB device is causing the problem.
After downloading, unzip the zip and run the executable file if this issue occurs on your PC.
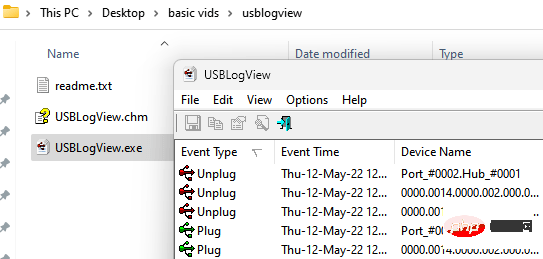
#A log will be displayed that allows you to easily identify the issue causing the USB.
Just double click on the item in the log and check the product name. This will help you identify the problem causing your USB device.
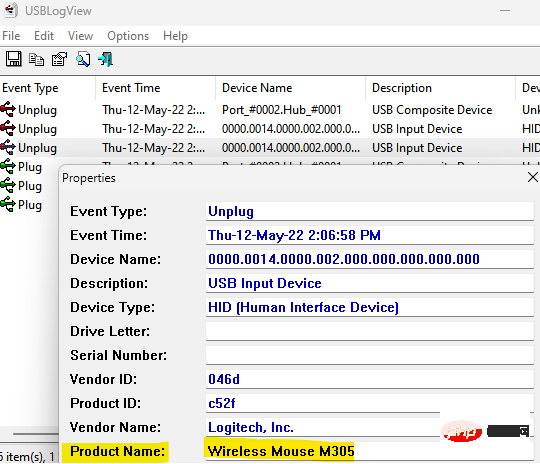
Disconnect the USB from your PC.
Fix 2 – Disable SSDP Discovery
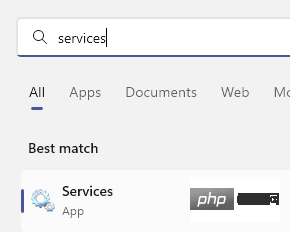
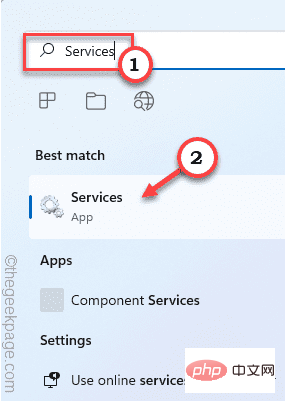
1 – Search for Services in the Windows taskbar and click on it to open the Service Manager window.
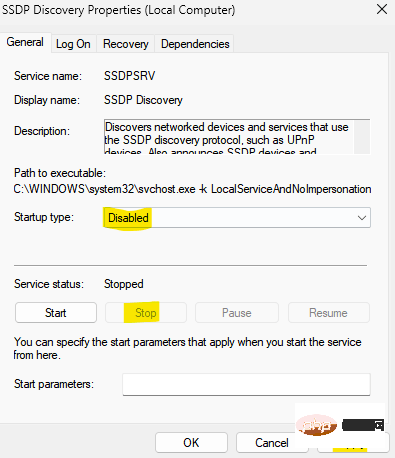
2 - Find the SSDP Discovery Service from the list and double-click it.

3 – Now, click Stop to stop this service.
4 - You can also permanently disable it by selecting Startup type to disabled.
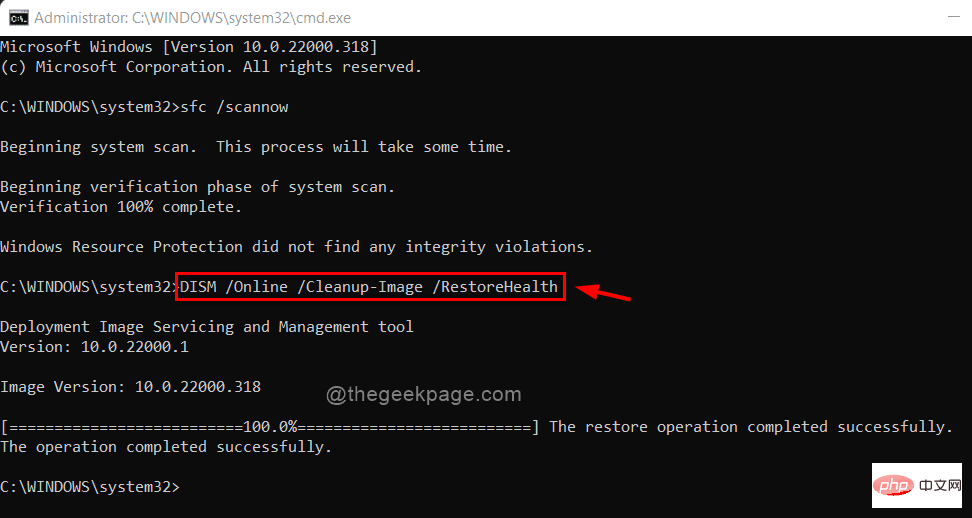
Fix 3 – Run SFC and DISM Restorehealth
System data files are very important for Windows to run efficiently and smoothly on the system. When these files get corrupted or corrupted, they can cause various problems in the system that are not easily known. Therefore, we recommend our users to perform a System File Checker scan on the system to detect corrupted files so that they can be replaced with new files from the internet.
Let's see how it is done using the SFC below.
Step 1: Press the Windows and R keys simultaneously on your keyboard to open the "Run" command frame.
Step 2: Then, enter cmd in the Run command box and hold down ctrl, shift and enter# at the same time ##key.
NOTE: Click is to continue the UAC prompt on the screen.
Command Prompt window as the system administrator.
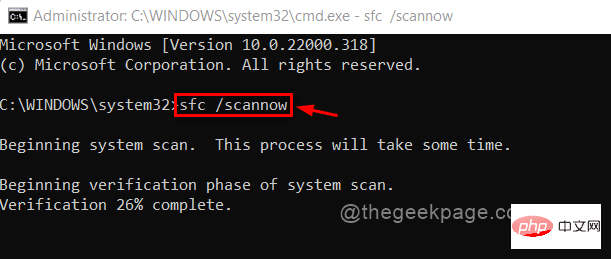
Step 4: Later, typesfc /scannow in the command prompt and press Enter key to execute it.
1 |
|
Windows key and type Services.
Step 2: Select theService application from the results as shown below.

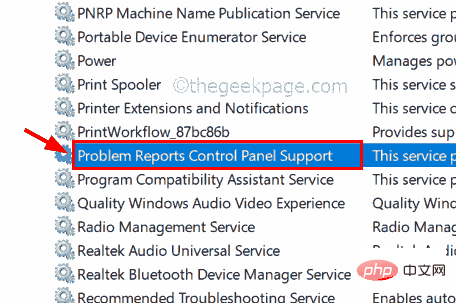
Problem Report Control Panel Supported service by scrolling down the list of services, as shown below.
Step 4:Double-click it to open its Properties window.
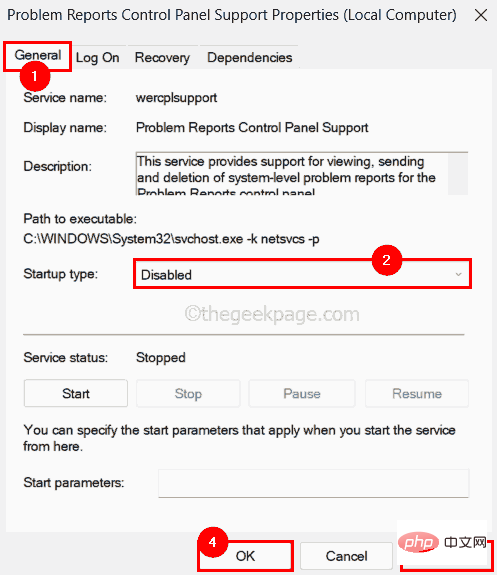
Step 5: Once the properties window opens, click on the "General" tab and select the "Startup Type" drop-down list Select "Disable".
Then, click Apply and OK to disable the service and close the Properties window.
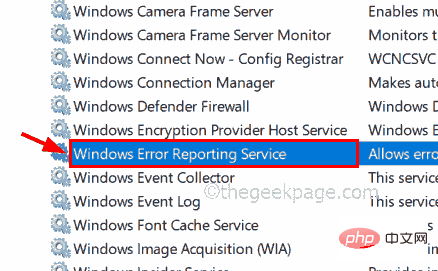
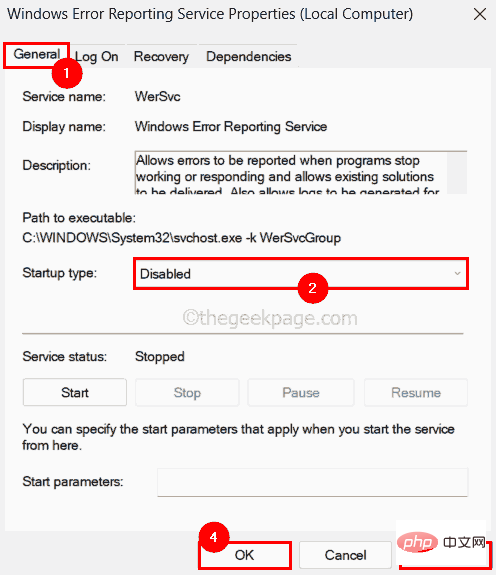
Step 6: Similarly, double-click to open the Windows Error Reporting Service.
Step 7: By going under the "General" tab and selecting "Disabled" as Startup type to disable the service.
Step 8: Then, click Apply and OK to reflect the changes as shown in the screenshot below.
Step 9: After disabling all necessary services, close the service application and restart the system once.
After the system starts, check whether the problem is solved.
Fix 5 – Run a clean boot on a Windows system
During a normal system boot, all very necessary services are loaded and then the system is started. Here we are not sure which service loaded among many is causing this issue. Therefore, for careful diagnosis, we recommend users to perform a clean boot on their system using MSConfig tool and enable only some specific services and check if these are the cause.
Here are a few steps on how to accomplish this.
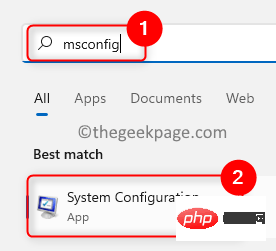
Step 1: Press the Windows key on your keyboard and enter ms config.
Step 2: Click on the System Configuration application from the search results as shown below.
Step 3: After opening the System Configuration application, go to the "Services" tab.
Step 4: In the "Services" tab, click the "Disable All" button at the bottom, as shown in the image below.
Step 5: Click the Hide all Microsoft services checkbox to select it, then click Apply and OK.
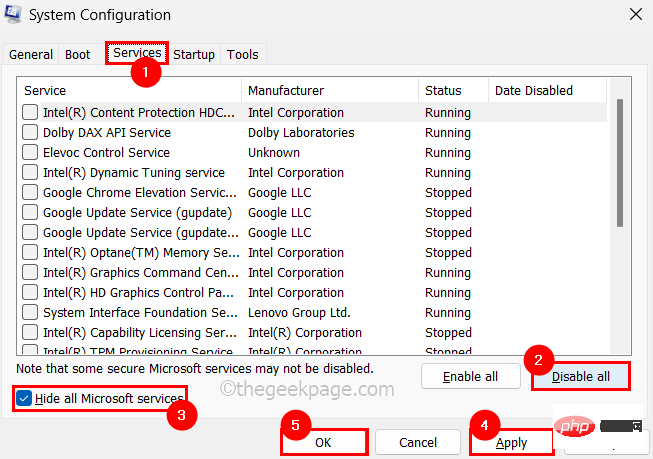
Step 6: After this, restart the system and check if the device manager is working properly.
Step 7: If this is working fine, then select the services one by one and clean boot the system to see if this service is actually causing the problem.
This way you can understand which service is the culprit.
Again, you can also use Task Manager to find the startup application causing this issue.
Step 1: Press and hold the CTRL, SHIFT, and ESC keys simultaneously to open the Task Manager window.
Step 2: Click on the Launch Application icon on the left panel as shown below.
Step 3: There will be a list of applications that launch on boot.
Step 4: Disable all the applications one by one by right-clicking on them and selecting the "Disable" option from the context menu as shown below.
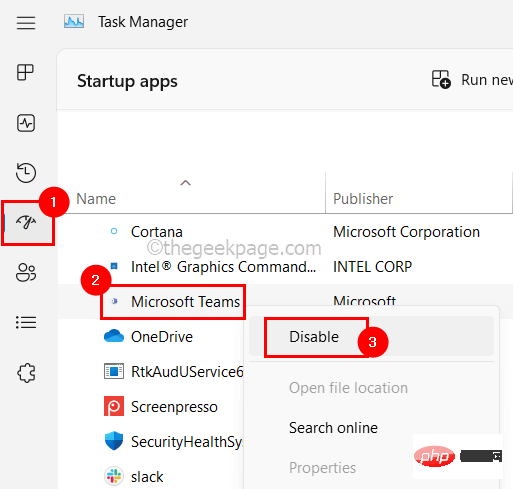
Step 5: Then, reboot and check if the issue is resolved.
This means that some startup application is causing the issue.
Step 6: So, enable the applications one by one and then restart the system and check the application causing the problem.
Hope this resolves the issue.
The above is the detailed content of Fix: Device Manager keeps refreshing in Windows 11, 10. For more information, please follow other related articles on the PHP Chinese website!

Hot AI Tools

Undresser.AI Undress
AI-powered app for creating realistic nude photos

AI Clothes Remover
Online AI tool for removing clothes from photos.

Undress AI Tool
Undress images for free

Clothoff.io
AI clothes remover

Video Face Swap
Swap faces in any video effortlessly with our completely free AI face swap tool!
Hot Article
Hot Tools

Notepad++7.3.1
Easy-to-use and free code editor

SublimeText3 Chinese version
Chinese version, very easy to use

Zend Studio 13.0.1
Powerful PHP integrated development environment

Dreamweaver CS6
Visual web development tools

SublimeText3 Mac version
God-level code editing software (SublimeText3)
Hot Topics
 1655
1655
 14
1414
52
1307
25
1253
29
1227
24
14
1414
52
1307
25
1253
29
1227
24

 Unable to remove Xbox wireless controller, removal failure fix
Apr 14, 2023 am 10:40 AM
Unable to remove Xbox wireless controller, removal failure fix
Apr 14, 2023 am 10:40 AM
The Xbox app allows its users to play exciting games on their PC in case the console is not there. Users can connect their Xbox controller directly to the PC and start playing on their Windows PC. Sometimes the Xbox Wireless Controller cannot be removed from a user's Windows 11/Windows 10 laptop. There are a number of issues, the most prominent of which is users encountering "removal failed" issues when trying to remove gadgets. If you get a "Removal failed" error when removing your Xbox Wireless Controller, restart your computer. The most straightforward solution to common problems is to restart your Windows device. If you are restarting your computer
 7 Fixes If Power Management Tab Is Missing in Device Manager
Apr 14, 2023 pm 07:04 PM
7 Fixes If Power Management Tab Is Missing in Device Manager
Apr 14, 2023 pm 07:04 PM
Device Manager is a utility in Windows that lists all connected devices. Additionally, you can identify and troubleshoot problematic hardware here, and even change power settings. However, for some users, the Power Management tab is missing from Device Manager. This can happen for a number of reasons and may impact your experience as changes cannot be made. In this case, you won't be able to configure how the system controls power to the device and whether the device can wake the PC. So, read the following section to know what to do if the Power Management tab is missing from Windows 11’s Device Manager. What should I do if the Power Management tab is missing from Device Manager? 1. Update Windows Press Wind
 How to fix Windows 11 not detecting your PS4 controller issue
May 09, 2023 pm 04:19 PM
How to fix Windows 11 not detecting your PS4 controller issue
May 09, 2023 pm 04:19 PM
There are many different ways you can play video games on your Windows 11 computer. A classic mouse and keyboard, Xbox controller or PlayStation 4 controller; all run on Microsoft's latest operating system. But there are reports that the PS4 controller may not be recognized on your Windows 11 PC. This may be due to outdated Bluetooth drivers not working properly or DS4Windows not working properly. What are the fixes for PS4 controller not recognized? Your PS4 can connect to your PC via Bluetooth, but many games don't support the controller and prefer Xbox devices. This is how you download and install DS4Windo
 DS4Windows controller not detected in Windows 11/10
Apr 15, 2023 pm 06:01 PM
DS4Windows controller not detected in Windows 11/10
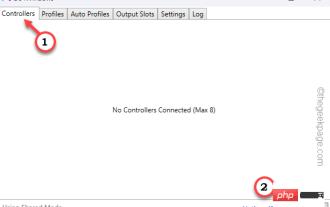
Apr 15, 2023 pm 06:01 PM
Sony puts out the best controllers with every iteration of its PlayStation version. However, you cannot use these controllers directly with Windows computers without using an emulator called DS4Windows. Sometimes, DS4Windows may not detect your controller. It even throws this error message "No controllers connected (max 4)". So, what should you do if this happens? Follow these solutions to resolve the issue so you can enjoy PC games with Dual Shock Controller in no time. Solution – 1. The first thing you should check is whether the controller battery is low or completely dead. In this case, please turn off and disconnect the controller first, then separately
 How to Download Drivers for Universal PnP Monitors: 5 Ways
Apr 21, 2023 pm 08:55 PM
How to Download Drivers for Universal PnP Monitors: 5 Ways
Apr 21, 2023 pm 08:55 PM
If you have recently upgraded to Windows 10 or Windows 11, you may need to download a universal PnP monitor driver on your PC. Therefore, we have come up with a tutorial that will tell you more about Universal PnP Monitor and some quick ways to download and install Universal PnP Drivers on Windows. You may need to download drivers for most monitor brands, including the AcerGenericPnP monitor driver. When looking for monitor types in Device Manager or under the Monitors tab of the display adapter properties, you may notice Generic PnP Monitor. Chances are you'll find it in dual-monitor setups on both laptops and desktops. Down
 Device Manager keeps refreshing? 7 easy ways to fix it
Apr 14, 2023 pm 01:49 PM
Device Manager keeps refreshing? 7 easy ways to fix it
Apr 14, 2023 pm 01:49 PM
Drivers are essential for the efficient operation of connected devices. These are generally managed through the device manager, but sometimes it keeps refreshing, which prevents the user from making any changes. This usually happens when a specific device keeps connecting/disconnecting, and every time the device manager refreshes to reflect the changes. Most of the time, USB devices have been found to cause the problem. However, conflicting third-party applications, corrupted system files, or the presence of malware on the system can also cause problems. Now that you have a basic understanding of the root cause, let us introduce you to the most effective ways to fix the Device Manager keeps resetting issue. What should I do if Device Manager keeps refreshing? 1. Remove non-critical USB devices as it is usually behind the problem
 When your USB C is not recognized by Windows 11, there are over 5 fixes to choose from.
May 08, 2023 pm 11:22 PM
When your USB C is not recognized by Windows 11, there are over 5 fixes to choose from.
May 08, 2023 pm 11:22 PM
USB-C connectors are now standard on most modern phones, laptops, and tablets. In other words, we have entered the USB-C era, and the traditional rectangular USB Type-A plugs we have become accustomed to are gradually disappearing. You can now charge your Windows 11 PC and communicate via USB-C connection with other USB Type-C gadgets that have USB-C ports (such as display adapters, docking stations, phones, etc.). Unfortunately, certain software and hardware combinations can cause problems. When this happens, you may see a message indicating that the USB-C connection has failed. In this article, we will show how to fix Win
 How to solve the problem 'The operation cannot be completed, error code 0x000006ba, restart the print spooler'?
Apr 23, 2023 pm 08:13 PM
How to solve the problem 'The operation cannot be completed, error code 0x000006ba, restart the print spooler'?
Apr 23, 2023 pm 08:13 PM
Printing something on your office printer is often a routine task, but only if everything works properly. If any problem occurs, the page will not print and you will see this error message "The operation could not be completed (error 0x000006ba). Please restart the spooler on the server or restart the server computer." Best solution for this problem State it directly in the error message. Solution - 1. You should restart the system and try the printing operation again. 2. If you are using an Office printer, make sure there are no other printing processes taking place. This may delay your work and show you error messages. Fix 1 – Restart the print spooler You must restart PrinterSpo