Apple's Self-Healing Initiative Toolkit - See What's Inside for Yourself
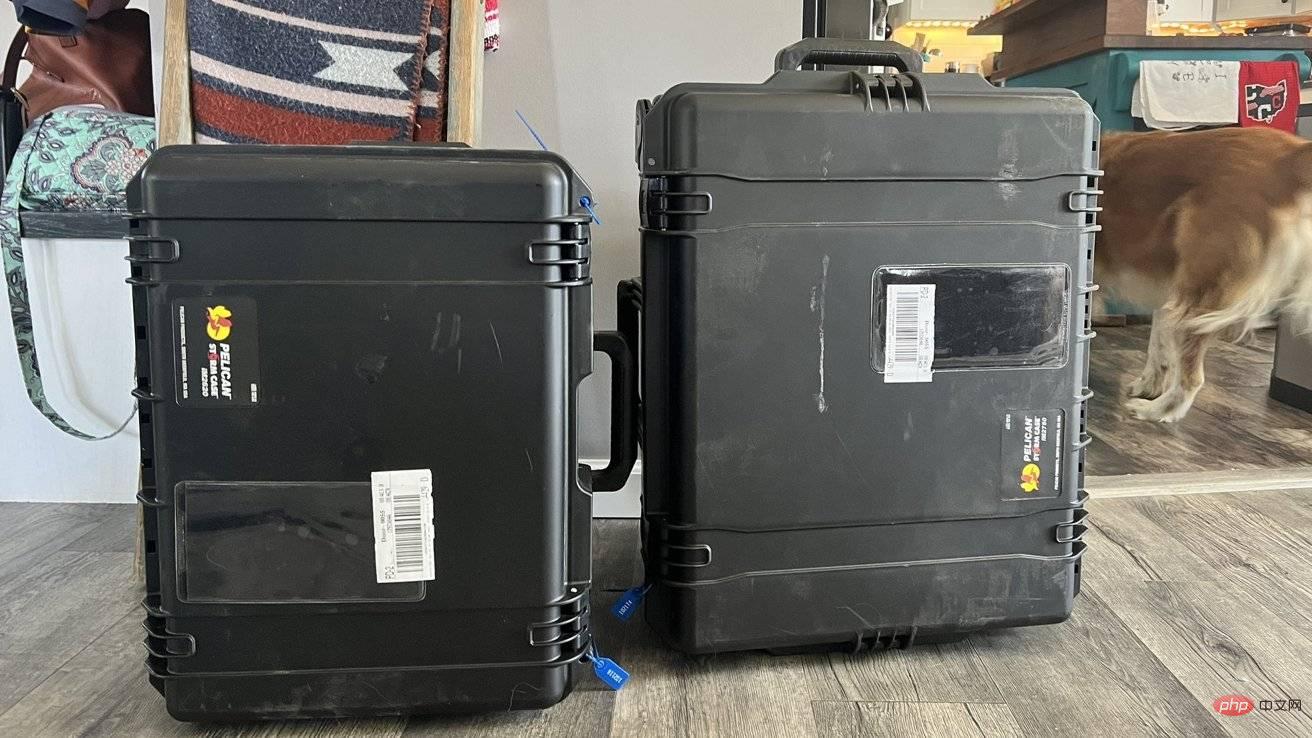
Apple's 79-pound iPhone Self-Repair Program kit on our test bench. This is what's inside the heavy repair kit.
Apple’s self-service repair portal has just launched and is currently focused solely on iPhone repairs. Equipment options may expand in the future.
You can now perform many common repairs on iPhone 12 series, iPhone 13 series, and iPhone SE, such as broken display and dead battery.
Explore Apple's Tools
In our case, we ordered a replacement battery for our iPhone 13 Pro. With the battery itself, we had to borrow Apple's tool kit for $49 to repair it ourselves.
Of course, this also comes with having $1,272 on our credit card.
 Apple’s Kit Has Arrived
The kit took two days to arrive and includes two large Pelican-branded cases. Combined, they weigh nearly 80 pounds.
After dragging them into the studio, we opened the security seal outside and explored its contents.
Case 1
After opening the first box (the smaller of the two boxes), we received the return label. Apple put two new zippered security tags in the box on the return trip.
This case is equipped with a heater that is used to loosen the adhesive that holds the display in place. The power cord and heat bag tray are required to attach the heated monitor removal clamp.
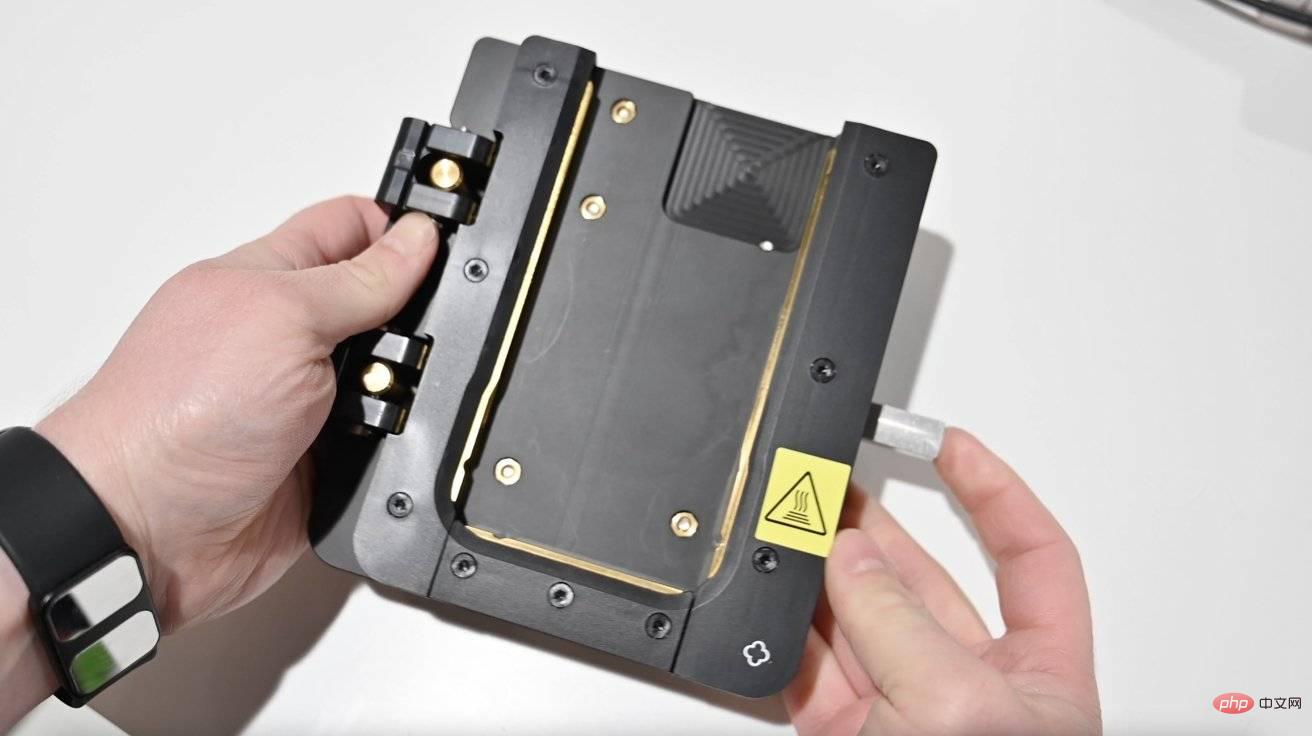 iPhone 13 Pro Hot Pocket
The Hot Pocket Tray clamps your phone with metal sides, then slide the smartphone into the display to remove the device. It intelligently heats your iPhone to a specified temperature for a precise amount of time to weaken the adhesive.
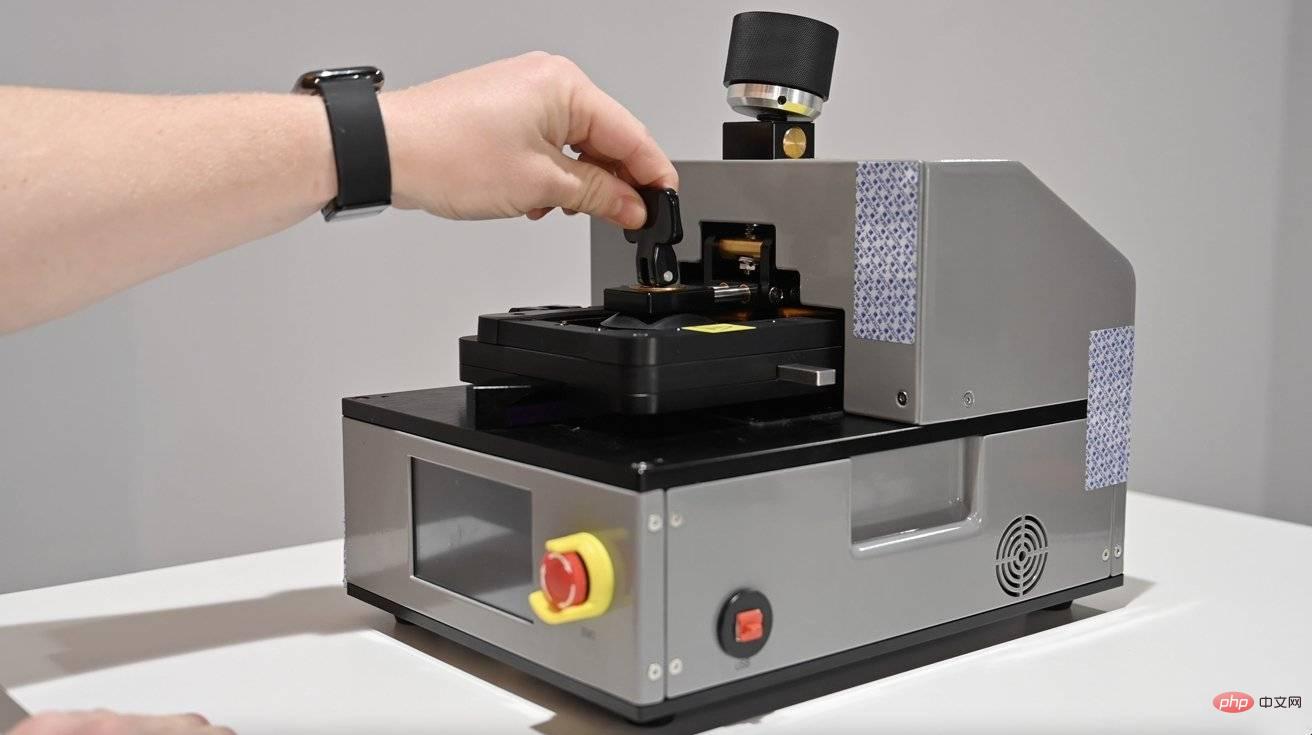 Display Heater
The suction cup is fixed to the display, and when you turn the knob on the top, it slowly applies pressure and pulls out the display panel. Once separated, you can use the included tool to break up any remaining adhesive.
Case 2
The second case has far more internal components and is the larger of the two. It comes with its own return label and security label next to all of our tools.
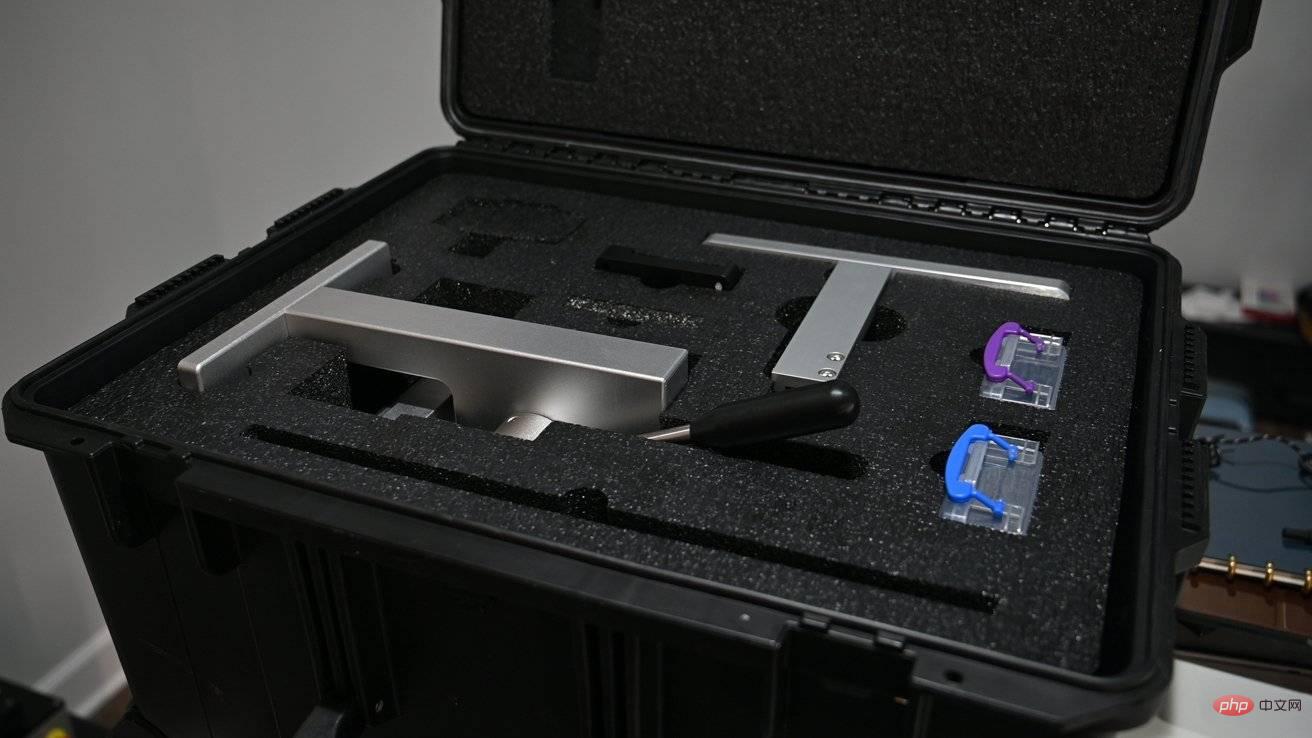 Second Tool Kit Case
This box also comes with a tutorial that shows where each tool goes and what they are. It certainly makes it easier to know what goes where and ensures you don't forget anything when packing.
There are two small boxes filled with screwdrivers, display cover, suction cups, and a plastic spudger. Then there are two large pieces of equipment—a display press and a battery press—and a pallet to hold them.
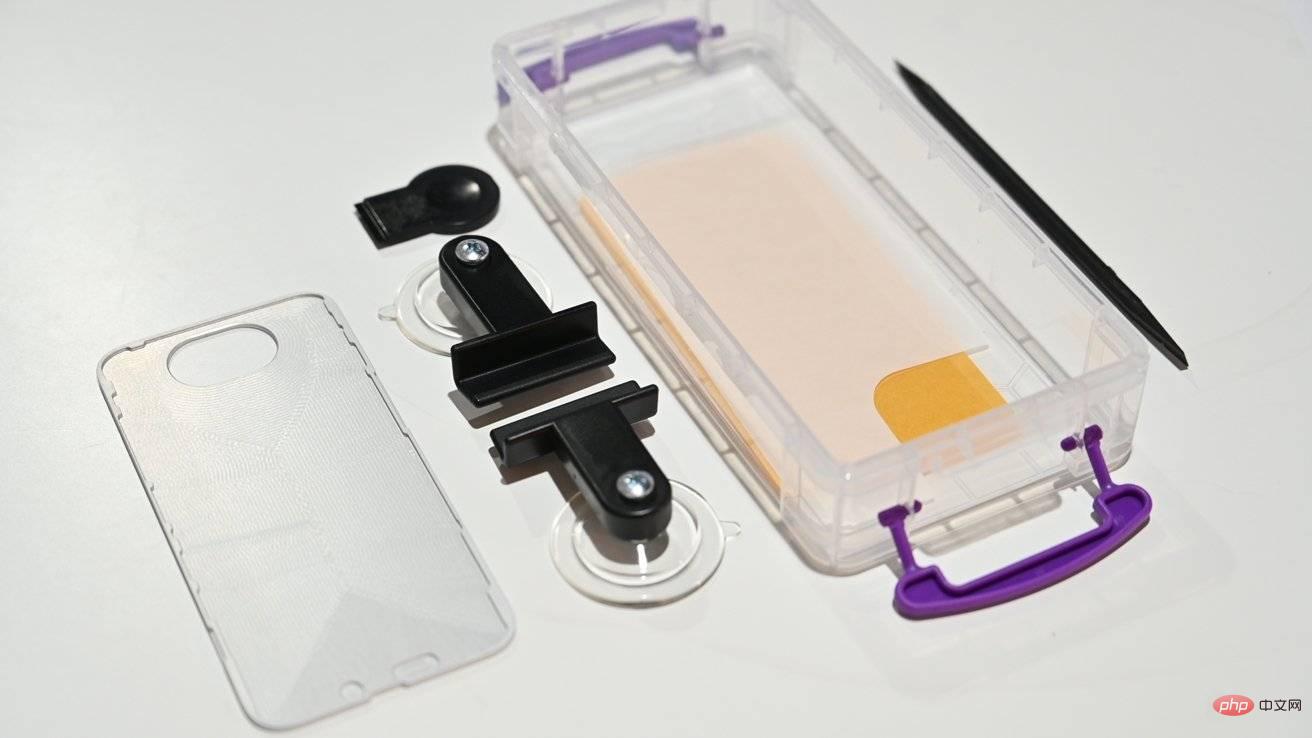 Small Repair Components
During many repairs, the user will use the display press several times. Their phone will be inserted into a device-specific tray and slid under the press.
Adhesive will be applied when used for the first time. During reassembly, glue is deposited on the phone and then a metal plate is placed on top. The pallet is then inserted into the press and the lever is pulled.
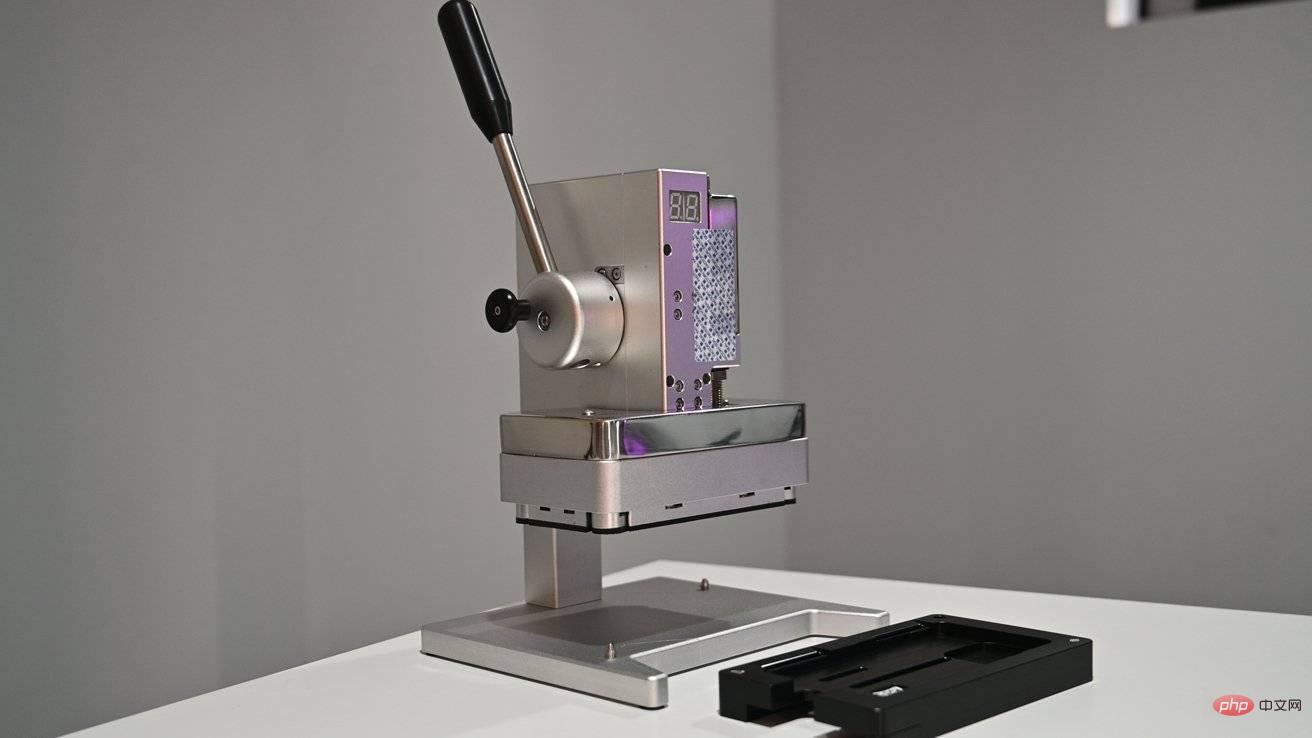 Show Press
After using the lever, the countdown starts at 30 and then emits a harsh beep at zero. You have to pull out the knob on the left to release the lever.
After applying the adhesive, the user must install the display assembly. Once properly connected and placed, the iPhone will regain access to the display to hold it in place.
Without this tool, the adhesive bond may not be as strong and may cause the display assembly to fall off or cause its waterproofing to be compromised.
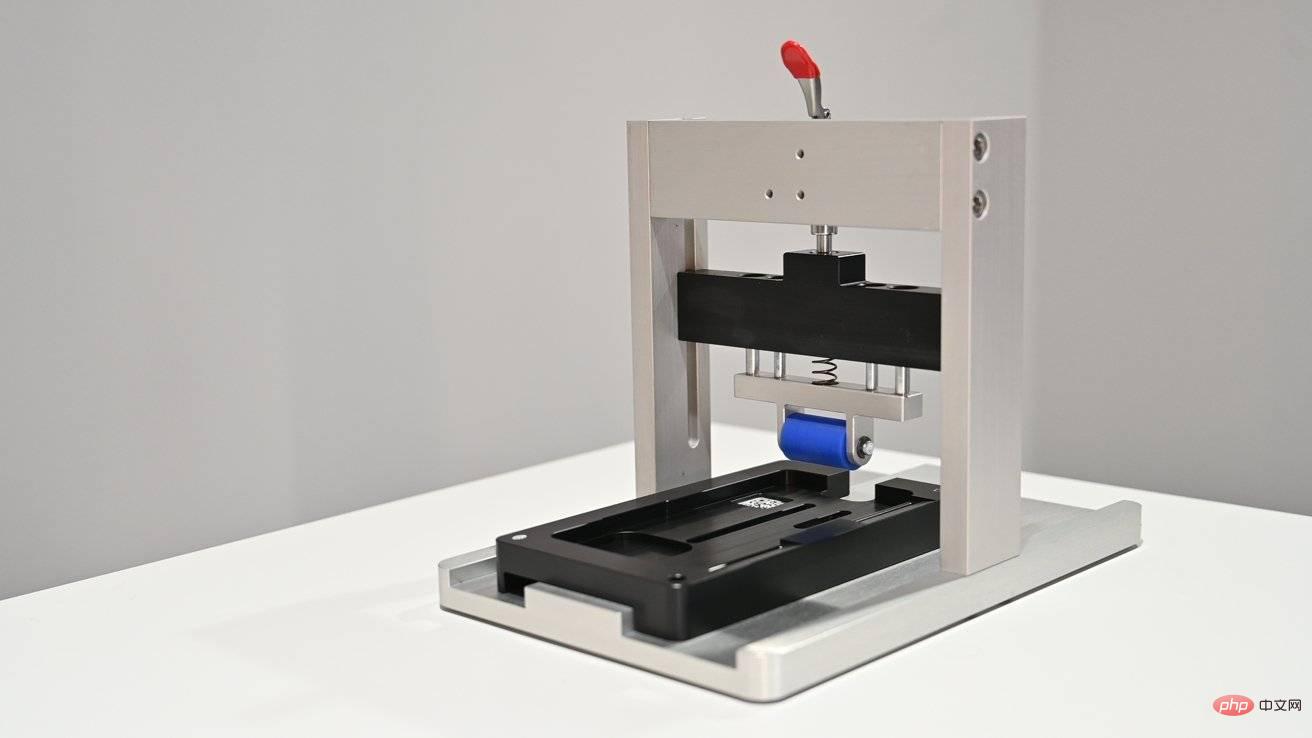 Battery Press
The battery press is a very niche device used in the battery replacement process. Start by installing a new battery with new adhesive underneath.
Then insert the phone into the battery press, pull down the top lever and place the rubber roller on top of the new battery. The user then slides the phone back and forth multiple times to secure the battery in place.
This tool applies constant, even pressure to the battery while ensuring the battery is not damaged.
The above is the detailed content of Apple's Self-Healing Initiative Toolkit - See What's Inside for Yourself. For more information, please follow other related articles on the PHP Chinese website!

Hot AI Tools

Undresser.AI Undress
AI-powered app for creating realistic nude photos

AI Clothes Remover
Online AI tool for removing clothes from photos.

Undress AI Tool
Undress images for free

Clothoff.io
AI clothes remover

Video Face Swap
Swap faces in any video effortlessly with our completely free AI face swap tool!

Hot Article

Hot Tools

Notepad++7.3.1
Easy-to-use and free code editor

SublimeText3 Chinese version
Chinese version, very easy to use

Zend Studio 13.0.1
Powerful PHP integrated development environment

Dreamweaver CS6
Visual web development tools

SublimeText3 Mac version
God-level code editing software (SublimeText3)

Hot Topics
 1664
1664
 14
14
 1423
1423
 52
52
 1317
1317
 25
25
 1268
1268
 29
29
 1243
1243
 24
24
 How to solve the problem of 'Undefined array key 'sign'' error when calling Alipay EasySDK using PHP?
Mar 31, 2025 pm 11:51 PM
Problem Description When calling Alipay EasySDK using PHP, after filling in the parameters according to the official code, an error message was reported during operation: "Undefined...
 Multi-party certification: iPhone 17 standard version will support high refresh rate! For the first time in history!
Apr 13, 2025 pm 11:15 PM
Apple's iPhone 17 may usher in a major upgrade to cope with the impact of strong competitors such as Huawei and Xiaomi in China. According to the digital blogger @Digital Chat Station, the standard version of iPhone 17 is expected to be equipped with a high refresh rate screen for the first time, significantly improving the user experience. This move marks the fact that Apple has finally delegated high refresh rate technology to the standard version after five years. At present, the iPhone 16 is the only flagship phone with a 60Hz screen in the 6,000 yuan price range, and it seems a bit behind. Although the standard version of the iPhone 17 will have a high refresh rate screen, there are still differences compared to the Pro version, such as the bezel design still does not achieve the ultra-narrow bezel effect of the Pro version. What is more worth noting is that the iPhone 17 Pro series will adopt a brand new and more
 How to view XML on your phone without a network
Apr 02, 2025 pm 10:30 PM
There are two ways to view XML files: Android phones: use file manager or third-party applications (XML Viewer, DroidEdit). iPhone: Transfer files via iCloud Drive and use the Files app or third-party app (XML Buddha, Textastic).
 How to open XML files with iPhone
Apr 02, 2025 pm 11:00 PM
There is no built-in XML viewer on iPhone, and you can use third-party applications to open XML files, such as XML Viewer, JSON Viewer. Method: 1. Download and install the XML viewer in the App Store; 2. Find the XML file on the iPhone; 3. Press and hold the XML file to select "Share"; 4. Select the installed XML viewer app; 5. The XML file will open in the app. Note: 1. Make sure the XML viewer is compatible with the iPhone iOS version; 2. Be careful about case sensitivity when entering file paths; 3. Be careful with XML documents containing external entities
 Compilation and installation of Redis on Apple M1 chip Mac failed. How to troubleshoot PHP7.3 compilation errors?
Mar 31, 2025 pm 11:39 PM
Problems and solutions encountered when compiling and installing Redis on Apple M1 chip Mac, many users may...
 Is there any mobile app that can convert XML into PDF?
Apr 02, 2025 pm 08:54 PM
An application that converts XML directly to PDF cannot be found because they are two fundamentally different formats. XML is used to store data, while PDF is used to display documents. To complete the transformation, you can use programming languages and libraries such as Python and ReportLab to parse XML data and generate PDF documents.
 How to compatible with multi-line overflow omission on mobile terminal?
Apr 05, 2025 pm 10:36 PM
Compatibility issues of multi-row overflow on mobile terminal omitted on different devices When developing mobile applications using Vue 2.0, you often encounter the need to overflow text...
 How to accurately realize the small label effect in the design draft on the mobile terminal?
Apr 04, 2025 pm 11:36 PM
How to achieve the effect of small labels in the design draft on the mobile terminal? When designing mobile applications, it is common to find out how to accurately restore the small label effect in the design draft...


