

Fix mouse cursor changes not persisting windows 11/10

The default mouse cursor in Windows is not that attractive, so users can download and change the mouse cursor scheme according to their preference. Many users are facing issues with changing the built-in cursor on their PC with a custom cursor of their choice. It has been noticed that once the system restarts, the custom cursor is reset to the Windows default cursor. The problem is that the change to the custom cursor is not permanent as it resets every time the system is restarted. In this case, the user must repeatedly modify the mouse pointer settings after each system restart.
Are you facing the issue of custom cursor resetting after reboot on your PC? Then, continue reading this article. Here, we have curated some fixes that can help you resolve this issue on your Windows PC.
Fix 1 – Move the custom cursor to the Windows Cursor Folder
Many users experiencing this custom cursor reset issue after reboot have noticed that moving the custom mouse cursor file Moving to the Windows Cursor folder and then changing the cursor settings will help them resolve this issue. Please follow the steps below.
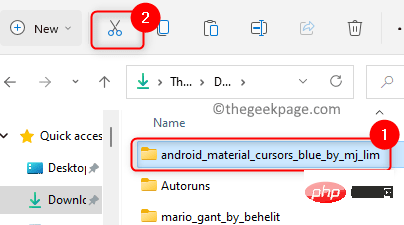
1. Go to the location where you downloaded and extract the custom cursor file of your choice.
To move this custom cursor folder, click the cut icon at the top.
2. Press Windows E to open File Explorer.
In File Explorer's navigation bar, type or copy and paste the following location.
C:\Windows\光标
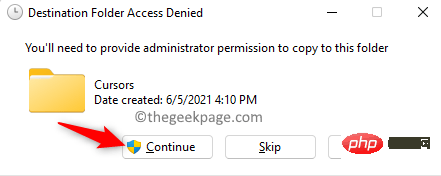
3. After entering the Cursor folder, click the paste icon at the top to paste the custom cursor folder you copied earlier.

When you see a pop-up window that says access to the destination folder is denied, click the Continue button.
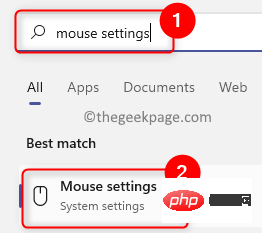
4. Click the Windows Start button (four blue squares) on the taskbar.
Type Mouse Settings in the Windows search box.
Click the mouse settings in the search results to open the Bluetooth and mouse settings in the device settings.
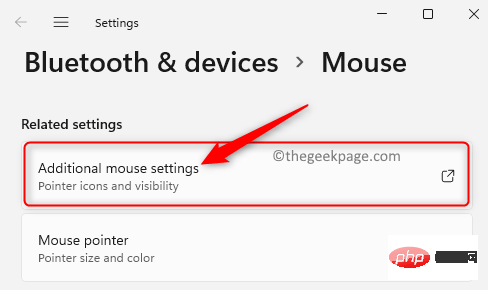
 5. On this page, scroll down and click the box labeled
in the Related Settings section .
 Now open the
window. 6. Select the
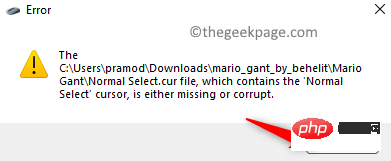
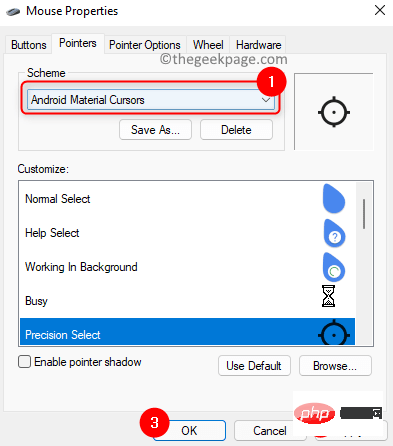
Pointertab in the Mouse Properties window. You will see an error message stating that the custom cursor has been changed and is missing. Keep clicking
OKuntil this error message stops popping up.
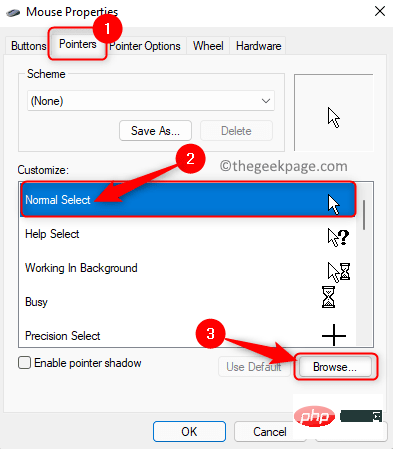
 Here, select the cursor type you need to change in the
section. For example, we selected Normal selection to change the cursor. Then, click the
Browsebutton.
 7. In the pop-up window, go to the
location. Open the folder using the custom cursor you moved here
in the previous step.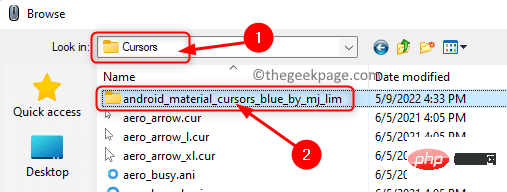
specific to the selected type and click to open it.
 #8. Repeat
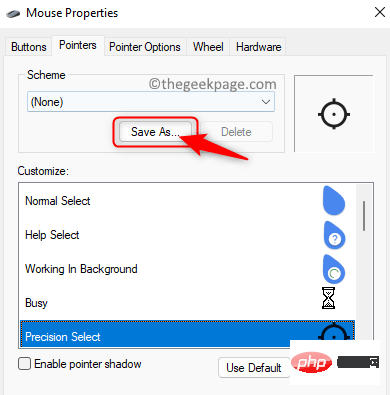
Customize section . When you have finished making changes, click the
Save As... button at the top of theScheme section.
 Give this
a name for easy use next time.
 Make sure this new cursor scheme is selected. Then, click
and OK to save the changes.
 9.
9.
computer and check if the custom cursor reset issue is resolved after the restart. Fix 2 – Make changes in the registry
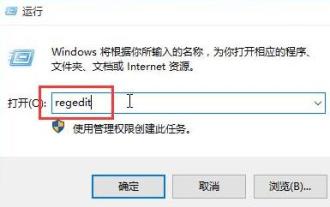
1. Use the
Windows and Rkey combination on your keyboard to open the Run box. Type
regeditand click OK to open the Registry Editor.
您将看到用户帐户控制提示请求权限。单击是。
2. 导航或复制粘贴注册表导航栏中的路径以到达安装键。
HKEY_LOCAL_MACHINE\SOFTWARE\Synaptics\SynTP\Install
3.选择Install键后,移动到右侧并找到DeleteUserSettingsOnUpgrade条目。
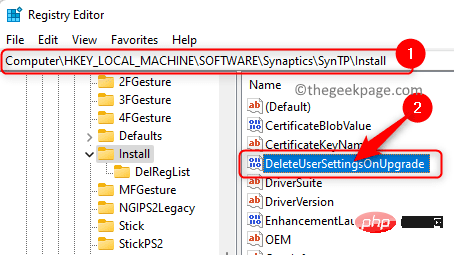
注意:如果找不到上述条目/密钥,则需要按照以下步骤创建一个新条目。
右键单击右侧窗格中的空白处,然后在菜单中选择新建 -> DWORD(32 位值) 。
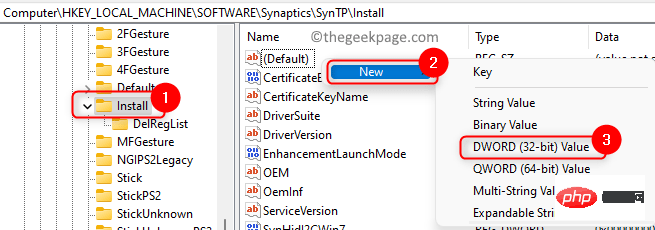
将密钥命名为DeleteUserSettingsOnUpgrade。
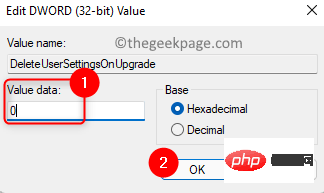
4.双击条目DeleteUserSettingsOnUpgrade以修改其值。
在条目的Edit窗口中,将Value Data字段从1更改为0。
单击确定。
5. 根据您的喜好更改鼠标光标。
重新启动您的 PC 并检查自定义光标重置问题是否已修复。
The above is the detailed content of Fix mouse cursor changes not persisting windows 11/10. For more information, please follow other related articles on the PHP Chinese website!

Hot AI Tools

Undresser.AI Undress
AI-powered app for creating realistic nude photos

AI Clothes Remover
Online AI tool for removing clothes from photos.

Undress AI Tool
Undress images for free

Clothoff.io
AI clothes remover

AI Hentai Generator
Generate AI Hentai for free.

Hot Article
Hot Tools

Notepad++7.3.1
Easy-to-use and free code editor

SublimeText3 Chinese version
Chinese version, very easy to use

Zend Studio 13.0.1
Powerful PHP integrated development environment

Dreamweaver CS6
Visual web development tools

SublimeText3 Mac version
God-level code editing software (SublimeText3)
Hot Topics


 This Apple ID is not yet in use in the iTunes Store: Fix
Jun 10, 2024 pm 05:42 PM
This Apple ID is not yet in use in the iTunes Store: Fix
Jun 10, 2024 pm 05:42 PM
When logging into iTunesStore using AppleID, this error saying "This AppleID has not been used in iTunesStore" may be thrown on the screen. There are no error messages to worry about, you can fix them by following these solution sets. Fix 1 – Change Shipping Address The main reason why this prompt appears in iTunes Store is that you don’t have the correct address in your AppleID profile. Step 1 – First, open iPhone Settings on your iPhone. Step 2 – AppleID should be on top of all other settings. So, open it. Step 3 – Once there, open the “Payment & Shipping” option. Step 4 – Verify your access using Face ID. step
 How to solve the problem of mouse cursor running randomly in Windows 10
Jan 12, 2024 pm 02:18 PM
How to solve the problem of mouse cursor running randomly in Windows 10
Jan 12, 2024 pm 02:18 PM
The Win10 system is the most mainstream computer operating system on the market now. Some friends have encountered the problem of the Win10 mouse cursor running around when using Win10. How to solve this problem? Next, let Xiaobai introduce to you the mouse cursor. The solution to running around. 1. First check whether the mouse is broken. Plug the mouse into another computer, or change the mouse to see if the problem is solved. If the mouse is broken, you need to replace it. 2. If it is a laptop, it may be caused by the laptop's touchpad. You can turn off the touchpad when using the mouse. Press and hold the Fn key on the keyboard and add the upper function key (touchpad icon) to turn it off. 3. If the above method does not solve the problem, you can follow the settings below
 How to fix red-eye on iPhone
Feb 23, 2024 pm 04:31 PM
How to fix red-eye on iPhone
Feb 23, 2024 pm 04:31 PM
So, you took some great photos at your last party, but unfortunately, most of the photos you took were of red eyes. The photo itself is great, but the red eyes in it kind of ruin the image. Not to mention, some of those party photos might be from your friends’ phones. Today we'll look at how to remove red eye from photos. What causes the red eyes in the photo? Red-eye often occurs when taking photos with flash. This is because the light from the flash shines directly into the back of the eye, causing the blood vessels under the eye to reflect the light, giving the effect of red eyes in the photo. Fortunately, with the continuous advancement of technology, some cameras are now equipped with red-eye correction functions that can effectively solve this problem. By using this feature, the camera takes pictures
 How to solve the problem of Win11 failing to verify credentials?
Jan 30, 2024 pm 02:03 PM
How to solve the problem of Win11 failing to verify credentials?
Jan 30, 2024 pm 02:03 PM
When a Win11 user uses credentials to log in, he or she receives an error message stating that your credentials cannot be verified. What is going on? After the editor investigated this problem, I found that there may be several different situations that directly or indirectly cause this problem. Let's take a look with the editor.
 An easy guide to fixing Windows 11 blue screen issues
Dec 27, 2023 pm 02:26 PM
An easy guide to fixing Windows 11 blue screen issues
Dec 27, 2023 pm 02:26 PM
Many friends always encounter blue screens when using computer operating systems. Even the latest win11 system cannot escape the fate of blue screens. Therefore, today I have brought you a tutorial on how to repair win11 blue screens. No matter whether you have encountered a blue screen or not, you can learn it first in case you need it. How to fix win11 blue screen method 1. If we encounter a blue screen, first restart the system and check whether it can start normally. 2. If it can start normally, right-click "Computer" on the desktop and select "Manage" 3. Then expand "System Tools" on the left side of the pop-up window and select "Event Viewer" 4. In the event viewer, we will You can see what specific problem caused the blue screen. 5. Then just follow the blue screen situation and events
 Comprehensive Guide to PHP 500 Errors: Causes, Diagnosis and Fixes
Mar 22, 2024 pm 12:45 PM
Comprehensive Guide to PHP 500 Errors: Causes, Diagnosis and Fixes
Mar 22, 2024 pm 12:45 PM
A Comprehensive Guide to PHP 500 Errors: Causes, Diagnosis, and Fixes During PHP development, we often encounter errors with HTTP status code 500. This error is usually called "500InternalServerError", which means that some unknown errors occurred while processing the request on the server side. In this article, we will explore the common causes of PHP500 errors, how to diagnose them, and how to fix them, and provide specific code examples for reference. Common causes of 1.500 errors 1.
 How to fix the volume cannot be adjusted in WIN10
Mar 27, 2024 pm 05:16 PM
How to fix the volume cannot be adjusted in WIN10
Mar 27, 2024 pm 05:16 PM
1. Press win+r to open the run window, enter [regedit] and press Enter to open the registry editor. 2. In the opened registry editor, click to expand [HKEY_LOCAL_MACHINESOFTWAREMicrosoftWindowsCurrentVersionRun]. In the blank space on the right, right-click and select [New - String Value], and rename it to [systray.exe]. 3. Double-click to open systray.exe, modify its numerical data to [C:WindowsSystem32systray.exe], and click [OK] to save the settings.
 Fix aksfridge.sys blue screen error in Windows 11/10
Feb 11, 2024 am 11:30 AM
Fix aksfridge.sys blue screen error in Windows 11/10
Feb 11, 2024 am 11:30 AM
If you encounter aksfridge.sys blue screen error after upgrading to Windows 11 or Windows 10, this article will provide you with solutions. You can try the following methods to successfully resolve this issue. The genuine aksfridge.sys file is the software component of AladdinHASP from AladdinKnowledgeSystems. AladdinHASP (Hardware Anti-Software Piracy) is a suite of digital rights management (DRM) protection and licensing software. Aksfridge.sys is a filter driver necessary for HASP to function properly. This component adds support for specialized external devices. Hardware Anti-Software Piracy, also known as AladdinHAS