

Fix: Modem reported error code 651 in Windows 11, 10

Several Windows users have recently complained that when they tried to connect a modem on their PC to access the Internet, it produced an error stating that the modem (or other connected device) reported a problem with error code 651 and was not Allow connection to the system.
This problem may be caused by system or modem failure, outdated network card driver, automatic adjustment option not disabled, etc.
Keeping all these things in mind, this article will show you various fixes that may be able to resolve this issue and allow the user to connect a modem to the system.
If you encounter similar issues, please continue reading to learn more.
Before that, you can try these solutions given below -
- Restart the system a few times and check if the issue is resolved.
- Try connecting the modem to another system to check if the problem is system related.
- If not, try connecting to another modem (different connection) to see if there are any issues with the modem.
- Check whether the cables are loose or damaged/damaged.
- Try restarting the system in safe mode over the network and see if it works!
Fix 1 – Disable the Auto-Tune feature
To improve network performance, Windows has added the Auto-Tune feature that monitors network latency, bandwidth, and other parameters. Enabling this feature may also cause the above issues.
Therefore, we recommend that users disable the auto-tuning feature on their systems. Let’s see how it can be done using the simple steps given below.
Step 1: Press the Windows X keys simultaneously to view the Context menu for the Start button.
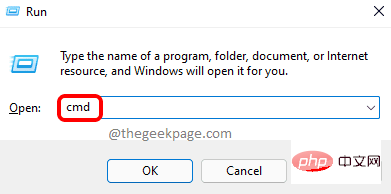
Step 2: Then, hit the R key on your keyboard to open the "Run" command box.
Step 3: Type cmd in the text box of the run window, and then press CTRL SHIFT ENTER at the same time Key to open command prompt as administrator.
Note: You can also continue accepting the UAC prompt by clicking Yes.
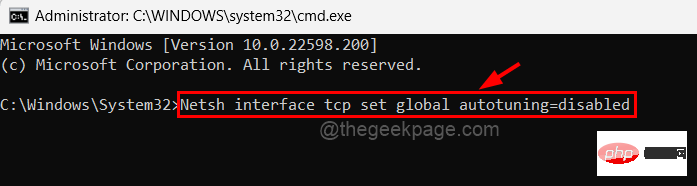
Step 4: Copy and paste the command given below into the command prompt window you just opened and press Enter to execute it .
Netsh interface tcp set global autotuning=disabled
Step 5: This will disable the auto-tuning feature on your system.
Step 6: Once completed, close the command prompt window.
Now check if you can establish an Internet connection by connecting the modem to your system.
Fix 2 – Reset TCP/IP on Windows systems
Both TCP and IP are responsible for establishing reliable connections between computers that can easily interact with each other. TCP allows packets to be sent from one device to another by using an IP address that contains device information.
This type of problem is common when modifying TCP/IP settings. So, follow the steps below to reset TCP/IP.
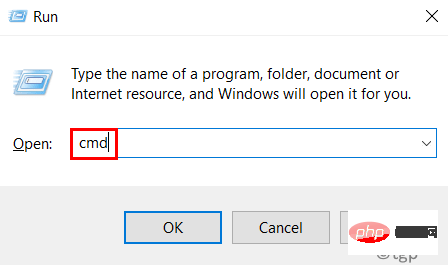
Step 1: Press the Windows and R keys on your keyboard at the same time, open the Run box.
Step 2: Next type cmd in the "Run" box and then hit the CTRL SHIFT ENTER keys simultaneously to open Elevated command prompt.
Step 3: Click Yes on the User Access Control prompt to continue.
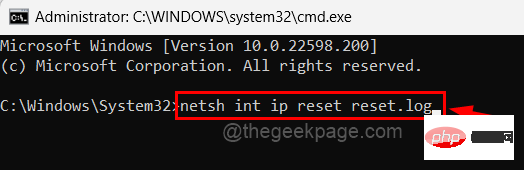
Step 4: Enter the following lines at the command prompt and press Enter to execute.
netsh int ip reset reset.log
Step 5: This will reset TCP/IP on the system.
Step 6: Once completed, close the command prompt and restart the system and check if the issue is resolved.
Fix 3 – Disable Internet Protocol Version 6 IPv6
Try disabling IPv6 on the system from the Ethernet adapter’s Network Connections page and check if that resolves the issue.
Please follow the steps below.
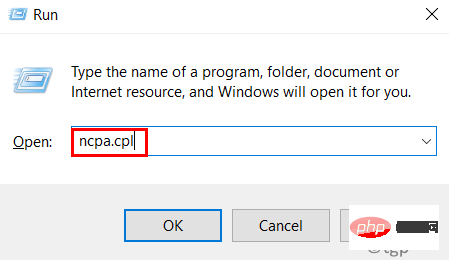
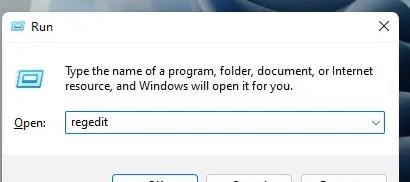
Step 1: Press the Windows and R keys simultaneously to open the Run command box.
Step 2: Type ncpa.cpl in the "Run" box and press Enter to open Network Connection page.
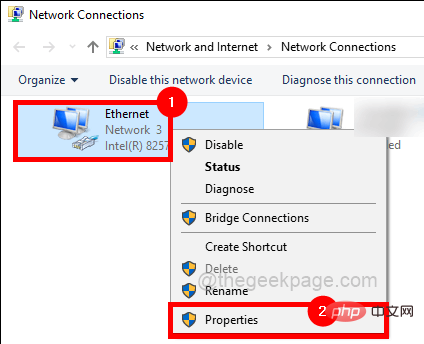
Step 3: Right-click on the EthernetAdapter and click Properties# from the context menu ##,As follows.
Internet Protocol Version 6 (IPv6) checkbox and click Sure.
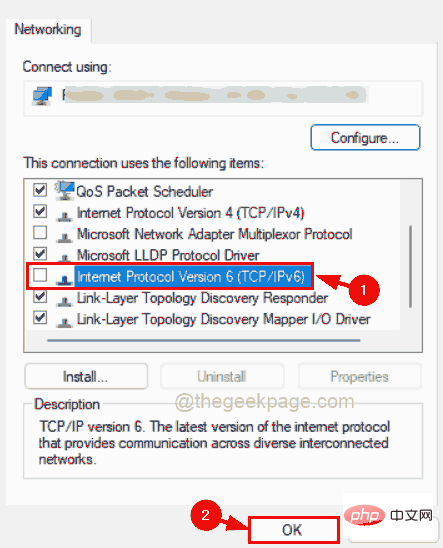
Step 5: This will disable IPv6 on the system for use with Ethernet.
Now try to establish a connection to your system and check if it works.
Fix 4 – Run the Network Adapter Troubleshooter
Windows systems have a built-in program called the Network Adapter Troubleshooter, which attempts to detect and fix network-related issues.
Let’s see how to run the network adapter troubleshooter on your system.
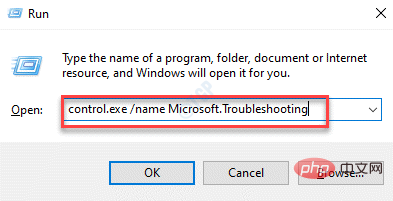
Step 1: Press the Windows and R keys simultaneously to open the Run box.
Step 2: Enter control.exe /name Microsoft.Troubleshooting in the Run box, and press Enter to open ## directly #Troubleshoot page.
Additional troubleshooting options by clicking as shown below.
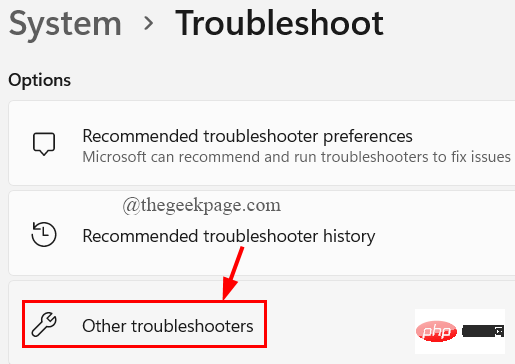
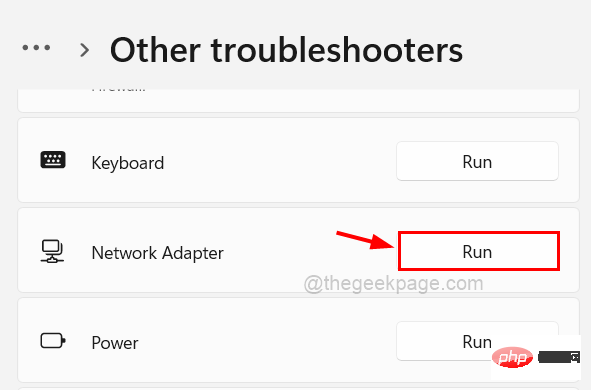
Run to perform Network Adaptertroubleshooting as shown in the image below.
Windows Step 2: Double-click the Network Adapters option to expand it.
Step 3: This contains all available network adapters on the system.Step 4: Right-click the
EthernetWAN miniport
and clickUpdate Driver from the context menu, as shown below shown in the screenshot. Step 5: Follow the on-screen instructions to complete the update process.
Step 6: Once completed, close Device Manager. 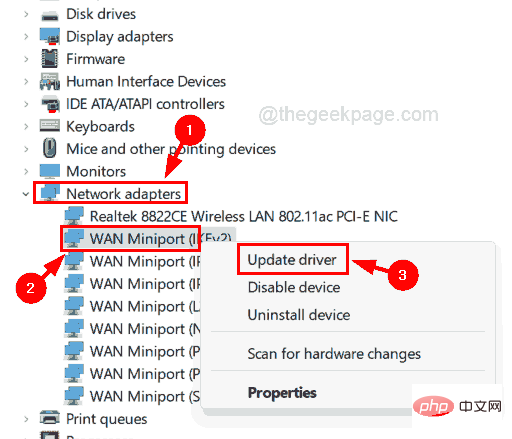
Windows
key and typecmd.
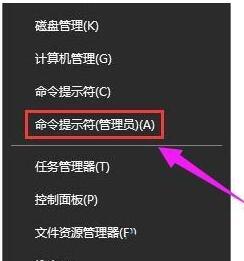
Step 2: Then, Right-click the Command Prompt
application and selectRun as administrator from the list,As follows. Step 3: Click Yes"Accept any UAC prompts that pop up to continue.
Step 4: After opening the command prompt, type
regsvr32 raspppoe.sys and press 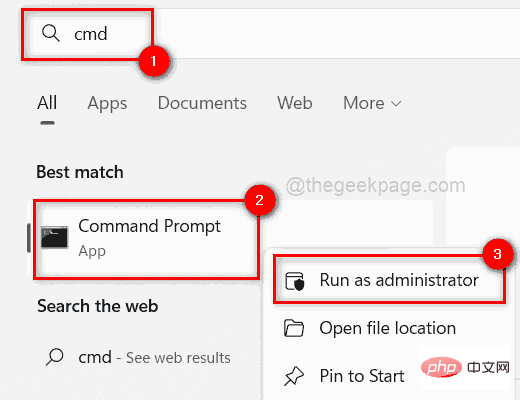 Enter
Enter
Step 5: This will re-register the raspppoe.sys file.
Step 6: Next, close the command prompt window and restart the system. 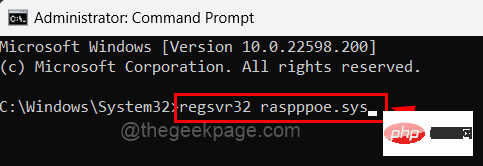
The above is the detailed content of Fix: Modem reported error code 651 in Windows 11, 10. For more information, please follow other related articles on the PHP Chinese website!

Hot AI Tools

Undresser.AI Undress
AI-powered app for creating realistic nude photos

AI Clothes Remover
Online AI tool for removing clothes from photos.

Undress AI Tool
Undress images for free

Clothoff.io
AI clothes remover

Video Face Swap
Swap faces in any video effortlessly with our completely free AI face swap tool!

Hot Article
Hot Tools

Notepad++7.3.1
Easy-to-use and free code editor

SublimeText3 Chinese version
Chinese version, very easy to use

Zend Studio 13.0.1
Powerful PHP integrated development environment

Dreamweaver CS6
Visual web development tools

SublimeText3 Mac version
God-level code editing software (SublimeText3)
Hot Topics
 1386
1386
 52
52

 How to Fix Steam Error Code 118
Feb 19, 2024 pm 05:56 PM
How to Fix Steam Error Code 118
Feb 19, 2024 pm 05:56 PM
Steam is a world-renowned gaming platform that allows users to purchase, download and play games. However, sometimes users may encounter some problems when using Steam, such as error code 118. In this article, we will explore this problem and how to solve it. First, let’s understand what error code 118 means. Error code 118 appears when you try to log into Steam, which means your computer cannot connect to the Steam servers. This may be due to network issues, firewall settings, proxy settings, or
 How to solve steam error code E20
Feb 19, 2024 pm 09:17 PM
How to solve steam error code E20
Feb 19, 2024 pm 09:17 PM
When using Steam to download, update or install games, you often encounter various error codes. Among them, a common error code is E20. This error code usually means that the Steam client is having trouble trying to update the game. Fortunately, though, it's not that difficult to fix this problem. First, we can try the following solutions to fix error code E20. 1. Restart the Steam client: Sometimes, directly restarting the Steam client can solve this problem. In the Steam window
![HRESULT 0x800A03EC Exception error occurred in Excel [Fixed]](https://img.php.cn/upload/article/000/887/227/170834257118628.jpg?x-oss-process=image/resize,m_fill,h_207,w_330) HRESULT 0x800A03EC Exception error occurred in Excel [Fixed]
Feb 19, 2024 pm 07:36 PM
HRESULT 0x800A03EC Exception error occurred in Excel [Fixed]
Feb 19, 2024 pm 07:36 PM
If you encounter error code 0x800A03EC in Microsoft Excel, here are some solutions. Usually this error code appears when trying to export an Excel file. Error is: System.Runtime.InteropServices.COMException(0x800A03EC): Exception from HRESULT: 0x800A03EC This problem may be caused by typos in the code, invalid methods, or incompatible data formats. Additionally, the file exceeding the limit of Excel or the file is corrupted may also cause this issue. Whatever the case, we will guide you on how to solve the problem. Would love to help you find answers
 How to fix Win10 activation error code '0xc0000022”?
Jan 12, 2024 pm 06:15 PM
How to fix Win10 activation error code '0xc0000022”?
Jan 12, 2024 pm 06:15 PM
The Win10 system provides more powerful and complete functions, coupled with its convenient operation methods, allowing more and more users to choose to install this operating system. However, many users have encountered many unknown errors during installation. In the end, A common problem is that Win10 activation fails and the error code "0xc0000022" is prompted. Below, the editor will bring you a graphic tutorial to solve the problem of activation failure and the error code "0xc0000022". Since Microsoft released win10, users have been looking forward to it. Therefore, many users have installed win10, and in order to be more perfect, activation is necessary. However, recently, some win10 users have failed to activate on their computers and prompted error code 0xc0000022. This is
![GeForce Now error code 0x0000012E [FIXED]](https://img.php.cn/upload/article/000/000/164/170834836989999.jpg?x-oss-process=image/resize,m_fill,h_207,w_330) GeForce Now error code 0x0000012E [FIXED]
Feb 19, 2024 pm 09:12 PM
GeForce Now error code 0x0000012E [FIXED]
Feb 19, 2024 pm 09:12 PM
If you encounter error code 0x0000012E on NVIDIA GeForceNOW, we'll share the solution. We've encountered the same issue, and here's how we fixed it so you can enjoy gaming on GeForce smoothly. Fix GeForce Now Error Code 0x0000012E Now To fix GeForceNow error code 0x0000012E on Windows computer, follow these solutions: Check internet connection requirements Verify hardware requirements Run as administrator Additional suggestions. Before starting, we recommend that you wait patiently for a while, as many users did not take action to resolve the issue. Sometimes, a malfunction may cause this
 Detailed explanation of how to solve win11 error code 0x800f0950
Dec 26, 2023 pm 05:46 PM
Detailed explanation of how to solve win11 error code 0x800f0950
Dec 26, 2023 pm 05:46 PM
Since the win11 system is the English version, many users choose to add the Chinese language pack after successful installation. The error code 0x800f0950 can be prompted during installation. Here is the solution to the win11 error code 0x800f0950. Quickly Let’s see how it works. How to solve win11 error code 0x800f0950: 1. First press the shortcut key "Win+R" to open the run, and then enter: Regedit to open the registry. 2. Enter "ComputerHKEY_LOCAL_MACHINESOFTWAREPoliciesMicrosoftWindowsDefender" in the search box. 3. Select
 How to solve win10 version 1909 update error code 0xc1900204
Jan 07, 2024 pm 02:02 PM
How to solve win10 version 1909 update error code 0xc1900204
Jan 07, 2024 pm 02:02 PM
If we are using the win10 operating system and install the win101909 version system and want to upgrade it, the update error code 0xc1900204 appears during the upgrade process. The editor thinks it may be because the system appears when we update. If there is a conflict, you can repair it in the services.msc service. Let’s take a look at what the editor said for details~ I hope it can help you. How to solve win10 version 1909 update error code 0xc1900204 1. Turn off the Windows Update service. ——Search for "Services" in the search box or Cortana 2. Or enter services.msc and press Enter to open "Services"
 Tips to solve error code 0xc004f034 during WIN10 system activation
Mar 27, 2024 pm 04:30 PM
Tips to solve error code 0xc004f034 during WIN10 system activation
Mar 27, 2024 pm 04:30 PM
1. Press Windows+X keys and click [Command Indicator (Administrator)]. 2. Enter: slmgr-upk in the command indicator box and press Enter (regardless of whether there is an activation code or not, clear it first). 3. Enter: slmgr.vbs-ipkQN2M7-VCVJQ-Y36FD-T3PHJ-82M93 (load key) and press Enter. 4. Enter: slmgr-ato, and press Enter to take a screenshot of the error code box that pops up (valid if the mantissa is 08020, invalid if the mantissa is 03060).