Prepare the email account and email login authorization code. The methods of obtaining authorization codes for different types of mailboxes are similar. Here, we take QQ mailbox as an example to demonstrate the steps for obtaining authorization codes:
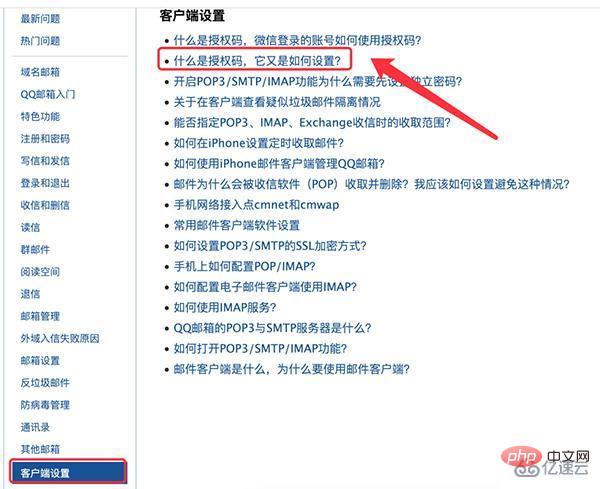
Step 1: Log in to QQ mailbox using the web page and find the help center

Step 2: Select the second question in "Client Settings" in the Help Center:

Then operate according to the corresponding requirements, obtain the authorization code and save it.
The steps for sending emails through code are basically the same as those for manually sending emails: Log in to the mailbox -> Prepare email content -> send email.
import smtplib
1. 连接邮箱服务器
连接对象 = smtplib.SMTP_SSL(服务器地址, 邮箱服务端口)
- 服务器地址:smtp.163.com(163邮箱)、smtp.qq.com(qq邮箱) - 邮箱服务端口:465或者25
2. 登录邮箱 连接对象.login(邮箱账号, 授权码)
The data refers to the content that needs to be sent. The construction of email content requires another library, email, which can be used to build email subjects and various forms of email content (including text content, image content, html content, attachments), etc. Let’s briefly talk about email subjects and Text content and other forms of content will be explained in detail in the email content section later.
from email.mime.multipart import MIMEMultipart
from email.mime.text import MIMEText
from email.header import Header
1. 创建邮件对象
邮件对象 = MIMEMultipart()
2. 设置邮件主题
主题对象 = Header(邮件标题, 编码方式).encode()
邮件对象['Subject'] = 主题对象
3.设置邮件发送者
邮件对象['From'] = '用户名 '
4.设置邮件接受者
邮件对象['To'] = '收件⼈1;收件⼈2;收件人3...'
5. 添加文字内容
文字内容对象 = MIMEText(内容, 类型, 编码方式)
- 内容:就是文字字符串
- 类型:plain(简单的⽂字内容)、html(超文本) 邮件对象.attach(文字对象)
连接对象.sendmail(发件⼈, 收件人, 邮件对象.as_string())
连接对象.quit()
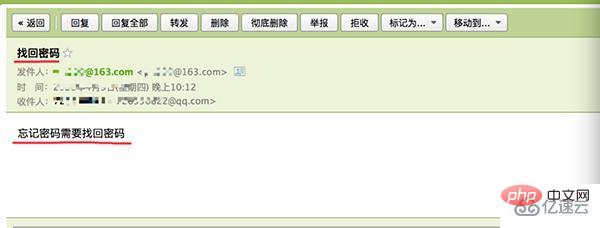
The email body of this type of email only has ordinary text information, no hypertext, no pictures, and no attachments:
import smtplib
from email.mime.multipart import MIMEMultipart
from email.mime.text import MIMEText
from email.header import Header
# 1. 连接邮箱服务器
con = smtplib.SMTP_SSL('smtp.163.com', 465)
# 2. 登录邮箱
con.login('XXXX@163.com', 'XXXXX')
# 2. 准备数据
# 创建邮件对象
msg = MIMEMultipart()
# 设置邮件主题
subject = Header('找回密码', 'utf-8').encode() msg['Subject'] = subject
# 设置邮件发送者
msg['From'] = 'XXXX@163.com'
# 设置邮件接受者
msg['To'] = '726550822@qq.com'
# 添加⽂文字内容
text = MIMEText('忘记密码需要找回密码', 'plain', 'utf-8')
msg.attach(text)
# 3.发送邮件
con.sendmail('xxxx@163.com', '726550822@qq.com', msg.as_string())
con.quit()

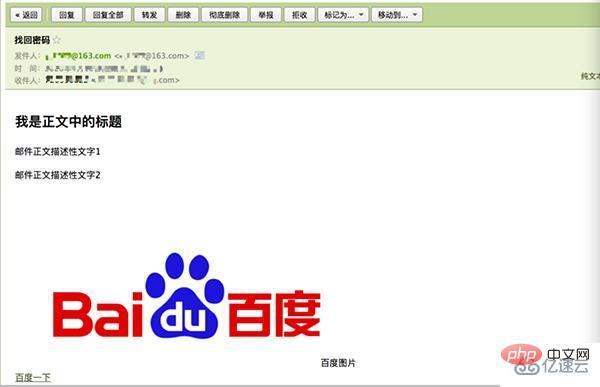
A kind of email with richer and more interesting text. The emails we receive from major platforms in life are all this kind of emails. The core code format is as follows:
from email.mime.text import MIMEText
html⽂本对象 = MIMEText(html内容字符串, 'html', 编码方式) 邮件对象.attach(html⽂本对象)
Specific code:
import smtplib
from email.mime.multipart import MIMEMultipart
from email.mime.text import MIMEText
from email.header import Header
con = smtplib.SMTP_SSL('smtp.163.com', 465)
con.login('xxxx@163.com', 'xxxxxx')
msg = MIMEMultipart()
subject = Header('找回密码', 'utf-8').encode()
msg['Subject'] = subject
msg['From'] = 'xxxx@163.com'
msg['To'] = '726550822@qq.com'
# 添加html内容
content = """我是正⽂中的标题邮件正文描述性文字1邮件正⽂描述性文字2 百度图片百度⼀下
"""
html = MIMEText(content, 'html', 'utf-8')
msg.attach(html)
# 发送邮件
con.sendmail('xxxx@163.com', '726550822@qq.com', msg.as_string())
con.quit()

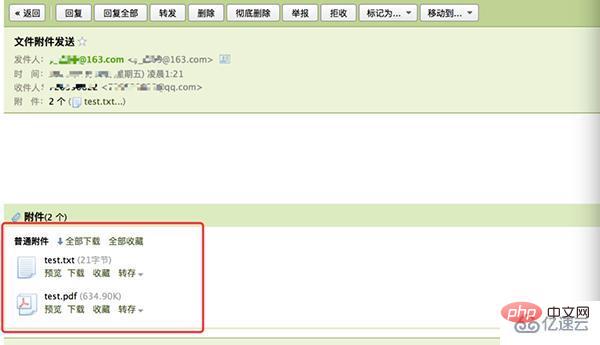
In addition to the main text content of the email, sometimes it is necessary to send various files separately as attachments. The core of sending attachments The code is as follows:
from email.mime.text import MIMEText
⽂文件对象 = MIMEText(⽂件二进制数据, 'base64', 编码⽅式)
文件对象["Content-Disposition"] = 'attachment; filename="⽂件名"'
邮件对象.attach(⽂件对象)
Specific code:
import smtplib
from email.mime.multipart import MIMEMultipart
from email.mime.text import MIMEText
from email.mime.image import MIMEImage
from email.header import Header
from email.mime.message import MIMEMessage from copy import deepcopy
con = smtplib.SMTP_SSL('smtp.163.com', 465)
con.login('xxxx@163.com', 'xxxxxx')
msg = MIMEMultipart()
subject = Header('⽂文件附件发送', 'utf-8').encode() msg['Subject'] = subject
msg['From'] = 'xxxx@163.com'
msg['To'] = '726550822@qq.com'
# 添加⽂文件附件
file1 = MIMEText(open('files/test.txt', 'rb').read(), 'base64', 'utf-8')
file1["Content-Disposition"] = 'attachment; filename="test.txt"'
msg.attach(file1)
file2 = MIMEText(open('files/pyecharts的使⽤用.pdf', 'rb').read(), 'base64', 'utf-8')
file2["Content-Disposition"] = 'attachment; filename="test.pdf"'
msg.attach(file2)
# 发送邮件
con.sendmail('xxxx@163.com', '726550822@qq.com', msg.as_string())
con.quit()

The above is the detailed content of How to send emails using Python. For more information, please follow other related articles on the PHP Chinese website!


