How to use Microsoft Word for audio transcription
How to Transcribe Audio in Microsoft Word
To transcribe audio files, you need to have Word online. If you try the free version, it will prompt you to sign up for a premium account.
To get started, use the following steps:
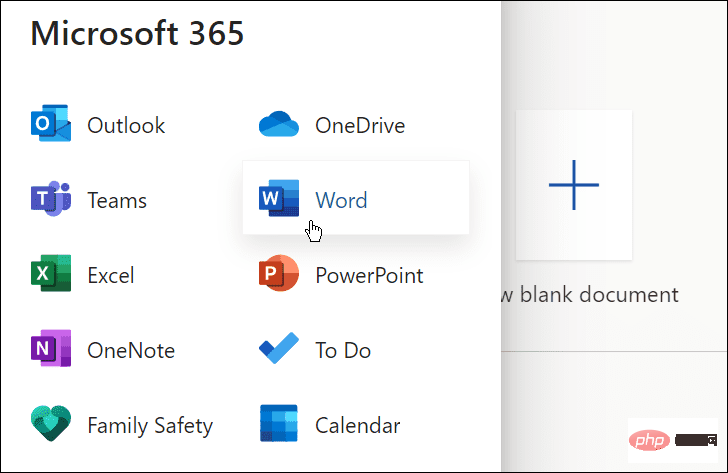
- If you are not already logged in, go to Word Online and log in.

- Open a new or existing document or create a new document.
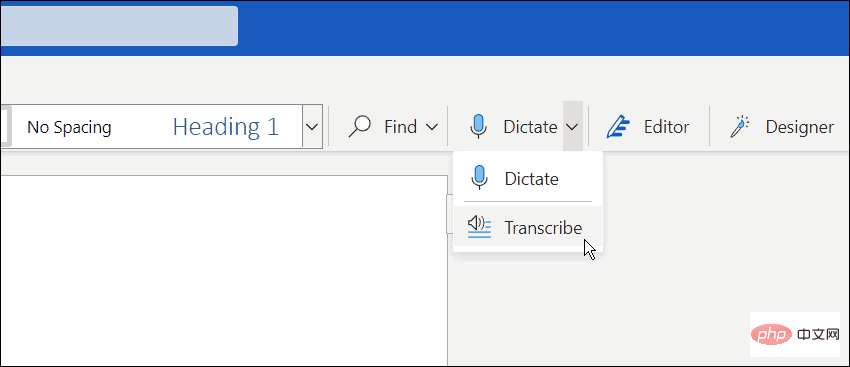
- You can do this by opening the Home tab, clicking the drop-down arrow next to the Dictation button and clicking Transcribe to start Microsoft Word transcription.

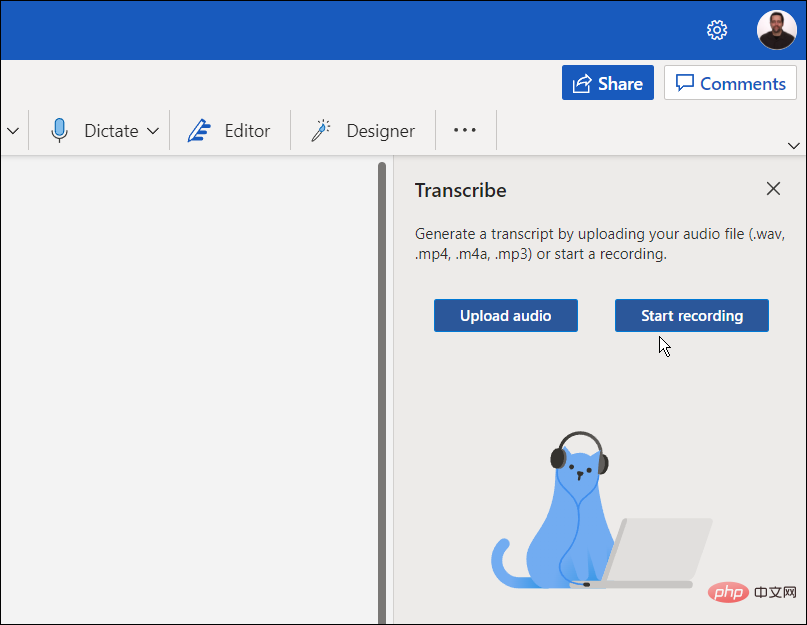
- A transcribed message will appear. You can upload an existing recording to start transcribing or start a new recording. First, let's look at creating a new recording.

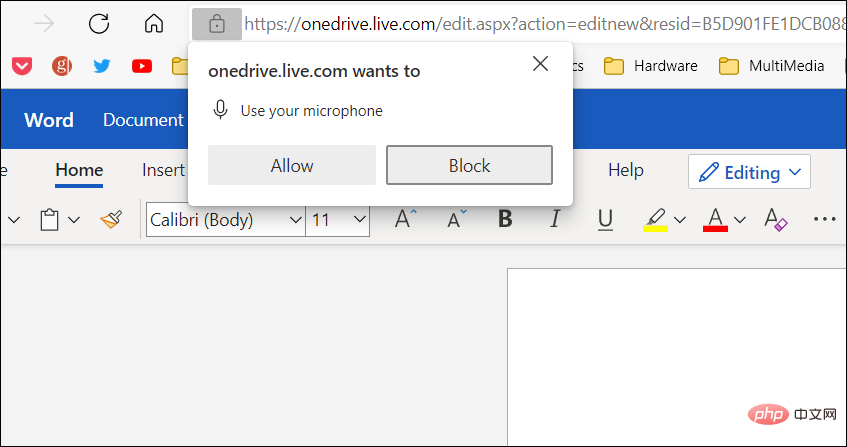
- Click the Start Recording button. If this is your first time recording a message, you'll need to give your PC's microphone access to Word.

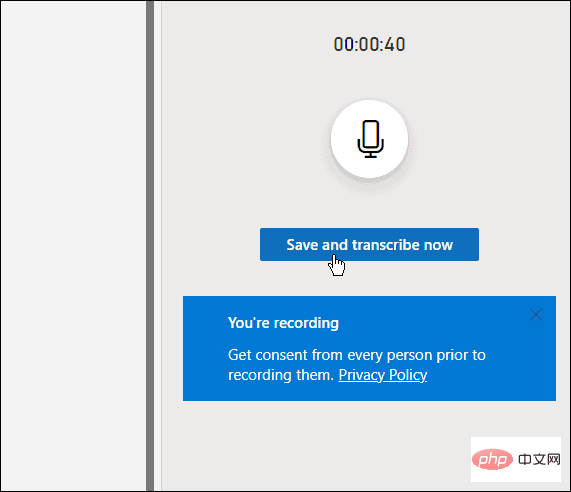
- Start recording your message and when finished, click the Pause button and then Save and transcribe now.

The time it takes to complete the transcription process depends on the amount of data you have. But once it's done, it will be loaded to OneDrive for later use.
Manage Transcriptions in Microsoft Word
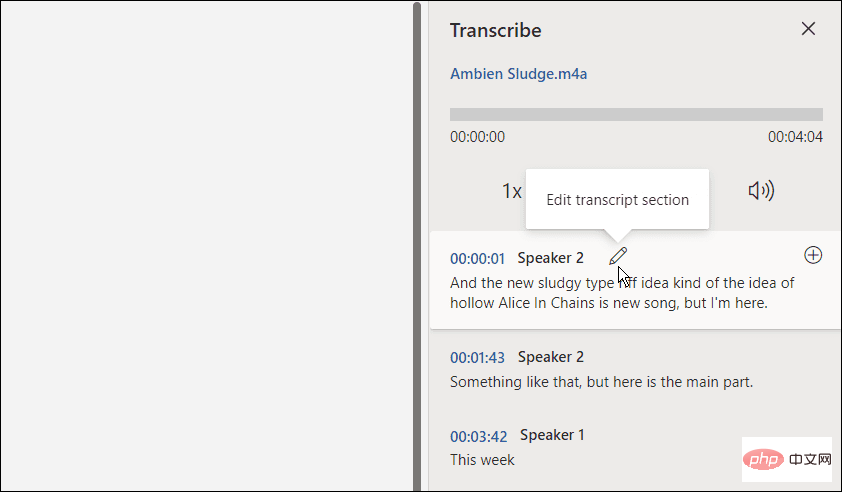
If there are multiple speakers in the Microsoft Word transcription, they will be identified as "Speaker 1", "Speaker 2", "Speaker 3" "wait.
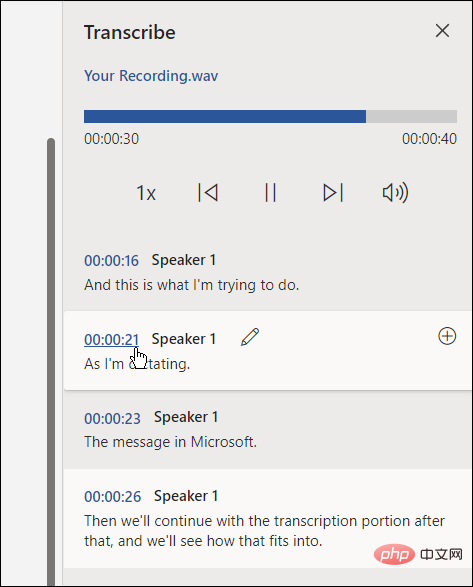
It’s also important to note that you can edit the transcription. For example, hover over the section you want to edit and click the pencil icon to edit it.
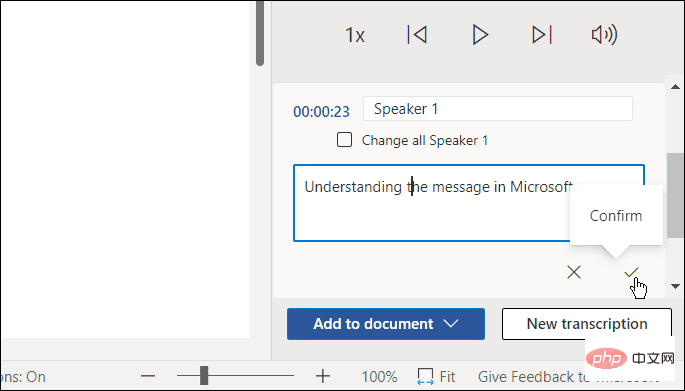
Enter your edits and click the Confirm button.
When you are ready to place your transcription into the document, click the Add to Document button at the bottom.
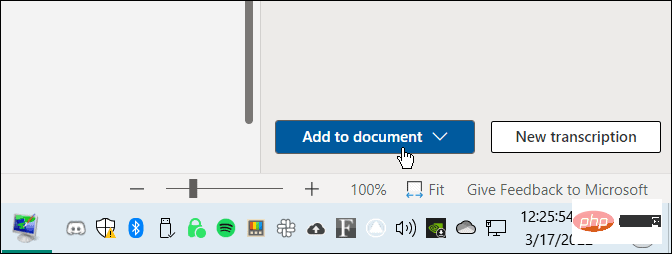
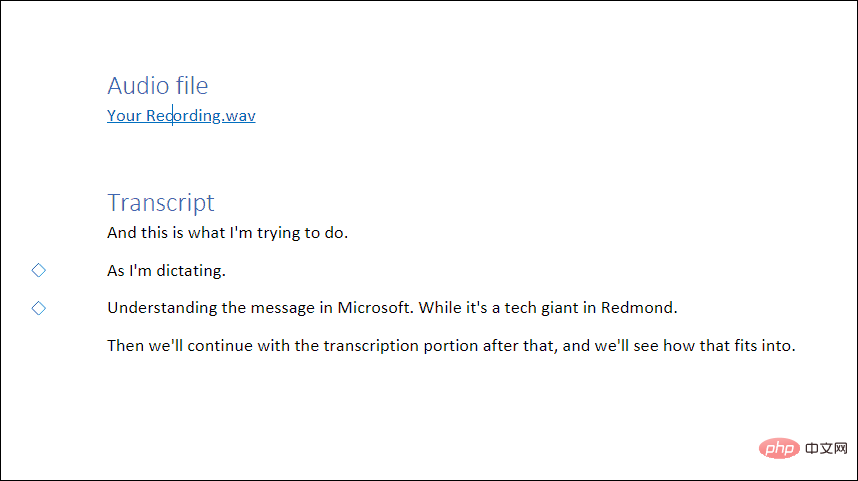
That’s all. The recording you made will now appear in your Word document. Users can click and listen to the audio link. However, any text edits you make will be text only, no audio.
How to Transcribe an Existing Audio File in Word
You can also have Word transcribe an existing audio file using the same tools.
To transcribe an audio file to Microsoft Word, use the following steps:
- In Word Online, click the Home tab.
-
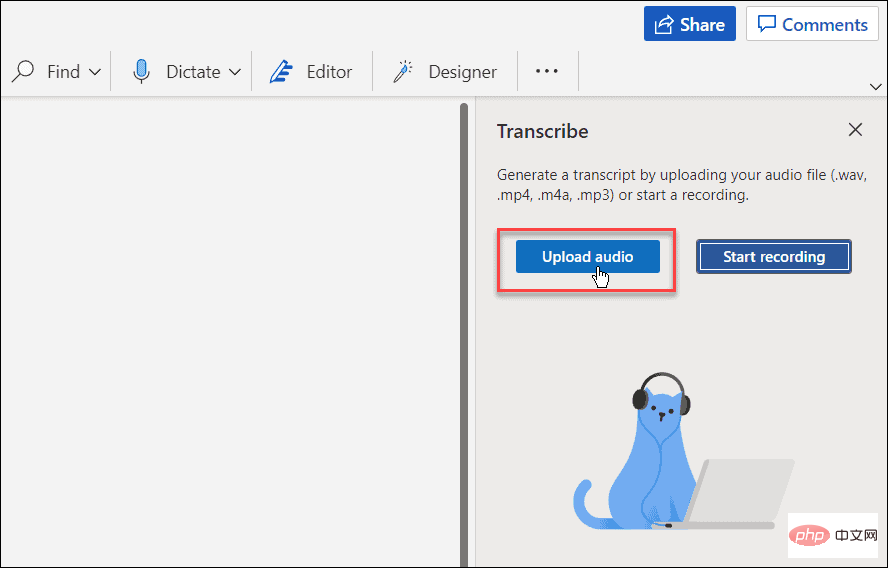
Click the down arrow next to Dictation and select Transcribe.

- Next, click Upload Audio. Please note that Word supports the WAV, MP4, M4A, and MP3 audio file formats. If you have FLAC, OGG, or other formats, you'll need to convert them first.

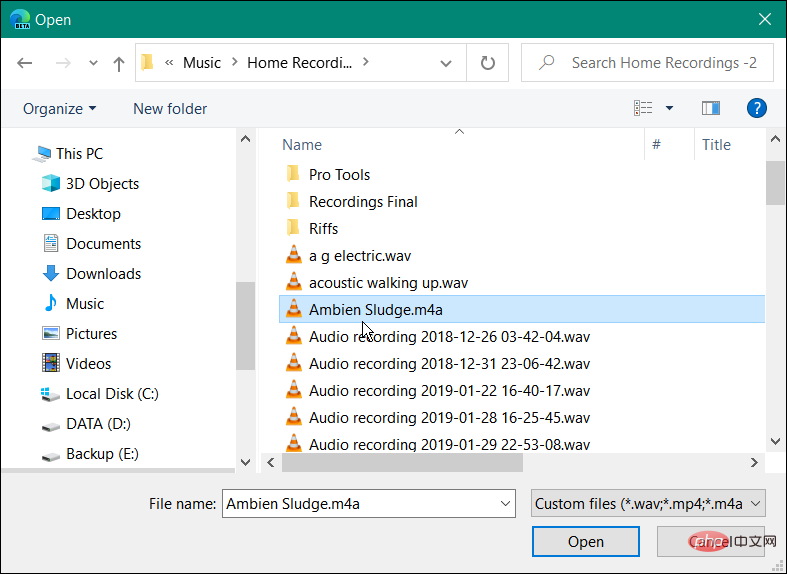
- Navigate to the location of the audio file you want to use. The transcription process may take a few minutes, so make sure to keep the window open until it's complete.

- Once the transcription is complete, you will see the text in the panel. Just like spoken audio, you can edit it as needed.

- After making the required edits, the transcription with the audio link will be returned to the document.

Working with Audio Files in Microsoft Office
While it's not perfect, this option can save a lot of time if you need to transcribe audio into a document - especially Yes if you have a good microphone and the speakers are clear and can make notifications.
You can do other cool things with Microsoft Office applications, like sprucing up your presentations by adding audio to PowerPoint. Likewise, when you transcribe an audio file in Microsoft Office, you can also record a voiceover in PowerPoint. If you're a Google Docs user, you can add audio to Google Slides.
The above is the detailed content of How to use Microsoft Word for audio transcription. For more information, please follow other related articles on the PHP Chinese website!

Hot AI Tools

Undresser.AI Undress
AI-powered app for creating realistic nude photos

AI Clothes Remover
Online AI tool for removing clothes from photos.

Undress AI Tool
Undress images for free

Clothoff.io
AI clothes remover

AI Hentai Generator
Generate AI Hentai for free.

Hot Article

Hot Tools

Notepad++7.3.1
Easy-to-use and free code editor

SublimeText3 Chinese version
Chinese version, very easy to use

Zend Studio 13.0.1
Powerful PHP integrated development environment

Dreamweaver CS6
Visual web development tools

SublimeText3 Mac version
God-level code editing software (SublimeText3)

Hot Topics
 How to open html file on ipad
Apr 02, 2024 pm 02:38 PM
Opening method: 1. With the help of browser software, such as Safari or Chrome. Users can transfer HTML files to iPad and then open them through a browser. 2. Use a file management application (such as local file management or cloud storage service) to open the HTML file. 3. Download an application specifically for viewing and editing HTML files.
 How to set the screen rotation lock on iPad 'Know it in seconds: How to set the screen not to rotate on iPad'
Feb 06, 2024 pm 09:10 PM
How to set the ipadair so that the screen does not rotate? Let’s take a look below. Operation method 01: Follow the steps of Settings - General, enter the general page, find lock screen rotation, and turn it on. 02 Place the iPad on its side, find the button in the picture below, and slide it down to lock the screen from rotating. 03Alternatively, you can also click AssistiveTouch on the screen. 04 Then click on the device to enter the page. 05 Turn on lock screen rotation to realize the function. 06 Directly on the home screen page, there is also an option to lock the screen by swiping up. The above is all the content of this article. I hope it can be helpful to my friends. After carefully reading this article, how to set up screen rotation lock on iPad "In seconds: iPad setting screen
 How to check iPad battery health
Feb 23, 2024 pm 08:43 PM
How to check the health of iPad battery? The health of iPad will decline over time, but most friends don’t know how to check the health of iPad. Next, the editor brings to users the pictures and texts of how to check the health of iPad battery. Tutorial, interested users come and take a look! How to check iPad battery health 1. First open iPad and enter the desktop, select [Settings] to open the function; 2. Then on the settings function page, slide the page and click [Battery] service; 3. Then jump to the battery service page, as shown below [Battery Health] indicated by the arrow; 4. Finally, you can see the capacity border position with the highest battery health.
 How to use Follow Up in the Mail app on iPhone, iPad, and Mac
Feb 05, 2024 pm 02:45 PM
Given the volume of emails we send, it is difficult to confirm that all responses have been received. Remember, if you don't receive a reply to the email you send, you can use the "Follow Up" function in AppleMail. What is "Follow Up" in AppleMail? How to use "Follow Up" in AppleMail How to turn off "Follow Up" in AppleMail What is "Follow Up" in AppleMail? The email follow-up feature in Apple Mail was introduced in iOS 16, iPadOS 16, and macOS Ventura. This feature is turned on by default, making it easy for you to try it out. If you don't receive a reply three days after sending an email, the email will automatically return to the top of your inbox.
 How to split screen on iPad How to split screen on two apps on iPad
Feb 22, 2024 pm 04:13 PM
Click Home Screen and Dock in Settings, enable multiple APP functions in Multitasking, swipe up and select the app and drag to any side of the screen to split the screen. Applicable models of this tutorial: iPad Pro System: iPadOS15.3 Analysis 1 Enter Settings and click on the Home Screen and Dock option, then click on the Multitasking option on the right side of the page. 2. After entering the multitasking page, turn on the button that allows multiple APPs and gestures. 3. Swipe up from the bottom of the screen and select the split-screen application. Drag to any side of the screen to split the screen. Supplement: How to enable picture-in-picture on iPad 1. First, click on the desktop to enter settings. 2After entering the settings page, click the Home Screen and Dock option. 3 Then click on the multitasking option. 4In the new interface, click to turn on picture-in-picture. 5Finally
 How long is the lifespan of Apple iPad? Quickly understand
Feb 05, 2024 pm 02:48 PM
Your iPad is a very convenient device, perfect for playing games, watching movies, or working on the go. However, if you’ve had it for a while, you might be wondering about its remaining lifespan. It depends on how you use and care for your tablet. How long can an iPad last? Your iPad should last at least 5 years. But your device may last longer, depending on: Your iPad model. Newer iPad Pros have more storage and features and will likely last longer than older or lower-end models. How you use it and what you use it for. If you use your iPad every day to play video games or use graphic design programs, it will wear out faster. How often you maintain it. If you update your iPad regularly
 The new iPad removes the physical SIM card slot: it is revealed that the iPhone 16 will do the same
May 09, 2024 am 10:16 AM
According to news on May 9, this week Apple released iPad Pro and iPad Air. These two new iPads have completely removed the physical SIM card slot, and all cellular network versions will only support eSIM technology. Some reports pointed out that the iPad only supports eSIM, suggesting that the iPhone will soon follow suit and remove the physical SIM card slot. Starting from the iPhone14 series, the US version of iPhone has removed the physical SIM card slot and only supports eSIM. However, iPhones sold in other regions still retain the physical SIM card design. Judging from the fact that all new iPad series support eSIM, the iPhone 16 series launched in the second half of this year will also support eSIM, and it is likely to be available in many markets around the world.
 Why does my iPad not show that it is charging?
Jan 23, 2024 pm 03:15 PM
Reasons why the iPad is not charging: 1. Charging cable or charger failure; 2. Dust or dirt; 3. Device overheating; 4. Power supply problem; 5. Software problem; 6. Battery problem; 7. Charging port failure. Detailed introduction: 1. The charging cable or charger is faulty. First check whether the charging cable and charger are damaged or loose. Try using different charging cables and chargers to confirm whether it is their own problem. If the charging cable or charger is faulty, If there is a problem, you can try to replace or repair it; 2. Dust or dirt, the charging port may be blocked by dust, dirt or debris, etc.


