

How to fix high CPU usage issue with Steam client in Windows 11?

Many gamers have reported seeing game stuttering and lag issues when using the Steam app. After checking the details, the issue appears to be primarily caused by the Steam VR WebHelper.
SteamVR WebHelper is the internal browser used by the Steam application to set up the required display of the Steam store game library. This can use up to 70% of the CPU, causing stuttering and lag issues in Steam.
In this article, we've put together a list of fixes that can help you overcome high CPU usage issues with the Steam client WebHelper.
Fix 1: Disable animated avatars
Step 1: Open the Steam app.
Step 2: Click on the Friends tab from the top menu options.
Step 3: Click to view the friend list.

Step 4: Click the Settings icon.

Step 5: Open the friend list settings window. Next to Enable animated avatars and animated avatar boxes in friends lists and chats, toggle the button to turn off the setting.

Fix 2: Disable Steam Overlay
Step 1: Double-click to open the Steam app.
Step 2: Click on the Steam menu option located in the left corner.
Step 3: Click Settings.

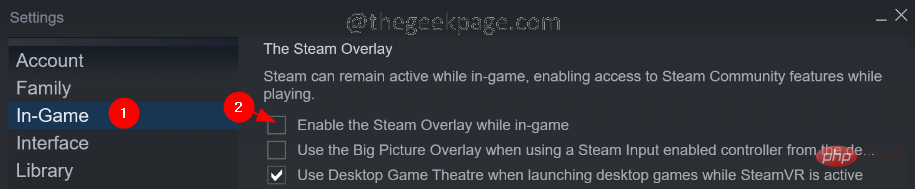
Step 4: In the settings window, click In-Game on the left.
Step 5: From the right, UncheckEnable Steam overlay in the game.
Interfaces" tab on the left.
Step 7:UncheckThese three options:
- Enable smooth scrolling in the web service (requires restart)
- Enable GPU accelerated rendering in Web view (requires restart)
- Enable hardware video decoding, if supported (requires restart)

Restart Steam button.

Open file location.

steam.exe and select the Copy file path option.

-no-browser open steam://open/minigameslist
The final command should look like this."C:\Program Files (x86)\Steam\steam.exe" -no-browser +open steam://open/minigameslist

Run Terminal using the Windows R key.
Step 2: Enter the commandappwiz.cpl and press Enter.

Step 3: In the window that appears, click to view installed updates.

#Step 4: Check the installation date of the application.
Step 5: Uninstall the update by right-clicking the update and selecting Uninstall.
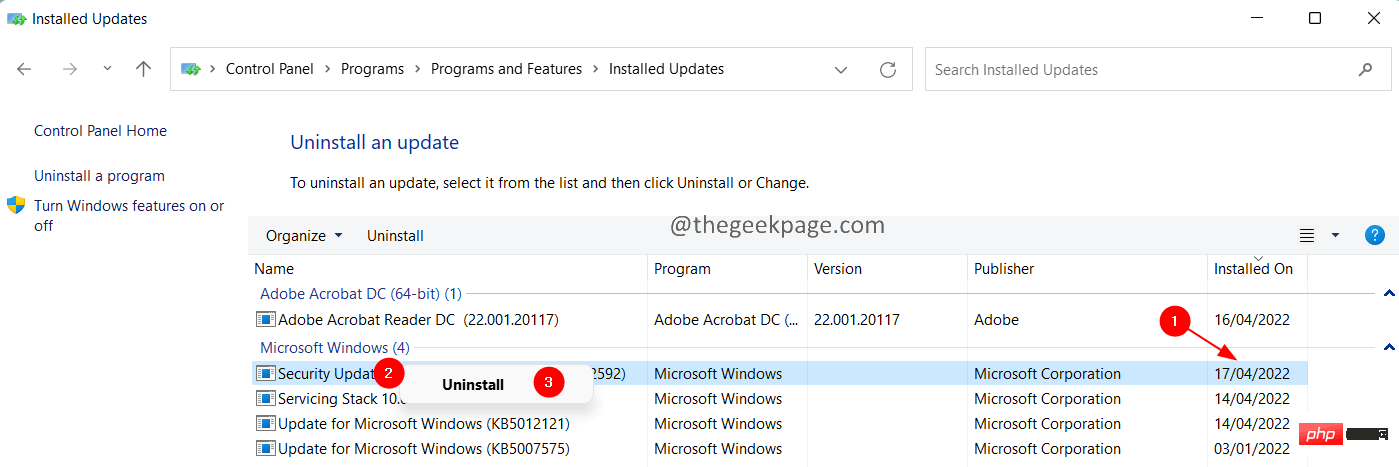
Step 6: Now uninstall the latest updates one by one and find out which update is causing the problem.
The above is the detailed content of How to fix high CPU usage issue with Steam client in Windows 11?. For more information, please follow other related articles on the PHP Chinese website!

Hot AI Tools

Undresser.AI Undress
AI-powered app for creating realistic nude photos

AI Clothes Remover
Online AI tool for removing clothes from photos.

Undress AI Tool
Undress images for free

Clothoff.io
AI clothes remover

AI Hentai Generator
Generate AI Hentai for free.

Hot Article
Hot Tools

Notepad++7.3.1
Easy-to-use and free code editor

SublimeText3 Chinese version
Chinese version, very easy to use

Zend Studio 13.0.1
Powerful PHP integrated development environment

Dreamweaver CS6
Visual web development tools

SublimeText3 Mac version
God-level code editing software (SublimeText3)
Hot Topics
 1378
1378
 52
52

 Leica Sofort 2: Strong Leica taste, but the image quality is not satisfactory
Jan 03, 2024 pm 04:08 PM
Leica Sofort 2: Strong Leica taste, but the image quality is not satisfactory
Jan 03, 2024 pm 04:08 PM
Yes, I spent more than 3,000 yuan to buy a real Leica camera. This is not a joint brand between Xiaomi and Sharp. It is a real Leica camera. It can even be found in the official Leica APP. It is a brand new product launched by Leica just last month - Sofort2. (Picture source: Photographed by Lei Technology) Last month I wrote an article commenting on Leica’s new machine, which is simply cutting leeks. The price of more than 3,000 yuan to buy such a machine is extremely high in the polaroid market. A backward product must have too much money and no place to spend it, and is simply a "big mistake". But adhering to the concept that if I don’t go to hell, who else will, I still placed an order for the Leica Sofort2 on the night it went on sale and became a “real” Leica user. Appearance: An exquisite toy? Leica Sofo
 OPPO did the right thing by giving up ProXDR
Jan 06, 2024 pm 11:37 PM
OPPO did the right thing by giving up ProXDR
Jan 06, 2024 pm 11:37 PM
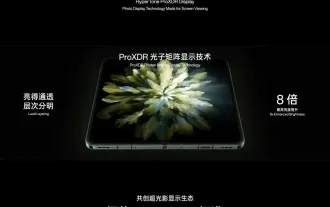
Not long ago, OPPO announced at the Paris Film Festival that it was working with Kazakhstan and the Soviet Union to create a new generation of super light and shadow imaging systems, which will be launched on the OPPO Find X7 series. Choosing to announce this news at the world's largest and most influential photography exhibition shows how much OPPO attaches importance to the new generation of ultra-light and shadow imaging systems. According to OPPO, the new generation of Super Light and Shadow imaging system mainly consists of three parts: - Super Light and Shadow full main camera system, from increasing the zoom magnification to creating multi-view creative freedom; - Super Light and Shadow image engine, using more calculations to achieve less Computational traces; - Ultra-light and shadow ProXDR display, a photo display technology that conforms to the screen viewing method. Among them, "super light and shadow full main camera system" refers to the hardware of the imaging system, and "super light and shadow image engine" refers to the image
 Can Meizu 21 Pro compete head-to-head with flagships from major manufacturers?
Jan 03, 2024 pm 06:10 PM
Can Meizu 21 Pro compete head-to-head with flagships from major manufacturers?
Jan 03, 2024 pm 06:10 PM
On the last day of November, Meizu took advantage of the new wave of Snapdragon 8Gen3 phones to bring its annual flagship new phone, Meizu 21. Not long ago, this site also conducted a review of this product. It is a mobile phone with obvious advantages and disadvantages. Moreover, Meizu 21 currently only has one model, unlike other brands that are divided into medium and large sizes. For those who want a super flagship, Meizu 21 seems a bit not “Pro” enough. (Photo source: Photographed by this site) However, recent news about Meizu 21Pro has appeared on the Internet, which is good news for Meizu friends who want more extreme configuration and experience. The screen of Meizu 21 is not strong enough? 2K screen is coming! The charging power of Meizu 21 is not high enough, 100W fast charging is coming! Could it be that Meizu 21 is just a “small test”?
 Razer Viper V3 Pro review: What's the trade-off between power and portability?
Jan 03, 2024 pm 04:17 PM
Razer Viper V3 Pro review: What's the trade-off between power and portability?
Jan 03, 2024 pm 04:17 PM
In the discussion about gaming mice some time ago, Xiao Lei mentioned that the first true “gaming mouse” was the Razer Boomslang released by Razer in 2003 – a USB game with a DPI of “up to” 2500 and a polling rate of 125Hz. mouse. But in fact, the statement is not accurate, because this 2100/25 polling rate 00DPI Boomslang is actually an upgraded version of this series. Its previous generation, Boomslang released in 1999, is the real first game. mouse. Compared with the second generation released 4 years later, the first generation Boomslang used a more primitive PS/2 interface, and the polling rate was only 10-200Hz; until 2005
 Redefining human-computer interaction, Honor MagicOS 8.0 is officially released!
Jan 11, 2024 pm 10:06 PM
Redefining human-computer interaction, Honor MagicOS 8.0 is officially released!
Jan 11, 2024 pm 10:06 PM
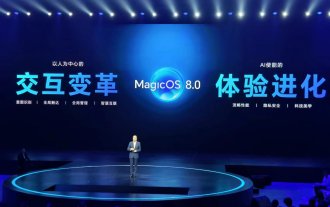
On January 10, 2024, Honor held its first offline conference of the year in Shanghai, where MagicOS 8.0 officially debuted. MagicOS8.0 is a new self-developed operating system created by Honor. It is the industry's first new generation of human-computer interaction - intent-recognized human-computer interaction. In addition, the new system also brings many new functions based on AI, such as "Any Door", "Conversation into Movies", "Multi-modal Schedule Management", etc. (Photographed by Lei Technology) Honor calls MagicOS8.0 a new generation of interactive mode system after command line interaction, graphical interaction and natural interaction. As for how awesome it is, let’s take a look below. A system that can learn, a system that understands you better. When it comes to "AI", in fact, Honor created its first smartphone as early as 2016.
 New affordable Meta Quest 3S VR headset appears on FCC, suggesting imminent launch
Sep 04, 2024 am 06:51 AM
New affordable Meta Quest 3S VR headset appears on FCC, suggesting imminent launch
Sep 04, 2024 am 06:51 AM
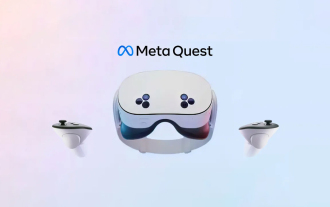
The Meta Connect 2024event is set for September 25 to 26, and in this event, the company is expected to unveil a new affordable virtual reality headset. Rumored to be the Meta Quest 3S, the VR headset has seemingly appeared on FCC listing. This sugge
 Huawei StarLight, wants to revolutionize Bluetooth?
Jan 11, 2024 pm 09:51 PM
Huawei StarLight, wants to revolutionize Bluetooth?
Jan 11, 2024 pm 09:51 PM
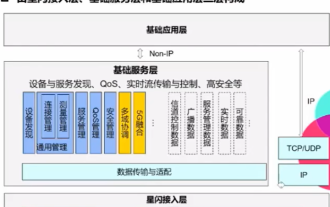
At a press conference some time ago, Huawei officially released a new generation of wireless connection technology - NearLink. Different from previous wireless technologies, NearLink is not developed based on the specifications of traditional wireless technologies such as Bluetooth, but Huawei's years of wireless experience. With the accumulation of technology, a new wireless connection specification is created. If you didn’t watch the press conference, it doesn’t matter. Let’s take a quick look at StarLight: it uses a set of standards to combine the advantages of traditional wireless technologies such as Bluetooth and WIFI. This technology is suitable for consumer electronics, smart homes, new energy vehicles, and industrial intelligence. Various scenes such as construction. Compared with Bluetooth technology, the power consumption is reduced by 60%, the transmission rate is increased by 6 times, it has lower latency, more stable connection and anti-interference ability, the coverage distance is increased by 2 times, and the number of connections is increased by 10 times. above
 How to build AR/VR applications using PHP
Jun 11, 2023 pm 07:22 PM
How to build AR/VR applications using PHP
Jun 11, 2023 pm 07:22 PM
With the development of AR (Augmented Reality) and VR (Virtual Reality), these two technologies have become an important part of innovation and experience. With the popularity of PHP as a network programming language, PHP has become a feasible choice for developing AR/VR applications. This article will introduce how to use PHP to build AR/VR applications. 1. Understand AR and VR technologies Before we start creating AR/VR applications, we need to understand the different technologies and libraries. AR technology allows virtual objects or information to interact with real-world environments. V